D-Link DSL-520B Product Manual
D-Link DSL-520B Manual
 |
UPC - 790069340185
View all D-Link DSL-520B manuals
Add to My Manuals
Save this manual to your list of manuals |
D-Link DSL-520B manual content summary:
- D-Link DSL-520B | Product Manual - Page 1
- D-Link DSL-520B | Product Manual - Page 2
- Summary (Bridging 37 LAN...38 NAT...39 Port Triggering 43 DMZ Host 44 Security...45 IP Filtering 45 Outgoing 46 Incoming 47 MAC Filtering 48 Parental Control 49 Quality of Service 50 QoS Configuration 52 Queue Classification 54 Routing...58 D-Link DSL-520B ADSL2+ Modem User Manual 2 - D-Link DSL-520B | Product Manual - Page 3
Default 69 System Log...70 System Log Configuration 71 TR-069 Client 72 Internet Time 73 Access Control-Services 74 Access Control-IP Address 75 Access Control-Passwords 76 Update Software 77 Save and Reboot 78 Troubleshooting 79 Networking Basics 81 D-Link DSL-520B ADSL2+ Modem User - D-Link DSL-520B | Product Manual - Page 4
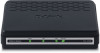
1 - General Information General Information The D-Link DSL-520B is an ADSL2+ modem that offers the convenience of Ethernet connections. This user manual provides a simple and easy-tounderstand format to install and configure your modem. Package Contents • ADSL2+ Modem • 12VDC, 500mA DC CEC-compliant - D-Link DSL-520B | Product Manual - Page 5
an IP address and is connected to the Internet. 4 Internet LED • A red light indicates that the modem does not have an IP address or authentication has failed • No light indicates that an ADSL connection is not present or the modem is in bridge mode. D-Link DSL-520B ADSL2+ Modem User Manual 5 - D-Link DSL-520B | Product Manual - Page 6
switches, and hubs. 3 Reset • Pressing the Reset button for 5 seconds restores the modem to its original factory default settings. 4 ON/OFF • Press this button to turn the unit ON or OFF. 5 Power Receptor • Receptor for the supplied power adapter. D-Link DSL-520B ADSL2+ Modem User Manual 6 - D-Link DSL-520B | Product Manual - Page 7
an Ethernet cable to a hub or a switch and the other to the Ethernet port (labeled LAN) on the modem. Note that either a crossover or straight-through Ethernet cable can be used. The modem automatically recognizes the type of connection that is required. D-Link DSL-520B ADSL2+ Modem User Manual 7 - D-Link DSL-520B | Product Manual - Page 8
Section 2 - Installing The Modem Connect the Power Adapter • Complete the process by connecting the supplied 12V, 500mA power adapter to the POWER boot up your PC and any LAN devices, such as hubs or switches, and any computers connected to them. D-Link DSL-520B ADSL2+ Modem User Manual 8 - D-Link DSL-520B | Product Manual - Page 9
Section 3 - Installation Diagram Installation Diagram Desktop Computer DSL-520B Modem LAN LAN RESET ON/OFF 5V - - - 3A D-Link DSL-520B ADSL2+ Modem User Manual 9 - D-Link DSL-520B | Product Manual - Page 10
. 4. In the Internet Protocol (TCP/IP) Properties dialog box, click on the radio buttons labeled Obtain an IP address automatically and Obtain DNS server address automatically. 5. Click on OK twice to save your changes and then close the Control Panel. D-Link DSL-520B ADSL2+ Modem User Manual 10 - D-Link DSL-520B | Product Manual - Page 11
, click Network. In the Show menu, select Built-in Ethernet or Ethernet (Depending on your Mac OS version.) 3. Click the TCP/IP tab. 4. In the Configure menu, select Using DHCP. 5. Click Apply Now and Save if your computer prompts you to save changes. D-Link DSL-520B ADSL2+ Modem User Manual 11 - D-Link DSL-520B | Product Manual - Page 12
all functions (username / password: admin / admin). Note: Passwords can be changed at any time. 3. Enter your user name and password, and then click OK to display the user interface. Note: This manual has been prepared using the admin user name. D-Link DSL-520B ADSL2+ Modem User Manual 12 - D-Link DSL-520B | Product Manual - Page 13
by your Internet Service Provider (ISP). Click Next to begin setup. Note: Quick Setup will allow you to configure a PPPoE connection. For more information on PPPoE and other connection types, please see the Advanced Setup section in this user manual. D-Link DSL-520B ADSL2+ Modem User Manual 13 - D-Link DSL-520B | Product Manual - Page 14
Setup The router will automatically perform a PVC scan in order to detect your DSL connection. If the scan is unsuccessful, you must manually enter account settings. For these settings, please refer to your account information provided by your ISP. D-Link DSL-520B ADSL2+ Modem User Manual 14 - D-Link DSL-520B | Product Manual - Page 15
Section 6 - Quick Setup When the PVC scan is complete, you will be prompted to enter your username and password as provided by your ISP. Advanced users can configure optional settings on this page. Click Next to continue setup. D-Link DSL-520B ADSL2+ Modem User Manual 15 - D-Link DSL-520B | Product Manual - Page 16
Section 6 - Quick Setup The router will automatically verify your username and password. D-Link DSL-520B ADSL2+ Modem User Manual 16 - D-Link DSL-520B | Product Manual - Page 17
Section 6 - Quick Setup This page allows you to adjust the Local Area Network settings. No changes are required on this page. Click Next to continue. D-Link DSL-520B ADSL2+ Modem User Manual 17 - D-Link DSL-520B | Product Manual - Page 18
Section 6 - Quick Setup Verify your settings are correct and click Save/Reboot. The router will save your settings and reboot itself. Please do not unplug any cables during this process. D-Link DSL-520B ADSL2+ Modem User Manual 18 - D-Link DSL-520B | Product Manual - Page 19
version of the software, bootloader, LAN IP address, etc. It also displays the current status of your DSL connection. Summary A summary of your device's information is provided in this section. The information will reflect your DSL's connection status. D-Link DSL-520B ADSL2+ Modem User Manual 19 - D-Link DSL-520B | Product Manual - Page 20
Section 7 - Device Info WAN The WAN Info screen displays WAN connections previously set up in the Home section. There is an extra "Status" column used for connection status information, displaying either ADSL Link Down or ADSL Link Up. D-Link DSL-520B ADSL2+ Modem User Manual 20 - D-Link DSL-520B | Product Manual - Page 21
for the Ethernet interface. Click on Reset Statistics to renew the information. WAN The WAN section shows received and transmitted packet information for the WAN connections that you have set up. Click on Reset Statistics to renew the information. D-Link DSL-520B ADSL2+ Modem User Manual 21 - D-Link DSL-520B | Product Manual - Page 22
Section 7 - Device Info ATM The ATM section displays statistical values for your ATM interface as well as for AAL5 and AAL5 VCC. Click on Reset Statistics to reset the values. D-Link DSL-520B ADSL2+ Modem User Manual 22 - D-Link DSL-520B | Product Manual - Page 23
Section 7 - Device Info ADSL Information contained in the ADSL screen is useful for troubleshooting and diagnosing connection problems. D-Link DSL-520B ADSL2+ Modem User Manual 23 - D-Link DSL-520B | Product Manual - Page 24
Section 7 - Device Info Route The Route Info section displays route information showing the IP addresses of the destination, gateway, and subnet mask as well as other route information. D-Link DSL-520B ADSL2+ Modem User Manual 24 - D-Link DSL-520B | Product Manual - Page 25
Section 7 - Device Info ARP This section allows you to query the MAC and IP address information of the equipment attached to the modem. D-Link DSL-520B ADSL2+ Modem User Manual 25 - D-Link DSL-520B | Product Manual - Page 26
the Ethernet port. When the router is used for DHCP it becomes the default gateway for DHCP client connected to it. Keep in mind that if you change the IP address of the router, you must change the range of IP addresses in the pool used for DHCP on the LAN. D-Link DSL-520B ADSL2+ Modem User Manual - D-Link DSL-520B | Product Manual - Page 27
you want to add a new connection for the WAN interface and to proceed to the ATM PVC Configuration screen on the following page. The ATM PVC Configuration screen allows you to configure an ATM PVC identifier (VPI and VCI) and select a service category. D-Link DSL-520B ADSL2+ Modem User Manual 27 - D-Link DSL-520B | Product Manual - Page 28
Category: Use the default setting unless otherwise instructed by your ISP. Enable QoS: Use the default setting unless otherwise instructed by your ISP. For more information about QoS, see the Quality of Service section in this user manual. Click Next D-Link DSL-520B ADSL2+ Modem User Manual 28 - D-Link DSL-520B | Product Manual - Page 29
for PPPoA and IPoA are similar to PPPoE and MER, respectively. Encapsulation Mode: Use the default setting unless otherwise instructed by your ISP. Note: These settings are ISP dependant. For information regarding proper configuration, contact your ISP. D-Link DSL-520B ADSL2+ Modem User Manual 29 - D-Link DSL-520B | Product Manual - Page 30
for troubleshooting connection issues. Bridge PPPoE Frames Between WAN and Local Ports (Default Enabled): Use the default setting unless otherwise instructed by your ISP. MTU: Use the default setting of 1492 unless otherwise instructed by your ISP. Click Next. D-Link DSL-520B ADSL2+ Modem User - D-Link DSL-520B | Product Manual - Page 31
WAN Service: This option is Enabled by default. Deselecting this option will cause your DSL connection to be disabled. Service Name: Enter any name that will help you identify your connection. This field will not affect your connection. Click Next. D-Link DSL-520B ADSL2+ Modem User Manual 31 - D-Link DSL-520B | Product Manual - Page 32
) Confirm the settings on this page match the settings provided by your ISP. To make any changes, click Back. If your settings are correct, click Save. Note: After clicking Save, you will have to reboot the modem in order to activate your connection. D-Link DSL-520B ADSL2+ Modem User Manual 32 - D-Link DSL-520B | Product Manual - Page 33
: This is the default option. If your ISP has provided you with static DNS server addresses, select Use the following DNS server addresses. Enter the Primary and Secondary (if available) DNS server addresses that you ISP has provided. Click Next. D-Link DSL-520B ADSL2+ Modem User Manual 33 - D-Link DSL-520B | Product Manual - Page 34
WAN Service: This option is Enabled by default. Deselecting this option will cause your DSL connection to be disabled. Service Name: Enter any name that will help you identify your connection. This field will not affect your connection. Click Next. D-Link DSL-520B ADSL2+ Modem User Manual 34 - D-Link DSL-520B | Product Manual - Page 35
) Confirm the settings on this page match the settings provided by your ISP. To make any changes, click Back. If your settings are correct, click Save. Note: After clicking Save, you will have to reboot the modem in order to activate your connection. D-Link DSL-520B ADSL2+ Modem User Manual 35 - D-Link DSL-520B | Product Manual - Page 36
Setup Bridging Enable WAN Service: This option is Enabled by default. Deselecting this option will cause your DSL connection to be disabled. Service Name: Enter any name that will help you identify your connection. This field will not affect your connection. Click Next. D-Link DSL-520B ADSL2+ Modem - D-Link DSL-520B | Product Manual - Page 37
Setup - Summary (Bridging) Confirm the settings on this page match the settings provided by your ISP. To make any changes, click Back. If your settings are correct, click Save. Note: After clicking Save, you will have to reboot the modem in order to activate your connection. D-Link DSL-520B ADSL2 - D-Link DSL-520B | Product Manual - Page 38
Mask for the LAN interface. The Save button only saves the LAN configuration data, but does not apply the configurations. Select the Save/ Reboot button to save the LAN configuration data, then reboot the modem and apply the new configuration. LAN D-Link DSL-520B ADSL2+ Modem User Manual 38 - D-Link DSL-520B | Product Manual - Page 39
configure the WAN connection at first, the NAT item appears in the Advanced Setup directory. In the pure bridging mode, there is no NAT service. Overview - Setting up the NAT Function The DSL router is equipped with the network address translation (NAT) function. With address mapping, several users - D-Link DSL-520B | Product Manual - Page 40
server of the DSL router, you must disable DHCP server as the settings in the local network menu entry for the lease time or assign static IP addresses for the PCs. • You can enable or disable the NAT function. By default, the NAT function is enabled. D-Link DSL-520B ADSL2+ Modem User Manual 40 - D-Link DSL-520B | Product Manual - Page 41
the ability to add additional public IP addresses to port forwarding rules, which you must obtain from your ISP, and enter into the IP addresses pool. Then, you can define FTP to use address X to reach computer A and address Y to reach computer B. D-Link DSL-520B ADSL2+ Modem User Manual 41 - D-Link DSL-520B | Product Manual - Page 42
destinations. DSL router is equipped with a robust list of ALG modules in order to enable maximum functionality in the home network. The ALG is automatically assigned based on the destination port. Virtual servers are configured for this purpose. D-Link DSL-520B ADSL2+ Modem User Manual 42 - D-Link DSL-520B | Product Manual - Page 43
a so-called trigger port and the protocol (TCP or UDP) that this port uses. You then assign the public ports that are to be opened for the application to this trigger port. You can select known Internet services or manually assign ports or port blocks. D-Link DSL-520B ADSL2+ Modem User Manual 43 - D-Link DSL-520B | Product Manual - Page 44
, to operate a Web server) and when other functions (for example, port forwarding) are inadequate. In this case, you should take appropriate measures for the clients concerned. Note: Only one PC per public IP address can be set up as an exposed host. D-Link DSL-520B ADSL2+ Modem User Manual 44 - D-Link DSL-520B | Product Manual - Page 45
: If the modem is configured to bridge mode only, IP filtering is disabled and the IP filtering interface does not appear. If the modem does not configure a PVC of Bridge mode, MAC filtering is disabled and the MAC Filtering interface does not appear. D-Link DSL-520B ADSL2+ Modem User Manual 45 - D-Link DSL-520B | Product Manual - Page 46
create a filter rule to identify outgoing IP traffic by specifying a new filter name and at least one condition. All specified conditions in the filtering rule must comply with the rule to take effect. Click Save/Apply to save and activate the filter. D-Link DSL-520B ADSL2+ Modem User Manual 46 - D-Link DSL-520B | Product Manual - Page 47
Click Security > IP Filtering > Incoming. Incoming By default, all incoming IP traffic from the WAN is blocked when the firewall is enabled. However, some IP traffic can be accepted by setting up filters. at least one WAN interface to apply this rule. D-Link DSL-520B ADSL2+ Modem User Manual 47 - D-Link DSL-520B | Product Manual - Page 48
ATM PVCs configured in Bridge mode. Forwarded means that all MAC layer frames are forwarded except those FORWARDED to BLOCKED. Read the warning information. Click Yes to change the MAC filtering global policy from Forwarded to Blocked. Click No to cancel. D-Link DSL-520B ADSL2+ Modem User Manual - D-Link DSL-520B | Product Manual - Page 49
MAC address of the LAN device where the browser is running. To restrict other LAN device, click Other MAC Address and enter the MAC address of the another LAN device. To obtain the MAC address of a Windows based PC, enter ipconfig /all in the DoS window. D-Link DSL-520B ADSL2+ Modem User Manual 49 - D-Link DSL-520B | Product Manual - Page 50
can result in poor or unacceptable performance for all applications. The QoS concept of quality is one in which the requirements of some applications and users are more critical than others, which means that some traffic needs preferential treatment. D-Link DSL-520B ADSL2+ Modem User Manual 50 - D-Link DSL-520B | Product Manual - Page 51
mark incoming traffic without reference to particular classifier. Select Advanced Setup > Quality of Service and the following page will appear. Select Enable QoS to enable QoS and set the default DSCP mark. Click Save/Apply to activate QoS. D-Link DSL-520B ADSL2+ Modem User Manual 51 - D-Link DSL-520B | Product Manual - Page 52
Setup QoS Configuration The queuing in packet QoS goes into effect only when a packet is forwarded to a QoS-enabled PVC. Packet forwarding is determined by IP routing or bridging interface (PVC 0/0/35). Set integer values for queue precedence to 1. D-Link DSL-520B ADSL2+ Modem User Manual 52 - D-Link DSL-520B | Product Manual - Page 53
following page will appear. This configuration takes effect immediately. To delete a certain queue, disable it, select it, and then click Remove. After the queue is configured, you can create several traffic class rules to classify the upstream traffic. D-Link DSL-520B ADSL2+ Modem User Manual 53 - D-Link DSL-520B | Product Manual - Page 54
data transfer where data packet with higher priority is given preference. Click QoS Classification and the following page will appear. In this page, you can configure network traffic classes. Click Add to continue. D-Link DSL-520B ADSL2+ Modem User Manual 54 - D-Link DSL-520B | Product Manual - Page 55
sets of classification rules. Set-1 is based on different fields within TCP/UDP/IP layer plus physical LAN port. Set-2 is based on MAC layer IEEE 802.1p priority field. Set-1 Rules contain the following: Physical LAN Port: Select one among Ethernet ports and D-Link DSL-520B ADSL2+ Modem User Manual - D-Link DSL-520B | Product Manual - Page 56
Mac Address Destination Mac Mask Set-2 Rules contain the following: 802.1p Priority: the 802.1p header includes a 3-bit prioritization field, which allows packets to be grouped into eight levels of priority (0-7), where level 7 is the highest one. D-Link DSL-520B ADSL2+ Modem User Manual 56 - D-Link DSL-520B | Product Manual - Page 57
traffic to a Diffserv-enabled network typically mark each transmitted packet with an appropriate DSCP. The DSCP markings are used by Diffserv network routers to appropriately classify packets and to apply particular queue handing or scheduling behavior. D-Link DSL-520B ADSL2+ Modem User Manual 57 - D-Link DSL-520B | Product Manual - Page 58
the static default gateway and/or a WAN interface. Then, click Save/Apply. Note: If the Automatic Assigned Default Gateway check box is changed from deselected to selected, you must reboot the router to obtain the automatic assigned default gateway. D-Link DSL-520B ADSL2+ Modem User Manual 58 - D-Link DSL-520B | Product Manual - Page 59
interface that the packets pass through on the modem. Click Add and the following page will appear. Enter the destination network address, subnet mask, gateway AND/ OR available WAN interface, then click Save/Apply to add the entry to the routing table. D-Link DSL-520B ADSL2+ Modem User Manual 59 - D-Link DSL-520B | Product Manual - Page 60
Section 9 - Advanced Setup RIP To activate RIP for the device, select the Enabled radio button for Global RIP Mode. To configure an individual interface, button to save the configuration, and to start or stop RIP based on the Global RIP mode selected. D-Link DSL-520B ADSL2+ Modem User Manual 60 - D-Link DSL-520B | Product Manual - Page 61
. If the checkbox is not selected, enter the primary and secondary (optional) DNS server IP addresses. The interface is as follows. Click Save to save the new configuration. Note: You must reboot the router to make the new configuration take effect. D-Link DSL-520B ADSL2+ Modem User Manual 61 - D-Link DSL-520B | Product Manual - Page 62
IP address to a static hostname in any of the many domains, allowing your DSL router to be more easily accessed from various locations on the Internet. Click Add to add Dynamic DNS Add dynamic DNS Enter your information in the spaces provided and click Save. D-Link DSL-520B ADSL2+ Modem User Manual - D-Link DSL-520B | Product Manual - Page 63
- Advanced Setup DSL The DSL settings page contains modulation and capability settings. Consult your ISP to determine the correct settings. Click Apply if you are finished or click on Advanced Settings if you want to configure other advanced settings. D-Link DSL-520B ADSL2+ Modem User Manual 63 - D-Link DSL-520B | Product Manual - Page 64
apart. Each tone carries separate data, so the modem operates as if 256 separate modems were running in parallel. The tone range is from 0 to 31 for upstream and from 32 to 255 for downstream. Do not change these settings unless directed by your ISP. D-Link DSL-520B ADSL2+ Modem User Manual 64 - D-Link DSL-520B | Product Manual - Page 65
Section 9 - Advanced Setup MAC Clone This page allosw you to clone the MAC address on your router. This is needed when adding a router to your network in order to share your internet connection. D-Link DSL-520B ADSL2+ Modem User Manual 65 - D-Link DSL-520B | Product Manual - Page 66
diagnostics screen allows you to run diagnostic tests to check your DSL connection. The results will show test results of two connections: • Connection to your local network • Connection to your DSL service provider Click Run Diagnostic Tests to begin. D-Link DSL-520B ADSL2+ Modem User Manual 66 - D-Link DSL-520B | Product Manual - Page 67
the configuration on the router, but would like to revert to a previous configuration. To save your current configuration, click the Backup Settings button. The following pop-up screen will appear with a prompt to open or save the file to your computer. D-Link DSL-520B ADSL2+ Modem User Manual 67 - D-Link DSL-520B | Product Manual - Page 68
11 - Management Update To load a previously saved configuration file onto your router, click Browse, select the file on your computer and then click on Update Settings. The router will restore settings and reboot to activate the restored settings. D-Link DSL-520B ADSL2+ Modem User Manual 68 - D-Link DSL-520B | Product Manual - Page 69
all current settings and restore the router to factory default settings. Click on the Restore Default Settings button to proceed. The following confirmation dialog will appear confirming your decision to restore default settings. Click on OK to continue. D-Link DSL-520B ADSL2+ Modem User Manual 69 - D-Link DSL-520B | Product Manual - Page 70
The default log level is Debugging and the default display level is Error. The mode options are Local, Remote, and Both. The default is Local. If you select Remote or Both, all events are transmitted to the specified UDP port of the specified log server. D-Link DSL-520B ADSL2+ Modem User Manual 70 - D-Link DSL-520B | Product Manual - Page 71
", events will be sent to a specified IP address and UDP port of a remote system log server. If the selected mode is "Local" or "Both", events will be recorded and viewed locally. Select the desired values and click Apply to save the system log options. D-Link DSL-520B ADSL2+ Modem User Manual 71 - D-Link DSL-520B | Product Manual - Page 72
, collection and diagnostics to this device. If you wish to enable this protocol, then select enable. Contact your ISP to determine the ACS URL, ACS User Name, and ACS Password. You must click on the Save/Reboot button for the change to take place. D-Link DSL-520B ADSL2+ Modem User Manual 72 - D-Link DSL-520B | Product Manual - Page 73
automatically synchronize with Internet time servers checkbox. Additional time settings will appear below the checkbox. Select from the list of NTP (Network Time Protocol) time servers. Then select the time zone that you are in and click Apply to save. D-Link DSL-520B ADSL2+ Modem User Manual 73 - D-Link DSL-520B | Product Manual - Page 74
Message Protocol) supports packets containing error, control, and informational messages. Telnet: A standard Internet protocol for accessing remote systems. TFTP: (Trivial File Transfer Protocol) A very simple form of the File Transfer Protocol (FTP). D-Link DSL-520B ADSL2+ Modem User Manual 74 - D-Link DSL-520B | Product Manual - Page 75
provided the correct username and password is supplied at log on. Enter the IP address of the management station permitted to access the local configuration and click Apply. This will return you to the previous screen where you can enable access control. D-Link DSL-520B ADSL2+ Modem User Manual 75 - D-Link DSL-520B | Product Manual - Page 76
your DSL router for maintenance and to run diagnostics. For "User", the user name can access the DSL router to view configuration settings, statistics, and update router's software. To change or create passwords, use the fields below and enter up to 16 characters. D-Link DSL-520B ADSL2+ Modem User - D-Link DSL-520B | Product Manual - Page 77
Section 11 - Management Update Software You can update your software through this screen. Follow the screen's steps. Select Browse to search for your software file and Update Software. D-Link DSL-520B ADSL2+ Modem User Manual 77 - D-Link DSL-520B | Product Manual - Page 78
Section 11 - Management Save and Reboot When clicking the Save/Reboot button, it will save all configuration changes made on the modem and restart the device. All new configuration settings will take effect when the modem starts up again. D-Link DSL-520B ADSL2+ Modem User Manual 78 - D-Link DSL-520B | Product Manual - Page 79
such as Zone Alarm, Black Ice, Sygate, Norton Personal Firewall, and Windows® XP firewall may block access to the configuration pages. Check the help files included with your firewall software for more information on disabling or configuring it. D-Link DSL-520B ADSL2+ Modem User Manual 79 - D-Link DSL-520B | Product Manual - Page 80
. With the modem powered on, use a paperclip to hold the button down for 10 seconds. Release the button and the modem will go through its reboot process. Wait about 30 seconds to access the modem. For information about logging into the modem see page 16. D-Link DSL-520B ADSL2+ Modem User Manual 80 - D-Link DSL-520B | Product Manual - Page 81
click OK. At the prompt, type ipconfig /all and press Enter. This will display information about all installed adapters on your computer. Your MAC address is listed as the "Physical Address" and should look like xx-xx-xx-xx-xx-xx or xx:xx:xx:xx:xx:xx D-Link DSL-520B ADSL2+ Modem User Manual 81 - D-Link DSL-520B | Product Manual - Page 82
same as the LAN IP address of your modem (192.168.1.1). Set Primary DNS the same as the LAN IP address of your modem (192.168.1.1). The Secondary DNS is not needed or you may enter a DNS server from your ISP. Step 5 Click OK twice to save your settings. D-Link DSL-520B ADSL2+ Modem User Manual 82 - D-Link DSL-520B | Product Manual - Page 83
and answers to technical issues. For customers within the United States: Phone Support: (877) 453-5465 Internet Support: http://support.dlink.com For customers within Canada: Phone Support: (800) 361-5265 Internet Support: http://support.dlink.ca D-Link DSL-520B ADSL2+ Modem User Manual 83 - D-Link DSL-520B | Product Manual - Page 84
will be rendered by D-Link at an Authorized D-Link Service Office. The replacement hardware need not be Link's functional specifications for the Software or to refund the portion of the actual purchase price paid that is attributable to the Software. D-Link DSL-520B ADSL2+ Modem User Manual - D-Link DSL-520B | Product Manual - Page 85
Number from D-Link Technical Support at 1-877- Link if you use an address in the United States, otherwise we will ship the product to you freight collect. Expedited shipping is available upon request and provided shipping charges are prepaid by the customer. D-Link DSL-520B ADSL2+ Modem User Manual - D-Link DSL-520B | Product Manual - Page 86
firmware or other products or services provided by anyone other than D-Link; and Products that have been purchased from inventory clearance or liquidation sales or other sales in which D-Link OF THE APPLICABLE WARRANTY PERIOD SET FORTH ABOVE. EXCEPT AS Link DSL-520B ADSL2+ Modem User Manual 86 - D-Link DSL-520B | Product Manual - Page 87
radio frequency energy and, if not installed and used in accordance with the instructions, may cause harmful interference to radio communication. However, there is no guarantee the United States, please contact the corresponding local D-Link office. D-Link DSL-520B ADSL2+ Modem User Manual 87 - D-Link DSL-520B | Product Manual - Page 88
Appendix D - Registration Registration Product registration is entirely voluntary and failure to complete or return this form will not diminish your warranty rights. Version 1.0 July 29, 2010 D-Link DSL-520B ADSL2+ Modem User Manual 88
-
 1
1 -
 2
2 -
 3
3 -
 4
4 -
 5
5 -
 6
6 -
 7
7 -
8
-
9
-
10
-
11
-
12
-
13
-
14
-
15
-
16
-
17
-
18
-
19
-
20
-
21
-
22
-
23
-
24
-
25
-
26
-
27
-
28
-
29
-
30
-
31
-
32
-
33
-
34
-
35
-
36
-
37
-
38
-
39
-
40
-
41
-
42
-
43
-
44
-
45
-
46
-
47
-
48
-
49
-
50
-
51
-
52
-
53
-
54
-
55
-
56
-
57
-
58
-
59
-
60
-
61
-
62
-
63
-
64
-
65
-
66
-
67
-
68
-
69
-
70
-
71
-
72
-
73
-
74
-
75
-
76
-
77
-
78
-
79
-
80
-
81
-
82
-
83
-
84
-
85
-
86
-
87
-
88
 |
 |
