D-Link DSN-2100-10 Hardware Reference Guide for DSN-2100-10 Valid for fir - Page 18
Site Considerations, General Considerations, Desktop, Floor or Shelf Installation
 |
UPC - 790069310638
View all D-Link DSN-2100-10 manuals
Add to My Manuals
Save this manual to your list of manuals |
Page 18 highlights
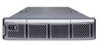
3.1 Site Considerations The site where you install the DSN-2100 storage system can affect its performance. Therefore, choose a site that conforms to the requirements in the following sections. 3.1.1 General Considerations Observe the following considerations when selecting a location to install the DSN-2100 storage system. The location should be fairly cool and dry for the acceptable temperature and humidity ranges. The location should be free of strong electromagnetic field generators (such as motors), vibration, dust, and direct exposure to sunlight. The location must provide sufficient airflow to the front and back of the DSN-2100 storage system for correct cooling. Ventilation must be sufficient to exhaust heat from the rear of the equipment. The location should offer a power outlet within six feet (1.82 meters) of the DSN-2100 storage system. The location should allow for at least six inches (152.3 mm) of space at the front and back of the DSN-2100 storage system for ventilation. Do not place the DSN-2100 storage system next to, on top off, or below any device that generates a significant amount of heat or will block the fee flow of air through the DSN2100 ventilation slots. 3.1.2 Desktop, Floor or Shelf Installation The DSN-2100 storage system can be mounted on a desktop or shelf. Observe the following considerations for desktop or shelf installations. Select a sturdy, level surface that can support the DSN-2100 storage system. A fully populated unit weighs approximately 45 lbs. (20.4 kg.). Allow enough ventilation space between the DSN-2100 storage system and any other objects in the vicinity. Be sure not to block the air vents on the front and back of the DSN-2100 storage system enclosure. Install the cables and power cords according to the procedures in the following sections. 18 Chapter 3 Installing the DSN-2100 Storage System
-
 1
1 -
2
-
3
-
4
-
5
-
6
-
7
-
8
-
9
-
10
-
11
-
12
-
 13
13 -
 14
14 -
 15
15 -
 16
16 -
 17
17 -
 18
18 -
 19
19 -
 20
20 -
 21
21 -
 22
22 -
 23
23 -
24
-
25
-
26
-
27
-
28
-
29
-
30
-
31
-
32
-
33
-
34
-
35
-
36
 |
 |
