Dell 1130 User Guide
Dell 1130 Manual
 |
UPC - 884116039259
View all Dell 1130 manuals
Add to My Manuals
Save this manual to your list of manuals |
Dell 1130 manual content summary:
- Dell 1130 | User Guide - Page 1
About this user's guide Features of your new product Introduction Getting started Network setup (Dell 1130n only) Basic setup Media and tray Printing Management tools Maintenance Troubleshooting Supplies Specifications Appendix Glossary Dell 1130 Dell 1130n www.dell.com | www.support.dell.com - Dell 1130 | User Guide - Page 2
- Dell 1130 | User Guide - Page 3
dcuonpvleexntpiorninting (manual) pdruinplteexr pdrriinvteinrg (manual) EpmrinbterddreidveWr eb Service gEemnbeerdadl softwares psyaspteemr inremquairneumaelnttrsay puanpifelerdindrtihvertcroanyf1igurator slopaedciinagl media Mpaapceinr tionsmhanual tray cpoampemr ionnthMeatrcainyt1osh problems - Dell 1130 | User Guide - Page 4
- Dell 1130 | User Guide - Page 5
Inc. is strictly forbidden. Trademarks used in this text: Dell, the DELL logo, and Dell Toner Management System are trademarks of Dell Inc.; Microsoft, Windows, Windows Vista, and Windows Server are registered trademarks of Microsoft Corporation in the United States and/or other countries. Adobe and - Dell 1130 | User Guide - Page 6
machine. Also, follow all warnings and instructions marked on the machine and in the of all icons and signs used in the user's guide: Warning Hazards or unsafe practices that may is grounded to prevent electric shock. Call the service center for help. Follow directions explicitly. Operating - Dell 1130 | User Guide - Page 7
/or injury to your pet. If the machine does not operate properly after these instructions have been followed, unplug the machine from all interface connections and request assistance from qualified service personnel. Otherwise, this could result in electric shock or fire. Operating method Caution - Dell 1130 | User Guide - Page 8
get injured. Keep the power cable and the contact surface of the should only be repaired by Dell service technician. Keep cleaning supplies away user's guide provided with the machine. Otherwise, it can cause damage to the machine. Supply usage Caution Do not disassemble the toner cartridge. Toner - Dell 1130 | User Guide - Page 9
, troubleshooting and replacing supplies. Printer Driver Help Dell website This help provides you with help information on printer driver and instructions for setting up the options for printing. (See Using help.) If you have Internet access, you can get help, support, printer drivers, manuals - Dell 1130 | User Guide - Page 10
- Dell 1130 | User Guide - Page 11
both sides of paper (Manual).) Print in various environments You can print with Windows as well as Linux and Macintosh systems. Your machine is equipped with a USB interface. The Dell 1130n comes with a built-in Network interface, 10/100 BaseTX. IPv6 This machine supports IPv6 (Dell 1130n only). - Dell 1130 | User Guide - Page 12
support all of your document needs from printing to more advanced networking solutions for your business. Features by models include: FEATURES Dell 1130 Dell 1130n Hi-Speed USB 2.0 ●[a] ● Network Interface Ethernet 10/100 BaseTX wired LAN ● Duplex (2-sided) printing (Manual) ● ● [a] USB - Dell 1130 | User Guide - Page 13
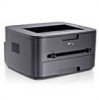
the control panel Machine overview Front view This illustration may differ from your machine depending on its model. 1 Document output tray 6 Manual feeder 2 Control panel 7 Manual feeder guide 3 Front cover handle 8 Output support 4 Front cover 9 Toner cartridge 5 Tray 1 Rear view - Dell 1130 | User Guide - Page 14
depending on its model. 1 Rear cover 3 USB port 2 Network Port[a] 4 Power receptacle [a] Dell 1130n only. Control panel overview This control panel may differ current status. LED Status Jam ( ) Orange On Online/Error Off ( ) Description A paper jam has occurred. (See Clearing paper jams.) - Dell 1130 | User Guide - Page 15
or repair required as a result of using nongenuine Dell toner cartridges will not be covered under the machine warranty. All printing errors will be appear in the Printer Status Monitor program window. If the problem persists, call for service. Buttons (Cancel button) By pressing the (cancel button - Dell 1130 | User Guide - Page 16
If you want to turn the power off, press and hold this button for 1 second. - Dell 1130 | User Guide - Page 17
This chapter gives you step-by-step instructions for setting up the USB connected machine and software. This chapter includes: Setting up the hardware Printing a demo page Supplied software System requirements Installing USB connected machine's driver Sharing your machine locally Setting up the - Dell 1130 | User Guide - Page 18
™window also displays the level of toner remaining and allows you to order replacement toner cartridge. Firmware Update Utility: This program helps you to update printer's firmware. SetIP (Dell 1130n only): Use this program to set your machine's TCP/IP addresses. Printer Driver: Use this driver - Dell 1130 | User Guide - Page 19
network connected machine's driver. (See Installing network connected machine's driver.) Only use an USB cable shorter than 3 m (118 in. ). Windows You can install the machine software using the typical or custom method. The following steps below are recommended for most users who use a machine - Dell 1130 | User Guide - Page 20
in Windows Vista, Windows 7 and Windows 2008 Server R2, click Run Setup.exe in Install or run program field, and click Continue or Yes in the User Account Control windows. 3. Click Next. If necessary, select a language from the drop-down list. 4. Select Typical installation for a local printer. Then - Dell 1130 | User Guide - Page 21
installation window in this user guide may differ depending on the machine and interface in use. 5. After the installation is finished, a window asking Printers > your printer driver name > Maintenance. 3. Select the option as you wish, follow the instruction on the window. Macintosh The software - Dell 1130 | User Guide - Page 22
Unified Linux Driver Configurator.) 1. Make sure that the machine is connected to your computer and powered on. 2. When the Administrator Login window appears, type in root in the Login field and enter the system password. You must log in as a super user (root) to install the machine software. If - Dell 1130 | User Guide - Page 23
window appears, type in "root" in the Login field and enter the system password. You must log in as a super user (root) to uninstall the printer driver. If you are not a super user, ask your system administrator. 3. Insert the supplied software to the machine with USB cable and is also connected - Dell 1130 | User Guide - Page 24
1. Install your printer driver. (See Installing USB connected machine's driver, Installing network connected machine's driver.) 2. Click the Windows Start menu. 3. For Windows 2000, select Settings > Printers. For Windows XP/Server 2003, select Printers and Faxes. For Windows Server 2008/Vista - Dell 1130 | User Guide - Page 25
1. Install your printer driver. (See Macintosh.) 2. Open the Applications folder > System Preferences and click Print & Fax. 3. Click the "+" icon. A display window showing the name of your shared printer appears. 4. Select your machine and click Add. - Dell 1130 | User Guide - Page 26
. The following table shows the network environments supported by the machine: Item Requirements Network interface Ethernet 10/100 Base-TX Network operating system Windows 2000/XP/Server 2003/Server 2008/Vista/7/2008 Server R2 Various Linux OS Mac OS X 10.3 ~ 10.6 Network protocols TCP/IPv4 - Dell 1130 | User Guide - Page 27
set up a network and troubleshooting problems. To print the report: instructions in the window and complete the installation. Starting the program 1. Connect your machine to the network with a network cable. 2. Turned on the machine. 3. From the Windows Start menu, select All Programs > Dell Printers - Dell 1130 | User Guide - Page 28
Web Service window opens, click Network Settings. 3. Click Reset. Then, click Clear for network. 4. Turn off and restart machine to apply settings. Installing network connected machine's driver Windows You can set up the machine driver, follow the steps below. This is recommended for most users. All - Dell 1130 | User Guide - Page 29
in Windows Vista, Windows 7 and Windows 2008 Server R2, click Run Setup.exe in Install or run program field, and click Continue or Yes in the User Account Control windows. 3. Click Next. If necessary, select a language from the drop-down list. 4. Select Typical installation for a network printer - Dell 1130 | User Guide - Page 30
> your printer driver name > Maintenance. 3. Select the option as you wish, follow the instruction on the window. Macintosh 1. Make sure that the machine is connected to your network and powered on. Also, your machine's IP address should have been set. 2. Insert the supplied software CD into - Dell 1130 | User Guide - Page 31
Select your machine and click Next. Add network Printer 1. Double-click the Unified Driver Configurator. 2. Click Add Printer... 3. The Add printer wizard window opens. Click Next. 4. Select Network printer and click the Search button. 5. The printer's IP address and model name appears on list field - Dell 1130 | User Guide - Page 32
: IPv6 address configured by a DHCPv6 server. Manual Address: Manually configured IPv6 address by a user. Manual address configuration 1. Start a web browser such as Internet Explorer that supports IPv6 addressing as a URL. (See Using Embedded Web Service (Dell 1130n only).) For IPv4, enter the IPv4 - Dell 1130 | User Guide - Page 33
3. Enter the IPv6 addresses. (ex: http://[FE80::215:99FF:FE66:7701]) Address must be enclosed in '[]' brackets. - Dell 1130 | User Guide - Page 34
For Dell 1130 1. Install the driver. (See Installing USB connected machine's driver or Installing network connected machine's driver.) 2. Click the Windows Start menu. For Windows 2000, select Settings > Printers. For Windows XP/Server 2003, select Printer and Faxes. For Windows Server 2008/Vista - Dell 1130 | User Guide - Page 35
. For Dell 1130 1. Install the driver. (See Installing USB connected machine's driver or Installing network connected machine's driver.) 2. Click the Windows Start menu. For Windows 2000, select Settings > Printers. For Windows XP/Server 2003, select Printer and Faxes. For Windows Server 2008/Vista - Dell 1130 | User Guide - Page 36
as follows: 1. Ensure that you have installed the printer driver with the provided software CD. 2. If you are a Windows user, you can launch it from the Start menu, select , PC-8 Latin/Greek Arabic & Farsi: HP Arabic-8, Windows Arabic, Code Page 864, Farsi, ISO 8859/6 Latin Arabic OCR: OCR-A, OCR-B - Dell 1130 | User Guide - Page 37
of print media, ensure that it meets the requirements specified in this user's guide. Using print media that does not meet these specifications may cause problems, requiring repairs. Such repairs are not covered by the warranty or service agreements. The amount of paper put into the tray may differ - Dell 1130 | User Guide - Page 38
the pages before loading papers. Insert the paper into the tray. 3. After inserting paper into the tray, adjust the support guide so that it lightly touches the paper stack. 4. Squeeze the paper width guides and slide them to the desired paper size marked at the bottom of the tray. Do not push the - Dell 1130 | User Guide - Page 39
problems with paper feeding, check whether the paper meets the media specification. (See Print media specifications.) Manual tray The manual or colored paper. Tips on using the manual tray If you select Manual Feeder for Source from your software application, you need to press (cancel button - Dell 1130 | User Guide - Page 40
and remove overlapping papers then try printing again. When paper does not feed well while printing, push the paper in manually until it starts feeding automatically. 2. Squeeze the manual tray paper guides and adjust them to the width of the paper. Do not force them too much, or the paper will bent - Dell 1130 | User Guide - Page 41
end of the envelope with the stamp area enters the printer first and center of the manual tray. If envelopes are printed out with wrinkles, crease be wrinkled, nicked, nor damaged. Temperature: Use envelopes that are compatible with the heat and pressure of the machine during operation. Use only - Dell 1130 | User Guide - Page 42
or with more than one flap that folds over to seal must use adhesives compatible with the machine's fusing temperature about 170°C (338 °F) for 0.1 second damaging the machine, only use transparencies designed for use in laser printers. Transparencies used in the machine must be able to withstand - Dell 1130 | User Guide - Page 43
-sided Face up Manual tray Face up Face down Letterhead/ Preprinted paper must be printed with heat-resistant ink that will not it. The printed pages stack on the output support, and the output support will help the printed pages to align. The printer sends output to the output tray by default - Dell 1130 | User Guide - Page 44
If you are using A5 paper, fold the output tray. Otherwise, printed pages might be mis-aligned or jammed. - Dell 1130 | User Guide - Page 45
Printing to a file (PRN) Macintosh printing Linux printing The procedures in this chapter are mainly based on Windows XP. Printer driver features Your printer drivers support the following standard features: Paper orientation, size, source, and media type selection Number of copies In addition - Dell 1130 | User Guide - Page 46
Devices and Printers. 3. For Windows 2000, XP, Server 2003 and Vista, double-click your machine. For Windows 7 and Windows Server 2008 R2, right click your printer icon > context menus > See what's printing. If See what's printing item has ► mark, you can select other printer drivers connected with - Dell 1130 | User Guide - Page 47
from the file menu. The Print window appears. 3. Select your machine from the Select Printer. 4. Click Properties or Preferences. Using Presets, all current driver settings are saved. If you click Add, the Add button changes to Update button. Select more options and click Update, settings will be - Dell 1130 | User Guide - Page 48
Preferences window, and enter a keyword in the input line of the Help option. To get information about supplies, driver update or pages on one sheet. 1. To change the print settings from your software application, access Printing Preferences. (See Opening printing preferences.) 2. Click the - Dell 1130 | User Guide - Page 49
until you exit the Print window. 7. You can complete the poster by pasting the sheets together. Printing booklets (Manual) This feature prints your sized print media. 1. To change the print settings from your software application, access the Printing Preferences. (See Opening printing preferences.) - Dell 1130 | User Guide - Page 50
the print settings from your software application, access Printing Preferences. (See Opening printing preferences.) 2. From the Advanced tab, select Edit from the Watermark drop-down list. The Edit Watermarks window appears. 3. Enter a text message in the Watermark Message box. You can enter up - Dell 1130 | User Guide - Page 51
the Current Watermarks list and change the watermark message and options. 4. Click Update to save the changes. 5. Click OK or Print until you exit the Print window. Deleting a watermark 1. To change the print settings from your software application, access Printing Preferences. (See Opening printing - Dell 1130 | User Guide - Page 52
message window printer, your printed output will appear very different from what it looks like on the screen. Graphic Controller: Fine Edge allows user to emphasize edges of texts and fine lines for improving readability. Toner Save: Selecting this option extends the life of your toner cartridge - Dell 1130 | User Guide - Page 53
settings available in the software application first, and change any remaining settings using the printer driver. 1. Click the Windows Start menu. 2. For Windows 2000, select Settings > Printers. For Windows XP/Server 2003, select Printers and Faxes. For Windows Server 2008/Vista, select Control - Dell 1130 | User Guide - Page 54
using Macintosh. You need to set the print environment before printing. USB connected (See Macintosh.) Network connected (See Macintosh.) Printing a document When you print with a Macintosh, you need to check the printer driver setting in each application you use. Follow the steps below to print - Dell 1130 | User Guide - Page 55
may differ depending on the machine in use. Except for the name, the composition of the printer properties window is similar to the following. The setting options may differ depending on printers and Macintosh OS version. Layout The Layout tab provides options to adjust how the document appears on - Dell 1130 | User Guide - Page 56
are Normal, Light, and Dark. Toner Save Mode: Selecting this option extends the life of your toner cartridge and reduces your cost per page without a significant reduction in print quality. Printer printer will reprint the last page sent from the computer after you have cleared the jam. (Dell 1130 - Dell 1130 | User Guide - Page 57
. 1. Open an application, and select Print from the File menu. 2. Select Print directly using lpr. 3. In the LPR GUI window, select the model name of your machine from the printer list and click Properties. 4. Change the print job properties using the following four tabs displayed at the top of the - Dell 1130 | User Guide - Page 58
supported. 5. Click Apply to apply the changes and close the Properties window. 6. Click OK in the LPR GUI window to start printing. 7. The Printing window appears, allowing you to monitor do that. But the drivers package replaces the standard lpr tool by a much more user-friendly LPR GUI program. - Dell 1130 | User Guide - Page 59
to view or select another port. If you change the machine port from USB to parallel or vice versa while in use, you must re-configure the machine port in this tab. Driver: Allows you to view or select another printer driver. By clicking Options, you can set the default device options. Jobs: This - Dell 1130 | User Guide - Page 60
your machine conveniently. Using Embedded Web Service (Dell 1130n only). Using the Printer Status Monitor. Using the Unified Linux Driver Configurator. Using Embedded Web Service (Dell 1130n only) Your Embedded Web Service window that appears in this user's guide may differ depending on the machine - Dell 1130 | User Guide - Page 61
of the printer. View the level of toner remaining in the toner cartridge(s). Order replacement toner cartridge(s) online. When error occurs, Help me button appears. You can directly open troubleshooting section in the user's guide. Opening the Troubleshooting Guide Find solutions for problems by - Dell 1130 | User Guide - Page 62
your machine by upgrading firmware. If you are a Windows user, you can launch it from the Start menu, select Programs or All Programs > Dell > Dell Printers > your printer driver name > Firmware Update Utility. Using the Unified Linux Driver Configurator The supplied software CD provides you with - Dell 1130 | User Guide - Page 63
Help. 3. After changing the configurations, click Exit to close the Unified Driver Configurator. Printers configuration Printers configuration has the two tabs: Printers and Classes. Printer tab View the current system's printer configuration by clicking on the machine icon button on the left side - Dell 1130 | User Guide - Page 64
machine. 3 Shows the status, model name and URI of your machine. The printer control buttons are, as follows: Refresh: Renews the available machines list. Add Printer: Allows you to add a new machines. Remove Printer: Removes the selected machine. Set as Default: Sets the current selected machine as - Dell 1130 | User Guide - Page 65
Refresh: Renews the classes list. Add Class: Allows you to add a new machine class. Remove Class: Removes the selected machine class. Port configuration In this window, you can view the list of available ports, check the status of each port and release a port that is stalled in a busy state when its - Dell 1130 | User Guide - Page 66
1 Switches to Ports configuration. 2 Shows all of the available ports. 3 Shows the port type, device connected to the port, and status. Refresh: Renews the available ports list. Release port: Releases the selected port. - Dell 1130 | User Guide - Page 67
on the demo page. Using toner low alert (Dell 1130n only) If the amount of toner in the cartridge is low, the LED blinks red. You can set the option for this LED to blink or not. 1. Install the driver. (See Installing USB connected machine's driver or Installing network connected machine - Dell 1130 | User Guide - Page 68
cover. 6. Plug in the power cord and turn the machine on. Storing the toner cartridge Toner cartridges contain components that are sensitive to light, temperature, and humidity. Dell suggests users follow the recommendations to ensure the optimum performance, highest quality, and longest life from - Dell 1130 | User Guide - Page 69
or shock. Never manually rotate the drum, especially in the reverse direction; this can cause internal damage and toner spillage. Use of non-Dell and refilled toner cartridge Dell does not recommend or approve the use of non-Dell brand toner cartridges in your printer including generic, store - Dell 1130 | User Guide - Page 70
an error. This chapter includes: Redistributing toner Tips for avoiding paper curls Tips for avoiding paper jams Clearing paper jams Solving other problems Redistributing toner When the toner cartridge is near the end of its life: White streaks or light printing occurs. The LED blinks red. If - Dell 1130 | User Guide - Page 71
a paper jam occurs, refer to the next guidelines. Ensure that the adjustable guides are positioned correctly. (See Loading paper in the tray.) Do not overload , or facing up in the manual tray. Clearing paper jams If a paper jam occurs, the LED on the control panel lights orange. Find and remove the - Dell 1130 | User Guide - Page 72
do not see the paper in this area, check the fuser area around the toner cartridge. (See Inside the machine.) 4. Insert tray back into the machine until it snaps into place. Printing automatically resumes. In the manual tray Click this link to open an animation about clearing a jam. 1. If the paper - Dell 1130 | User Guide - Page 73
when removing paper from the machine. 1. Open the front cover and pull the toner cartridge out, lightly pushing it down. 2. Remove the jammed paper by gently pulling it straight out. 3. Replace the toner cartridge and close the front cover. Printing automatically resumes. In exit area Click this - Dell 1130 | User Guide - Page 74
. Follow the suggested solutions until the problem is corrected. If the problem persists, call for service. Power problems Click this link to open an animation about power problems. Condition The machine is not receiving power, or the connection cable between the computer and the machine is - Dell 1130 | User Guide - Page 75
on special materials, use the manual tray. An incorrect type of laser printers. Remove each together in the paper exit. transparency as it exits from the machine. Envelopes skew or fail to feed correctly. Ensure that the paper guides are against both sides of the envelopes. Printing problems - Dell 1130 | User Guide - Page 76
machine's driver, Installing network connected machine's driver.) The machine is malfunctioning. Check the LEDs on the control panel to see if the machine is indicating a system error. Contact a service representative. Checking an error message is also possible from the Printer Status Monitor on - Dell 1130 | User Guide - Page 77
entire page is light, the print resolution setting is too low or the toner save mode is on. Adjust the print resolution and turn the toner save mode off. See the help screen of the printer driver. A combination of faded or smeared defects may indicate that the toner cartridge needs cleaning. (See - Dell 1130 | User Guide - Page 78
toner cartridge.) Parts of the machine may have toner on them. If the defects occur on the back of the page, the problem will likely correct itself after a few more pages. The fusing assembly may be damaged. Contact a service Ensure that the guides are not too tight or too loose against the paper - Dell 1130 | User Guide - Page 79
the toner cartridge.) If the problem persists, the machine may require repair. Contact a service representative. If the printed paper is curled or paper does not feed into the machine: Turn the stack of paper over in the tray. Also try rotating the paper 180° in the tray. Change the printer option - Dell 1130 | User Guide - Page 80
and/or whether an error has occurred. Refer to Microsoft Windows User's Guide that came with your computer for further information on Windows error messages. Common Linux problems condition Suggested solutions The machine does not print. Check if the printer driver is installed in your - Dell 1130 | User Guide - Page 81
Click this link to open an animation about replacing a toner cartridge. When the toner cartridge reaches its estimated cartridge life: The Printer Status Monitor program window appears on the computer telling you the toner cartridge needs to be replaced. The machine stops printing. At this - Dell 1130 | User Guide - Page 82
the toner cartridge. Use the handle on the cartridge to avoid touching this area. 7. Hold the toner cartridge by the handle and slowly insert the cartridge into the opening in the machine. Tabs on the sides of the cartridge and corresponding grooves within the machine will guide the cartridge into - Dell 1130 | User Guide - Page 83
8. Close the front cover. Make sure that the cover is securely closed. - Dell 1130 | User Guide - Page 84
on preliminary data. See www.dell.com or support.dell.com for current information. Hardware specifications Item Description Dimension Height 197 mm (7.76 inches) Depth 389 mm (15.31 inches) Width 360 mm (14.17 inches) Weight Machine with consumables Dell 1130: 7.25 Kg (15.98 lbs) Dell - Dell 1130 | User Guide - Page 85
Dell 1130n: Less than 6.5 W Power off mode Less than 0.8 W [a] See the rating Refer to the Plain paper section Thin paper Refer to the Plain paper section Dimensions Print media weight[a]/Capacity[b] Tray1 Manual tray 216 x 279 mm (8.50 x 11.00 inches) 216 x 356 mm (8.50 x 14.00 inches) - Dell 1130 | User Guide - Page 86
to 19 lb bond) to 19 lb bond) 1 sheet stacking Transparency Refer to the Plain paper section Refer to the Plain Not available in paper section tray1. 138 to 146 g/m2 (36.81 to 38.91 lb bond) 1 sheet stacking Labels [c ] Letter, Legal, US Folio, A4, JIS B5, ISO Refer to the Plain Not - Dell 1130 | User Guide - Page 87
troubleshooting process and provides for restoration of the Operating System, application software, and hardware drivers to the original default configuration as shipped from Dell, as well as the verification of appropriate functionality of the printer the appropriate service or support link based - Dell 1130 | User Guide - Page 88
mentioned in this user's guide. 802.11 802 2.4 GHz band. 802.11b supports bandwidth up to 11 Mbps; monochrome or black and white. BMP A bitmapped graphics format used internally by the Microsoft Windows them. The BOOTP servers assign the IP address monitoring instruments are displayed. They are typically found - Dell 1130 | User Guide - Page 89
and at the same time, a toner usage will be as much as printer out of its box state, reset, or initialized. DHCP A Dynamic Host Configuration Protocol (DHCP) is a client-server networking protocol. A DHCP server service which enables a user a printer limits 2,400 pages a day. ECM Error Correction - Dell 1130 | User Guide - Page 90
media access control (MAC)/data link layer service on your machine. FTP A File Transfer Protocol (FTP) is a commonly used protocol for exchanging files over any network that supports the TCP/IP protocol (such as the Internet or an intranet). Fuser Unit The part of a laser printer that melts the toner - Dell 1130 | User Guide - Page 91
locally or over the Internet to hundreds of printers, and also supports access control, authentication, and encryption, making it services running over TCP/IP. LED A Light-Emitting Diode (LED) is a semiconductor device that indicates the status of a machine. MAC address Media Access Control (MAC - Dell 1130 | User Guide - Page 92
to run various services on a PC, and the network protocols were based on the archetypal Xerox XNS stack. Today NetWare supports TCP/IP as well as IPX/SPX. OPC Organic Photo Conductor (OPC) is a mechanism that makes a virtual image for print using a laser beam emitted from a laser printer, and it is - Dell 1130 | User Guide - Page 93
simple, text-based protocol, where one or more recipients of a message are specified, and then the message text is transferred. It is a client-server protocol, where the client transmits an email message to the server. SSID Service Set Identifier (SSID) is a name of a wireless local area network - Dell 1130 | User Guide - Page 94
applications. Toner Cartridge A kind of bottle within a machine like printer which contains toner. Toner is a powder used in laser printers and point to another. WIA Windows Imaging Architecture (WIA) is an imaging architecture that is originally introduced in Windows Me and Windows XP. A scan can be - Dell 1130 | User Guide - Page 95
WPA-PSK WPA-PSK (WPA Pre-Shared Key) is special mode of WPA for small business or home users. A shared key, or password, is configured in the wireless access point (WAP) and any wireless laptop or desktop devices. WPA-PSK generates a unique key for each session between a wireless client and the - Dell 1130 | User Guide - Page 96
- Dell 1130 | User Guide - Page 97
- Dell 1130 | User Guide - Page 98
- Dell 1130 | User Guide - Page 99
- Dell 1130 | User Guide - Page 100
- Dell 1130 | User Guide - Page 101
-
 1
1 -
 2
2 -
 3
3 -
 4
4 -
 5
5 -
 6
6 -
 7
7 -
8
-
9
-
10
-
11
-
12
-
13
-
14
-
15
-
16
-
17
-
18
-
19
-
20
-
21
-
22
-
23
-
24
-
25
-
26
-
27
-
28
-
29
-
30
-
31
-
32
-
33
-
34
-
35
-
36
-
37
-
38
-
39
-
40
-
41
-
42
-
43
-
44
-
45
-
46
-
47
-
48
-
49
-
50
-
51
-
52
-
53
-
54
-
55
-
56
-
57
-
58
-
59
-
60
-
61
-
62
-
63
-
64
-
65
-
66
-
67
-
68
-
69
-
70
-
71
-
72
-
73
-
74
-
75
-
76
-
77
-
78
-
79
-
80
-
81
-
82
-
83
-
84
-
85
-
86
-
87
-
88
-
89
-
90
-
91
-
92
-
93
-
94
-
95
-
96
-
97
-
98
-
99
-
100
-
101
 |
 |

Copyright
Safety information
About this user’s guide
Features of your new product
Introduction
Getting started
Network setup (Dell 1130n only)
Basic setup
Media and tray
Printing
Management tools
Maintenance
Troubleshooting
Supplies
Specifications
Appendix
Glossary
www.dell.com
|
www.support.dell.com
Dell 1130
Dell 1130n