Dell 2155CDN User Manual
Dell 2155CDN Manual
 |
View all Dell 2155CDN manuals
Add to My Manuals
Save this manual to your list of manuals |
Dell 2155CDN manual content summary:
- Dell 2155CDN | User Manual - Page 1
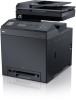
Dell™ 2155cn/2155cdn Multifunction Color Printer User's Guide www.dell.com | support.dell.com - Dell 2155CDN | User Manual - Page 2
- Dell 2155CDN | User Manual - Page 3
??\Mioga_AIO_UG_FM\Mioga_AIO _UG_FM\Mioga-AIO-UGTOC.fm Contents Dell™ 2155cn/2155cdn Multifunction Color Printer User's Guide 1 Before Beginning 25 A Notes, Notices, and Cautions 27 1 Dell™ 2155cn/2155cdn Multifunction Color Printer User's Guide 29 2 Finding Information 31 3 Product Features 35 - Dell 2155CDN | User Manual - Page 4
(Printer Setup) 47 5 Preparing Printer Hardware 49 Removing Tape 49 Removing the Print Head Device (PHD) Ribbons . . . . . 50 Installing the Toner Cartridges 50 6 Installing Optional Accessories 53 Installing the Optional Memory Module 53 Printing System Settings Report 56 Updating Your Driver - Dell 2155CDN | User Manual - Page 5
Setup Navigator . . . . . 103 When Using the Operator Panel 104 When Using the Tool Box 105 Verifying the IP Settings 106 Verifying the Settings Using System Settings Report 106 Verifying the Settings Using Ping Command . . 107 9 Loading Paper 109 10 Installing Printer Drivers on the Windows - Dell 2155CDN | User Manual - Page 6
Printer Setup on a Local Network . . . 118 Network Printer Setup on a Remote Network . . 124 Setting Up for Shared Printing 131 Point and Print 133 Peer-to-Peer 136 11 Installing Printer Drivers on the Macintosh Computers 141 Installing the Drivers and Software 141 Adding a Printer on Mac - Dell 2155CDN | User Manual - Page 7
. 154 Setup Overview 154 Installing the Printer Driver 154 Setting Up the Queue 154 Setting the Default Queue 156 Specifying the Printing Options 156 Setting the Password for Authority as the Printer Administrator 157 Uninstalling the Printer Driver 157 Using Your Printer 159 13 Dell Printer - Dell 2155CDN | User Manual - Page 8
FILE LOCATION: C:\Users\fxstdpc-admin\Desktop\0630_UG??\Mioga_AIO_UG_FM\Mioga_AIO _UG_FM\Mioga-AIO-UGTOC.fm E-Mail Alert 165 Set Password 165 Online Help 165 Order Supplies at 165 Contact Dell Support at 165 Setting Up the Dell Printer Configuration Web Tool0 . 165 Setting Up From Web Browser - Dell 2155CDN | User Manual - Page 9
Labels 268 Storing Print Media 269 Identifying Print Media and Specifications 270 Supported Paper Sizes 270 Supported Paper Types 271 Paper Type Specifications 271 15 Loading Print Media 273 Capacity 273 Print Media Dimensions 273 Loading Print Media in the Standard 250-Sheet Tray and the - Dell 2155CDN | User Manual - Page 10
Paper Jams 291 Sending a Job to Print 292 Canceling a Print Job 292 Canceling a Job From the Operator Panel . . . . 292 Canceling a Job From a Computer Running Windows 293 Duplex Printing 293 Duplex Printing With Duplexer (Dell 2155cdn Multifunction Color Printer Only 294 Duplex Printing - Dell 2155CDN | User Manual - Page 11
Using the Operator Panel to Change the Printer Settings 305 Using the Dell Printer Configuration Web Tool to Change the Printer Settings 306 Resetting Defaults 308 Adjusting the Language 309 18 Copying 311 Loading Paper for Copying 311 Selecting Paper Tray 311 Preparing a Document 311 Making - Dell 2155CDN | User Manual - Page 12
scanner driver 335 Scanning - Without scanner driver 336 Scanning From the Operator Panel 337 Scanning Using the TWAIN Driver 339 Scan Setting Tool 342 IP Address Settings 343 Password Setting 345 Scanning Using the Windows Image Acquisition (WIA) Driver 346 Scanning to Network 348 Overview - Dell 2155CDN | User Manual - Page 13
File on the Network . . . . 368 Scanning to a USB Memory 368 Types of a USB Memory 369 Specifying a Folder to Save the Scanned Image . 369 Inserting and Removing a USB Memory . . . . 370 Sending an E-Mail With the Scanned Image . . . . . 370 Setting an E-Mail Alert 370 Registering a New User 371 - Dell 2155CDN | User Manual - Page 14
Automatic Redialing 395 Sending a Delayed Fax 395 Sending a Fax from the Driver (Direct Fax 396 Example 397 Receiving a Fax 404 About Receiving Modes 404 Loading Paper for Receiving Faxes 404 Receiving a Fax Automatically in the Fax Mode 404 Receiving a Fax Manually in the Telephone Mode 404 - Dell 2155CDN | User Manual - Page 15
417 Fax Activity 417 Fax Pending 417 Print Meter 417 Changing Setting Options 418 Know Your Printer 419 21 Understanding the Tool Box Menus . . 421 Printer Settings Report 421 Printer Information 421 Menu Settings 422 Reports 426 TCP/IP Settings 427 Defaults Settings 427 Fax Settings - Dell 2155CDN | User Manual - Page 16
439 Paper Density 440 Color Registration Adjustment 440 Adjust Altitude 442 Reset Defaults 442 Non-Dell Toner 443 Initialize Print Meter 443 Tray Settings 443 TCP/IP Settings 446 Network Settings 447 Copy Defaults 447 Scan Defaults 453 Fax Defaults 456 Print from USB Defaults 458 Fax - Dell 2155CDN | User Manual - Page 17
Documents 471 Admin Menu 471 Phone Book 471 Print Language 472 Network 482 Fax Settings 490 System Settings 501 Maintenance 513 Secure Settings 519 USB Settings 521 Defaults Settings 522 Copy Defaults 522 Scan Defaults 524 Fax Defaults 525 Print from USB Defaults 526 Tray Settings - Dell 2155CDN | User Manual - Page 18
FILE LOCATION: C:\Users\fxstdpc-admin\Desktop\0630_UG??\Mioga_AIO_UG_FM\Mioga_AIO _UG_FM\Mioga-AIO-UGTOC.fm Secure Print 530 Private Mail Box 531 Public Mail Box 532 Proof Print 533 Secure Receive 534 Copy Menu 534 Select Tray 534 SSF Paper Size 535 SSF Paper Type 536 Collated 537 Reduce/ - Dell 2155CDN | User Manual - Page 19
549 Polling Receive 550 Fax Cover Page 550 Print from USB Menu 550 Document 550 Select Tray 551 SSF Paper Size 551 SSF Paper Type 552 2Sided 552 Layout 553 PDF Password 553 Panel Lock 553 Enabling the Panel Lock 553 Disabling the Panel Lock 554 Resetting Defaults 555 When Using the - Dell 2155CDN | User Manual - Page 20
C:\Users\fxstdpc-admin\Desktop\0630_UG??\Mioga_AIO_UG_FM\Mioga_AIO _UG_FM\Mioga-AIO-UGTOC.fm 23 Understanding Your Printer Software . 557 Printer Settings Utility 559 Status Window 560 Tool Box 560 Updater 560 Troubleshooting 560 Address Book Editor 560 ScanButton Manager 560 Dell ScanCenter - Dell 2155CDN | User Manual - Page 21
FILE LOCATION: C:\Users\fxstdpc-admin\Desktop\0630_UG??\Mioga_AIO_UG_FM\Mioga_AIO _UG_FM\Mioga-AIO- Printer Services 601 Printer Setup 602 Installing a Printer Driver Using the Add Printer Wizard 602 27 Specifications 605 Operating System Compatibility 605 Power Supply 605 Dimensions 605 Memory - Dell 2155CDN | User Manual - Page 22
Printer 613 Determining the Status of Supplies 613 Conserving Supplies 613 Ordering Supplies 614 Storing Print Media 614 Storing Consumables 615 Replacing the Toner Cartridges 615 Removing the Toner Cartridge 616 Installing a Toner Cartridge 617 Replacing the Print Head Device (PHD) Unit - Dell 2155CDN | User Manual - Page 23
FILE LOCATION: C:\Users\fxstdpc-admin\Desktop\0630_UG??\Mioga_AIO_UG_FM\Mioga_AIO _UG_FM\Mioga-AIO-UGTOC.fm Removing the Retard Roller in the Standard 250-Sheet Tray 628 Installing a Retard Roller in the Standard 250-Sheet Tray 629 Cleaning Inside the Printer 631 Cleaning the Feed Roller 631 - Dell 2155CDN | User Manual - Page 24
fm Clearing Paper Jams From the Fuser 672 Clearing Paper Jams From the Duplexer 676 Clearing Paper Jams From the Optional 250-Sheet Feeder 677 Troubleshooting 683 31 Troubleshooting Guide 685 Basic Printer Problems 685 Display Problems 685 Printing Problems 686 Print Quality Problems 688 The - Dell 2155CDN | User Manual - Page 25
Multi-feed Jam 718 Noise 719 Copy Problem 720 Fax Problems 720 Scanning Problems 723 Problems With Installed Optional Accessories . . . . 727 Scanner Driver/Printer Utility Problems 728 Other Problems 730 Contacting Service 732 Appendix 737 B Appendix 739 Dell™ Technical Support Policy 739 - Dell 2155CDN | User Manual - Page 26
FILE LOCATION: C:\Users\fxstdpc-admin\Desktop\0630_UG??\Mioga_AIO_UG_FM\Mioga_AIO _UG_FM\Mioga-AIO-UGTOC.fm Contacting Dell 740 24 Contents - Dell 2155CDN | User Manual - Page 27
Before Beginning D E L L C ON F I D E N T I A L - P R E L I M I N A RY 9 / 1 3 / 1 0 - F O R P R O O F O N LY 25 - Dell 2155CDN | User Manual - Page 28
FILE LOCATION: C:\Users\fxstdpcadmin\Desktop\0630_UG??\Mioga_AIO_UG_FM\Mioga_AIO_UG_FM\sectionnote.fm DE LL CONFIDENTIAL - PRE LIMINARY 9/13/10 - FOR PROOF ONLY 26 - Dell 2155CDN | User Manual - Page 29
Dell, the DELL logo are trademarks of Dell Inc.; Microsoft, Windows, Windows Server, Windows Vista, and Active Directory are either trademarks or registered trademarks of Microsoft Corporation in the United ., in the United States and other countries. XML Paper Specification (XPS): This product may - Dell 2155CDN | User Manual - Page 30
Users\fxstdpcadmin\Desktop\0630_UG??\Mioga_AIO_UG_FM\Mioga_AIO_UG_FM\sectionnote.fm As for RSA BSAFE RSA BSAFE software, produced by RSA Security Inc., has been installed on this printer. UNITED 252.227-7013 and in applicable FAR provisions: Dell Inc., One Dell Way, Round Rock, Texas, 78682, USA. - Dell 2155CDN | User Manual - Page 31
1 Dell™ 2155cn/2155cdn Multifunction Color Printer User's Guide Click the links to the left for information on the features, options, and operation of your printer. For information on other documentation included with your printer, see "Finding Information." To order replacement toner cartridges or - Dell 2155CDN | User Manual - Page 32
you get the best service, have your Dell printer Service Tag ready. For information regarding locating your Service Tag number, see "Express Service Code and Service Tag." DE LL CONFIDENTIAL - PRE LIMINARY 9/13/10 - FOR PROOF ONLY 30 Dell™ 2155cn/2155cdn Multifunction Color Printer User's Guide - Dell 2155CDN | User Manual - Page 33
are you looking for? • Drivers for my printer • My User's Guide Find it here Drivers and Utilities CD The Drivers and Utilities CD contains setup video, documentation, and drivers for your printer. You can use the CD to install drivers or access your setup video and documentation. Readme files - Dell 2155CDN | User Manual - Page 34
: C:\Users\fxstdpcadmin\Desktop\0630_UG??\Mioga_AIO_UG_FM\Mioga_AIO_UG_FM\section02.fm What are you looking for? • How to use my printer Find it here Quick Reference Guide • Safety information • Warranty information Product Information Guide CAUTION: Read and follow all safety instructions in - Dell 2155CDN | User Manual - Page 35
What are you looking for? • How to set up my printer Find it here Setup diagram • Express Service Code and Service Tag The Express Service Code and Service Tag are located inside the toner access cover of your printer. • Latest drivers for my printer Go to support.dell.com. • Documentation for my - Dell 2155CDN | User Manual - Page 36
- Upgrade information for components, such as the printer drivers • Customer Care - Contact information, order status, warranty, and repair information • Downloads - Drivers • Manuals- Printer documentation and product specifications Go to support.dell.com. Select your region, and fill in the - Dell 2155CDN | User Manual - Page 37
Up feature enables you to print documents as reduced-size documents containing 2, 4, 8, 16, or 32 pages on a single sheet of paper by setting from the printer driver. This feature helps save paper. Multiple-Up (2-in-1 Copy) 2 Sided (Duplex Copy) You can copy documents as reducedsize two-page - Dell 2155CDN | User Manual - Page 38
Copies From the Document Glass (Scan From Document Glass) With the Scan to USB Memory feature, you don't need a PC to connect a USB memory. You can specify the USB memory inserted into the printer's port as a data saving location when you scan data. You can scan the pages of a book or a brochure - Dell 2155CDN | User Manual - Page 39
FILE LOCATION: C:\Users\fxstdpcadmin\Desktop\0630_UG??\Mioga_AIO_UG_FM\Mioga_AIO_UG_FM\section03.fm Making Copies From the ADF (Scan From ADF) Sending a Fax from the Driver (Direct Fax) (Direct Fax from PC) You can scan pieces of unbound paper using the ADF. When you scan documents using the ADF, - Dell 2155CDN | User Manual - Page 40
FILE LOCATION: C:\Users\fxstdpcadmin\Desktop\0630_UG??\Mioga_AIO_UG_FM\Mioga_AIO_UG_FM\section03.fm DE LL CONFIDENTIAL - PRE LIMINARY 9/13/10 - FOR PROOF ONLY 38 Product Features - Dell 2155CDN | User Manual - Page 41
an overview of your Dell™ 2155cn/2155cdn Multifunction Color Printer. NOTE: In this manual, Dell™ 2155cdn Multifunction Color Printer is referred to as the "printer". NOTE: The images used and procedures described in this manual are those of Dell 2155cdn Multifunction Color Printer. D E L L C ON - Dell 2155CDN | User Manual - Page 42
.fm Front and Rear View Front View 1 Automatic Document Feeder 7 Duplexer (2155cdn only) (ADF) 2 Side Button 8 Optional 250-Sheet Feeder 3 Power Switch 4 Toner Access Cover (toner cartridges inside) 5 Fuser 9 Standard 250-Sheet Tray 10 Single Sheet Feeder (SSF) 11 Front Cover NOTE: You can - Dell 2155CDN | User Manual - Page 43
Users\fxstdpcadmin\Desktop\0630_UG??\Mioga_AIO_UG_FM\Mioga_AIO_UG_FM\section04.fm 6 Belt Unit 12 Operator Panel NOTICE: To avoid irregular screen image or malfunctioning of your printer, avoid placing the printer Provide enough room to open the printer trays, covers, and optional accessories, and - Dell 2155CDN | User Manual - Page 44
.75 inches 600 mm/23.62 inches 250 mm/9.84 inches 436 mm/17.16 inches 100 mm/3.94 inches Automatic Document Feeder (ADF) 1 2 3 5 4 1 ADF Cover 2 Document Guides 3 Document Glass 4 Document Feeder Tray 5 Front USB Port DE LL CONFIDENTIAL - PRE LIMINARY 9/13/10 - FOR PROOF ONLY 42 About the - Dell 2155CDN | User Manual - Page 45
. For details, see the operating instructions supplied with the Kensington lock. Ordering Supplies You can order consumables from Dell online when using a networked printer. Enter the IP address of your printer in your web browser, launch the Dell Printer Configuration Web Tool, and click the - Dell 2155CDN | User Manual - Page 46
Supplies button to open Order window. 1 Double-click the icon on your desktop. If you cannot find the icon on your desktop: a Click DLRMM.EXE under x:\abc\Dell Printers\Additional Color Laser Software\Reorder, where x:\abc is the location where the printer software is installed. b Click File on the - Dell 2155CDN | User Manual - Page 47
FILE LOCATION: C:\Users\fxstdpcadmin\Desktop\0630_UG??\Mioga_AIO_UG_FM\Mioga_AIO_UG_FM\section04.fm D E L L C ON F I D E N T I A L - P R E L I M I N A RY 9 / 1 3 / 1 0 - F O R P R O O F O N LY About the Printer 45 - Dell 2155CDN | User Manual - Page 48
FILE LOCATION: C:\Users\fxstdpcadmin\Desktop\0630_UG??\Mioga_AIO_UG_FM\Mioga_AIO_UG_FM\section04.fm DE LL CONFIDENTIAL - PRE LIMINARY 9/13/10 - FOR PROOF ONLY 46 About the Printer - Dell 2155CDN | User Manual - Page 49
Setting up the Printer (Printer Setup) D E L L C ON F I D E N T I A L - P R E L I M I N A RY 9 / 1 3 / 1 0 - F O R P R O O F O N LY 47 - Dell 2155CDN | User Manual - Page 50
FILE LOCATION: C:\Users\fxstdpcadmin\Desktop\0630_UG??\Mioga_AIO_UG_FM\Mioga_AIO_UG_FM\section05.fm DE LL CONFIDENTIAL - PRE LIMINARY 9/13/10 - FOR PROOF ONLY 48 - Dell 2155CDN | User Manual - Page 51
fm 5 Preparing Printer Hardware Removing Tape 1 Remove tapes and packaging material from the printer. 2 Pull the protective sheet out of the printer. CAUTION: Before performing any of the following procedures, read and follow the safety instructions in your Product Information Guide. D E L L C ON - Dell 2155CDN | User Manual - Page 52
: C:\Users\fxstdpcadmin\Desktop\0630_UG??\Mioga_AIO_UG_FM\Mioga_AIO_UG_FM\section05.fm Removing the Print Head Device (PHD) Ribbons 1 Open the toner access cover. 2 Completely pull out the eight yellow ribbons. Installing the Toner Cartridges 1 Press and slide the blue latches of the four toner - Dell 2155CDN | User Manual - Page 53
FILE LOCATION: C:\Users\fxstdpcadmin\Desktop\0630_UG??\Mioga_AIO_UG_FM\Mioga_AIO_UG_FM\section05.fm 2 Close the toner access cover. D E L L C ON F I D E N T I A L - P R E L I M I N A RY 9 / 1 3 / 1 0 - F O R P R O O F O N LY Preparing Printer Hardware 51 - Dell 2155CDN | User Manual - Page 54
FILE LOCATION: C:\Users\fxstdpcadmin\Desktop\0630_UG??\Mioga_AIO_UG_FM\Mioga_AIO_UG_FM\section05.fm DE LL CONFIDENTIAL - PRE LIMINARY 9/13/10 - FOR PROOF ONLY 52 Preparing Printer Hardware - Dell 2155CDN | User Manual - Page 55
and optional 250-sheet feeder. NOTE: The images used and procedures described in this manual are those of Dell™ 2155cdn Multifunction Color Printer. Installing the Optional Memory Module NOTE: Your printer supports additional 512 MB memory module. 1 Ensure that the printer is turned off. 2 Turn the - Dell 2155CDN | User Manual - Page 56
4 Open the control board cover completely. 5 Align the connector of the memory module with the slot and insert the memory module into the slot. 54 Installing Optional Accessories - Dell 2155CDN | User Manual - Page 57
6 Push the memory module firmly into the slot. NOTE: Ensure that the memory module is firmly fixed in the slot and does not move easily. 7 Close the control board cover, and slide it towards the front of the printer. Installing Optional Accessories 55 - Dell 2155CDN | User Manual - Page 58
the system settings report to confirm that the newly installed memory is detected by the printer. Printing System Settings Report When Using the Operator Panel a Press the (Menu) button. b Press button until System Setup is highlighted, and then press the (Set) button. c Ensure that Report/List - Dell 2155CDN | User Manual - Page 59
) button. The system settings report is printed. When Using the Tool Box NOTE: a Click Start All Programs Dell Printers Dell 2155 Multifunction Color Printer Tool Box. NOTE: The Select Printer window appears in this step when multiple printer drivers are installed on your computer. In this case - Dell 2155CDN | User Manual - Page 60
® Windows® 7/Windows 7 x64/ Windows Server® 2008 R2 x64 Windows Vista®/ Vista x64 Windows Server 2008/ Server 2008 x64 Windows XP/XP x64/ Windows Server 2003/ Windows Server 2003 x64 1 Click Start Devices and Printers. 2 Right-click the printer icon of the Dell 2155cdn Multifunction Color Printer - Dell 2155CDN | User Manual - Page 61
250-sheet feeder in the location that the printer is located. 4 Pull the standard 250-sheet tray out of the printer about 200 mm. Hold the standard 250-sheet tray with both hands, and remove it from the printer. 5 Lift the printer and align the five guide pins of the optional 250-sheet feeder with - Dell 2155CDN | User Manual - Page 62
to the printer by tightening the two screws provided with the feeder, with a coin or similar object. NOTE: The screw hole is located in 216 mm recess from the front of the printer. 7 Insert the standard 250-sheet tray into the printer, and push until it stops. 60 Installing Optional Accessories - Dell 2155CDN | User Manual - Page 63
into the back of the printer, and turn on the printer. NOTE: The printer will automatically detect the attached tray but will not detect the paper type. 9 Print the system settings report to confirm the optional 250-sheet feeder is installed correctly. Printing System Settings Report When Using - Dell 2155CDN | User Manual - Page 64
that the selected paper type is highlighted, and then press the (Menu) button. 12 If you installed the optional 250-sheet feeder after installing the printer driver, update your driver by following the instructions for each operating system. If the printer is on a network, update the driver for each - Dell 2155CDN | User Manual - Page 65
Windows 7/ Windows 7 x64/ Windows Server 2008 R2 x64 Windows Vista/Vista x64 Windows Server 2008/ Server 2008 x64 Windows XP/XP x64/ Windows Server 2003/ Windows Server 2003 x64 1 Click Start Devices and Printers. 2 Right-click the printer icon of the Dell 2155cdn Multifunction Color Printer - Dell 2155CDN | User Manual - Page 66
Click Apply, and then click OK. 4 Close the Printers and Faxes(, Printers, or Devices and Printers) dialog box. Installing the Optional Wireless Adapter The wireless adapter allows you to use the printer with wireless network connection. The specifications of the wireless adapter are described below - Dell 2155CDN | User Manual - Page 67
with your printer, which can also be downloaded from support.dell.com. Installing the Wireless Adapter Using Video Instructions (Recommended) To install the Dell wireless adapter, perform the following method. 1 Insert the Drivers and Utilities CD in your computer. The Easy Setup Navigator file - Dell 2155CDN | User Manual - Page 68
to configure wireless settings. Installing the Optional Wireless Adapter NOTE: You can also install the Dell wireless adapter by following the instructions described in Installing the Optional Wireless Adapter provided with the wireless adapter. 1 Ensure that the printer is turned off. 66 - Dell 2155CDN | User Manual - Page 69
inserted and secured. 3 Turn on the printer. NOTE: If a message displays telling you to make initial setup on the operator panel, always do as instructed. 4 Print the system settings report to confirm that the wireless adapter is installed correctly. Printing System Settings Report When Using the - Dell 2155CDN | User Manual - Page 70
a Click Start All Programs Dell Printers Dell 2155 Multifunction Color Printer Tool Box. NOTE: The Select Printer window appears in this step when multiple printer drivers are installed on your computer. In this case, click the name of this printer listed in Printer Names, and then click OK. - Dell 2155CDN | User Manual - Page 71
the name that identifies the wireless network with up to 32 alphanumeric characters. Specifies the network type from Ad-hoc or Infrastructure. Selects Setup Navigator. You can select a method to configure a wireless adapter from the following: Wizard Setup through USB connection Installing - Dell 2155CDN | User Manual - Page 72
the access point supports WPS. NOTE: The optional wireless adapter must be installed on the printer. NOTE: For information on how to install a wireless adapter, see "Installing the Optional Wireless Adapter." Using Wizard Setup to Configure a Wireless Adapter 1 Insert the Drivers and Utilities CD - Dell 2155CDN | User Manual - Page 73
3 Click Connect Your Printer. 4 Select Wireless Connection, and then click the Next button. Installing Optional Accessories 71 - Dell 2155CDN | User Manual - Page 74
-screen instructions to configure wireless settings. Using Advanced Setup to Configure a Wireless Adapter You can configure the wireless adapter with the following connection methods: • Network Cable • WPS-PIN • WPS-PBC • Operator Panel • Dell Printer Configuration Web Tool 1 Insert the Drivers and - Dell 2155CDN | User Manual - Page 75
2 Click Guided Setup. 3 Click Connect Your Printer. Installing Optional Accessories 73 - Dell 2155CDN | User Manual - Page 76
the Next button. The Wireless Connection window appears. For Network, follow the on-screen instructions to configure wireless settings. 1 Select Network Cable, and then click the Next button. The instruction video starts. Follow the on-screen instructions to configure wireless settings, and then - Dell 2155CDN | User Manual - Page 77
supports WPS. 1 Press the (Menu) button. 2 Press button until System Setup is highlighted, and then press the (Set) button. 3 Press button until Admin Menu is highlighted, and then press the (Set) button. 4 Press button until Network is highlighted, and then press the (Set) button. Installing - Dell 2155CDN | User Manual - Page 78
supports WPS. 1 Press the (Menu) button. 2 Press button until System Setup is highlighted, and then press the (Set) button. 3 Press button until Admin Menu is highlighted, and then press the (Set) button. 4 Press button until Network is highlighted, and then press the (Set) button. 76 Installing - Dell 2155CDN | User Manual - Page 79
. Operator Panel 1 Press the (Menu) button. 2 Press button until System Setup is highlighted, and then press the (Set) button. 3 Press button until Admin Menu is highlighted, and then press the (Set) button. 4 Press button until Network is highlighted, and then press the (Set) button. 5 Press button - Dell 2155CDN | User Manual - Page 80
type from No Security, WEP (64Bit), and WEP (128Bit). When you do not set security for your wireless network Dell Printer Configuration Web Tool 1 Launch the Dell Printer Configuration Web Tool by entering the IP address of the printer in your web browser. 2 Click Print Server Settings. 3 Click Print - Dell 2155CDN | User Manual - Page 81
using the tool provided with the operating system. See the instructions below. For Windows XP and Windows Server 2003: a Select Network Connections from Control Panel. b Right-click Wireless Network Connection and select Properties. c Select the Wireless Networks tab. d Ensure the check box for Use - Dell 2155CDN | User Manual - Page 82
to a network. f Select Connect Anyway in the warning dialog box indicating you are entering an unsecured area. g Click Close in the dialog box after confirming the connection is a success. For Windows Server 2008: a Open Control Panel. b Select Network and Sharing Center. 80 Installing Optional - Dell 2155CDN | User Manual - Page 83
IP address assigned by AutoIP on the printer. a Press the (Menu) button. b Press button until System Setup is highlighted, and then press the (Set) button. c Press button until Admin Menu is highlighted, and then press the (Set) button. d Press button until Network is highlighted, and then press the - Dell 2155CDN | User Manual - Page 84
4 Open Dell Printer Configuration Web Tool using the WEB browser. 5 Create wireless setting of the printer on Dell Printer Configuration Web Tool. 6 Reboot the printer. 7 Restore the wireless settings on your computer. 82 Installing Optional Accessories - Dell 2155CDN | User Manual - Page 85
using the tool provided with the operating system. See the instructions below. For Windows XP and Windows Server 2003: a Select Network Connections from Control Panel. b Right-click Wireless Network Connection and select Properties. c Select Wireless Network tab. d Ensure the check box for Use - Dell 2155CDN | User Manual - Page 86
the tool provided with the operating system. See the instructions below. For Windows XP and Windows Server 2003: a Select Network Connections from Control Panel. b Right-click Wireless Network Connection and select Properties. c Select the Wireless Networks tab. 84 Installing Optional Accessories - Dell 2155CDN | User Manual - Page 87
: Open Data encryption: Disabled Ad hoc network: checked i Click the Move up button to move the newly added SSID to the top of the list. j Click OK to close the Property dialog box. For Windows Vista: a Open Control Panel. b Select Network and Internet. Installing Optional Accessories 85 - Dell 2155CDN | User Manual - Page 88
Windows 7: a Open Control Panel. b Select Network and Internet. c Select Network and Sharing Center. d Select Connect to a network. e Select dell_device from the network items listed in the available network list, and click Connect. 2 Check the IP address on your computer. 86 Installing Optional - Dell 2155CDN | User Manual - Page 89
3 Set the IP address on the printer. a Press the (Menu) button. b Press button until System Setup is highlighted, and then press the (Set) button. c Press button until Admin menu is highlighted, and then press the (Set) button. d Press button until Network is highlighted, and then press the (Set) - Dell 2155CDN | User Manual - Page 90
setting of the printer on Dell Printer Configuration Web Tool. 6 Reboot the printer. 7 Restore the instructions below. a For Windows XP and Windows Server 2003: b Select Network Connections from Control Panel. c Right-click Wireless Network Connection and select Properties. d Select Wireless Network - Dell 2155CDN | User Manual - Page 91
the Property dialog box. For Windows Vista: a Open Control Panel. b Select Network and Internet. c Select Network and Sharing Center. d Select Connect to a network. e Select the setting you send to the printer from the network items listed in Connect to a network. f Select Connect Anyway in the - Dell 2155CDN | User Manual - Page 92
is a success. For Windows Server 2008 R2 and Windows 7: a Open Control Panel. b Select Network and Internet. c Select Network and Sharing Center. d Select Connect to a network. e Select the setting you send to the printer from the network items listed in the available network list, and click Connect - Dell 2155CDN | User Manual - Page 93
following requirements: NOTE: The images used and procedures described in this manual are those of Dell 2155cdn Multifunction Color Printer. Connection type USB Ethernet Wireless (optional) Wall jack connector Phone connector Connection specifications USB 2.0 10 Base-T/100 Base-TX/1000 Base-T IEEE - Dell 2155CDN | User Manual - Page 94
the USB cable. If your printer is connected to a network instead of your computer, skip this section and go to "Network Connection." The following operating systems support USB connection: • Microsoft® Windows® XP • Windows XP 64-bit Edition • Windows Server® 2003 • Windows Server 2003 x64 Edition - Dell 2155CDN | User Manual - Page 95
• Windows 7 • Windows 7 64-bit Edition • Mac OS X 10.3.9/10.4.11/10.5/10.6 • Red Hat® Enterprise Linux® 4 WS/5 Client (x86) • SUSE® Linux Enterprise Desktop 10/11 (x86) To connect the printer to a computer: 1 Connect the smaller USB connector into the USB port at the back of the printer. 1 USB port - Dell 2155CDN | User Manual - Page 96
setup a wireless connection, insert the wireless adapter into the wireless adapter socket on the back of the printer. For a wireless connection, see "Installing the Optional Wireless Adapter." NOTE: To use the wireless adapter, be sure to disconnect the network cable. Connecting the Telephone Line - Dell 2155CDN | User Manual - Page 97
2 Remove the "Blue" plug from the phone connector. 3 To connect a telephone and/or answering machine to your printer, plug the telephone or answering machine line cord into the phone connector ( ). Connecting Your Printer 95 - Dell 2155CDN | User Manual - Page 98
and Switzerland), and that you are supplied with a "Yellow" terminator, insert the "Yellow" terminator into the phone connector ( ). Phone connector "Yellow" terminator 96 Connecting Your Printer - Dell 2155CDN | User Manual - Page 99
, the USB driver is automatically installed. Setting Initial Settings on the Operator Panel You need to set the printer language, country, clock date, and time when you turn on printer for the first time. When you turn the printer on, the wizard screen to perform the initial setup appears on the - Dell 2155CDN | User Manual - Page 100
the Printer Menus." For more information on Dell Printer Configuration Web Tool, see "Dell Printer Configuration Web Default Paper Size A4 A4 A4 A4 A4 Letter Letter Letter A4 Display Format DD/MM/YY DD/MM/YY DD/MM/YY DD/MM/YY DD/MM/YY MM/DD/YY DD/MM/YY DD/MM/YY DD/MM/YY 98 Connecting Your Printer - Dell 2155CDN | User Manual - Page 101
/MM/YY DD/MM/YY DD/MM/YY DD/MM/YY DD/MM/YY DD/MM/YY MM/DD/YY DD/MM/YY Connecting Your Printer 99 - Dell 2155CDN | User Manual - Page 102
Russia Saudi Arabia Slovakia Slovenia South Africa Spain Sweden Switzerland Tunisia Turkey United Arab Emirates United Kingdom United States Unknown +3:00 +3:00 +1:00 +1:00 +2:00 +1:00 +1:00 +1:00 +1:00 +2:00 +4:00 UTC -04:00 UTC -03:30 UTC -03:00 UTC -02:00 UTC -01:00 100 Connecting Your Printer - Dell 2155CDN | User Manual - Page 103
and then press the (Set) button. This ends the basic printer settings. Press the (Set) button to set Fax settings or press the (Start) button to end the initial setup. 6 Please Enter Fax Number appears. Enter the fax number of the printer, and then press the (Set) button. 7 Please Enter Name appears - Dell 2155CDN | User Manual - Page 104
The printer automatically restarts after resetting your regional clock and registering the fax information. 102 Connecting Your Printer - Dell 2155CDN | User Manual - Page 105
8 Setting the IP Address NOTE: The images used and procedures described in this manual are those of Dell™ 2155cdn Multifunction Color Printer. Assigning an IP Address An IP address is a unique number that consists of four sections that are delimited by a period and can include up to - Dell 2155CDN | User Manual - Page 106
see "Operator Panel." 1 Turn on the printer. 2 Press the (Menu) button. 3 Press button until System Setup is highlighted, and then press the (Set) button. 4 Press button until Admin Menu is highlighted, and then press the (Set) button. 5 Press button until Network is highlighted, and then press the - Dell 2155CDN | User Manual - Page 107
then turn it on again. When Using the Tool Box NOTE: 1 Click Start All Programs Dell Printers Dell 2155 Multifunction Color Printer Tool Box. NOTE: The Select Printer window appears in this step when multiple printer drivers are installed on your computer. In this case, click the name of this - Dell 2155CDN | User Manual - Page 108
System Settings is highlighted, and then press the (Set) button. The system settings report is printed. When Using the Tool Box NOTE: a Click Start All Programs Dell Printers Dell 2155 Multifunction Color Printer Tool Box. DE LL CONFIDENTIAL - PRE LIMINARY 9/13/10 - FOR PROOF ONLY 106 Setting - Dell 2155CDN | User Manual - Page 109
FILE LOCATION: C:\Users\fxstdpcadmin\Desktop\0630_UG??\Mioga_AIO_UG_FM\Mioga_AIO_UG_FM\section08.fm NOTE: The Select Printer window appears in this step when multiple printer drivers are installed on your computer. In this case, click the name of this printer listed in Printer Names, and then click - Dell 2155CDN | User Manual - Page 110
FILE LOCATION: C:\Users\fxstdpcadmin\Desktop\0630_UG??\Mioga_AIO_UG_FM\Mioga_AIO_UG_FM\section08.fm DE LL CONFIDENTIAL - PRE LIMINARY 9/13/10 - FOR PROOF ONLY 108 Setting the IP Address - Dell 2155CDN | User Manual - Page 111
Paper NOTE: To avoid paper jams, do not remove the tray while printing is in progress. NOTE: Use only laser print media. Do not use ink jet paper in your printer. 1 Pull the tray out of the printer about 200 mm. Hold the tray with both hands, and remove it from the printer. 2 Adjust the paper guides - Dell 2155CDN | User Manual - Page 112
on a level surface. 4 Load the print media into the tray with the recommended print side facing up. NOTE: Do not exceed the maximum fill line in the tray. Overfilling the tray may cause paper jams. 5 Align the width guides against the edges of the paper. DE LL CONFIDENTIAL - PRE LIMINARY 9/13 - Dell 2155CDN | User Manual - Page 113
print media, adjust the width guides and slide the extendable part of the tray by pinching the length guide and sliding it until it rests lightly against the edge of the paper. 6 After confirming that the guides are securely adjusted, insert the tray into the printer. NOTE: Select the paper type - Dell 2155CDN | User Manual - Page 114
FILE LOCATION: C:\Users\fxstdpcadmin\Desktop\0630_UG??\Mioga_AIO_UG_FM\Mioga_AIO_UG_FM\section09.fm DE LL CONFIDENTIAL - PRE LIMINARY 9/13/10 - FOR PROOF ONLY 112 Loading Paper - Dell 2155CDN | User Manual - Page 115
Printer Driver Pre-install Status Before installing the printer driver on your computer, check the IP address of your printer by performing one of the following procedures. NOTE: The images used and procedures described in this manual are those of Dell™ 2155cdn Multifunction Color Printer - Dell 2155CDN | User Manual - Page 116
default), an IP address has not been assigned. To assign one for your printer, see "Assigning an IP Address." Disabling Firewall Before Installing Printer Software NOTE: This step is necessary if you have Windows XP Service Pack 2 or 3 installed. If your printer is connected directly to a network - Dell 2155CDN | User Manual - Page 117
computer or a print server using a USB. If your printer is connected to a network and not your computer, see "Network Connection Setup." For installing XML Paper Specification (XPS) printer driver NOTE: XPS driver is supported on the following operating systems: Windows Vista, Windows Vista 64-bit - Dell 2155CDN | User Manual - Page 118
. D:\Drivers\XPS\Win_7Vista\XPS_2155.zip (where D is the CD drive letter) 2 Click Start Control Panel Hardware and Sound Printers. 3 Click Add a printer. 4 Click Add a local printer. DE LL CONFIDENTIAL - PRE LIMINARY 9/13/10 - FOR PROOF ONLY 116 Installing Printer Drivers on the Windows - Dell 2155CDN | User Manual - Page 119
not share this printer. If you share your printer, select Share this printer so that others on your network can find and use it. 12 Click Next. Installation starts. 13 As the driver installation is completed, click Print a test page to print a test page. 14 Click Finish. Windows 7, Windows 7 64-bit - Dell 2155CDN | User Manual - Page 120
. The command strings are mount/media/CD-ROM. Network Printer Setup on a Local Network For installing PCL printer driver 1 In the Easy Setup Navigator window, click Software Installation to launch the installation software. 2 Select Network Installation, and then click Next. 3 Select the model name - Dell 2155CDN | User Manual - Page 121
default printer, select the Set this printer as default check box. d If you want to restrict color printing, select the appropriate Dell ColorTrack option. Enter the password when Color-Password Enabled is selected for Dell ColorTrack. e If you want to install the Fax Driver, select the Fax Driver - Dell 2155CDN | User Manual - Page 122
printer, select the Set as the default printer check box, and then click Next. Installation starts. 13 As the driver installation is completed, click Print a test page to print a test page. DE LL CONFIDENTIAL - PRE LIMINARY 9/13/10 - FOR PROOF ONLY 120 Installing Printer Drivers on the Windows - Dell 2155CDN | User Manual - Page 123
printer, select Do not share this printer. If you share your printer, select Share this printer so that others on your network can find and use it. 14 Click Next. D E L L C ON F I D E N T I A L - P R E L I M I N A RY 9 / 1 3 / 1 0 - F O R P R O O F O N LY Installing Printer Drivers on the Windows - Dell 2155CDN | User Manual - Page 124
the driver installation is completed, click Print a test page to print a test page. 16 Click Finish. Windows Server 2008 R2 1 Extract the following zip file to your desired location. D:\Drivers\XPS\Win_7Vista\XPS_2155.zip (where D is the CD drive letter) 2 Click Start Devices and Printers. 3 Click - Dell 2155CDN | User Manual - Page 125
to print a test page. 14 Click Finish. Windows 7 or Windows 7 64-bit Edition 1 Extract the following zip file to your desired location. D:\Drivers\XPS\Win_7Vista\XPS_2155.zip (where D is the CD drive letter) 2 Click Start Devices and Printers. 3 Click Add a printer. 4 Click Add a network, wireless - Dell 2155CDN | User Manual - Page 126
on the SMTP server until an error occurs. Network Printer Setup on a Remote Network Before Installation Before you start remote installation, perform the following procedures. DE LL CONFIDENTIAL - PRE LIMINARY 9/13/10 - FOR PROOF ONLY 124 Installing Printer Drivers on the Windows Computers - Dell 2155CDN | User Manual - Page 127
box. For Windows XP, Windows Server 2003, Windows Server 2008, click start All Programs Accessories Run. For Windows Vista, click Start Run. 2 Type gpedit.msc, and then click OK. 3 Click Computer Configuration Administrative Templates Printers. 4 Right-click Allow Print Spooler to accept - Dell 2155CDN | User Manual - Page 128
click OK. For Windows Server 2008 R2 and Windows 7: 1 Click Start Control Panel. 2 Select System and Security. 3 Click Windows Firewall. 4 Click Allow a program or feature through Windows Firewall. DE LL CONFIDENTIAL - PRE LIMINARY 9/13/10 - FOR PROOF ONLY 126 Installing Printer Drivers on the - Dell 2155CDN | User Manual - Page 129
Control Panel. 2 Select User Accounts and Family Safety. 3 Click User Accounts. 4 Click Turn User Account Control on or off. 5 Click Continue. D E L L C ON F I D E N T I A L - P R E L I M I N A RY 9 / 1 3 / 1 0 - F O R P R O O F O N LY Installing Printer Drivers on the Windows Computers 127 - Dell 2155CDN | User Manual - Page 130
you use Windows Vista, Windows Vista 64-bit Edition, Windows Server 2008, Windows Server 2008 64-bit Edition, Windows Server 2008 R2, Windows 7, and Windows 7 64-bit Edition for the server computer. DE LL CONFIDENTIAL - PRE LIMINARY 9/13/10 - FOR PROOF ONLY 128 Installing Printer Drivers on the - Dell 2155CDN | User Manual - Page 131
-click Network access: Sharing and security model for local accounts and select Properties. 11 Ensure Classic - local users authenticate as themselves is selected. Installing the Printer Driver NOTE: Installation is not supported on Windows XP Home Edition, Windows Vista Home Basic, Windows Vista - Dell 2155CDN | User Manual - Page 132
as default, select the Set this printer as default check box. d If you want to restrict color printing, select the appropriate Dell ColorTrack option. Enter the password when Color-Password Enabled is selected for Dell ColorTrack. e If you want to install the Fax Driver, select the Fax Driver check - Dell 2155CDN | User Manual - Page 133
the printer on a network, share the printer and install its drivers on all the computers on the network. NOTE: You need to purchase an Ethernet cable for shared printing. Windows XP, Windows XP 64-bit Edition, Windows Server 2003, or Windows Server 2003 x64 Edition 1 Click start Printers and Faxes - Dell 2155CDN | User Manual - Page 134
printer check box, and then type a name in the Share name text box. 5 Click Additional Drivers and select the operating systems of all network clients that print to the printer. 6 Click OK. DE LL CONFIDENTIAL - PRE LIMINARY 9/13/10 - FOR PROOF ONLY 132 Installing Printer Drivers on the Windows - Dell 2155CDN | User Manual - Page 135
the printer on network clients using the point and print method or the peer-to-peer method. Point and Print Point and Print is a Microsoft Windows technology that allows you to connect to a remote printer. This feature automatically downloads and installs the printer driver. Windows XP, Windows XP - Dell 2155CDN | User Manual - Page 136
for the driver information to be copied from the server computer to the client computer, and for a new printer object to be added to the Printers and Faxes folder. The copy time varies, based on network traffic and other factors. 4 Close My Network Places. 5 Print a test page to verify installation - Dell 2155CDN | User Manual - Page 137
-bit Edition, or Windows Server 2008 R2 1 On the Windows desktop of the client computer, click Start your user name Network (Start Network for Windows Server 2008 R2). D E L L C ON F I D E N T I A L - P R E L I M I N A RY 9 / 1 3 / 1 0 - F O R P R O O F O N LY Installing Printer Drivers on the - Dell 2155CDN | User Manual - Page 138
printer driver is fully installed on each client computer. Network clients retain control of driver modifications. The client computer handles the print job processing. Windows XP, Windows XP 64-bit Edition, Windows Server 2003, or Windows Server 2003 x64 Edition 1 Click start Printers and Faxes - Dell 2155CDN | User Manual - Page 139
to available drivers. 6 Select Yes if you want this printer to be set as the default printer, and then click Next. If you want to verify installation, click Yes to print a test page. 7 Click Finish. When a test page prints successfully, installation is complete. Windows Vista or Windows Vista 64 - Dell 2155CDN | User Manual - Page 140
specify the path to available drivers. 4 Select Yes if you want this printer to be set as the default printer, and then click Next. 5 If you want to verify installation, click Print a test page. 6 Click Finish. When a test page prints successfully, installation is complete. Windows Server 2008 or - Dell 2155CDN | User Manual - Page 141
a path to available drivers. 4 Select Yes if you want this printer to be set as the default printer, and then click Next. 5 Click Print a test page if you want to verify installation. 6 Click Finish. When a test page prints successfully, installation is complete. Windows 7, Windows 7 64-bit Edition - Dell 2155CDN | User Manual - Page 142
FILE LOCATION: C:\Users\fxstdpcadmin\Desktop\0630_UG??\Mioga_AIO_UG_FM\Mioga_AIO_UG_FM\section10.fm DE LL CONFIDENTIAL - PRE LIMINARY 9/13/10 - FOR PROOF ONLY 140 Installing Printer Drivers on the Windows Computers - Dell 2155CDN | User Manual - Page 143
that you want to install. • Dell 2155 Color MFP Printer Driver • Dell 2155 Color MFP Fax Driver • Dell 2155 Color MFP Scan Driver • Dell Printer Status Monitor 10 Type the administrator's name and password, and then click OK. 11 Click Continue Installation to continue the installation. 12 When the - Dell 2155CDN | User Manual - Page 144
Preferences, and click Print & Fax. 4 Click the Plus (+) sign, and click IP. 5 Select Line Printer Daemon - LPD for Protocol. 6 Type the IP address for the printer in the Address area. 7 Select Dell 2155cdn Color MFP for Print Using. NOTE: When printing is set up using IP printing, the queue name - Dell 2155CDN | User Manual - Page 145
that the printer is displayed in the Print & Fax dialog box. Adding a Printer on Mac OS X 10.4.11 When Using a USB Connection 1 Turn on the printer. 2 Connect the USB cable between the printer and the Macintosh computer. 3 Start Printer Setup Utility. NOTE: You can find Printer Setup Utility in - Dell 2155CDN | User Manual - Page 146
can find Printer Setup Utility in the Utilities folder in Applications. 4 Click Add. 5 Click IP Printer in the Printer Browser dialog box. 6 Select Line Printer Daemon - LPD for Protocol. 7 Type the IP address for the printer in the Address area. 8 Select Dell 2155cdn Color MFP for Print Using. NOTE - Dell 2155CDN | User Manual - Page 147
, and select Dell 2155cdn Color MFP. NOTE: When printing is set up using IP printing, the queue name is displayed as blank. You do not need to specify it. 9 Click Add. D E L L C ON F I D E N T I A L - P R E L I M I N A RY 9 / 1 3 / 1 0 - F O R P R O O F O N LY Installing Printer Drivers on the - Dell 2155CDN | User Manual - Page 148
, and select Dell 2155cdn Color MFP. 7 Click Add. Configuring Settings All the optional accessories are verified as installed. Mac OS X 10.5 or 10.6 1 Open the System Preferences, and click Print & Fax. 2 Select the printer in the Printer Name list, and click Options & Supplies. 3 Select Driver, and - Dell 2155CDN | User Manual - Page 149
images used and procedures described in this manual are those of Dell™ 2155cdn Multifunction Color Printer. Operation on Red Hat Enterprise Linux 4 WS/5 Client Setup Overview Red Hat Enterprise Linux 4 WS/5 Client: 1 Install the printer driver. 2 Set up the print queue. 3 Specify the default queue - Dell 2155CDN | User Manual - Page 150
set up the print queue on your workstation. 1 Open the URL "http://localhost:631" using a web browser. 2 Click Administration. 3 Type root as the user name, and type the administrator password. 4 Click Add Printer. Type the name of the printer in the Name box in the Add New Printer window, and click - Dell 2155CDN | User Manual - Page 151
the Default Queue 1 Select Applications System Tools Terminal. 2 Type the following command in the terminal window. su (Type the administrator password) lpadmin -d (Type the queue name) Specifying the Printing Options You can specify the printing options such as color mode or double-sided printing - Dell 2155CDN | User Manual - Page 152
terminal window. su (Type the administrator password) rpm -e Dell-2155cdn-Color-MFP The printer driver is uninstalled. Operation on SUSE Linux Enterprise Desktop 10 Setup Overview SUSE Linux Enterprise Desktop 10: 1 Install the printer driver. 2 Set up the print queue. 3 Specify the default queue - Dell 2155CDN | User Manual - Page 153
queue, and click Next. f Type the printer name in Name for printing. NOTE: The Description of Printer and Location of Printer do not have to be specified. g Select the Do Local Filtering check box, and click Next. h Select DELL as Select manufacturer. Select 2155cdn Color MFP as Select Model, and - Dell 2155CDN | User Manual - Page 154
such as color mode or double-sided printing. 1 Open a web browser. 2 Type http://localhost:631/admin in Location, and press the key. 3 Type root as the user name, and type the administrator password. The CUPS window appears. NOTE: Set the password for authority as the printer administrator - Dell 2155CDN | User Manual - Page 155
password again prompt.) Uninstalling the Printer Driver 1 Select Computer More Applications... and select Konsole on the Application Browser. 2 Type the following command in the terminal window to delete the print queue. su (Type the administrator password) /usr/sbin/lpadmin -x (Type the printer - Dell 2155CDN | User Manual - Page 156
. 3 Specify the default queue. 4 Specify the printing options. Installing the Printer Driver 1 Double-click Dell-2155-Color-MFP-x.x-x.i686.rpm in the Drivers and Utilities CD. 2 Type the administrator password, and click Continue. Installation starts. When the installation is complete, the window is - Dell 2155CDN | User Manual - Page 157
from Access Network Printer or Printserver Box via. d Type the IP address of the printer in IP Address or Host Name:. e Select Dell in the Select the printer manufacturer: drop-down menu. f Click OK. The Add New Printer Configuration dialog box appear. g Select Dell 2155cdn Color MFP vx.x [Dell - Dell 2155CDN | User Manual - Page 158
such as color mode or double-sided printing. 1 Open a web browser. 2 Type http://localhost:631/admin in Location, and press the key. 3 Type root as the user name, and type the administrator password. The CUPS window appears. NOTE: Set the password for authority as the printer administrator - Dell 2155CDN | User Manual - Page 159
prompt.) Uninstalling the Printer Driver 1 Select Computer More Applications... and select GNOME Terminal on the Application Browser. 2 Type the following command in the terminal window to delete the print queue. su (Type the administrator password) /usr/sbin/lpadmin -x (Type the printer queue name - Dell 2155CDN | User Manual - Page 160
LOCATION: C:\Users\fxstdpcadmin\Desktop\0630_UG??\Mioga_AIO_UG_FM\Mioga_AIO_UG_FM\section12.fm su (Type the administrator password) rpm -e Dell-2155cdn-Color-MFP The printer driver is uninstalled. DE LL CONFIDENTIAL - PRE LIMINARY 9/13/10 - FOR PROOF ONLY 158 Installing Printer Drivers on the - Dell 2155CDN | User Manual - Page 161
Using Your Printer 159 - Dell 2155CDN | User Manual - Page 162
160 - Dell 2155CDN | User Manual - Page 163
is not available unless the printer is connected to a network using a network cable or the wireless printer adapter. NOTE: The images used and procedures described in this manual are those of Dell™ 2155cdn Multifunction Color Printer. One of the features of the Dell Printer Configuration Web Tool is - Dell 2155CDN | User Manual - Page 164
Assigning an IP Address." When Using the Tool Box NOTE: 1 Click Start All Programs Dell Printers Dell 2155 Multifunction Color Printer Tool Box. NOTE: The Select Printer window appears in this step when multiple printer drivers are installed on your computer. In this case, click the name of this - Dell 2155CDN | User Manual - Page 165
Printer Settings • Print Volume • Address Book • Printer Information • Tray Settings • E-Mail Alert • Set Password • Online Help • Order Supplies at: • Contact Dell Support at: Printer Status Use the Printer Status menu to get immediate feedback on the printer supply status. When a toner cartridge - Dell 2155CDN | User Manual - Page 166
Information Use the Printer Information menu to get information on service calls, inventory reports, or the status of current memory and engine code levels. Tray Settings Use the Tray Settings menu to get information about the paper type and size for each tray. 164 Dell Printer Configuration Web - Dell 2155CDN | User Manual - Page 167
. To be notified, type your name or the name of the key operator in the e-mail list box. Set E-mail Alert also when using the Scan to E-mail feature. Set Password Use the Set Password menu to lock the Dell Printer Configuration Web Tool with a password so that other users do not inadvertently change - Dell 2155CDN | User Manual - Page 168
(United States Printer to Non-Proxy 1 Select Internet Options from the Tools menu. 2 Click LAN Settings under Local Area Network type (the IP address of the printer) in the URL entry field of the browser to activate the Dell Printer Configuration Web Tool. 166 Dell Printer - Dell 2155CDN | User Manual - Page 169
enu. For example: • English [en] or English/United States [en-us] • Italian [it] • Spanish Printer to Non-Proxy 1 Select Options from the Tools menu 2 Click Advanced tab. 3 Click Network network check box. • Select the Manual proxy configuration check box, and then enter the IP address of the printer - Dell 2155CDN | User Manual - Page 170
, type (the IP address of the printer) in the URL entry field of the browser to activate the Dell Printer Configuration Web Tool. Setting Up From Operator Panel You can launch the Dell Printer Configuration Web Tool only when EWS is set to Enable (the factory default) on - Dell 2155CDN | User Manual - Page 171
1 Dell 2155cdn Displays the product name of the printer. Color MFP 2 IPv4 Displays the IP address of the printer. IPv6 3 Location Displays location of the printer. The location can be changed in the Basic Information section on the Print Server Settings page. 4 Contact Person Displays the name - Dell 2155CDN | User Manual - Page 172
menus are displayed in the left frame. 1 Printer Status 2 Printer Jobs 3 Printer Settings 4 Print Server Settings 5 Copy Printer Settings 6 Print Volume 7 Address Book Links to the Printer Status menu. Links to the Printer Jobs menu. Links to the Printer Settings Report menu. Links to the - Dell 2155CDN | User Manual - Page 173
Links to the Printer Status menu. 9 Tray Settings Links to the Tray Settings menu. 10 E-Mail Alert Links to the Print Server Settings menu. 11 Set Password Links to the Security menu. 12 Online Help Links to the Dell Support website. 13 Order Supplies at: Links to the Dell web page. 14 - Dell 2155CDN | User Manual - Page 174
Menu Items Some menus allow you to change the printer settings through the Dell Printer Configuration Web Tool. When you access these menus, the authentication window appears on the screen. Type a user name and password for the printer administrator by following the prompts displayed in the dialog - Dell 2155CDN | User Manual - Page 175
default user name is admin, and the default password is left blank (NULL). You can change only the password in the Set Password page in the Security menu. The user name cannot be changed. See "Set Password" for more information. Details of the Menu Items "Printer Status" "Printer Status" "Printer - Dell 2155CDN | User Manual - Page 176
Settings" "PDF Settings" "Secure Settings" "Copy Defaults" "Copy Color Balance" "Copy Settings" "Fax Defaults" "Fax Settings" "Scan Defaults" "Print from USB Defaults" "Printer Maintenance" "Paper Density" "Adjust BTR" "Adjust Fuser" "Auto Registration Adjustment" "Color Registration - Dell 2155CDN | User Manual - Page 177
"Wireless LAN"*2 "Reset Print Server" "Set Password" "LDAP Server" "LDAP User Mapping" "SSL/TLS" "IPsec" "802.1x"*3 "IP Filter (IPv4)" "Copy Printer Settings" "Copy Printer Settings Report" "Print Volume" "Dell ColorTrack" "E-Mail Address - Top Page" "E-Mail Group - Top Page" "Default Setup" "Server - Dell 2155CDN | User Manual - Page 178
toner for use. Indicates that the toner needs to be replaced soon. Indicates that the toner needs to be replaced now. Indicates that the status of PHD unit is OK for use. Indicates that the PHD unit needs to be replaced soon. Indicates that the PHD unit needs to be replaced now. 176 Dell Printer - Dell 2155CDN | User Manual - Page 179
the maximum capacity of the paper tray. Indicates that the cover is closed. Indicates that the cover is open. Displays the type of the printer. Color Laser is displayed normally. Displays the printing speed. Printer Events Purpose: When faults occur, such as Out of Paper or Cover is Open, the - Dell 2155CDN | User Manual - Page 180
Code Displays Dell express service code. Asset Tag Number Displays the asset tag number of the printer. Printer Serial Number Displays the serial number of the printer. Memory Capacity Displays the memory capacity. Processor Speed Displays the processing speed. Printer Revision Firmware - Dell 2155CDN | User Manual - Page 181
Jobs Purpose: To check the completed jobs. Up to the last 20 jobs are displayed. Click the Refresh button to update the screen. Values: ID Job Name Owner Host Name Output Result Job Type Impression Number No. of Sheets Host I/F Job Submitted Time Displays the job ID. Displays the file name - Dell 2155CDN | User Manual - Page 182
Deep Sleep mode when OnHook is Off. Auto Reset Displays the amount of time before the printer automatically resets the settings on the operator panel to the defaults when no additional settings are made. Fault . Off indicates that the tone is disabled. 180 Dell Printer Configuration Web Tool - Dell 2155CDN | User Manual - Page 183
disabled. mm / inch Displays the measurement unit that is used on the operator panel screen. Default Print Paper Size Displays the default print paper size. Auto Log Print Displays whether to automatically print a job history report after every 20 jobs. Dell Printer Configuration Web Tool 181 - Dell 2155CDN | User Manual - Page 184
of another size has to be used when the paper that is loaded in the specified tray does not match the paper size setting for the current job. Letterhead Displays whether to print both sides on Duplex Mode*3 letterhead. Low Toner Alert Displays whether to show the alert message Msg when the - Dell 2155CDN | User Manual - Page 185
to print in the draft mode. Line Termination Displays whether to set the line termination. Default Color Displays the color mode setting. Quantity 2 Sided*3 Displays the number of copies to print. Displays whether to print on both sides of a sheet of paper. Print Mode Displays the print mode - Dell 2155CDN | User Manual - Page 186
to lock Admin Menu with a password. Displays whether to lock the Copy service with a password. Displays whether to lock the Fax service with a password. Displays whether to lock the Scan service with a password. Displays whether to lock the Print from USB service with a password. Displays whether - Dell 2155CDN | User Manual - Page 187
Copy Defaults Color Displays whether to make copies in color or in black and white. Select Tray Displays the default input tray. SSF Paper Size Displays the paper size setting of the single sheet feeder. SSF Paper Type Displays the paper type settings of the single sheet feeder. Collated - Dell 2155CDN | User Manual - Page 188
balance level of low density black. Black Medium Displays the color balance level of medium Dens. density black. Black High Dens. Displays the color balance level of high density black. 2 Sided*3 Displays whether to print on both sides of a sheet of paper. Multiple-Up Displays whether the - Dell 2155CDN | User Manual - Page 189
Fax Defaults Resolution Lighter/Darker Delayed Start Displays the resolution level to be used for fax transmission. Displays the density level to be used for fax transmission. Displays the fax transmission start time. Dell Printer Configuration Web Tool 187 - Dell 2155CDN | User Manual - Page 190
remote receive code when Tone Remote Receive is On. Fax Header Displays whether to print the information of the sender on the header of faxes. Fax Header Name Displays the name of the sender that will be printed on the header of faxes. Fax Number Displays the fax number of the printer, which - Dell 2155CDN | User Manual - Page 191
text or images at the bottom of a fax page when the entire page does not fit onto the output paper. Displays whether the Error Correction Mode (ECM) is enabled. Displays the modem speed. Displays the country where the printer is used. Displays whether to automatically print a fax activity report - Dell 2155CDN | User Manual - Page 192
and white or in grayscale when Black & White is selected for a color mode. Color Button Displays whether to scan in color or in color (Photo) when Color is selected for a color mode. Resolution Displays the default scan resolution. Document Size Displays the paper size of the original. Lighter - Dell 2155CDN | User Manual - Page 193
Print from USB Defaults Paper Density Adjust BTR Color Select Tray SSF Paper Size SSF Paper Type 2 Sided*3 Layout Plain Label Plain Plain Thick Covers Covers Thick Label Coated Coated Thick Envelope Recycled Displays whether to print in color or in black and white. Displays the default input tray. - Dell 2155CDN | User Manual - Page 194
fuser (-2 to 2) for recycled paper. Displays whether to automatically perform color registration adjustment. Displays the altitude of the location where the printer is installed. Displays whether to use toner cartridge of another manufacturer. Displays the default date format. Displays the default - Dell 2155CDN | User Manual - Page 195
feeder. Tray 2 Paper Type*4 Displays the paper type setting of the optional 250-sheet feeder. Tray 2 Display Popup*4 Displays whether to show a popup menu that prompts the user to set the paper size and type when the paper is loaded in the optional 250sheet feeder. Dell Printer Configuration - Dell 2155CDN | User Manual - Page 196
only when the optional 512 MB memory module is installed. *3 This item is available only for Dell 2155cdn Multifunction Color Printer. *4 This item is available only when the optional 250-sheet feeder is installed. Reports Purpose: To print various types of reports and lists. Values: System - Dell 2155CDN | User Manual - Page 197
Settings, USB Settings, PCL Settings, PDF Settings, Secure Settings, Copy Defaults, Copy Color Balance, Copy Settings, Fax Defaults, Fax Settings, Scan Defaults, and Print from USB Defaults pages. System Settings Purpose: To configure the basic printer settings. Values: Power Saver Time - Sleep - Dell 2155CDN | User Manual - Page 198
Low Toner Alert Tone Auto Clear Alert Tone Base Tone All Tones mm / inch Default Print Paper Size Auto Log Print Print ID Print Text Banner Sheet Insert Position*1 Banner Sheet Specify Tray*1 RAM Disk*2 Substitute Tray Sets the volume of the tone that is emitted when a job other than a copy job - Dell 2155CDN | User Manual - Page 199
memory module is installed. *3 This item is available only for Dell 2155cdn Multifunction Color Printer. USB Settings Purpose: To change USB settings on your printer. Values: USB Port Enables the USB interface on your printer. PCL Settings Purpose: To change the PCL settings. Values: Paper Tray - Dell 2155CDN | User Manual - Page 200
Color or Black. This setting is used for print jobs without a specified color print mode. PDF Settings Purpose: To change the PDF settings. Values: Quantity 2 Sided*1 Sets the number of copies. Sets whether to print on both sides of a sheet of paper. Print Mode Sets a print mode. PDF Password - Dell 2155CDN | User Manual - Page 201
the Scan service with a password. Print from USB Sets whether to lock the Print from USB service with a password. New Password Sets a password that is required to access the Copy, Scan, Fax, and Print from USB services. Re-enter Password Confirms the set password. Secure Receive Dell Printer - Dell 2155CDN | User Manual - Page 202
for the Print, Copy, Fax, and Scan services. Values: Set Available Time Start Time Allows you to set the available time period for the Print, Copy, Fax, and Scan services. Sets the start time of the available time period for the Print, Copy, Fax, and Scan services. 200 Dell Printer Configuration - Dell 2155CDN | User Manual - Page 203
whether to print in color or in black and white. Sets the default input tray. Sets the size of paper loaded in the single sheet feeder. Sets the type of paper loaded in the single sheet feeder. Sets whether to sort a copy job. Sets the default reduction/enlargement ratio. Dell Printer Configuration - Dell 2155CDN | User Manual - Page 204
Dens. Sets the color balance level of low density black. Black Medium Dens. Sets the color balance level of medium density black. Black High Dens. Sets the color balance level of high density black. Copy Settings Purpose: To configure the Copy settings. 202 Dell Printer Configuration Web Tool - Dell 2155CDN | User Manual - Page 205
Middle Sets the value of the middle margin within the range of 0 mm (0.0 inch) to 50 mm (2.0 inch). *1 This item is available only for Dell 2155cdn Multifunction Color Printer. Fax Defaults Purpose: To create your own default Fax settings. NOTE: Values marked by an asterisk (*) are the factory - Dell 2155CDN | User Manual - Page 206
a fax at a specified time. Fax Settings Purpose: To configure the Fax settings. NOTE: You cannot set up the items on the Fax Settings page unless you set up the country code under Country. NOTE: Values marked by an asterisk (*) are the factory default menu settings. Values: 204 Dell Printer - Dell 2155CDN | User Manual - Page 207
, the printer will monitor the fax ax signal and pick up the line if there are fax tones. If the phone communication in your country is serial, this mode is not supported. DRPD Before using the Distinctive Ring Pattern Detection (DRPD) option, a distinctive ring service must be installed on - Dell 2155CDN | User Manual - Page 208
the default line type; PSTN or PBX. Tone/Pulse Sets whether to use tone or pulse dialing. Resend Delay Sets the interval (3-255 seconds) between re-send attempts. Redial Attempts Sets the number of redial attempts (0-13) to make if the destination fax number is busy. If you enter 0, the printer - Dell 2155CDN | User Manual - Page 209
only when an error occurs. Fax Protocol Sets whether to print the protocol monitor report after every fax transmission or only when an error occurs. *1 This item is available only for Dell 2155cdn Multifunction Color Printer. Scan Defaults Purpose: To create your own default Scan settings. NOTE - Dell 2155CDN | User Manual - Page 210
Black & White is selected for a color mode. Color Button Displays whether to scan in color or in color (Photo) when Color is selected for a color mode. Resolution Sets the default scan resolution. Document Size Sets the paper Image Sets the image compression level. Compression Max Email Size - Dell 2155CDN | User Manual - Page 211
set password. *1 This item is available only for Dell 2155cdn Multifunction Color Printer. Printer Maintenance The Printer Maintenance tab includes the Paper Density, Adjust BTR, Adjust Fuser, Auto Registration Adjustment, Color Registration Adjustments, Clean Developer, Reset Defaults, Initialize - Dell 2155CDN | User Manual - Page 212
the temperature settings value for the fuser. Values: Plain Plain Thick Sets the temperature settings for the fuser for plain paper within the range of -2 to 2. Sets the temperature settings for the fuser for thick plain paper within the range of -2 to 2. 210 Dell Printer Configuration Web Tool - Dell 2155CDN | User Manual - Page 213
Adjustments Purpose: To specify whether to manually perform color registration adjustment. Manual Color Registration Adjustments are required such as when the printer is initially installed and after the printer is moved. NOTE: The Color Registration Adjustments feature can be configured when - Dell 2155CDN | User Manual - Page 214
the toner in the black toner cartridge. Cleans the surface of the PHD unit. Reset Defaults Purpose: To initialize wired network data stored in non-volatile memory (NVM). After executing this function and rebooting the printer, all wired network settings are reset to their default values. 212 Dell - Dell 2155CDN | User Manual - Page 215
Reset Defaults Power On Wizard Reset Defaults User Click the Start button to reset the fax Fax Section and restart number entries in the Address Book. printer. Reset Defaults User Scan Section and restart printer. Click the Start button to reset the email and server address entries in the Address - Dell 2155CDN | User Manual - Page 216
use toner cartridge of another manufacturer. NOTICE: Using a non-Dell toner cartridge may severely damage your printer. The warranty does not cover damages caused by using non-Dell toner cartridges. Adjust Altitude Purpose: To specify the altitude of the location where the printer is installed. The - Dell 2155CDN | User Manual - Page 217
set the type of printer interface and the necessary conditions for communication. The following tabbed pages are displayed in the top of the right frame. Print Server Reports The Print Server Reports tab includes the Print Server Setup Page and the EMail Alert Setup Page. Print Server Setup Page - Dell 2155CDN | User Manual - Page 218
Wireless Settings*2 TCP/IP Settings SSID Network Type MAC Address Link Channel Link Quality IP Mode Host Name IPv4*3 IPv6*4 Displays the MAC address of the printer. Displays the name that identifies the network. Displays the network type from either the Ad-Hoc or Infrastructure mode. Displays - Dell 2155CDN | User Manual - Page 219
address. Get DNS Server Address from DHCPv6-lite Displays if the printer receives the DNS server address automatically from the DHCPv6-lite server. server address. Port Status Displays the port status of the Line Printer Daemon (LPD) protocol. Connection Time-Out Displays the connection time - Dell 2155CDN | User Manual - Page 220
IPP WSD Network TWAIN HTTP Port Status Displays the port status. Printer URI Displays the printer URI. Connection Time-Out Displays the connection time-out period. Port connections. Connection Time-Out Displays the connection time-out period. 218 Dell Printer Configuration Web Tool - Dell 2155CDN | User Manual - Page 221
sessions. Unicode Support Displays whether password during SMB transmission. Job Time-Out Displays the job time-out period. Connection Time-Out Displays the connection time-out period. Port Status Displays the port status. Host Name Displays the host name. Printer Name Displays the printer - Dell 2155CDN | User Manual - Page 222
of IP addresses that are permitted or denied access to the printer. *1 This item is available only when the printer is connected using LAN cable. *2 This item is available only when the printer is connected using the wireless network *3 This item is displayed when IPv4 Mode is selected. *4 This - Dell 2155CDN | User Manual - Page 223
Alerts for List 2 Supplies Alerts Displays the e-mail alert receive status for consumables. Paper Handling Displays the e-mail alert receive Alerts status for paper handling. Service Call Displays the e-mail alert receive status for service calls. Dell Printer Configuration Web Tool 221 - Dell 2155CDN | User Manual - Page 224
Settings, TCP/IP, SMB, E-Mail Alert, Bonjour (mDNS), SNMP, Scan to PC, LLTD, Wireless LAN, and Reset Print Server pages. Basic Information Purpose: To configure basic information of the printer. Values: System Settings Printer Name Sets the name of the printer. Location Sets the location of the - Dell 2155CDN | User Manual - Page 225
Selects 100Base-TX FullDuplex as the default value. 1000BASE-T Full-Duplex Selects 1000Base-T FullDuplex as the default value. Current Ethernet Settings Displays the current settings of the Ethernet. MAC Address Displays the MAC address of the printer. Port Status LPD Sets whether to - Dell 2155CDN | User Manual - Page 226
Address Mode Sets the method for acquiring the IP address. Manual IP Address When an IP address is being set manually, the IP is allocated to the printer using the format nnn.nnn.nnn.nnn. Each octet that specified for the first octet of a gateway address. 224 Dell Printer Configuration Web Tool - Dell 2155CDN | User Manual - Page 227
Manual Address Select the check box to set the IP address manually. Manual details, consult your system administrator. Manual Gateway Address Sets the gateway address. DHCP address via DHCP. Manual DNS Manually sets the DNS server address - lite server. lite Manual DNS Sets the DNS server - Dell 2155CDN | User Manual - Page 228
address in xxx.xxx.xxx.xxx format when WINS Mode is not selected. WINS Secondary Server Manually sets the secondary (backup) WINS server address in xxx.xxx.xxx.xxx format when WINS Mode Notification Sets the maximum number of notifications from 10 to 20. 226 Dell Printer Configuration Web Tool - Dell 2155CDN | User Manual - Page 229
Password Sets the password for Telnet. Re-enter Password Confirms the set password to the current value. IP Filter Setup Procedure You can set up to a Printing From a Specified User The following describes the procedure to disable printing only from the "192.168.100.10" IP address. Dell Printer - Dell 2155CDN | User Manual - Page 230
List row 1. 2 Enter "192.168.100.10" in the Address field and " Printing from Network Addresses You can enable printing from the "192.168" network address and disable printing from the "192.168.200" network address. The example below describes how to enable printing Dell Printer Configuration Web Tool - Dell 2155CDN | User Manual - Page 231
Maximum Sessions Sets the maximum number of sessions. Unicode Support Sets whether to notify the host name and workgroup name to enable the Auto Master Mode. Encrypt Password Sets whether to encrypt the password. Job Time-Out Sets the job time-out . Dell Printer Configuration Web Tool 229 - Dell 2155CDN | User Manual - Page 232
using up to 31 alphanumeric characters. Re-enter POP Confirms the set password. User Password*1 Reply Address Designates the reply e-mail address sent with each E-mail Alert. SMTP Server Displays the status of the SMTP server connection. Connection 230 Dell Printer Configuration Web Tool - Dell 2155CDN | User Manual - Page 233
Alert for consumables. Paper Handling Select the check box to receive Alerts an E-Mail Alert for paper handling. Service Call Select the check box to receive an E-Mail Alert for Service Calls. *1 This setting will remain valid if no input is made. Dell Printer Configuration Web Tool 231 - Dell 2155CDN | User Manual - Page 234
Name Sets the printer name up to 63 alphanumeric characters and symbol sets. The original setting will remain valid if no Characters entered for community name in the previous settings will not be displayed on the screen. The default Read Community is public. 232 Dell Printer Configuration Web Tool - Dell 2155CDN | User Manual - Page 235
is made. Characters entered for Community Name (Trap) in the previous settings will not be displayed on the screen. The default Trap Community is " " (NULL). Re-enter Enters the community name used for trap again to Community confirm it. Name (Trap)*1 Dell Printer Configuration Web Tool 233 - Dell 2155CDN | User Manual - Page 236
Trap Trap Address Notification 1-4 Type Trap Address Port Number Notify Select the check 65,535. Authenticate Select the check box to notify Authenticate Error Error Trap Trap. *1 The default value can be changed by using Dell Printer Configuration Web Tool. SNMP v3 Purpose: To edit the - Dell 2155CDN | User Manual - Page 237
Select the check box to enable the print drivers and remote client account. Reset to default Click to reset the password for the print drivers and Password remote client account to default. Scan To PC Purpose: To specify the client when scanning data. Values: FTP Client SMB Client Connection - Dell 2155CDN | User Manual - Page 238
the network type from either Ad-Hoc or Infrastructure. Displays the MAC address of the wireless adapter for the printer. Displays the channel number of the wireless connection for the printer. Displays the quality of the wireless network connection for the printer. 236 Dell Printer Configuration - Dell 2155CDN | User Manual - Page 239
WEP key set used through the wireless network only when WEP 128bit or WEP 64bit is selected for Encryption. Enters the WEP key 4 again to confirm it. Sets the transmit key type from the list. Sets the pass phrase. Enters the pass phrase again to confirm it. Dell Printer Configuration Web Tool 237 - Dell 2155CDN | User Manual - Page 240
for Network Type. NOTE: The optional wireless adapter supports WEP, WPA-PSK-TKIP, WPAPSK-AES, and WPA-PSK-AES. Reset Print Server Purpose: To initialize NVRAM (non-volatile RAM) for the network feature and reboot the printer. You can also initialize NVRAM of the printer from Reset Defaults in - Dell 2155CDN | User Manual - Page 241
set password. Sets the amount of time the administrator should wait for the access to the printer setup from Dell Printer Configuration Web Tool. Sets the time period from 5 up to 255 seconds. The access is denied if the time-out time is exceeded. If you set 0, this mode is disabled. LDAP Server - Dell 2155CDN | User Manual - Page 242
server address book for the Scan to E-mail feature. NOTE: Server Phone Book must be set to On before you can use the server phone book for the Fax service. LDAP User Mapping Purpose: To specify the settings of the LDAP user mapping. Values: Common Name Sets the attribute type of the common name - Dell 2155CDN | User Manual - Page 243
SSL/TLS Purpose: To specify the settings for the SSL encryption communication to the printer. Values: SSL/TLS HTTP-SSL/TLS Select the check box to enable the HTTPCommunication*1 the signed certificate. Click this button to go back to the previous page. Dell Printer Configuration Web Tool 241 - Dell 2155CDN | User Manual - Page 244
. Certificate Purpose Displays the purpose of certificate. Certificate Selection Displays the type of device certificate you Status selected. Delete Click this button to delete Protocol (IPsec) for encrypted communication to the printer. Values: 242 Dell Printer Configuration Web Tool - Dell 2155CDN | User Manual - Page 245
not support IPsec. policy NOTE: If IPsec is enabled with incorrect settings, you must disable it using the Reset IPsec menu on the operator panel. 802.1x Purpose: To specify the settings for IEEE 802.1x authentication for encrypted communication to the printer. Values: Dell Printer Configuration - Dell 2155CDN | User Manual - Page 246
the subnet mask that are permitted or denied access to the printer. Enter a numeric value between 0 and 255 in each field. Reject Rejects printing from specified network address. Permit Permits printing from specified network address. Disabled Disables the IP Filter feature for the specified IP - Dell 2155CDN | User Manual - Page 247
printer has a fax job. Copy Printer Settings Report Purpose: To verify whether the printer setting is copied to other printers successfully. NOTE: The history is cleared by turning off the printer. Print Volume The Printer Volume menu includes the Print Volume and Dell ColorTrack pages. Print - Dell 2155CDN | User Manual - Page 248
the total number of pages printed since the printer was shipped from the factory. Displays the number of pages printed for each paper size. Dell ColorTrack Purpose: To specify which users have access to color printing and to limit print volume per user. Values: ColorTrack Mode Sets whether - Dell 2155CDN | User Manual - Page 249
to permit only monochrome printing or both color and monochrome printing. Upper Limit for Color Sets the maximum number of color pages the user is permitted Print to print. Cumulative Color Page Count Displays the total number of color pages printed to date. Dell Printer Configuration Web Tool - Dell 2155CDN | User Manual - Page 250
under the user registration number. Click this button to apply the new settings. Click this button to return to the Edit Print User Registration page. Address Book The Address Book menu includes the E-Mail Address, Server Address, and Phone Book pages. 248 Dell Printer Configuration Web - Dell 2155CDN | User Manual - Page 251
IDs indicated on the button. ID Displays the user ID. Name Displays the user name. (Not in Use) is displayed in Name when there is no registration. Address Displays the e-mail address of the user. Delete Deletes the entry for the selected user ID. Dell Printer Configuration Web Tool 249 - Dell 2155CDN | User Manual - Page 252
E-mail Address top page. Values: ID Displays the selected user ID. Name Allows you to view or edit the name of the user registered under the user ID, or enter a name for the new entry. Address Address top page. Values: ID 250 Displays the selected user ID. Dell Printer Configuration Web Tool - Dell 2155CDN | User Manual - Page 253
Name Displays the name of the of the user registered under the selected user ID. Address Displays the e-mail address of the user. Apply New Settings Click this button to apply the new settings. group name. Click this button to delete the current entry. Dell Printer Configuration Web Tool 251 - Dell 2155CDN | User Manual - Page 254
you to view or edit the e-mail address of an entry registered under the selected user ID, or enter an e-mail address for the new entry. Apply New Settings Click to the top page. Default Setup Purpose: To set the default e-mail subject and message. Values: 252 Dell Printer Configuration Web Tool - Dell 2155CDN | User Manual - Page 255
Subject Body Text Apply New Settings Restore Settings Allows you to enter the default e-mail subject. Allows you to enter the default e-mail message. Click this button to apply the new settings. Click or Create button on the Server Address top page. Values: Dell Printer Configuration Web Tool 253 - Dell 2155CDN | User Manual - Page 256
Confirms the set password. Click this button to delete the current entry. Apply New Settings Click this button to apply the new settings. Restore Settings Click this button to restore the previous settings. Back Click this button to return to the top page. 254 Dell Printer Configuration Web - Dell 2155CDN | User Manual - Page 257
is available only when Server Type is set to SMB. fax number entries registered on the FAX Speed Dial page. Values: Speed Dial List to: Selecting each button displays a list of entries for the group of speed dial codes indicated on the button. Speed Dial Displays the speed dial ID. Dell Printer - Dell 2155CDN | User Manual - Page 258
a new entry under the selected speed dial code. FAX Speed Dial (Confirm/Change, Create) Purpose: To view or edit the speed dial entries on the FAX Speed Dial page, or create a new entry you click the Confirm / Change button. FAX Speed Dial (Delete) Purpose: 256 Dell Printer Configuration Web Tool - Dell 2155CDN | User Manual - Page 259
/Change, Create) Purpose: To view or edit the fax number group entries on the FAX Group page, or create a new entry. The following items are in the dialog box that appears when you click the Confirm/Change or Create button on the FAX Group top page. Values: Dell Printer Configuration Web Tool 257 - Dell 2155CDN | User Manual - Page 260
the fax number of an entry registered under the selected speed dial code, or enter a fax number FAX Group top page. Values: ID Displays the selected group ID. Name Displays the name assigned for the group ID. Apply New Settings Click this button to apply the new settings. 258 Dell Printer - Dell 2155CDN | User Manual - Page 261
. Type*1 Tray 2 Display Sets whether to display a popup message that prompts the user to set Popup*1 the paper size and type when the paper is loaded in the optional 250- sheet feeder. *1 This item is available only when the optional 250-sheet feeder is installed. Dell Printer Configuration - Dell 2155CDN | User Manual - Page 262
260 Dell Printer Configuration Web Tool - Dell 2155CDN | User Manual - Page 263
printer helps avoid printing troubles. This section describes selecting print media, caring for print media, and loading the print media in the standard 250-sheet tray. Paper For the best print quality in color, use 75 g/m2 (20 lb) xerographic, grain long paper. For the best print quality in black - Dell 2155CDN | User Manual - Page 264
FILE LOCATION: C:\Users\fxstdpcadmin\Desktop\0630_UG??\Mioga_AIO_UG_FM\Mioga_AIO_UG_FM\section14.fm unwrapped, even in the paper tray, can contribute to paper curling prior to printing and cause feeding problems regardless of humidity. When printing on curled paper, straighten the paper and then - Dell 2155CDN | User Manual - Page 265
any print media, you should consider the weight, fiber content, and color. Unacceptable Paper The following paper types are not recommended for use with the printer: • Chemically treated paper used to make copies without carbon paper, also known as carbonless paper, carbonless copy paper (CCP - Dell 2155CDN | User Manual - Page 266
. • Use paper printed with heat-resistant inks designed for use in xerographic copiers. The ink must withstand temperatures of 225 °C (437 °F) without melting or releasing hazardous emissions. • Use inks that are not affected by the resin in the toner or the silicone in the fuser. Inks that are - Dell 2155CDN | User Manual - Page 267
acceptable for laser printers. Page orientation is important when printing on pre-printed paper such as letterhead and pre-punched paper. The following table shows the orientation when loading letterheads in the tray or feeders. For other pre-printed and prepunched paper, load the paper by reference - Dell 2155CDN | User Manual - Page 268
250-sheet Dell 2155cn Multifunction Color Printer tray and Optional 250-sheet feeder Face up Page orientation Letterhead enters the printer last Dell 2155cdn Multifunction Color Printer Letterhead enters Face down the printer first NOTE: Set Letterhead Duplex Mode to Enable and Paper Type to - Dell 2155CDN | User Manual - Page 269
Envelope in the SSF" for instructions on loading an envelope. When printing on envelopes: • Use only high-quality envelopes that are designed for use in laser printers. • Set the print media source to the single sheet feeder or the standard 250-sheet tray. Set the paper type to Envelope, and select - Dell 2155CDN | User Manual - Page 270
and the short-edge of the envelope facing into the printer. The print side must be facing down. • See "Loading Envelopes in the Standard 250-Sheet Tray and the Optional 250-Sheet Feeder" or "Loading an Envelope in the SSF" for instructions on loading an envelope. • Use one envelope size during - Dell 2155CDN | User Manual - Page 271
wrinkling, or releasing hazardous emissions. • Set the paper type to Label from the printer driver. • Use "Standard Tray" for label. • Do not print through "Single Sheet Feeder" for label. • Do not load labels together with paper in the same tray. • Do not print within 1 mm (0.04 inches) of the die - Dell 2155CDN | User Manual - Page 272
Media and Specifications The following tables show print media information. Supported Paper Sizes Paper size Single sheet Standard 250- Optional 250- Duplexer feeder sheet tray sheet feeder Side 1 Side 2 Side 1 Side 2 Side 1 Side 2 A4 (210 x 297 mm) YYYYYY Y B5 (182 x 257 mm) YYYYYY N A5 - Dell 2155CDN | User Manual - Page 273
Supported Paper Types Paper type Plain Covers Coated Label Envelope Recycled Letterhead Preprinted Prepunched Color Light Normal Thick Normal Thick Normal Thick Normal Thick Single sheet feeder Standard 250-sheet tray Optional 250-sheet feeder Duplexer Side 1 Side 2 Side 1 Side 2 Side 1 Side - Dell 2155CDN | User Manual - Page 274
LOCATION: C:\Users\fxstdpcadmin\Desktop\0630_UG??\Mioga_AIO_UG_FM\Mioga_AIO_UG_FM\section14.fm Paper type Labels Covers Covers Thick Envelope Coated Coated Thick Letterhead Preprinted Prepunched Color Weight (g/m2) - 106-163 164-216 106-163 164-216 64 64 64 Remarks Inkjet printer paper cannot be - Dell 2155CDN | User Manual - Page 275
.00 inches) Loading Print Media in the Standard 250-Sheet Tray and the Optional 250-Sheet Feeder NOTE: To avoid paper jams, do not remove the tray while printing is in progress. NOTE: Use only laser print media. Do not use ink jet paper in the printer. 1 Pull the tray out of the printer about 200 mm - Dell 2155CDN | User Manual - Page 276
FILE LOCATION: C:\Users\fxstdpcadmin\Desktop\0630_UG??\Mioga_AIO_UG_FM\Mioga_AIO_UG_FM\section15.fm 2 Adjust the paper guides. NOTE: Extend the rear side of the tray when you load Legal size paper. 3 Before loading the print media, flex the sheets and fan them. Straighten the edges of the stack on - Dell 2155CDN | User Manual - Page 277
print side facing up. NOTE: Do not exceed the maximum fill line in the tray. Overfilling the tray may cause paper jams. 5 Align the width guides against the edges of the paper. NOTE: When loading user-specified print media, adjust the width guides and slide the extendable part of the tray - Dell 2155CDN | User Manual - Page 278
the standard 250-sheet tray and optional 250-sheet feeder right after they have been removed from the packaging, they may bulge. To avoid jams, flatten them as shown below before loading the envelopes in the tray. DE LL CONFIDENTIAL - PRE LIMINARY 9/13/10 - FOR PROOF ONLY 276 Loading Print Media - Dell 2155CDN | User Manual - Page 279
FILE LOCATION: C:\Users\fxstdpcadmin\Desktop\0630_UG??\Mioga_AIO_UG_FM\Mioga_AIO_UG_FM\section15.fm Envelope #10 Load the envelopes short edge feed with the flaps closed and the print side up. Ensure that the flaps come at the right when you face towards the printer. Monarch or DL The Monarch or DL - Dell 2155CDN | User Manual - Page 280
paper enter the printer with the print side facing down as shown below. NOTE: For Dell 2155cdn Multifunction Color Printer, set Letterhead Duplex Mode to Enable and Paper Type to Letterhead, Preprinted, or Prepunched from the operator panel or the printer driver even when you print on a single side - Dell 2155CDN | User Manual - Page 281
250-sheet Dell 2155cn Multifunction Color Printer tray and optional 250-sheet feeder Face up Page orientation Letterhead enters the printer last Dell 2155cdn Multifunction Color Printer Letterhead enters Face down the printer first NOTE: Set Letterhead Duplex Mode to Enable and Paper Type to - Dell 2155CDN | User Manual - Page 282
FILE LOCATION: C:\Users\fxstdpcadmin\Desktop\0630_UG??\Mioga_AIO_UG_FM\Mioga_AIO_UG_FM\section15.fm Print media source Single sheet feeder (SSF) Print side Face down Page orientation Letterhead enters the printer first Loading Print Media in the SSF 1 Adjust the width guides to the print media's - Dell 2155CDN | User Manual - Page 283
entering the printer first. NOTE: If you experience problems with paper feed, turn the paper around. Loading an Envelope in the SSF Envelope #10, Monarch, or DL To load an envelope into the single sheet feeder, insert the envelope short edge feed with the flap closed and the print side down. Ensure - Dell 2155CDN | User Manual - Page 284
.fm NOTICE: Never use envelopes with windows, coated linings, or self-stick adhesives. These lead to paper jams and can cause damage to the printer. NOTE: Ensure that you load an envelope with the flap completely closed. NOTE: Insert an envelope with the flap side face up and with the stamp area - Dell 2155CDN | User Manual - Page 285
is designed for use in laser printer. For more guidelines on print media, see "Print Media Guidelines." • Do not add or remove print media when the printer is printing from the SSF. This may result in a paper jam. • Print media should be loaded with the recommended print side down and the top of - Dell 2155CDN | User Manual - Page 286
source (tray). To disable tray linking change the Paper type in one of the sources (trays) to a unique value. NOTE: If different types of print media of the same size are loaded in each tray, the printer will automatically link them if the paper type is not specified in the printer driver properties - Dell 2155CDN | User Manual - Page 287
control buttons, and numeric keypad, which allow you to control the printer. NOTE: The images used and procedures described in this manual are those of Dell™ 2155cdn Multifunction Color Printer. 1 One Touch Dial button • Calls up the stored Fax number registered in the Phone Book. The first eight - Dell 2155CDN | User Manual - Page 288
up when the printer has an error. (Error LED) 6 button • Moves a cursor or highlight right or left. 7 button • Moves a cursor or highlight up or down. 8 (Set) button • Confirms the entry of values. 9 (Contacts) button • Moves to the Address Book menu for the Fax and Scan services. 10 - Dell 2155CDN | User Manual - Page 289
instructions, and error messages. 21 (Scan) button • Moves to the top level of the Scan menu. 22 (Menu) button • Moves to the top level of the Print from USB Memory Setup is printed. When Using the Tool Box NOTE: 1 Click Start All Programs Dell Printers Dell 2155 Multifunction Color Printer - Dell 2155CDN | User Manual - Page 290
FILE LOCATION: C:\Users\fxstdpcadmin\Desktop\0630_UG??\Mioga_AIO_UG_FM\Mioga_AIO_UG_FM\section16.fm NOTE: The Select Printer window appears in this step when multiple printer drivers are installed on your computer. In this case, click the name of this printer listed in Printer Names, and then click - Dell 2155CDN | User Manual - Page 291
Printing, Copying, Scanning, and Faxing 289 - Dell 2155CDN | User Manual - Page 292
290 - Dell 2155CDN | User Manual - Page 293
. NOTE: The images used and procedures described in this manual are those of Dell™ 2155cdn Multifunction Color Printer. Tips for Successful Printing Tips on Storing Print Media Store your print media properly. For more information, see "Storing Print Media." Avoiding Paper Jams NOTICE: Before buying - Dell 2155CDN | User Manual - Page 294
support all of the printer features, use the printer driver. When you choose Print from a software program, a window representing the printer driver opens. Select the appropriate settings for the specific job that you are sending to print. Print settings selected from the driver override the default - Dell 2155CDN | User Manual - Page 295
in the printer window. 3 Select the job you want to cancel. 4 Press Delete on the keyboard. Duplex Printing Duplex printing (or two-sided printing) allows you to print on both sides of a sheet of paper. For sizes that are acceptable for duplex printing, see "Supported Paper Sizes." Printing 293 - Dell 2155CDN | User Manual - Page 296
support manual duplex printing, see "Supported Paper Sizes." NOTE: You can use the manual duplex feature using PCL 6 printer driver. NOTE: To use the manual duplex feature, select Paper Source other than Auto or SSF. 1 Click StartPrinters and Faxes. For Windows XP: Click start Printers and Faxes - Dell 2155CDN | User Manual - Page 297
on Long Edge" and "Flip on Short Edge." 5 Click OK. A window that shows the instructions for manual duplex printing appears. The even-numbered pages are printed from the printer. Clicking the OK button on your printer driver will first print the evennumbered pages of your document. If your document - Dell 2155CDN | User Manual - Page 298
. NOTE: For Dell 2155cdn Multifunction Color Printer, select Paper Source or Auto to use the booklet printing feature. For Dell 2155cn Multifunction Color Printer, select Paper Source. You cannot select Auto or SSF for booklet printing. NOTE: When XPS driver is used, booklet print is not available - Dell 2155CDN | User Manual - Page 299
is installed. • The RAM disk is enabled in the operator panel menu. • RAM Disk is set to Available in the printer driver. NOTE: The data in memory is cleared when the printer is turned off. The stored print function includes the following job types: • Secure Print • Private MailBox Print Printing - Dell 2155CDN | User Manual - Page 300
set for checking, before proceeding to print the remaining copies at the printer. NOTE: If a print job is too large for the memory available, the printer may display error messages. NOTE: If a document name is not assigned to your print job in the printer driver, the job's name will be identified - Dell 2155CDN | User Manual - Page 301
a job type other than Normal Print in the Paper/Output tab of the printer driver, the job will be stored in temporary memory until you request to print it from the operator panel or turn off the printer. NOTE: Secure Print and Private MailBox Print require specifying a password for confidentiality - Dell 2155CDN | User Manual - Page 302
device other than USB memory to the USB port of the printer. NOTICE: DO NOT remove the USB memory from the USB port until the printer has finished printing. The USB port of the printer is designed for USB 2.0 devices. You must use only an authorized USB memory with an A plug type connector. Use only - Dell 2155CDN | User Manual - Page 303
. NOTE: You can print files scanned and stored using the Scan to USB Memory feature. Files saved without using the feature such as files created by user may not be printed properly. PDF Port Direct Printing You can directly print PDF files in a computer by specifying LPR command (Windows): lpr - Dell 2155CDN | User Manual - Page 304
directly print PDF files scanned and stored using the Scan to USB Memory feature. Files saved without using the feature such as files created by user may not be printed properly. Printing a Report Page By using the Reports menu, you can print a variety of settings for your printer including system - Dell 2155CDN | User Manual - Page 305
: 1 Click Start All Programs Dell Printers Dell 2155 Multifunction Color Printer Tool Box. NOTE: The Select Printer window appears in this step when multiple printer drivers are installed on your computer. In this case, click the name of this printer listed in Printer Names, and then click OK - Dell 2155CDN | User Manual - Page 306
: 1 Click Start All Programs Dell Printers Dell 2155 Multifunction Color Printer Tool Box. NOTE: The Select Printer window appears in this step when multiple printer drivers are installed on your computer. In this case, click the name of this printer listed in Printer Names, and then click OK - Dell 2155CDN | User Manual - Page 307
) button. The system settings report is printed. When Using the Tool Box NOTE: 1 Click Start All Programs Dell Printers Dell 2155 Multifunction Color Printer Tool Box. NOTE: The Select Printer window appears in this step when multiple printer drivers are installed on your computer. In this case - Dell 2155CDN | User Manual - Page 308
the (Cancel) button. Driver settings may override changes previously made and may require you to change the operator panel defaults. Using the Dell Printer Configuration Web Tool to Change the Printer Settings If your printer is connected to the network, you can change the printer settings from your - Dell 2155CDN | User Manual - Page 309
) button. The system settings report is printed. When Using the Tool Box NOTE: 1 Click Start All Programs Dell Printers Dell 2155 Multifunction Color Printer Tool Box. NOTE: The Select Printer window appears in this step when multiple printer drivers are installed on your computer. In this case - Dell 2155CDN | User Manual - Page 310
to apply the settings. When Using the Tool Box NOTE: 1 Click Start All Programs Dell Printers Dell 2155 Multifunction Color Printer Tool Box. NOTE: The Select Printer window appears in this step when multiple printer drivers are installed on your computer. In this case, click the name of this - Dell 2155CDN | User Manual - Page 311
press the (Set) button. When Using the Tool Box NOTE: 1 Click Start All Programs Dell Printers Dell 2155 Multifunction Color Printer Tool Box. NOTE: The Select Printer window appears in this step when multiple printer drivers are installed on your computer. In this case, click the name of this - Dell 2155CDN | User Manual - Page 312
310 Printing - Dell 2155CDN | User Manual - Page 313
18 Copying Loading Paper for Copying The instructions for loading documents are the same whether you are printing, faxing, or copying. For more details, see "Print Media Guidelines." Selecting Paper Tray After loading the print media for copy output, select the desired paper tray to be used for - Dell 2155CDN | User Manual - Page 314
such as glue, ink and correcting fluid in ADF. NOTE: To get the best scan quality, especially for color or gray scale images, use the document glass instead of the ADF. Making Copies From the Document Glass NOTE: A computer connection is not required for copying. NOTE: Remove any documents from the - Dell 2155CDN | User Manual - Page 315
. To customize the copy settings including the number of copies, copy size, contrast, and image quality, see "Setting Copy Options." To clear the option settings, press the (All Clear) button. NOTE: The copy options automatically return to their default status after the next copy is performed or the - Dell 2155CDN | User Manual - Page 316
the following options for the current copy job before pressing the (Start) button to begin copying. NOTE: The copy options automatically return to their default status after the next copy is performed or the auto clear timer is expired. • Number of Copies • Color DE LL CONFIDENTIAL - PRE LIMINARY - Dell 2155CDN | User Manual - Page 317
\section18.fm • Select Tray • SSF Paper Size • SSF Paper Type • Collated • Reduce/Enlarge • Document Size • Original Type • Lighter/Darker • Sharpness • Color Saturation • Auto Exposure • 2 Sided • Multiple-Up • Margin Top/Bottom • Margin Left/Right • Margin Middle Number of Copies To specify the - Dell 2155CDN | User Manual - Page 318
is fed from the tray 1. The paper is fed from the tray 2. The paper is fed from the single sheet feeder. * Denotes the factory default setting. NOTE: Tray 2 is only available when the optional 250-sheet feeder is installed. DE LL CONFIDENTIAL - PRE LIMINARY 9/13/10 - FOR PROOF ONLY 316 Copying - Dell 2155CDN | User Manual - Page 319
FILE LOCATION: C:\Users\fxstdpcadmin\Desktop\0630_UG??\Mioga_AIO_UG_FM\Mioga_AIO_UG_FM\section18.fm SSF Paper Size To select the default paper size of the single sheet feeder: NOTE: This setting is only available when the SSF is selected for the paper tray. 1 Load the document(s) facing up with - Dell 2155CDN | User Manual - Page 320
FILE LOCATION: C:\Users\fxstdpcadmin\Desktop\0630_UG??\Mioga_AIO_UG_FM\ default setting. 5 Press the (Start) button to begin copying. SSF Paper Type To select the default paper type of the single sheet feeder: NOTE: This setting is only available when the SSF is selected for the paper tray - Dell 2155CDN | User Manual - Page 321
S2 Plain Thick S2 Recycled S2 Color S2 * Denotes the factory default setting. 5 Press the (Start) button to begin copying. Collated To sort the copy output: For example, if you make two copies of three page documents, one complete three page document will be printed followed by the second complete - Dell 2155CDN | User Manual - Page 322
Reduce/Enlarge To reduce or enlarge the size of a copied image, from 25 percent to 400 percent when you copy original documents from the document glass or ADF: NOTE: When you make a reduced copy, black lines may appear at the bottom of your copy. 1 Load the document(s) facing up with top edge in - Dell 2155CDN | User Manual - Page 323
LglLtr (78%) 100%* StmtLtr (129%) StmtLgl (154%) 200% (mm series) Custom 100% 50% A4A5 (70%) B5A5 (81%) 100%* A5B5 (122%) A5A4 (141%) 200% * Denotes the factory default setting. D E L L C ON F I D E N T I A L - P R E L I M I N A RY 9 / 1 3 / 1 0 - F O R P R O O F O N LY Copying 321 - Dell 2155CDN | User Manual - Page 324
1% from 25 to 400 by pressing or button or entering a value using the numeric keypad. 5 Press the (Start) button to begin copying. Document Size To select the default document size: 1 Load the document(s) facing up with top edge in first into the ADF. OR Place a single document facing down on - Dell 2155CDN | User Manual - Page 325
) B5 (182 x 257mm) Letter (8.5 x 11") Folio (8.5 x 13") Legal (8.5 x 14") Executive (7.3 x 10.5") * Denotes the factory default setting. 5 Press the (Start) button to begin copying. Original Type To select the copy image quality: 1 Load the document(s) facing up with top edge in first into the ADF - Dell 2155CDN | User Manual - Page 326
FILE LOCATION: C:\Users\fxstdpcadmin\Desktop\ typed or printed documents. Darker1 Works well with light print or faint pencil markings. Darker2 Darker3 * Denotes the factory default setting. 5 Press the (Start) button to begin copying. Sharpness To adjust the sharpness to make the copy image - Dell 2155CDN | User Manual - Page 327
is the same as the original. Softer Makes the copy image softer than the original. * Denotes the factory default setting. 5 Press the (Start) button to begin copying. Color Saturation To adjust the amount of colors of the copy to make the colors darker or lighter than the original: 1 Load the - Dell 2155CDN | User Manual - Page 328
and then press the (Set) button. 5 Press the (Start) button to begin copying. 2 Sided To make duplex copies with the specified binding position: NOTE: This feature is available only for Dell 2155cdn Multifunction Color Printer. 1 Load the document(s) facing up with top edge in first into the ADF - Dell 2155CDN | User Manual - Page 329
4 Press or button until the desired setting is highlighted, and then press the (Set) button. 1 -> 1Sided* Long Edge Biding Select 1 sided or 2 sided and specify binding position for the 2 sided copy. Short Edge Binding * Denotes the factory default setting. 5 Press the (Start) button to begin - Dell 2155CDN | User Manual - Page 330
-Up To print two original images to fit onto one sheet of paper: 1 Load the document(s) facing up with top edge in first into the ADF. OR Place a single document facing down on the document glass, and close the document cover. For details about loading a document, see "Making Copies From the - Dell 2155CDN | User Manual - Page 331
in the original size. Manual Prints the original pages onto the one sheet of paper in the size specified in Reduce/Enlarge. * Denotes the factory default setting. To customize the copy settings including the number of copies, contrast, and image quality, see "Setting Copy Options." 5 Press the - Dell 2155CDN | User Manual - Page 332
FILE LOCATION: C:\Users\fxstdpcadmin\Desktop\0630_UG??\Mioga_AIO_UG_FM\Mioga_AIO_UG_FM\section18.fm 2 Press the (Copy) button. 3 * Denotes the factory default setting. 5 Press the (Start) button to begin copying. Margin Left/Right To specify the left and right margins of the copy: 1 Load the - Dell 2155CDN | User Manual - Page 333
increments of 0.1 inch (1 mm). 0.0-2.0 inch (0-50 mm) * Denotes the factory default setting. 5 Press the (Start) button to begin copying. Changing the Default Settings The default settings of the copy menu options including contrast and image quality can be set to the most frequently used modes - Dell 2155CDN | User Manual - Page 334
enters the power saver mode when the printer is not used for a certain period of time. To set the power saver timer: 1 Press the (Menu) button. 2 Press button until System Setup is highlighted, and then press the (Set) button. 3 Press button until Admin Menu is highlighted, and then press the - Dell 2155CDN | User Manual - Page 335
FILE LOCATION: C:\Users\fxstdpcadmin\Desktop\0630_UG??\Mioga_AIO_UG_FM\Mioga_AIO_UG_FM\section18.fm To return to the top screen of the Clear) button. (Menu) menu, press the (All D E L L C ON F I D E N T I A L - P R E L I M I N A RY 9 / 1 3 / 1 0 - F O R P R O O F O N LY Copying 333 - Dell 2155CDN | User Manual - Page 336
FILE LOCATION: C:\Users\fxstdpcadmin\Desktop\0630_UG??\Mioga_AIO_UG_FM\Mioga_AIO_UG_FM\section18.fm DE LL CONFIDENTIAL - PRE LIMINARY 9/13/10 - FOR PROOF ONLY 334 Copying - Dell 2155CDN | User Manual - Page 337
described in this manual are those of Dell 2155cdn Multifunction Color Printer. The Dell 2155cn/2155cdn Multifunction Color Printer provides several ways to scan your document. There are two main scanning types. One is operated on the printer side without using the scanner driver, and the other - Dell 2155CDN | User Manual - Page 338
Photographs and pictures Images for an inkjet printer Images for a high-resolution printer Resolution 300 dpi black-and-white or 200 dpi grayscale or color 400 dpi black-and-white or 300 dpi grayscale 100-200 dpi color or 200 dpi grayscale 150-300 dpi 300-600 dpi Scanning above these recommended - Dell 2155CDN | User Manual - Page 339
is supported only on Windows. NOTE: You can use PaperPort's built-in Optical Character Recognition (OCR) software to copy text from scanned documents so that you can use and edit the text in any text editing, word processing, or spreadsheet program. The OCR process requires textual images scanned at - Dell 2155CDN | User Manual - Page 340
size. For details, see "Scan to Application." 5 Press the (Start) button. NOTE: If the following dialog box appears on your computer, select 2155 Color MFP ScanButton Manager, and then click OK. For Microsoft Windows: NOTE: Once you select 2155 Color MFP ScanButton Manager with the Always use - Dell 2155CDN | User Manual - Page 341
Macintosh: Scanning Using the TWAIN Driver Your printer supports the TWAIN driver for scanning images that supports Microsoft® Windows® XP, Windows Server® 2003, Windows Vista®, Windows Server 2008, Windows Server 2008 R2, Windows 7, Apple Mac OS X 10.3.9, Mac OS X 10.4.11, Mac OS X 10.5, Mac OS - Dell 2155CDN | User Manual - Page 342
Scanners dialog box, select TWAIN: Dell 2155 Color MFP, and then click OK. 5 Make sure that Display scanner dialog box check box is selected on the Scan or Get Photo panel. 6 Click Scan to begin scanning process. The Dell 2155 Color MFP TWAIN Driver window appears. DE LL CONFIDENTIAL - PRE - Dell 2155CDN | User Manual - Page 343
Users\fxstdpcadmin\Desktop\0630_UG??\Mioga_AIO_UG_FM\Mioga_AIO_UG_FM\section19.fm For Microsoft Windows: For Apple Macintosh: NOTE: The screen image may vary depending on the operating system. 7 In the Basic Scanning tab, set the desired preferences, and click Preview to display the preview image - Dell 2155CDN | User Manual - Page 344
set the password using the Scan Setting Tool. To open the Scan Settings Tool: For Microsoft Windows: Click Start Program Dell Printers Dell 2155 Multifunction Color PrinterScan Settings Tool. For Apple Macintosh: Click Settings on the main scanning window of the Dell 2155 Color MFP window. DE - Dell 2155CDN | User Manual - Page 345
address that is set for your scanner or change the scanner selection. • IP Address Enter the IP address. • Search all scanners from the network (Windows only) Searches scanners in your network. • Scanner List Displays a list of scanners that are detected. • Search again Searches the scanners in your - Dell 2155CDN | User Manual - Page 346
Box (Windows only) • Subnet Address Enter the subnet address. • IPv4: Broadcast Address such as "192.168.1.255" • IPv6: Multicast Address such as "ff02::1" • Search Time Specify a time period for searching a scanner. • Community Name Enter the SNMPv1/v2 community name. The default community name - Dell 2155CDN | User Manual - Page 347
: C:\Users\fxstdpcadmin\Desktop\0630_UG??\Mioga_AIO_UG_FM\Mioga_AIO_UG_FM\section19.fm Password Setting In the Password Setting tab, you can input the password that is set for your scanner to access from your computer to the printer. For Microsoft Windows: For Apple Macintosh: • Password for - Dell 2155CDN | User Manual - Page 348
\Desktop\0630_UG??\Mioga_AIO_UG_FM\Mioga_AIO_UG_FM\section19.fm Scanning Using the Windows Image Acquisition (WIA) Driver Your printer also supports the WIA driver for scanning images. WIA is one of the standard components provided by Microsoft Windows XP and later operating systems and works - Dell 2155CDN | User Manual - Page 349
, and then click OK. 6 Click Scan to start scanning. 7 Click File Save to save your scanned document in your desired location on your computer. To scan an image from Control Panel: NOTE: This feature is supported on Microsoft Window Server 2003 and Windows XP only. 1 Load the document(s) facing - Dell 2155CDN | User Manual - Page 350
the desired location to save the scanned document. 7 Click Next to start scanning. 8 Follow the on-screen instructions to edit the picture after it is copied to your computer. Scanning to Network NOTE: This feature does not require a network scan driver. DE LL CONFIDENTIAL - PRE LIMINARY 9/13 - Dell 2155CDN | User Manual - Page 351
the scanned documents to a computer or FTP server. Required operating systems: For FTP: NOTE: For information on how to configure the FTP service, refer to the manual provided with the software. NOTE: Microsoft Windows Server 2003, Windows XP, Windows Vista, Mac OS X 10.3.9/10.4.11/10.5 support - Dell 2155CDN | User Manual - Page 352
10.4.11/10.5/10.6 FTP service of Mac OS X For SMB: NOTE: Microsoft Windows Server 2003, Windows XP, Mac OS X 10.3.9/10.4.11/10.5/10.6 support IPv4 only. • Microsoft Windows XP • Microsoft Windows Server 2003 • Microsoft Windows Vista • Microsoft Windows Server 2008 • Microsoft Windows Server 2008 R2 - Dell 2155CDN | User Manual - Page 353
Panel. 2 Double-click User Accounts. 3 Click Create a password for your account and add in a password for your user login account. For Windows Server 2008 R2: 1 Click Start Control Panel. D E L L C ON F I D E N T I A L - P R E L I M I N A RY 9 / 1 3 / 1 0 - F O R P R O O F O N LY Scanning 351 - Dell 2155CDN | User Manual - Page 354
Accounts. 2 Select Change Password. 3 Enter a password for your user login account in New password. 4 Re-enter the password in Verify. Creating a Shared Folder (SMB Only) Create a shared folder to store the scanned document from your printer. For Microsoft Windows XP Home Edition: 1 Create - Dell 2155CDN | User Manual - Page 355
\Desktop\0630_UG??\Mioga_AIO_UG_FM\Mioga_AIO_UG_FM\section19.fm 5 Select the Allow network users to change my files check box, and click OK. NOTE Second-level folder name: MyPic, Third-level D E L L C ON F I D E N T I A L - P R E L I M I N A RY 9 / 1 3 / 1 0 - F O R P R O O F O N LY Scanning 353 - Dell 2155CDN | User Manual - Page 356
fm folder name: John You should now see MyShare\MyPic\John in your directory. For Microsoft Windows XP Professional: 1 Create a folder in the desired directory on your computer (Example of folder name select Share this folder. DE LL CONFIDENTIAL - PRE LIMINARY 9/13/10 - FOR PROOF ONLY 354 Scanning - Dell 2155CDN | User Manual - Page 357
the user login name in Enter the object names to select box and click Check Names to confirm (Example of user login name, Myself). 11 Click OK. NOTE: Do not use Everyone as the user login name. D E L L C ON F I D E N T I A L - P R E L I M I N A RY 9 / 1 3 / 1 0 - F O R P R O O F O N LY Scanning - Dell 2155CDN | User Manual - Page 358
Windows Server 2008 R2, or Windows 7: 1 Create a folder in the desired directory on your computer (Example of folder name, MyShare). 2 Right-click on the folder, and then select Properties. The Properties dialog box appears. DE LL CONFIDENTIAL - PRE LIMINARY 9/13/10 - FOR PROOF ONLY 356 Scanning - Dell 2155CDN | User Manual - Page 359
FILE LOCATION: C:\Users\fxstdpcadmin\Desktop\0630_UG??\Mioga_AIO_UG_FM\Mioga_AIO_UG_FM\section19.fm 3 Click on the Sharing tab, and create a write permission for this folder. 7 Click Add. D E L L C ON F I D E N T I A L - P R E L I M I N A RY 9 / 1 3 / 1 0 - F O R P R O O F O N LY Scanning 357 - Dell 2155CDN | User Manual - Page 360
and click Check Names to confirm (Example of user login name, Myself). 9 Click OK. 10 Click on the user login name that you have just entered. Select to send the document into this folder. NOTE: Do not use Everyone as the user login name. 11 Click OK. NOTE: To add sub-folders, create new folders - Dell 2155CDN | User Manual - Page 361
book using Dell Printer Configuration Web Tool or Address Book Editor. Before beginning to setup a destination, make sure you have the IP addresses you need such as printer and computer. Verifying the IP Address Setting of the Printer To setup the server address book through the network, you will - Dell 2155CDN | User Manual - Page 362
) button. The system settings report is printed. When Using the Tool Box NOTE: 1 Click Start All Programs Dell Printers Dell 2155 Multifunction Color PrinterTool Box. NOTE: The Select Printer window appears in this step when multiple printer drivers are installed on your computer. In this case - Dell 2155CDN | User Manual - Page 363
to check the IP address of the printer, see "Verifying the IP Address Setting of the Printer." 3 Click Address Book. If a security login dialog box appears, type in the correct User Name and Password. NOTE: The default user name is "admin", and the default password is left blank (NULL). 4 Click the - Dell 2155CDN | User Manual - Page 364
FILE LOCATION: C:\Users\fxstdpcadmin\Desktop\0630_UG??\Mioga_AIO_UG_FM\Mioga_AIO_UG_FM\section19.fm Server Address page appears. To fill in the fields, enter the information as follows: (1) Name (2) Server Type Enter a friendly name that you want it to appear on the Server address book. Select - Dell 2155CDN | User Manual - Page 365
(7) Login Name Enter the user account name to allow access to a shared folder on your computer or to a FTP server. • For FTP: Contact the system administrator. • For SMB: Windows login name that you have specified in the procedure 1. (8) Login Enter the password corresponding to the above login - Dell 2155CDN | User Manual - Page 366
FILE LOCATION: C:\Users\fxstdpcadmin\Desktop\0630_UG??\Mioga_AIO_UG_FM\Mioga_AIO_UG_FM\section19.fm Using Address Book Editor 1 Click Start All ProgramsDell PrintersDell 2155 Multifunction Color Printer Address Book Editor. 2 Click Tool New (Device Address Book)Server. DE LL CONFIDENTIAL - - Dell 2155CDN | User Manual - Page 367
FILE LOCATION: C:\Users\fxstdpcadmin\Desktop\0630_UG??\Mioga_AIO_UG_FM\Mioga_AIO_UG_FM\section19.fm For Microsoft Windows: For Apple Macintosh: Server Address dialog box appears. D E L L C ON F I D E N T I A L - P R E L I M I N A RY 9 / 1 3 / 1 0 - F O R P R O O F O N LY Scanning 365 - Dell 2155CDN | User Manual - Page 368
: C:\Users\fxstdpcadmin\Desktop\0630_UG??\Mioga_AIO_UG_FM\Mioga_AIO_UG_FM\section19.fm For Microsoft Windows: For Apple Macintosh: To fill in the fields, enter the information as follows: (1) Name Enter a friendly name that you want it to appear on the Server address book. (2) Server Type - Dell 2155CDN | User Manual - Page 369
Login Name Enter the user account name to allow access to a shared folder on your computer or to a FTP server. • For Computer: Windows login name that you have specified in the procedure 1. • For Server: Contact the system administrator. (7) Login Enter the password corresponding to the above - Dell 2155CDN | User Manual - Page 370
format, color mode, resolution, and document size. For details, see "File Format." 8 Press the (Start) button to begin sending the scanned files. Scanning to a USB Memory The Scan to USB Memory feature allows you to store scanned image directly to a USB memory attached to the printer without using - Dell 2155CDN | User Manual - Page 371
Remove the USB memory from the printer. See "Inserting and Removing a USB Memory" for more details. Specifying a Folder to Save the Scanned Image To save the scanned image to a USB memory, specify a folder in the USB memory before executing the scan job. 1 Select a folder to save the scanned image - Dell 2155CDN | User Manual - Page 372
USB memory device itself may be destroyed. Sending an E-Mail With the Scanned Image To send an e-mail attached with the scanned image from your printer, follow the steps below: • Set E-Mail Alert • Register a user • Start to send e-mail with the scanned file Setting an E-Mail Alert 1 From the Dell - Dell 2155CDN | User Manual - Page 373
the e-mail server. NOTE: If an error message including 016-506 or 016-764 is displayed, contact your server administrator for the settings for E-Mail Send Authentication. 3 Click the Apply New Settings button. Registering a New User 1 From the Dell Printer Configuration Web Tool, click Address Book - Dell 2155CDN | User Manual - Page 374
• Address 4 Click the Apply New Settings button. Sending an E-mail With the Scanned File 1 Press the (Scan) button. 2 Press button until Scan to E-Mail is highlighted, and then press the (Set) button. 3 Ensure that Email to is highlighted, and then press the (Set) button. 4 Press button until - Dell 2155CDN | User Manual - Page 375
Users\fxstdpcadmin\Desktop\0630_UG??\Mioga_AIO_UG_FM\Mioga_AIO_UG_FM\section19.fm Search Local Address Book: Search an e-mail address from the local address book. Search Server Address Book: Search an e-mail address from the LDAP E L I M I N A RY 9 / 1 3 / 1 0 - F O R P R O O F O N LY Scanning 373 - Dell 2155CDN | User Manual - Page 376
FILE LOCATION: C:\Users\fxstdpcadmin\Desktop\0630_UG??\Mioga_AIO_UG_FM\Mioga_AIO_UG_FM\section19.fm DE LL CONFIDENTIAL - PRE LIMINARY 9/13/10 - FOR PROOF ONLY 374 Scanning - Dell 2155CDN | User Manual - Page 377
described in this manual are those of Dell™ 2155cdn Multifunction Color Printer. Specifying the Fax Initial Settings Using the Easy Setup Navigator You can specify the country, line type, tone/pulse, receive mode, DRPD pattern, fax header name, and fax number. 1 Insert the Drivers and Utilities CD - Dell 2155CDN | User Manual - Page 378
Mode • DRPD Pattern (This setting is available only when a distinctive ring service is installed on your telephone line by your telephone company.) • FAX Header Name • FAX Number NOTE: To make initial settings from the printer operator panel, see "Setting Your Country." Setting Your Country 1 Press - Dell 2155CDN | User Manual - Page 379
Users\fxstdpcadmin\Desktop\0630_UG??\Mioga_AIO_UG_FM\Mioga_AIO_UG_FM\section20.fm 2 Press button until System Setup is highlighted, and then press the (Set) button. 3 Press button until Admin Menu is highlighted, and then press the (Set) button. 4 Press button until Fax up your printer, you enter - Dell 2155CDN | User Manual - Page 380
FILE LOCATION: C:\Users\fxstdpcadmin\Desktop\0630_UG??\Mioga_AIO_UG_FM\ F 3 4 g h iG H I 4 5 j k l J K L 5 6 m n o M N O 6 7 p q r s P Q R S 7 8 t u v T U V 8 9 w x y z W X Y Z 9 0 0 * @ . _ - # (space) \ & ( ) DE LL CONFIDENTIAL - PRE LIMINARY 9/13/10 - FOR PROOF ONLY 378 Faxing - Dell 2155CDN | User Manual - Page 381
Users access code to function. For example, enter the access code 9 reset the correct time and date if loss of power to the printer occurs. To set the time and date: 1 Press the (Menu) button. 2 Press button until System Setup is highlighted, and then press the (Set) button. 3 Press button until Admin - Dell 2155CDN | User Manual - Page 382
Speaker Volume 1 Press the (Menu) button. 2 Press button until System Setup is highlighted, and then press the (Set) button. 3 Press button until Admin Menu is highlighted, and then press the (Set) button. 4 Press button until Fax Settings is highlighted, and then press the (Set) button. DE LL - Dell 2155CDN | User Manual - Page 383
. 7 Reboot the printer by turning the power switch off and then on again. Specifying the Fax Settings Options Changing the Fax Settings Options 1 Press the (Menu) button. 2 Press button until System Setup is highlighted, and then press the (Set) button. 3 Press button until Admin Menu is highlighted - Dell 2155CDN | User Manual - Page 384
Ring Pattern Detection (DRPD) option, distinctive ring service must be installed on your telephone line by the telephone company. After the telephone company has provided a separate number for faxing with a distinctive ring pattern, configure the fax setup to monitor for that specific ring pattern - Dell 2155CDN | User Manual - Page 385
Ans/Fax Line Monitor Ring Tone Volume Line Type Tone/Pulse Resend Delay Redial Attempts Redial Delay Description Sets the interval at which the printer goes into the fax receive mode after receiving an incoming call. The interval can be specified within the range of 0 to 255 seconds. The default is - Dell 2155CDN | User Manual - Page 386
distinctive ring pattern, configure the fax setup to monitor for that specific ring pattern. You can set whether to make duplex print when you print faxes. Select Off to print faxes on one side of a sheet of paper. Select On to print faxes on both sides of a sheet of paper. DE LL CONFIDENTIAL - PRE - Dell 2155CDN | User Manual - Page 387
in the memory. Then, the printer dials the fax number that you have specified and sends the fax. Select Off not to forward incoming faxes. Select Forward to forward incoming faxes without printing. If an error occurs during forwarding a received fax, the printer prints the fax. Select Print and - Dell 2155CDN | User Manual - Page 388
by turning the power switch off and then on again. Advanced Fax Settings NOTE: The advanced fax settings are only meant for advanced users. Incorrect settings on the Dell 2155cdn Multifunction Color Printer may damage the device. DE LL CONFIDENTIAL - PRE LIMINARY 9/13/10 - FOR PROOF ONLY 386 - Dell 2155CDN | User Manual - Page 389
fm If you are experiencing fax send or receive errors, there is an advanced fax settings menu which you can access and change the settings accordingly. To enter the Diagnostic Menu (Customer Mode), follow the instructions. 1 Turn off the printer. 2 Disconnect all network, phone line, and USB cables - Dell 2155CDN | User Manual - Page 390
. 4 Ensure that FAX Parameter appears, and then press the (Set) button. 5 Press button until G3M RX Coding appears, and then Fax Connection You can diagnose the Fax connection using the FAX Line Diagnosis feature that can detect the abnormalities of telephone line connection. 1 Turn on the printer - Dell 2155CDN | User Manual - Page 391
printer. You can also directly fax data transferred from the computer running a Microsoft® Windows® operating system. Loading an Original Document You can use the ADF or the document glass to load an original document for faxing. Using the ADF, you can load up to 35 sheets of 75 g/m2 (20 lb) paper - Dell 2155CDN | User Manual - Page 392
document resolution. (For details, see "Adjusting the Document Resolution.") To fax a document from the document glass: 1 Open the document cover. 2 Place the document facing down on the document glass and align it with the registration guide on the top left corner of the glass. DE LL CONFIDENTIAL - Dell 2155CDN | User Manual - Page 393
FILE LOCATION: C:\Users\fxstdpcadmin\Desktop\0630_UG??\Mioga_AIO_UG_FM\Mioga_AIO_UG_FM\section20.fm 3 Adjust the resolution, especially for the document in low-quality or containing the photographic image. 1 Press the (Fax) button. 2 Press button until Resolution is highlighted, and then press the - Dell 2155CDN | User Manual - Page 394
-matrix printer. Used for documents containing extremely fine detail. The super fine mode is enabled only if the remote machine also supports the Super Fine resolution. See the note below. Used for documents containing photographic images. * Denotes the factory default setting. NOTE: Faxes scanned - Dell 2155CDN | User Manual - Page 395
LOCATION: C:\Users\fxstdpcadmin\Desktop\0630_UG??\Mioga_AIO_UG_FM\Mioga_AIO_UG_FM\section20.fm Sending a Fax Automatically 1 numbers. • Search Local - Searches a fax number from the local Phone Book. • Search Server - Searches a fax number from the LDAP server. This item is displayed when Server - Dell 2155CDN | User Manual - Page 396
fax immediately, and then press the (Set) button. The printer starts dialing the number, and then sending the fax when the remote fax machine is ready. NOTE: You can cancel the fax job at any time while sending the fax Enabled" for the Fax service.) Sending a Fax Manually 1 Load the document - Dell 2155CDN | User Manual - Page 397
the Available time and "Function Enabled" for the Fax service.) Confirming Transmissions When the last page of your document has been sent successfully, the printer beeps and returns to the standby mode. If something goes wrong while sending your fax, an error message appears on the display. If you - Dell 2155CDN | User Manual - Page 398
the printer cannot send the delayed fax at the specified time. (For details, see "Set Available Time" for the Available time and "Function Enabled" for the Fax service.) Sending a Fax from the Driver (Direct Fax) You can send a fax directly from your computer by using the driver. NOTE: Only black - Dell 2155CDN | User Manual - Page 399
, you must install the fax driver. (For details, see "Inserting the Drivers and Utility CD" for Windows or "Installing the Drivers and Software" for Macintosh.) 1 Open the file you want to send by fax. 2 Open the print dialog box from the application, and then select Dell 2155cdn MFP Fax. 3 Click - Dell 2155CDN | User Manual - Page 400
FILE LOCATION: C:\Users\fxstdpcadmin\Desktop\0630_UG??\Mioga_AIO_UG_FM\Mioga_AIO_UG_FM\section20.fm For Apple Macintosh: 4 When the setting dialog box appears, specify the following settings. NOTE: The settings done here are only applied to a single fax job. DE LL CONFIDENTIAL - PRE LIMINARY 9/13 - Dell 2155CDN | User Manual - Page 401
FILE LOCATION: C:\Users\fxstdpcadmin\Desktop\0630_UG??\Mioga_AIO_UG_FM\Mioga_AIO_UG_FM\section20.fm For Microsoft Windows: For Apple Macintosh: a. Transmission image quality Purpose: To set the output quality. Values: D E L L C ON F I D E N T I A L - P R E L I M I N A RY 9 / 1 3 / 1 0 - F O R P R - Dell 2155CDN | User Manual - Page 402
printer. For documents containing extremely fine detail. The super fine mode is enabled only if the remote machine also supports Super Fine resolution. See the notes below. * Denotes the factory default setting. NOTE: Faxes printed in the Super-high image quality by Direct Fax driver transmits - Dell 2155CDN | User Manual - Page 403
Name. * Denotes the factory default setting. Sender Name Purpose: To enter a sender's name that will be printed on the fax cover page. The sender's name can be up to 30 characters. If it exceeds 30 characters, only the first 30 characters will be printed. 5 For Windows, click OK to close the - Dell 2155CDN | User Manual - Page 404
FILE LOCATION: C:\Users\fxstdpcadmin\Desktop\0630_UG??\Mioga_AIO_UG_FM\Mioga_AIO_UG_FM\section20.fm For Microsoft Windows: For Apple Macintosh: DE LL CONFIDENTIAL - PRE LIMINARY 9/13/10 - FOR PROOF ONLY 402 Faxing - Dell 2155CDN | User Manual - Page 405
on the 2155cn/2155cdn Multifunction Color Printer. • Import and add file (Windows only): Allows you to select a source file such as a CSV file, WAB file, MAPI, or a LDAP server. (For details on LDAP server, see "LDAP Server" and "Server Phone Book.") NOTE: Enter the password in the Password field in - Dell 2155CDN | User Manual - Page 406
on the back of your printer. When the memory is full, the fax is received in the Telephone mode. Loading Paper for Receiving Faxes The instructions for loading paper in the paper tray are the same whether you are printing, faxing, or copying, except that faxes can only be printed on Lettersized, A4 - Dell 2155CDN | User Manual - Page 407
printer hears a fax tone on the line, it automatically starts to receive a fax. NOTE: If you have set your printer to Ans Machine/Fax printer, your printer will automatically go into the Fax mode after a predefined time. Receiving a Fax Manually changing the code, see "Available Fax Settings Options." - Dell 2155CDN | User Manual - Page 408
use this service. Receiving Faxes in the Memory Since your printer is a multi-tasking device, it can receive faxes while you are making copies or printing. If you receive a fax while you are copying, printing, or run out of paper or toner, your printer stores incoming faxes in the memory. Then, as - Dell 2155CDN | User Manual - Page 409
enter the fax number of the remote machine, see "Sending a Fax Automatically" or "Sending a Fax Manually." 5 Dell Printer Configuration Web Tool. Setting Speed Dial 1 Press the (Menu) button. 2 Press button until System Setup is highlighted, and then press the (Set) button. 3 Press button until Admin - Dell 2155CDN | User Manual - Page 410
FILE LOCATION: C:\Users\fxstdpcadmin\Desktop\0630_UG??\Mioga_AIO_UG_FM\Mioga_AIO_UG_FM\section20.fm 6 2 To enter the speed dial number do one of the followings after pressing the (Fax) button: • Ensure that Fax to is highlighted, and then press the (Set) button. Press button until Speed Dial - Dell 2155CDN | User Manual - Page 411
Users fax needs. (For details, see "Adjusting the Document Resolution." For adjusting the contrast, see "Adjusting the Document Contrast.") 5 Press the (Start) button. The document scans into the memory System Setup is highlighted, and then press the (Set) button. 3 Press button until Admin Menu - Dell 2155CDN | User Manual - Page 412
FILE LOCATION: C:\Users\fxstdpcadmin\Desktop\0630_UG??\Mioga_AIO_UG_FM\Mioga_AIO_UG_FM\section20.fm 4 1 Press the (Menu) button. 2 Press button until System Setup is highlighted, and then press the (Set) button. 3 Press button until Admin Menu is highlighted, and then press the (Set) button. DE - Dell 2155CDN | User Manual - Page 413
C:\Users\ printer automatically scans the document loaded in the Automatic Document Feeder or on the document glass into the memory. The printer dials each of the numbers included in the group. D E L L C ON F I D E N T I A L - P R E L I M I N A RY 9 / 1 3 / 1 0 - F O R P R O O F O N LY Faxing - Dell 2155CDN | User Manual - Page 414
Users\fxstdpcadmin\Desktop\0630_UG??\Mioga_AIO_UG_FM\Mioga_AIO_UG_FM\section20.fm Printing a Speed Dial List You can check your automatic dial setting by printing a Speed Dial list. 1 Press the (Menu) button. 2 Press button until System Setup Press the (Fax) button. 3 Ensure that Fax to is - Dell 2155CDN | User Manual - Page 415
the printer is unattended. In the secure fax mode, all incoming faxes will go in memory. When the mode turns off, any faxes stored will be printed. NOTE: Before operation, ensure Panel Lock is enabled. To turn the secure receiving mode on: 1 Press the (Menu) button. 2 Press button until System Setup - Dell 2155CDN | User Manual - Page 416
fax is received in the secure receiving mode, your printer stores it into memory and the JOB STATUS screen displays "Secure Receive" to let you know that there is a fax stored. To print . 4 Enter the password, and then press the (Set) button. The faxes stored in memory are printed. To turn the - Dell 2155CDN | User Manual - Page 417
time for the TAD. • When the TAD picks up the call, the printer monitors and takes the line if fax tones are received and then starts receiving the fax. • If the answering device is off, the printer automatically goes into the Fax after the ring tone sounds for a predefined time. • If you answer the - Dell 2155CDN | User Manual - Page 418
not use the computer modem if your printer is sending or receiving a fax. • Follow the instructions provided with your computer modem and fax application to fax via the computer modem. Printing a Report The following reports may be useful when using fax: NOTE: For more information on other reports - Dell 2155CDN | User Manual - Page 419
all of the numbers currently stored in the printer's memory as Server Address information. Fax Activity This report shows information about the faxes you recently received or sent. Fax Pending This list shows the status of pending faxes. You may print this list to confirm your changes after changing - Dell 2155CDN | User Manual - Page 420
Address list • Fax Activity: Fax activity information • Fax Pending: Pending faxes • Print Meter: Print volume report Changing Setting Options 1 Press the (Menu) button. 2 Press button until System Setup is highlighted, and then press the (Set) button. 3 Press button until Defaults Settings is - Dell 2155CDN | User Manual - Page 421
Know Your Printer 419 - Dell 2155CDN | User Manual - Page 422
420 - Dell 2155CDN | User Manual - Page 423
settings. NOTE: The images used and procedures described in this manual are those of Dell™ 2155cdn Multifunction Color Printer. Printer Settings Report The Printer Settings Report tab includes the Printer Information, Menu Settings, Reports, TCP/IP Settings, Defaults Settings, and Fax Settings pages - Dell 2155CDN | User Manual - Page 424
Network Firmware Version Displays the NIC version. MCU Firmware Version Displays the version of the Machine Control Unit (MCU) firmware. Printing Speed (Color) Displays the speed for color printing. Printing the printer automatically resets the settings on the operator panel to the defaults when - Dell 2155CDN | User Manual - Page 425
Tone Out of Paper Alert Tone Low Toner Alert Tone Auto Clear Alert Tone Base Tone Fault Time-out Displays the volume of the tone that is emitted when the printer becomes ready. Off indicates that the tone is disabled. Displays the volume of the tone that is emitted when a copy job is complete - Dell 2155CDN | User Manual - Page 426
measurement unit used on the operator panel. Default Print Paper Size Displays the default print paper size. ColorTrack Error Report Displays whether to print the error report on the ColorTrack Letterhead Duplex Mode*3 Displays whether to print both sides of a sheet of letterhead paper. Low Toner - Dell 2155CDN | User Manual - Page 427
. Displays the plain paper density settings. Displays the label paper density settings. Displays whether to automatically adjust color registration. Displays the altitude of the location where the printer is installed. Displays whether to use toner cartridge of another manufacturer. Understanding - Dell 2155CDN | User Manual - Page 428
type when paper is loaded in the optional 250-sheet feeder. *1 This item is available only when the optional 512 MB memory module is installed. *2 This item is available only when the optional 250-sheet feeder is installed. *3 This item is available only for Dell 2155cdn Multifunction Color Printer - Dell 2155CDN | User Manual - Page 429
subnet mask. Displays the gateway address. Defaults Settings Purpose: To display the default settings for the Copy, Scan, Fax, and Print from USB services of the printer. Values: Copy Defaults Color Select Tray Displays whether to make copies in color or in black and white. Displays the input - Dell 2155CDN | User Manual - Page 430
ratio. Document Size Displays the default paper size. Original Type Displays the type of the original document. Lighter/Darker Displays the default copy density level. Sharpness Displays the default sharpness level. Color Saturation Displays the default color saturation level. Auto Exposure - Dell 2155CDN | User Manual - Page 431
of low density black. Color Balance (Black Middle Dens.) Displays the color balance level of medium density black. Color Balance (Black High Dens.) 2Sided*1 Displays the color balance level of high density black. Displays whether to copy on both sides of a sheet of paper. Multiple-Up Displays - Dell 2155CDN | User Manual - Page 432
Button) Displays whether to scan in color or in color (Photo) when Color is selected for a color mode Resolution Displays the default scan resolution. Document Size Displays the paper size of the original document. Lighter/Darker Displays the default scan density level. Sharpness Displays - Dell 2155CDN | User Manual - Page 433
the default paper type when the single sheet feeder is used. 2Sided*1 Displays whether to copy on both sides of a sheet of paper. Layout Displays the default paper layout when Multiple - Up is selected. *1 This item is available only for Dell 2155cdn Multifunction Color Printer. Fax Settings - Dell 2155CDN | User Manual - Page 434
of faxes. Displays the fax number of the printer, which will be printed on the header of faxes. Displays whether to attach a cover page to faxes. Displays the Distinctive Ring Pattern Detection (DRPD) setting. Displays whether to print the received fax on both sides of a sheet of paper. Displays - Dell 2155CDN | User Manual - Page 435
The Printer Maintenance tab includes the System Settings, Date & Time, Paper Density, Color Registration Adjustment, Adjust Altitude, Reset Defaults, Non-Dell Toner, Initialize Print Meter, Tray Settings, TCP/IP Settings, Network Settings, Copy Defaults, Scan Defaults, Fax Defaults, Print from - Dell 2155CDN | User Manual - Page 436
Sleep mode. Sets whether to wake up from the Sleep or Deep Sleep mode when OnHook is Off. Sets the amount of time before the printer automatically resets the settings on the operator panel to the defaults when no additional settings are made. 434 Understanding the Tool Box Menus - Dell 2155CDN | User Manual - Page 437
panel input is incorrect. Does not emit a tone when the printer becomes ready. Emits a tone at the specified volume when the printer becomes ready. Does not emit a tone when copying is complete. Emits a tone at the specified volume when copying is complete. Does not emit a tone when any other job - Dell 2155CDN | User Manual - Page 438
* Does not emit a tone when a problem occurs. Emits a tone at the specified volume when a problem occurs. Does not emit a tone when the printer runs out of paper. Emits a tone at the specified volume when the printer runs out of paper. Does not emit a tone when the toner is low. Emits a tone at the - Dell 2155CDN | User Manual - Page 439
every 20 jobs. Does not print the user ID. Prints the user ID on the specified location. Does not print the received PDL data as text data. Prints the received PDL data as text data. Does not insert the banner sheet. Sets where to insert the banner sheet. Sets the tray for the banner sheet. Does - Dell 2155CDN | User Manual - Page 440
mm/inch Default Print Paper Size ColorTrack Error Report Nearest Size* Millimeters(mm)* Inches(") A4* Letter Off* On Letterhead Duplex Mode*3 Disable* Enable Low Toner Alert On* Msg Off Email From Field Enable* Disable Server Address On Book Off* Server Phone On Book Off* No tray size - Dell 2155CDN | User Manual - Page 441
item is available only when the optional 250-sheet feeder is installed. *3 This item is available only for Dell 2155cdn Multifunction Color Printer. *4 This item is available only when the optional 512 MB memory module is installed. Date & Time Purpose: To specify the date and time. Values: Date - Dell 2155CDN | User Manual - Page 442
Auto Registration Adjustment is set to On, the printer prints the color registration chart and adjusts the color registration by using the chart. Color registration adjustments need to be made during the initial setup of the printer or when the printer is moved to a different location. Values: 440 - Dell 2155CDN | User Manual - Page 443
) 0* Restart printer to apply new settings Does not perform color registration automatically. Performs color registration automatically. Click Start to perform color registration automatically. Click Start to print a color registration chart. Sets lateral (perpendicular to paper feed direction - Dell 2155CDN | User Manual - Page 444
the altitude of the location where the printer is installed. The method for charging the photo printer, all wired network settings are reset to their default values. Values: Reset Defaults System Section User Fax Section User Scan Section Initializes the system parameters. Initializes the fax - Dell 2155CDN | User Manual - Page 445
printer and apply the settings changes. Initialize Print Meter Purpose: To initialize the Print Meter. When the print meter is initialized, the meter count is reset to 0. Values: Initialize Print Meter Click Start to initialize the PrintMeter. Tray Settings Purpose: To specify the paper types - Dell 2155CDN | User Manual - Page 446
Tray 1 Paper Type Plain* Plain Thick Sets the type of paper loaded in the standard 250-sheet tray. Covers Covers Thick Label Envelope Recycled Letterhead Preprinted Prepunched Color Plain - Side 2 Plain Thick - Side 2 Recycled - Side 2 Tray 1 Paper Size Color - Side 2 A4* A5 Sets the - Dell 2155CDN | User Manual - Page 447
77-215 mm - X (3.0-8.5 inch) 210 mm* (8.3 inch) Tray 1 Display On* Popup Tray 2 Paper Type*1 Plain* Plain Thick Recycled Letterhead Preprinted Prepunched Color Plain - Side 2 Plain Thick - Side 2 Recycled - Side 2 Color - Side 2 Tray 2 Paper Size*1 A4* A5 B5 Letter Folio Legal - Dell 2155CDN | User Manual - Page 448
printer to apply new settings Click this button to restart the printer and apply the changes. *1 This item is available only when the optional 250-sheet feeder is installed . Manually sets the IP address. Manually sets the IP address allocated to the printer. It is allocated to the printer using - Dell 2155CDN | User Manual - Page 449
Settings NOTE: Network Settings is not available when the printer is connected using a USB cable. Purpose: To configure the setup of the printer using your web browser. Values: Print Server Display Settings*1 Click to display the Print Server Setup page on the Dell Printer Configuration Web Tool - Dell 2155CDN | User Manual - Page 450
Color Select Tray Black & White Color* Tray 1* Tray 2*1 SSF Paper Size SSF A4* A5 B5 Letter Folio Legal Executive Envelope #10 Monarch DL C5 Prints in black and white mode. Prints in color mode. The paper is fed from the standard 250sheet tray. The paper is fed from the optional 250sheet feeder. - Dell 2155CDN | User Manual - Page 451
- Side 2 Plain Thick - Side 2 Recycled - Side 2 Color - Side 2 Off On Auto* Custom 50% A4A5 (70%) B5A5 (81%) 100% A5B5 (122%) A5A4 (141%) 200% Sets the document type loaded in the single sheet feeder. Does not sort copy job. Sorts the copy job. Automatically sorts the copy job. Sets the default - Dell 2155CDN | User Manual - Page 452
series Custom Reduce/Enlarge Document Size Original Type Custom Sets the default reduction ratio. 50% LedgerLetter (64%) LegalLetter (78%) 100% Does not enlarge or reduce the size of a copied image. StatementLetter Sets the default enlargement ratio. (129%) StatementLegal (154%) 200 - Dell 2155CDN | User Manual - Page 453
typed or printed documents. Makes the copy darker than the original. Works well with light print or faint pencil markings. Makes the copy sharper than the original. Does not make the copy sharper or softer than the original. Makes the copy softer than the original. Increases the color saturation - Dell 2155CDN | User Manual - Page 454
magenta. Sets the color balance level of low density cyan. Sets the color balance level of medium density cyan. Sets the color balance level of high density cyan. Sets the color balance level of low density black. Sets the color balance level of medium density black. Sets the color balance level of - Dell 2155CDN | User Manual - Page 455
this button to restart the printer and apply the changes. *1 This item is available only when the optional 250-sheet feeder is installed. *2 This item is available only for Dell 2155cdn Multifunction Color Printer. Scan Defaults Purpose: To create your own scan settings. Values: Understanding the - Dell 2155CDN | User Manual - Page 456
(Network)* PDF* Stores the scanned image on a computer using the Server Message Block (SMB) protocol. Saves the scanned image in PDF. Multi Page Saves the scanned image in Multi Page TIFF. TIFF TIFF Saves the scanned image in TIFF. JPEG Saves the scanned image in JPEG. Black & White Color - Dell 2155CDN | User Manual - Page 457
. Level Margin Top/Bottom Lighter 3 Lighter 2 Makes the scanned image lighter than the original. Works well with dark print. Lighter 1 Normal* Works well with standard typed or printed documents. Darker 1 Darker 2 Darker 3 Makes the scanned image darker than the original. Works well with light - Dell 2155CDN | User Manual - Page 458
. Apply New Settings After you change the settings, click this button to apply the changes. Restart printer to apply new settings Click this button to restart the printer and apply the changes. Fax Defaults Purpose: To create your own fax settings. Values: 456 Understanding the Tool Box Menus - Dell 2155CDN | User Manual - Page 459
supports the Super Fine resolution. Photo Improves the output quality of the original. For documents containing photographic images. Lighter/Darker Lighter 3 Lighter 2 Makes the documents lighter than the original. Works well with dark print. Lighter 1 Normal* Works well with standard typed - Dell 2155CDN | User Manual - Page 460
your own settings for Print from USB Defaults. Values: Color Select Tray Black & White Color* Tray 1* Tray 2* 1 SSF SSF Paper Size A4* A5 B5 Letter Folio Legal Prints in black and white mode. Prints in color mode. The paper is fed from the standard 250sheet tray. The paper is fed from the - Dell 2155CDN | User Manual - Page 461
the changes. Restart printer to apply new settings Click this button to restart the printer and apply the changes. *1 This item is available only when the optional 250-sheet feeder is installed. *2 This item is available only for Dell 2155cdn Multifunction Color Printer. Understanding the Tool - Dell 2155CDN | User Manual - Page 462
an incoming call is a telephone call through the internal speaker when Receive Mode is set to Telephone/Fax. Low Sets the volume of the ring tone. Line Type Medium High* PSTN* Sets the default line type to PSTN. PBX Sets the default line type to PBX. 460 Understanding the Tool Box Menus - Dell 2155CDN | User Manual - Page 463
the sender on the header of faxes. Fax Header Name Sets the sender's name to be printed on the header on faxes. Fax Number Sets the fax number of the printer, which will be printed on the header of faxes. Fax Cover On Page Off* Attaches a cover page to faxes. Does not attach a cover page to - Dell 2155CDN | User Manual - Page 464
Duplex On Print* 1 Off* Sent Fax Fwd Off* Prints the received fax on both sides of a sheet of paper. Does not print the received fax on both sides of a sheet of paper. Does not forward any of the incoming faxes to a specified destination. Forward Forwards the incoming faxes to a specified - Dell 2155CDN | User Manual - Page 465
available only for Dell 2155cdn Multifunction Color Printer. Diagnosis The Diagnosis tab includes the Chart Print, Machine Check, Paper Wrinkle Check Mode, Environment Sensor Info, Clean Developer, and Refresh Mode pages. NOTE: Values marked by an asterisk (*) are the factory default menu settings - Dell 2155CDN | User Manual - Page 466
to check for proper alignment of the print image on the paper. One page is printed. Drum Refresh Configuration Chart Prints a chart to check the light fatigue of the drum cartridge. Machine Check Purpose: To check the operation of the printer components. Values: 464 Understanding the Tool Box - Dell 2155CDN | User Manual - Page 467
determine whether or not paper is wrinkled in the fuser. This function stops printing before the paper enters the fuser. After you remove the paper inside the printer, check the following: • If the paper is wrinkled, the wrinkle occurred in the part other than fuser. • If the paper is not wrinkled - Dell 2155CDN | User Manual - Page 468
Off* Does not use the print side 2 of the paper. On Color* Uses the print side 2 of the paper. Prints in color mode. Black & White Prints in monochrome mode. Click this button to print in the specified paper size, type, and color mode. Environment Sensor Info Purpose: 466 Understanding - Dell 2155CDN | User Manual - Page 469
: Toner Refresh Mode Drum Refresh Mode Yellow Magenta Cyan Black Drum Click Yellow to clean the yellow cartridge. Click Magenta to clean the magenta cartridge. Click Cyan to clean the cyan cartridge. Click Black to clean the black cartridge. Click Drum to clean the drum. Resetting Defaults After - Dell 2155CDN | User Manual - Page 470
1 Click Start All Programs Dell Printers Dell 2155 Multifunction Color Printer Tool Box. NOTE: The Select Printer window appears in this step when multiple printer drivers are installed on your computer. In this case, click the name of this printer listed in Printer Names, and then click OK. The - Dell 2155CDN | User Manual - Page 471
you can use your printer driver to override user defaults and select settings for individual print jobs. NOTE: The images used and procedures described in this manual are those of Dell™ 2155cdn Multifunction Color Printer. Report / List Use the Report/List menu to print various types of reports and - Dell 2155CDN | User Manual - Page 472
of the available PDF fonts. Job History Purpose: To print a detailed list of the print, copy, fax, or scan jobs that have been processed. This list contains the last 20 jobs. Error History Purpose: To print a detailed list of paper jams and fatal errors. Print Meter Purpose: To print the reports for - Dell 2155CDN | User Manual - Page 473
the optional 512 MB memory module is installed on the printer and RAM Disk under System Settings is enabled. Purpose: To print a list of all files stored for Secure Print, Private Mail Box Print, Public Mail Box Print, and Proof Print in the RAM disk. Admin Menu Use the Admin Menu menu to configure - Dell 2155CDN | User Manual - Page 474
codes can be registered. Print Language Purpose: To specify the settings for PCL or PDF. PCL Use the PCL menu to change printer settings that only affect jobs using the PCL emulation printer language. NOTE: Values marked by an asterisk (*) are the factory default menu settings. Paper Tray Purpose - Dell 2155CDN | User Manual - Page 475
default value. inch series Letter*1 Folio Legal A4 A5 B5 Executive Envelope #10 Monarch Env. DL Env. C5 Env. Custom Size *1 Denotes country-specific factory default value. NOTE: Selecting a custom size for the paper size prompts you to enter a custom length and width. Understanding the Printer - Dell 2155CDN | User Manual - Page 476
and graphics parallel to the long edge of the paper. 2 Sided NOTE: 2 Sided print feature is available only for Dell 2155cdn Multifunction Color Printer. Purpose: To specify whether to print on both sides of a sheet of paper. Values: 2 Sided Print Binding Edge Off* On Flip Long Edge* Flip Short - Dell 2155CDN | User Manual - Page 477
Font Purpose: To specify the default font from the fonts registered in the printer. Values: CG Times CG Times It CG Arial BdIt Times New Times New It Times New Bd Times New BdIt Symbol Wingdings Line Printer Times Roman Times It Times Bd Times BdIt Helvetica Helvetica Ob Helvetica Bd CourierPS - Dell 2155CDN | User Manual - Page 478
font. One point equals approximately 1/72 of an inch. NOTE: The Font Size menu is only displayed for typographic fonts. See also: 476 Understanding the Printer Menus - Dell 2155CDN | User Manual - Page 479
horizontal inch of type. lines in a page. Values: mm series 64*1 Sets the value in increments of 1. 5-128 *1 Denotes country-specific factory default values. inch series 60*1 Sets the value in increments of 1. 5-128 *1 Denotes country-specific factory default values. Understanding the Printer - Dell 2155CDN | User Manual - Page 480
Select the correct Form Line and Orientation before changing Form Line. See also: "Orientation" Quantity Purpose: To set the default print quantity. (Set the number of copies required for a specific job from the printer driver. Values selected from the printer driver always override values selected - Dell 2155CDN | User Manual - Page 481
CR-FF The CR and LF commands are added. CR=CR-LF, LF=CR-LF, FF=CR-FF Default Color Purpose: To specify the color mode to Color or Black. This setting is used for a print job that does not specify a print mode. Values: Black* Prints in the black and white mode. Understanding the Printer Menus 479 - Dell 2155CDN | User Manual - Page 482
the number of copies to print. Values: 1* 1-999 Sets the value in increments of 1. 2 Sided Print NOTE: 2 Sided Print feature is available only for Dell 2155cdn Multifunction Color Printer. Purpose: To specify whether to print on both sides of a sheet of paper. Value: 1 Sided* Long Edge Flip - Dell 2155CDN | User Manual - Page 483
secure PDF. Value: Enter PDF Password Enter the password to print the secure PDF. Collated Purpose: To specify whether to sort the job. Value: Off* Does not sort the job. On Sorts the job. Output Size Purpose: To specify the output paper size for PDF. Value: A4*1 Letter*1 Auto *1 The default paper - Dell 2155CDN | User Manual - Page 484
: To specify the output color. Value: Color (Auto)* Black & White Network Use the Network menu to change the printer settings affecting jobs sent to the printer through the wired or wireless network. NOTE: Values marked by an asterisk (*) are the factory default menu settings. Ethernet Purpose - Dell 2155CDN | User Manual - Page 485
Values: Connection SSID Encryption Type Good Acceptable Low No Reception Displays the name that identifies the wireless network. Displays the encryption type. Wireless Setup NOTE: Wireless Setup is available only when the printer is connected using the wireless network. Purpose: To configure the - Dell 2155CDN | User Manual - Page 486
Manual Setup Enter Network (SSID) Specifies a name to identify the wireless network. Up to 32 alphanumeric characters can be entered. Infra- Select when you configure the wireless setting characters from 8 to 63 only when WPA-PSKAES is selected for Encryption. 484 Understanding the Printer Menus - Dell 2155CDN | User Manual - Page 487
assigned automatically by the * printer. Print PIN Code Prints the PIN code. Confirm it when entering PIN assigned to the printer into your computer. Reset Wireless NOTE: Reset Wireless feature is available only when the printer is connected using the wireless network. Purpose: To initialize - Dell 2155CDN | User Manual - Page 488
setting. Start Resets the wireless setting. TCP/IP Purpose: To configure TCP/IP settings. Values: IP Mode Dual Stack* IPv4 Mode IPv6 Mode Uses both IPv4 and IPv6 to set the IP address. Uses IPv4 to set the IP address. Uses IPv6 to set the IP address. 486 Understanding the Printer Menus - Dell 2155CDN | User Manual - Page 489
169.254.1.0 to 169.254.254.255 that is not currently in use on the network is set as the IP address. The subnet mask is set as 255.255.0.0. want to set the IP address manually on the operator panel. When an IP address is being set manually, the IP is allocated to the printer using the format nnn.nnn. - Dell 2155CDN | User Manual - Page 490
the LPD port. Enables the Line Printer Daemon (LPD) port. Disables Network Management Protocol (SNMP) UDP port. Disables the E-Mail Alert feature. Enables the E-Mail Alert feature. Disables an access to Dell Printer Configuration Web Tool embedded in the printer. Enables an access to Dell Printer - Dell 2155CDN | User Manual - Page 491
off and then on again. Values: Disable Disables IEEE 802.1x. Reset LAN Purpose: To initialize wired network data stored in non-volatile memory (NVM). After executing this function and rebooting the printer, all wired network settings are reset to their default values. Values: Understanding the - Dell 2155CDN | User Manual - Page 492
service must be installed on your telephone line by the telephone company. After the telephone company has provided a separate number for faxing with a distinctive ring pattern, configure the fax setup to monitor for that specific ring pattern. Auto Rec Fax Purpose: 490 Understanding the Printer - Dell 2155CDN | User Manual - Page 493
: To set the interval at which the printer goes into the fax receive mode after the external answering machine receives an incoming call. Values: 21* Sets the interval in increments of 1 second. 0-255 Line Monitor Purpose: To set the volume of the line monitor, which audibly monitors a transmission - Dell 2155CDN | User Manual - Page 494
set to Telephone/Fax. Values: Off Low Medium High* Turns off the volume of the ring tone. Sets the volume of the ring tone to Low. Sets the volume of the ring tone to Medium. Sets the volume of the ring tone to High. Line Type Purpose: To select the default line type. Values: PSTN* Uses - Dell 2155CDN | User Manual - Page 495
15 minutes. Values: 1* Sets the interval in increments of 1 minute. 1-15 Junk Fax Setup Purpose: To reject unwanted faxes by accepting faxes only from the fax numbers registered in the Phone Book. Values: Off* Does not reject faxes sent from unwanted numbers. Understanding the Printer Menus 493 - Dell 2155CDN | User Manual - Page 496
not receive a fax by pressing a remote receive code on the external telephone. On Receives a fax by pressing a remote receive code on the faxes. Values: Off Does not print the sender's information on the header of faxes. On* Prints the sender's information on the header of faxes. NOTE: If United - Dell 2155CDN | User Manual - Page 497
To set the fax number of the printer, which will be printed on the header of a fax message. NOTE: Ensure to specify Fax Number before using Junk Fax Setup. Fax Cover Page Purpose: To set whether to attach a cover page to faxes. Values: Off* Does not attach a cover page to faxes. On Attaches a cover - Dell 2155CDN | User Manual - Page 498
specified by your telephone company. The patterns provided with your printer are shown below: Pattern 1 Pattern 2 Pattern 3 Pattern 4* Pattern 5 Pattern 6 Pattern 7 Ask your telephone company which pattern you need to select to use this service. For example, Pattern 7 is the New Zealand FaxAbility - Dell 2155CDN | User Manual - Page 499
Duplex Print NOTE: Duplex Print feature is available only for Dell 2155cdn Multifunction Color Printer. To set the duplex printing for fax. Values: Off* Does not perform duplex printing. On Performs duplex printing. Sent Fax Fwd Purpose: To set whether to forward incoming faxes to a specified - Dell 2155CDN | User Manual - Page 500
Branch Exchange (PABX). Discard Size Purpose: To set the printer to discard images or any text at the bottom of a fax page when the entire page does not fit the output paper. Values: Off* Prints excess images or text at the bottom of a fax page without discarding it. On Discards any excess - Dell 2155CDN | User Manual - Page 501
printer is used. Values: Algeria Australia Austria Belgium Bulgaria Canada Colombia Costa Rica Cyprus Czech Republic Denmark Dominican Republic Egypt Estonia Finland France Germany Greece Guatemala Fax Tunisia Turkey U.A.E. United Kingdom United States Unknown* Understanding the Printer Menus 499 - Dell 2155CDN | User Manual - Page 502
an error occurs. Print Disable Does not print a transmission report after a fax transmission to multiple destinations. Fax Protocol Purpose: To set whether to print the protocol monitor report, which helps you identify the cause of a communication problem. Values: 500 Understanding the Printer - Dell 2155CDN | User Manual - Page 503
a protocol monitor report after every fax transmission. Print On Error Prints the protocol monitor report only when an error occurs. Print Disable* Does not print the protocol monitor report. System Settings Use System Settings to configure the power saving mode, warning tones, time-out duration - Dell 2155CDN | User Manual - Page 504
Purpose: To automatically reset the settings for COPY, SCAN, or FAX to the default settings and return to the standby mode after you do not specify any settings for the specified time. Values: 45sec* 1min 2min 3min 4min Fault Time-out Purpose: To specify the amount of time the printer waits before - Dell 2155CDN | User Manual - Page 505
-out Purpose: To specify the amount of time the printer waits for data to arrive from the computer. The print job is cancelled if the time-out time is exceeded. Values: Off Disables the job time-out. On* 30sec* Sets the time the printer waits for data to arrive from the 5-300 sec - Dell 2155CDN | User Manual - Page 506
when the operator panel input is incorrect. Does not emit a tone when the printer is ready to process a job. Emits a tone when the printer is ready to process a job. Does not emit a tone when a copy job is complete. Emits a tone when a copy job is complete. Does not emit a tone when a job other than - Dell 2155CDN | User Manual - Page 507
Off Does not emit a tone when a problem occurs. Emits a tone when a problem occurs. Does not emit a tone when the printer runs out of paper. Emits a tone when the printer runs out of paper. Does not emit a tone when a toner is low. Emits a tone when a toner is low. Does not emit a tone 5 seconds - Dell 2155CDN | User Manual - Page 508
Selects millimeter as the default measurement unit. Inches (") Selects inch as the default measurement unit. NOTE: The default for mm/inch varies depending on other settings, such as Country and Document Size. Default Print Paper Size Purpose: To specify the default paper size. Values: mm series - Dell 2155CDN | User Manual - Page 509
data. Banner Sheet NOTE: Banner Sheet feature is available only when the optional 250-sheet feeder is installed to Dell 2155cdn Multifunction Color Printer. Purpose: To specify the position of banner sheet, and also specify the tray in which the banner sheet is loaded. Values: Understanding the - Dell 2155CDN | User Manual - Page 510
-sheet tray. Tray 2 The banner sheet is loaded in the optional 250-sheet feeder. RAM Disk NOTE: RAM Disk feature is available only when the optional 512 MB memory module is installed on the printer. Purpose: To allocate memory to the RAM disk file system for the Secure Print, Mailbox Print, and - Dell 2155CDN | User Manual - Page 511
there is no larger paper size, the printer substitutes paper of nearest size. Nearest Size* Substitutes paper of nearest size. Set Available Time Purpose: Sets the available time for the Print, Copy, Scan, and Fax services. Values: Off* Does not set the time when printing is available. On Sets - Dell 2155CDN | User Manual - Page 512
printing. No Account User Print Purpose: To specify whether to permit the printing of data without authentication information. Values: Off* Does not permit non-account user to print the data. On*1 Permits non-account user to print the data. *1 Set No Account User Password using the Dell Printer - Dell 2155CDN | User Manual - Page 513
printing with Color Track results in an error. On Prints the error report when printing with Color Track results in an error. Letterhead Duplex Mode NOTE: Letterhead Duplex Mode feature is available only for Dell 2155cdn Multifunction Color Printer. Purpose: To specify whether to print on both sides - Dell 2155CDN | User Manual - Page 514
from the Phone Book for the LDAP server. NOTE: You can search the phone numbers only from the local Phone Book when Server Phone Book is set to Off. Power on Wizard Purpose: To perform initial setup for the printer. Values: Yes Performs the initial setup for the printer. 512 Understanding the - Dell 2155CDN | User Manual - Page 515
an asterisk (*) are the factory default menu settings. F/W Version Purpose: To confirm the current F/W version. Service Tag Purpose: To confirm the service tag. Express Code Purpose: To confirm the express service code. Paper Density Purpose: To specify paper density settings. Values: Plain Label - Dell 2155CDN | User Manual - Page 516
in increments of 1. The default settings may not give the best output on all paper types. If you see mottles on the print output, try to increase the voltage. If you see white spots on the print output, try to decrease the voltage. Adjust Fuser NOTE: The print quality changes depending on the - Dell 2155CDN | User Manual - Page 517
1. The default settings may not give the best output on all paper types. When the printed paper has curled, try to lower the temperature. When the toner does not fuse on the paper properly, try to increase the temperature. Auto Reg Adjust Purpose: To specify whether to automatically perform color - Dell 2155CDN | User Manual - Page 518
and process adjustment. Press the (Set) button to save all the settings. -9 to +9 NOTE: Ensure that you remove the paper from the single sheet feeder before performing Auto Correct. Clean Developer Purpose: To stir the toner in a new toner cartridge. Values: 516 Understanding the Printer Menus - Dell 2155CDN | User Manual - Page 519
Cyan, Black Yes Cleans the toner in the selected toner cartridge. No* Does not clean the toner in each toner cartridge. Drum Refresh Purpose: To clean the surface of the PHD unit. Values: Yes Cleans the surface of the PHD unit. No* Does not clean the surface of the PHD unit. Reset Defaults Purpose - Dell 2155CDN | User Manual - Page 520
the printer. When the print meter is initialized, the meter count is reset to zero. Clear Storage NOTE: Clear Storage feature is available only when the additional 512 MB memory module is installed. Purpose: To clear all files stored as Secure Print, Mailbox Print, Proof Print, and Stored Print in - Dell 2155CDN | User Manual - Page 521
altitude adjustment setting leads to poor printing quality, incorrect indication of remaining toner, etc. Values: 0m* 1000m 2000m 3000m Sets the altitude of the location where the printer is installed. Secure Settings Use the Secure Settings menu to set a password to limit access to the menus - Dell 2155CDN | User Manual - Page 522
printer services, or to require a password to use the services. Values: Copy Fax On* On (Password) On (Color Password) Off On* On (Password) Off Scan On* On (Password) Off Print from USB On* On (Password) On (Color Password) Off Change Password*1 Enables the Copy service. Enables the Copy - Dell 2155CDN | User Manual - Page 523
not require a password to receive faxes. Enable Change Password*1 0000-9999 Requires a password to receive faxes. Sets or changes the password required to receive faxes. *1 This item is available only when Secure Receive Set is set to Enable. Login Error NOTE: Login Error feature is available - Dell 2155CDN | User Manual - Page 524
the COPY, SCAN, or FAX menu defaults. Copy Defaults Purpose: To modify the COPY menu defaults. Copy Defaults allows you to configure the following items in addition to the items under the COPY menu. Color Purpose: To select color or black and white copying. Values: Black & White Prints in black and - Dell 2155CDN | User Manual - Page 525
. Sets the color balance level of low density cyan. Sets the color balance level of medium density cyan. Sets the color balance level of high density cyan. Sets the color balance level of low density black. Sets the color balance level of medium density black. Understanding the Printer Menus 523 - Dell 2155CDN | User Manual - Page 526
the SCAN menu defaults. Scan Defaults allows you to configure the following items in addition to the items under the SCAN menu. Color Purpose: To specify whether to print in color or black and white. Values: Color Black & White* Prints in black and white. Color Prints in color. Color Button - Dell 2155CDN | User Manual - Page 527
Sets the image compression level to Medium. Sets the image compression level to Low. Max Email Size Purpose: To specify the maximum size of e-mail that can be sent. Values: 2048 KB* Sets the maximum size of e-mail that can be sent, in increments of 1. 50-16384 Fax Defaults Purpose: Understanding - Dell 2155CDN | User Manual - Page 528
black and white. Color* Prints in color. Tray Settings Use the Tray Settings menu to define the print media loaded in the standard 250-sheet tray and the optional 250-sheet feeder. NOTE: Values marked by an asterisk (*) are the factory default menu settings. Tray 1 Purpose: To specify the paper - Dell 2155CDN | User Manual - Page 529
Paper Size mm series inch series A4*1 A5 B5 Letter Folio Legal Executive Envelope #10 Monarch Env. Monarch Env. L DL Env. DL Env. L C5 Env. Custom Size Letter*1 Folio Legal A4 A5 B5 Executive Envelope #10 Monarch Env. Monarch Env. L DL Env. DL Env. L C5 Env. Custom Size Understanding the Printer - Dell 2155CDN | User Manual - Page 530
set Paper Type and Paper Size when paper is loaded in the standard 250sheet tray. NOTE: For more information on supported paper sizes, see "Supported Paper Sizes." Tray 2 NOTE: Tray 2 feature is available only when the optional 250-sheet feeder is installed. 528 Understanding the Printer Menus - Dell 2155CDN | User Manual - Page 531
-sheet feeder. Values: Paper Size mm series inch series Paper Type A4*1 A5 B5 Letter Folio Legal Executive Letter*1 Folio Legal A4 A5 B5 Executive Plain* Plain Thick Recycled Letterhead Preprinted Prepunched Color Plain S2 Plain Thick S2 Recycled S2 Color S2 Understanding the Printer Menus 529 - Dell 2155CDN | User Manual - Page 532
is loaded in the standard 250-sheet feeder. Displays a popup message that prompts to set Paper Type and Paper Size when paper is loaded in the standard 250-sheet feeder. *1 Denotes country-specific factory default value. Panel Language Purpose: To determine the language of the text on the operator - Dell 2155CDN | User Manual - Page 533
you arrive at the printer and type the password on the operator panel. Values: Select User ID Enter the password you specified on the printer driver. All Print and Documents*1 Delete Deletes all documents from print memory after printing them. Delete document n*2 Print and Delete Deletes all - Dell 2155CDN | User Manual - Page 534
User ID Enter the password you specified on the printer driver. All Print and Deletes all documents from print Documents*1 Delete memory after printing them. Print Prints all documents and saves them in memory. Delete document n*2 Print and Delete Deletes all documents from print memory - Dell 2155CDN | User Manual - Page 535
Select User ID All Print and Documents*1 Delete Deletes all documents from print memory after printing them. Print Prints all documents and saves them in memory. Delete document n*2 Print and Delete Deletes all documents from print memory. Deletes the specified document from print memory - Dell 2155CDN | User Manual - Page 536
: Password Enters the password to access the confidential job. Copy Menu Use the COPY menus to configure a variety of copy features. NOTE: Values marked by an asterisk (*) are the factory default menu settings. Select Tray Purpose: To specify the input tray. 534 Understanding the Printer Menus - Dell 2155CDN | User Manual - Page 537
*1 This item is available only when the optional 250-sheet feeder is installed. SSF Paper Size NOTE: SSF Paper Size feature is available only when print media is inserted in the single sheet feeder. Purpose: To specify the default paper size of the single sheet feeder. Values: mm series A4*1 A5 B5 - Dell 2155CDN | User Manual - Page 538
available only when print media is inserted in the single sheet feeder. Purpose: To specify the default paper type of the single sheet feeder. Values: Plain* Plain Thick Covers Covers Thick Coated Coated Thick Envelope Recycled Letterhead Preprinted Prepunched 536 Understanding the Printer Menus - Dell 2155CDN | User Manual - Page 539
set of three page documents is printed one by one. Values: Off On Auto* Does not sort a copy job. Sorts a copy job. Automatically sorts a copy job only when you use the ADF. Reduce/Enlarge Purpose: To reduce or enlarge the size of a copied image. Values: mm series Custom 100% 50% A4A5 (70%) B5 - Dell 2155CDN | User Manual - Page 540
(78%) 100%* StmtLtr (129%) StmtLgl (154%) 200% NOTE: You can set the value in a percentage for Custom. Document Size Purpose: To specify the default document size. Values: mm series Auto*1 A4 A5 B5 Letter Folio Legal Executive inch series Auto*1 Letter Folio 538 Understanding the Printer Menus - Dell 2155CDN | User Manual - Page 541
country-specific factory default values. NOTE: When Auto is selected, the printer assumes that the document size is the size of the print media loaded in the standard 250-sheet tray or single sheet feeder. Original Type Purpose: To improve the image quality by selecting the type of the original - Dell 2155CDN | User Manual - Page 542
to lighten the color of the copy. Auto Exposure Purpose: To suppress the background of the original to enhance text on the copy. Values: Off Does not suppress the background. On* Suppresses the background to enhance text. 2Sided Purpose: To specify whether to make duplex copy and select the - Dell 2155CDN | User Manual - Page 543
Binding Prints on one side of a sheet of paper. Prints on both sides of a sheet of paper to be bound by long edge. Prints on both sides of a sheet of paper to be bound by short edge. Multiple-Up Purpose: To print two original pages to fit onto one sheet of paper. Values: Off* Auto ID Copy Manual - Dell 2155CDN | User Manual - Page 544
by an asterisk (*) are the factory default menu settings. Scan to USB Memory Save to Purpose: To save the scanned image to a USB memory attached to the printer. Values: Save to Saves the scanned image to root or folders in a USB memory. Scan to E-Mail Email to Purpose: To specify the recipient - Dell 2155CDN | User Manual - Page 545
the Address Book. Searches an e-mail address from the Email Group in the Address Book. Searches an e-mail address Scan to Network Scan to Purpose: To store the scanned image on a network server or a computer. Values: Network (Computer) Network (Server) Search Address Book Stores the scanned image - Dell 2155CDN | User Manual - Page 546
from the printer to a computer connected via a USB cable. The computer must have ScanButton Manager installed to receive the data. File Format Purpose: To specify the file format to save the scanned image. Values: PDF* MultiPageTIFF TIFF JPEG Color Mode Purpose: To select color or black and white - Dell 2155CDN | User Manual - Page 547
Size Purpose: To specify the default paper size. Values: mm series A4* A5 B5 Letter Folio Legal Executive *1 Denotes country-specific factory default values. inch series Letter* Folio Legal A4 A5 B5 Executive *1 Denotes country-specific factory default values. Understanding the Printer Menus 545 - Dell 2155CDN | User Manual - Page 548
Lighter1 Normal* Darker1 Darker2 Darker3 Works well with dark print. Works well with standard typed or printed documents. Works well with light print or faint pencil markings. Sharpness Purpose: To adjust the sharpness to make the scanned image sharper or softer than the original. Values: Sharper - Dell 2155CDN | User Manual - Page 549
the background of the original to enhance text on the copy. Values: Off Does not suppress the background. On* Suppresses the background to enhance text. Margin Top/Bottom Purpose: To specify the top and bottom margins of the scanned image. Values: 0.1 inch* (2 mm*) Sets the value in increments of - Dell 2155CDN | User Manual - Page 550
mm) Fax Menu Use the FAX menus to configure a variety of fax features. NOTE: The FAX service cannot be used unless you set up a country code under Country. If Country is not set up, a message Set Fax Country appears on the display. NOTE: Values marked by an asterisk (*) are the factory default menu - Dell 2155CDN | User Manual - Page 551
or documents printed using a dot-matrix printer. Suitable for documents containing extremely fine detail. The Super Fine mode is enabled only if the remote machine also supports the Super Fine mode. See the notes below. Suitable for documents containing photographic images. NOTE: Faxes scanned in - Dell 2155CDN | User Manual - Page 552
at a later time. Values: Off* Does not send a fax at a later time. On Sends a fax at a later time. NOTE: A maximum of 19 delayed fax jobs can be stored in the Dell 2155cdn Multifunction Color Printer. Polling Receive Purpose: To receive faxes from the remote fax machine when you want to receive it - Dell 2155CDN | User Manual - Page 553
: Tray 1* Tray 2*1 SSF *1 This item is available only when the optional 250-sheet feeder is installed. SSF Paper Size Purpose: Values: mm series A4*1 A5 B5 Letter Folio Legal *1 Denotes country-specific factory default values. inch series Letter*1 Folio Legal A4 A5 B5 Understanding the Printer - Dell 2155CDN | User Manual - Page 554
default values. SSF Paper Type Purpose: Values: Plain* Plain Thick Covers Covers Thick Coated Coated Thick Envelope Recycled Letterhead Preprinted Prepunched Color Plain S2 Plain Thick S2 Recycled S2 Color S2 2Sided NOTE: 2Sided feature is available only for Dell 2155cdn Multifunction Color Printer - Dell 2155CDN | User Manual - Page 555
page on one side of a sheet of paper. Prints two pages on one side of a sheet of paper. Prints four pages on one side of a sheet of paper. PDF Password Purpose: To enter the password when you print the secure PDF job. Values: Enter PDF Password Enter the password to print the secure PDF job. Panel - Dell 2155CDN | User Manual - Page 556
described below allows you to reset the password, but the settings for Address Book and Phone Book are cleared. • Turn off the printer. Then, while holding the (Menu) button, turn on the printer. Perform steps 8 and 9. 9 Re-enter the password to confirm the password that you entered, and then - Dell 2155CDN | User Manual - Page 557
and rebooting the printer, all the menu parameters, except the parameters for the network, are reset to their default values. When Using the Operator Panel 1 Press the (Menu) button. 2 Press button until System Setup is highlighted, and then press the (Set) button. 3 Press button until Admin Menu is - Dell 2155CDN | User Manual - Page 558
556 Understanding the Printer Menus - Dell 2155CDN | User Manual - Page 559
paper jam occurs or toner is running low. By default, the Printer Status window launches only when an error occurs. When an error occurs, the error message appears on the Printer Status window. You can set the Printer Status window to always launch when printing in Printing Status Window Properties - Dell 2155CDN | User Manual - Page 560
or in a server on the network. Using the setup disk that you have created will reduce the amount of work required when installing the printer driver. • Install the Dell™ 2155cdn Multifunction Color Printer driver in the computer on which the setup disk is to be created. • The setup disk can only be - Dell 2155CDN | User Manual - Page 561
the Quick Launch Utility when you install the Dell software. For information about installing the software, see "Setting Up for Shared Printing." To open the Quick Launch Utility window: 1 Click Start All Programs Dell Printers Additional Color Laser Software Quick Launch Utility. The Quick - Dell 2155CDN | User Manual - Page 562
to "Understanding the Tool Box Menus." Updater The Updater button updates the Dell software and printer firmware. Troubleshooting The Troubleshooting button opens the Troubleshooting Guide, which allows you to solve problems by yourself. Address Book Editor The Address Book Editor button opens the - Dell 2155CDN | User Manual - Page 563
section. NOTE: For information on how to setup the LDAP server, see "LDAP Server" and "LDAP User Mapping." For information on the LDAP Address Books, see "Server Address Book" and "Server Phone Book." Types of Address Books • E-mail Address Book (for Scan to E-mail) E-mail addresses registered for - Dell 2155CDN | User Manual - Page 564
Services Features Types of Address Books Entry Registration Operator Address Dell Printer Panel on the Book Editor Configurati Printer on Web Tool Scan E-mail Address Book - Email Group - Server Address - - - Book (LDAP server) Network Address Book - Fax Fax - Dell 2155CDN | User Manual - Page 565
changes to the entries in Address Book Editor. NOTE: This tool is supported on both Microsoft Windows and Apple Macintosh. NOTE: When the printer and your computer is connected via USB, you must install the scanner driver. With Address Book Editor, you can: • Automatically retrieves data from the - Dell 2155CDN | User Manual - Page 566
FILE LOCATION: C:\Users\fxstdpcadmin\Desktop\0630_UG??\Mioga_AIO_UG_FM\Mioga_AIO_UG_FM\section23.fm For Microsoft Windows: For Apple Macintosh: • Device Address Book • Fax DE LL CONFIDENTIAL - PRE LIMINARY 9/13/10 - FOR PROOF ONLY 564 Understanding Your Printer Software - Dell 2155CDN | User Manual - Page 567
up to 200 fax numbers and 6 groups with 200 fax numbers. • E-Mail Links to the printer's Address Book for Scan to E-mail feature. You can register up to 100 e-mail addresses and 10 groups with 10 e-mail addresses. • Server Links to the printer's Address Book for Scan to Network feature. You can - Dell 2155CDN | User Manual - Page 568
check the status of Dell printers currently connected to your Macintosh • Receiving Alerts Alerts you to problems, such as paper jams or low toner • Ordering Supplies Allows you to access the web site to order supplies Before Installing the Status Monitor Widget Operating systems • Mac OS X 10.4.11 - Dell 2155CDN | User Manual - Page 569
FILE LOCATION: C:\Users\fxstdpcadmin\Desktop\0630_UG??\Mioga_AIO_UG_FM\Mioga_AIO_UG_FM\section23.fm of Status Monitor in the Widget Bar. The Printer Status window appears. NOTE: If the message Select a printer is displayed, select your printer in Preferences. (For more information on Preferences - Dell 2155CDN | User Manual - Page 570
USB cable, you cannot check the status of the printer during a print or scan job. Printer Status Image Area Displays the image of printer condition. • Estimated Toner Level image Displays the estimated toner level of each color if the printer is functioning properly. NOTE: If the utility does not - Dell 2155CDN | User Manual - Page 571
image when an error occurs. An error has occurred and the printer requires your attention to correct a problem. An error has occurred and the printer cannot be used. An unknown error has occurred and the printer cannot be used. Order Supplies button Click this button to display the Order window - Dell 2155CDN | User Manual - Page 572
By Phone • Phone number list Displays a list of available phone numbers that you can call to order Dell printer supplies. Preferences To open Preferences: 1 Click the info (i) button in the Printer Status window. Preferences appears. NOTE: The info (i) button appears on the lower-right corner of the - Dell 2155CDN | User Manual - Page 573
default community name (public). Up to 31 characters can be entered. Service Tag button Click this button to obtain the service tag. NOTE: You cannot retrieve the service tag when the printer is connected via USB cable. done button Click this button to return to the Printer Status window. Status - Dell 2155CDN | User Manual - Page 574
Allows you to check the status of Dell printers currently connected to your Linux. • Receiving Alerts Alerts you to problems, such as paper jams or low toner. • Ordering Supplies Allows you to access the web site to order supplies. Before Installing the Status Monitor Console NOTE: The Status - Dell 2155CDN | User Manual - Page 575
Management System window. See "Dell Supplies Management System Window." Printer Selection Window Printers list All the printers registered in the CUPS (Common UNIX Printing System) are displayed in a list. • Status icons: Ready Unknown/Offline/Toner Low/Paper Low Door Open/Paper Jam/No Toner/Out Of - Dell 2155CDN | User Manual - Page 576
button Click this button to open the Printer Status window. If a non-supported printer is selected, it opens the Dell Printer Configuration Web Tool. For details on the Dell Printer Configuration Web Tool, see "Dell Printer Configuration Web Tool." Refresh button Click this button to update the - Dell 2155CDN | User Manual - Page 577
button appears when the amount of toners becomes less than 30%. Refresh button Click this button to update the status of the printer. Close button Click this button to close the Printer Status window. Dell Supplies Management System Window This window provides you with the information for ordering - Dell 2155CDN | User Manual - Page 578
: Click this button to open the Service Tag window. • When the Premier URL is selected in the Select Reorder URL: Click this button to open the procurement and support web site. • Select Reorder URL Displays a list of available URLs where you can order Dell printer supplies. Select a URL address to - Dell 2155CDN | User Manual - Page 579
button Click this button to close the Dell Supplies Management System window. Service Tag Window 1 Enter the Dell printer service tag. NOTE: For information on the service tag, see "Express Service Code and Service Tag." Settings Window To open the Settings window: 1 Click the Settings button in the - Dell 2155CDN | User Manual - Page 580
FILE LOCATION: C:\Users\fxstdpcadmin\Desktop\0630_UG??\Mioga_AIO_UG_FM\Mioga_AIO_UG_FM\section23.fm Update of status • Printer Status is regularly updated check box Select the check box to enable/disable the Printer Status to be updated by the specified interval. • Update interval text box Specify - Dell 2155CDN | User Manual - Page 581
\Mioga_AIO_UG_FM\section23.fm The selected URL address is set as default web site for the Select Reorder URL in the Dell Supplies Management System window. D E L L C ON F I D E N T I A L - P R E L I M I N A RY 9 / 1 3 / 1 0 - F O R P R O O F O N LY Understanding Your Printer Software 579 - Dell 2155CDN | User Manual - Page 582
FILE LOCATION: C:\Users\fxstdpcadmin\Desktop\0630_UG??\Mioga_AIO_UG_FM\Mioga_AIO_UG_FM\section23.fm DE LL CONFIDENTIAL - PRE LIMINARY 9/13/10 - FOR PROOF ONLY 580 Understanding Your Printer Software - Dell 2155CDN | User Manual - Page 583
to a document. Well-chosen typefaces make a document easier to read. The printer has numerous resident fonts in PCL 5/PCL 6. See "Resident Fonts" for a . Thicker lines result in darker characters. Some words commonly used to describe the weight of a typeface are bold, medium, light, black, and heavy - Dell 2155CDN | User Manual - Page 584
FILE LOCATION: C:\Users\fxstdpcadmin\Desktop\0630_UG??\Mioga_AIO_UG_FM\Mioga_AIO_UG_FM\section24.fm Pitch number of characters that will print in one horizontal inch of type. For example, all 10-pitch fonts print 10 characters per inch (cpi) and all 12-pitch fonts print 12 cpi: In proportional (or - Dell 2155CDN | User Manual - Page 585
examples illustrate two very different proportional fonts at 14 point: Bitmapped and Scalable Fonts The printer uses both bitmapped and scalable fonts. Bitmapped fonts are stored in print memory as predefined patterns of bits that represent a typeface at a specific size, style, and resolution. The - Dell 2155CDN | User Manual - Page 586
it temporarily in print memory. These temporary bitmapped fonts are deleted when you turn off or reset the printer. Scalable fonts provide the flexibility of printing in many different point sizes. Your printer uses different scalable font formats for downloading fonts to the printer. PCL 5/PCL - Dell 2155CDN | User Manual - Page 587
permanently in print memory. Different fonts are available in PCL 5/PCL 6. Some of the most popular typefaces, like Courier and TimesNew, are available for all printer languages. The following table lists all the fonts resident in your printer. See "Printing Font Sample List" for instructions on how - Dell 2155CDN | User Manual - Page 588
FILE LOCATION: C:\Users\fxstdpcadmin\Desktop\0630_UG??\Mioga_AIO_UG_FM\Mioga_AIO_UG_FM\ print for each key on the keyboard (or more specifically, for each code point). Some applications require different characters at some code points. To support multiple applications and languages, your printer - Dell 2155CDN | User Manual - Page 589
FILE LOCATION: C:\Users\fxstdpcadmin\Desktop\0630_UG??\Mioga_AIO_UG_FM\Mioga_AIO_UG_FM\section24.fm Roman 8 (Default) ISO 8859-9 Latin 5 PC-8 DN PC-852 Latin 2 Windows 3.1 Latin 1 DeskTop Microsoft Publishing Pi Font ISO 6 ASCII ISO 17 Spanish ISO 69 French Symbol ISO 8859-1 Latin 1 ISO 8859-10 - Dell 2155CDN | User Manual - Page 590
FILE LOCATION: C:\Users\fxstdpcadmin\Desktop\0630_UG??\Mioga_AIO_UG_FM\Mioga_AIO_UG_FM\section24.fm DE LL CONFIDENTIAL - PRE LIMINARY 9/13/10 - FOR PROOF ONLY 588 Understanding Fonts - Dell 2155CDN | User Manual - Page 591
an error message appears, the print data remaining on the printer and the information accumulated in the memory of the printer are not secure. NOTE: An error code is listed in an error message. NOTE: For error messages that are not listed in this chapter, refer to instructions in each error messages - Dell 2155CDN | User Manual - Page 592
.fm Error-Code What you can do 004-310 Turn off the printer. Confirm that the optional 250-sheet feeder is correctly installed, and turn on the printer. Contact customer support if this failure is repeated. 004-311 Turn off the printer. Confirm that the duplexer is correctly installed, and - Dell 2155CDN | User Manual - Page 593
-523 016-524 016-527 016-531 016-532 016-533 016-545 016-535 016-536 Turn off the printer, and turn it on again. Contact customer support if (Set) button, or wait for 30 seconds for the printer to recover. Check if user name and password used for SMTP server are set correctly. Contact your system - Dell 2155CDN | User Manual - Page 594
to clear the message and cancel the current print job. Confirm the configuration of the printer on the printer driver. Press the (Set) button and try again. The device is not supported. Remove it from the front USB port. The USB hub is not supported. Remove it from the front USB port. DE LL - Dell 2155CDN | User Manual - Page 595
031-521 031-522 031-523 031-524 031-525 031-526 031-527 Press the (Set) button, or wait for 30 seconds for the printer to recover. Retry scanning by lowering the resolution setting or changing the file format of the scanned image. Reload the specified paper on the standard 250-sheet tray. Reload - Dell 2155CDN | User Manual - Page 596
??\Mioga_AIO_UG_FM\Mioga_AIO_UG_FM\section25.fm 031-528 031-529 031-530 031-531 031-532 031-533 031-534 031-535 031-536 031-537 031-539 031-540 031-541 Press the (Set) button, or wait for 30 seconds for the printer to recover. Check if the printer can communicate via network with the forwarding - Dell 2155CDN | User Manual - Page 597
to recover. On server security settings, check access permission of null password user. Press the (Set) button, or wait for 30 seconds for the printer to recover. Check append access right to the file. Check if server supports SMB append command. Press the (Set) button, or wait for 30 seconds - Dell 2155CDN | User Manual - Page 598
??\Mioga_AIO_UG_FM\Mioga_AIO_UG_FM\section25.fm 031-578 031-579 031-580 031-581 031-582 031-584 031-585 031-587 031-588 031-590 031-594 031-595 031-598 031-599 Press the (Set) button, or wait for 30 seconds for the printer to recover. Check if login name (user name) and password are correct. Press - Dell 2155CDN | User Manual - Page 599
numbers. NOTE: For more information, see "Junk Fax Setup." Press the (Set) button, or wait for 30 seconds for the printer to recover. Try the following: • Remove the received fax, or wait for a while until sending a fax is completed. • Print the fax job stored using the Secure Receive feature. NOTE - Dell 2155CDN | User Manual - Page 600
. Wait for a while until the printer cools down. Remove the standard 250-sheet tray and jammed paper. Open and close the front cover. Set side 2 of the sheet to the standard 250-sheet tray. Press the (Set) button. Remove the optional 250-sheet feeder and jammed paper. Open and close the front cover - Dell 2155CDN | User Manual - Page 601
. Close the toner access cover. Remove the ribbon from the PHD unit. Contact customer support if this failure is repeated. Open the front cover, and make sure that the PHD unit is fully installed. Clean the CTD sensor. Remove and shake the yellow cartridge. Contact customer support if this failure - Dell 2155CDN | User Manual - Page 602
toner access cover. Remove the unsupported cyan cartridge, and install a supported cartridge. Open the toner access cover. Remove the unsupported black cartridge, and install a supported cartridge. Open the front cover. Remove the unsupported PHD unit, and install a supported unit. Open the toner - Dell 2155CDN | User Manual - Page 603
network printing with WSD, the new Microsoft® protocol for Microsoft Windows® Vista®, Windows Server® 2008, Windows Server 2008 R2, and Windows 7. Adding Roles of Printer Services When you use Windows Server 2008 or Windows Server 2008 R2, you need to add the roles of print services to the Windows - Dell 2155CDN | User Manual - Page 604
: C:\Users\fxstdpcadmin\Desktop\0630_UG??\Mioga_AIO_UG_FM\Mioga_AIO_UG_FM\section26.fm Printer Setup You can install your new printer on the network using the Drivers and Utilities CD that shipped with your printer, or using Microsoft Windows' Add Printer wizard. Installing a Printer Driver Using - Dell 2155CDN | User Manual - Page 605
print installation. a Click Start Control Panel Hardware and Sound Printers (Start Devices and Printers for Windows Server 2008 R2 and Windows 7). b Right-click the printer you just created, and then click Properties (Printer properties for Windows Server 2008 R2 and Windows 7). For PCL driver - Dell 2155CDN | User Manual - Page 606
FILE LOCATION: C:\Users\fxstdpcadmin\Desktop\0630_UG??\Mioga_AIO_UG_FM\Mioga_AIO_UG_FM\section26.fm DE LL CONFIDENTIAL - PRE LIMINARY 9/13/10 - FOR PROOF ONLY 604 Printing With Web Services on Devices (WSD) - Dell 2155CDN | User Manual - Page 607
Operating System Compatibility Your Dell™ 2155cn/2155cdn Multifunction Color Printer is compatible with Microsoft® Windows® XP, Windows XP 64-bit Edition, Windows Server® 2003, Windows Server 2003 x64 Edition, Windows Server 2008, Windows Server 2008 64-bit Edition, Windows Server 2008 R2 64 - Dell 2155CDN | User Manual - Page 608
routers, or computers). This information helps network administrators manage the network (analyze performance, traffic, errors, and so on). Dell 2155cn/2155cdn Multifunction Color Printer complies with standard industry MIB specifications, allowing the printer to be recognized and managed by various - Dell 2155CDN | User Manual - Page 609
to 40 °C (0 °F to 104 °F) 5 % - 85 % RH (no condensation) Operating Storage Up to 3,100 m (10,000 feet) 70.9275 Kpa Cables Your interconnection cable must meet the following requirements: Connection type Connection specifications and symbols 1 USB USB 2.0 2 Wireless IEEE 802.11b/802.11g/802 - Dell 2155CDN | User Manual - Page 610
FILE LOCATION: C:\Users\fxstdpcadmin\Desktop\0630_UG??\Mioga_AIO_UG_FM\Mioga_AIO_UG_FM\section27.fm Copier Specifications Item Copy Resolution Copy Speed Paper Size Zoom Rate Multiple copies Copy mode (=Original Type) Description Optical: 600 dpi x 600 dpi Color 23 cpm or more, Black & White 23 - Dell 2155CDN | User Manual - Page 611
bit depth Effective scanning length Effective scanning width Scan speed (Text mode) Description TWAIN, Windows Image Acquisition (WIA) Optical: 600 dpi x 600 dpi, 1,200 dpi x 1,200 dpi Enhanced: 9,600 dpi x 9,600 dpi (Gray and Color only in TWAIN) 24 bit (WIA, TWAIN) 1 bit for Line art. 8 bit for - Dell 2155CDN | User Manual - Page 612
7.5 seconds/Letter (at fine fax resolution mode) Maximum document length Document glass: 297 mm ADF: 355.6 mm Paper size Letter, A4 (depending on a country) Resolution Standard: R8 x 3.85 l/mm, Fine: R8 x 7.7l/mm, Super Fine: 400 dpi x 400 dpi, Photo: R8 x 7.71/mm User Memory 4 MB (320 pages - Dell 2155CDN | User Manual - Page 613
Maintaining Your Printer 611 - Dell 2155CDN | User Manual - Page 614
612 - Dell 2155CDN | User Manual - Page 615
images used and procedures described in this manual are those of Dell™ 2155cdn Multifunction Color Printer. Determining the Status of Supplies If your printer is connected to the network, the Dell Printer Configuration Web Tool can provide instant feedback on remaining toner levels. Type the printer - Dell 2155CDN | User Manual - Page 616
at: to order toner for your printer. You can also order toner cartridges by the following method. 1 Click Start All Programs Dell Printers Additional Color Laser Software Dell Supplies Management System. The Dell Supplies Management System window appears. 2 Select your printer from the Select - Dell 2155CDN | User Manual - Page 617
." It is recommended to use Dell toner cartridges for your printer. Dell does not provide warranty coverage for problems caused by using accessories, parts, or components not supplied by Dell. CAUTION: Never throw used toner cartridges into fire. The residual toner could explode resulting in burns - Dell 2155CDN | User Manual - Page 618
Removing the Toner Cartridge 1 Open the toner access cover. 2 Push the latch(es) backwards to pop open the toner cartridge(s) that you want to replace. 3 Pull the cartridge holder until it clicks, and then pull out the toner cartridge. 616 Maintaining Your Printer - Dell 2155CDN | User Manual - Page 619
not shake the toner cartridge as it may cause toner spills. Installing a Toner Cartridge 1 Ensure that the color of the new toner cartridge matches that on the handle before replacing it. Shake the new toner cartridge five or six times to distribute the toner evenly. Maintaining Your Printer 617 - Dell 2155CDN | User Manual - Page 620
2 Insert the toner cartridge into the associated cartridge holder, and then slide the latch of the toner cartridge. 3 Close the toner access cover. 618 Maintaining Your Printer - Dell 2155CDN | User Manual - Page 621
or scratches the surface (black-colored film) of the belt unit. Scratches, dirt, or oil from your hands on the film of the belt unit may reduce print quality. Removing the PHD Unit 1 Ensure that the printer is turned off. 2 Pull the standard 250-sheet tray out of the printer about 200 mm. Hold - Dell 2155CDN | User Manual - Page 622
3 Push the side button to open the front cover. 4 Open the belt unit. 620 Maintaining Your Printer - Dell 2155CDN | User Manual - Page 623
5 Turn the four PHD lock levers 90-degrees counterclockwise. 6 Hold the gray tabs, and then pull the PHD unit out of the printer. Maintaining Your Printer 621 - Dell 2155CDN | User Manual - Page 624
Installing a PHD Unit 1 Open the PHD packaging. 622 Maintaining Your Printer - Dell 2155CDN | User Manual - Page 625
2 Take out the PHD unit from the packaging. 3 Completely pull out the eight yellow ribbons from the PHD unit. 4 Remove the rear protective cover from the PHD unit. NOTE: Do not remove the front protective cover at this moment. Maintaining Your Printer 623 - Dell 2155CDN | User Manual - Page 626
5 Insert the PHD unit until the line on the handle aligns with the white line on the printer. 6 Turn the four PHD lock levers 90-degrees clockwise to lock the PHD unit. 624 Maintaining Your Printer - Dell 2155CDN | User Manual - Page 627
7 Remove the front protective cover from the PHD unit. NOTICE: Ensure that you do not hit the belt unit when removing the front protective cover. Maintaining Your Printer 625 - Dell 2155CDN | User Manual - Page 628
8 Close the belt unit, and push at the top of the unit until it clicks. 9 Close the front cover. 626 Maintaining Your Printer - Dell 2155CDN | User Manual - Page 629
10 Insert the standard 250-sheet tray into the printer, and push until it stops. Replacing the Retard Roller Keeping the retard roller in the paper tray clean helps ensure the best possible copies. It is recommended to clean the retard roller at regular intervals. CAUTION: To prevent electric shock - Dell 2155CDN | User Manual - Page 630
, parts, or components not supplied by Dell. Removing the Retard Roller in the Standard 250-Sheet Tray 1 Pull the standard 250-sheet tray out of the printer about 200 mm. Hold the standard 250-sheet tray with both hands, and remove it from the printer. NOTE: Ensure that you remove all the paper - Dell 2155CDN | User Manual - Page 631
Installing a Retard Roller in the Standard 250-Sheet Tray 1 Align the new retard roller with the groove on the axle. Maintaining Your Printer 629 - Dell 2155CDN | User Manual - Page 632
into the axle until it snaps. The protrusions fit completely into the slots and the roller hook reseats into the groove on the axle. 3 Load paper in the standard 250-sheet tray, and then insert the tray into the printer and push until it stops. 630 Maintaining Your - Dell 2155CDN | User Manual - Page 633
feed roller inside the printer if print media does not feed correctly. 1 Ensure that the printer is turned off. 2 Pull the standard 250-sheet tray out of the printer about 200 mm. Hold the standard 250-sheet tray with both hands, and remove it from the printer. 3 Push the side button to open the - Dell 2155CDN | User Manual - Page 634
4 Open the belt unit. 5 Turn the four PHD lock levers 90-degrees counterclockwise. 632 Maintaining Your Printer - Dell 2155CDN | User Manual - Page 635
6 Hold the gray tabs, and then pull out the PHD unit. Maintaining Your Printer 633 - Dell 2155CDN | User Manual - Page 636
NOTE: Keep the PHD unit in a dark place. If the front cover remains open for more than three minutes, print quality may deteriorate. 7 Clean the feed roller inside the printer with a dry cloth. 634 Maintaining Your Printer - Dell 2155CDN | User Manual - Page 637
8 Insert the PHD unit until it stops, and then turn the four PHD lock levers 90degrees clockwise to lock the PHD unit. 9 Close the belt unit, and push at the top of the unit until it clicks. Maintaining Your Printer 635 - Dell 2155CDN | User Manual - Page 638
10 Close the front cover. 11 Insert the standard 250-sheet tray into the printer, and push until it stops. 636 Maintaining Your Printer - Dell 2155CDN | User Manual - Page 639
the Color Toner Density (CTD) sensor only when an alert for the CTD sensor is shown on the Status Monitor or operator panel. 1 Ensure that the printer is turned off. 2 Pull the standard 250-sheet tray out of the printer about 200 mm. Hold the standard 250-sheet tray with both hands, and remove it - Dell 2155CDN | User Manual - Page 640
4 Open the belt unit. 5 Clean the CTD sensor inside the printer with a clean dry cotton swab. 638 Maintaining Your Printer - Dell 2155CDN | User Manual - Page 641
6 Close the belt unit, and push at the top of the unit until it clicks. 7 Close the front cover. Maintaining Your Printer 639 - Dell 2155CDN | User Manual - Page 642
250-sheet tray into the printer, and push until it stops. Cleaning the Scanner Keeping the scanner clean helps ensure the best possible copies. It is recommended to clean the scanner at the start of each day and during the day, as needed. 1 Slightly dampen a soft lint-free cloth or paper towel with - Dell 2155CDN | User Manual - Page 643
3 Wipe the surface of the document glass and ADF glass until it is clean and dry. 1 White Sheet NOTE: Handle with care. 2 Document Cover 3 Document Glass Maintaining Your Printer 641 - Dell 2155CDN | User Manual - Page 644
Keeping the ADF feed roller clean helps ensure the best possible copies. It is recommended to clean the ADF feed roller at regular ink stains, paper from the ADF may also be soiled. In this case, slightly dampen a soft lint-free cloth or paper towel with a neutral detergent or water, and then remove - Dell 2155CDN | User Manual - Page 645
first install the printer or after moving it to a new location, follow the procedure below. • Printing the Color Registration Chart • Determining Values • Entering Values Printing the Color Registration Chart When Using the Operator Panel 1 Press the (Menu) button. 2 Press button until System Setup - Dell 2155CDN | User Manual - Page 646
: 1 Click Start All Programs Dell Printers Dell 2155 Multifunction Color Printer Tool Box. NOTE: The Select Printer window appears in this step when multiple printer drivers are installed on your computer. In this case, click the name of this printer listed in Printer Names, and then click OK - Dell 2155CDN | User Manual - Page 647
line, make a note of the value (-9 - +9) indicated by the medium line for each color. When the value is 0 for each color, you do not need to adjust the color registration for the slow scan. When the value is not 0, enter the value using the procedure in "Entering Values." Maintaining Your Printer - Dell 2155CDN | User Manual - Page 648
Using the operator panel, enter the values found in the color registration chart to make adjustments. 1 Press the (Menu) button. 2 Press button until System Setup is highlighted, and then press the (Set) button. 3 Press button until Admin Menu is highlighted, and then press the (Set) button. 4 Press - Dell 2155CDN | User Manual - Page 649
the values that you found in the color registration chart to make adjustments. 1 Click Start All Programs Dell Printers Dell 2155 Multifunction Color Printer Tool Box. NOTE: The Select Printer window appears in this step when multiple printer drivers are installed on your computer. In this case - Dell 2155CDN | User Manual - Page 650
next to Print Color Regi Chart. The color registration chart is printed with the new values. 6 Adjust till all straight lines are at the value of 0. Show image of before and after adjustment will help. After printing the color registration chart, do not turn off the printer until the printer motor - Dell 2155CDN | User Manual - Page 651
be shipped to a new location, all print media handling options must be removed from the printer. For shipping, pack the printer and print media handling options securely to avoid damage. Removing the Optional Memory Module CAUTION: When you remove the optional memory module, be sure to turn off the - Dell 2155CDN | User Manual - Page 652
: C:\Users\fxstdpcadmin\Desktop\0630_UG??\Mioga_AIO_UG_FM\Mioga_AIO_UG_FM\section29.fm 4 Open the control board cover completely. 5 Push the clips on both sides of the slot outward to raise the memory module up. DE LL CONFIDENTIAL - PRE LIMINARY 9/13/10 - FOR PROOF ONLY 650 Removing Options - Dell 2155CDN | User Manual - Page 653
??\Mioga_AIO_UG_FM\Mioga_AIO_UG_FM\section29.fm 6 Hold the memory module and pull it straight out. 7 Close the control board cover, and then slide it towards the front of the printer. D E L L C ON F I D E N T I A L - P R E L I M I N A RY 9 / 1 3 / 1 0 - F O R P R O O F O N LY Removing Options 651 - Dell 2155CDN | User Manual - Page 654
cable. Then, disconnect all cables from the back of the printer. 2 Pull the standard 250-sheet tray out of the printer about 200 mm. Hold the tray with both hands, and remove it from the printer. 3 Remove the two screws joining the printer and the optional 250-sheet feeder by unscrewing them with - Dell 2155CDN | User Manual - Page 655
printer. The printer should be lifted holding the front and back. Never lift the printer from its sides. 5 Insert the standard 250-sheet tray into the printer, and push until it stops. D E L L C ON F I D E N T I A L - P R E L I M I N A RY 9 / 1 3 / 1 0 - F O R P R O O F O N LY Removing Options - Dell 2155CDN | User Manual - Page 656
not use excessive force on the tray. Doing so could damage the tray or the inside of the printer. 6 Reconnect all cables including the power cable into the back of the printer and turn on the printer. Removing the Optional Wireless Adapter CAUTION: When you remove the optional wireless adapter, be - Dell 2155CDN | User Manual - Page 657
FILE LOCATION: C:\Users\fxstdpcadmin\Desktop\0630_UG??\Mioga_AIO_UG_FM\Mioga_AIO_UG_FM\section29.fm 3 Slide the control board cover towards the back of the printer. 4 Open the control board cover completely. 5 Remove the wireless adapter from the printer by releasing the adapter's hook while - Dell 2155CDN | User Manual - Page 658
FILE LOCATION: C:\Users\fxstdpcadmin\Desktop\0630_UG??\Mioga_AIO_UG_FM\Mioga_AIO_UG_FM\section29.fm 6 Close the control board cover, and then slide it towards the front of the printer. 7 Turn the screw clockwise. DE LL CONFIDENTIAL - PRE LIMINARY 9/13/10 - FOR PROOF ONLY 656 Removing Options - Dell 2155CDN | User Manual - Page 659
FILE LOCATION: C:\Users\fxstdpcadmin\Desktop\0630_UG??\Mioga_AIO_UG_FM\Mioga_AIO_UG_FM\section29.fm 8 Turn on the printer. D E L L C ON F I D E N T I A L - P R E L I M I N A RY 9 / 1 3 / 1 0 - F O R P R O O F O N LY Removing Options 657 - Dell 2155CDN | User Manual - Page 660
FILE LOCATION: C:\Users\fxstdpcadmin\Desktop\0630_UG??\Mioga_AIO_UG_FM\Mioga_AIO_UG_FM\section29.fm DE LL CONFIDENTIAL - PRE LIMINARY 9/13/10 - FOR PROOF ONLY 658 Removing Options - Dell 2155CDN | User Manual - Page 661
Print Media." • Do not remove the feeding tray during a print job. • Push the tray in firmly after loading. • Ensure that all cables that connect to the printer are correctly attached. D E L L C ON F I D E N T I A L - P R E L I M I N A RY 9 / 1 3 / 1 0 - F O R P R O O F O N LY Clearing Jams - Dell 2155CDN | User Manual - Page 662
using tools or instruments. This may permanently damage the printer. The following illustration shows where paper jams may occur along the print media path. 1 Automatic Document Feeder (ADF) 2 Duplexer (2155cdn only) 3 Fuser 4 Optional 250-Sheet Feeder DE LL CONFIDENTIAL - PRE LIMINARY 9/13/10 - Dell 2155CDN | User Manual - Page 663
mixed documents. NOTICE: Protect the drums of the Print Head Device (PHD) against bright light. If the front cover remains open for more than three minutes, print quality may deteriorate. 1 Remove the remaining documents from the ADF. If the document is jammed in the paper feed area: a Open the ADF - Dell 2155CDN | User Manual - Page 664
FILE LOCATION: C:\Users\fxstdpcadmin\Desktop\0630_UG??\Mioga_AIO_UG_FM\Mioga_AIO_UG_FM\section30.fm If you find it difficult to pull the document: c Remove the release roller assembly and remove the document by gently pulling it straight up. d Insert the release roller assembly and press down the - Dell 2155CDN | User Manual - Page 665
FILE LOCATION: C:\Users\fxstdpcadmin\Desktop\0630_UG??\Mioga_AIO_UG_FM\Mioga_AIO_UG_FM\section30.fm If the document is jammed in the paper exit area: e Remove the jammed document from the document output tray. f Close the ADF cover, and then load the documents back into the ADF. D E L L C ON F I D - Dell 2155CDN | User Manual - Page 666
document cover. 3 Remove the document from the ADF feeder roller or the feed area by carefully pulling it to the right. 4 Close the document cover, and then load the documents back into the ADF. Clearing Paper Jams From the SSF NOTICE: Protect the drums of the Print Head Device (PHD) against bright - Dell 2155CDN | User Manual - Page 667
FILE LOCATION: C:\Users\fxstdpcadmin\Desktop\0630_UG??\Mioga_AIO_UG_FM\Mioga_AIO_UG_FM\section30.fm 2 Remove the standard 250-sheet tray from the printer, and then pull out the jammed paper remaining inside the printer. If no jammed paper can be found or you are unable to remove the paper, go to the - Dell 2155CDN | User Manual - Page 668
FILE LOCATION: C:\Users\fxstdpcadmin\Desktop\0630_UG??\Mioga_AIO_UG_FM\Mioga_AIO_UG_FM\section30.fm 3 Push the side button to open the front cover. 4 Open the belt unit until it stops and remove the jammed paper. Confirm that there are no scraps of paper remaining inside the printer. DE LL - Dell 2155CDN | User Manual - Page 669
: C:\Users\fxstdpcadmin\Desktop\0630_UG??\Mioga_AIO_UG_FM\Mioga_AIO_UG_FM\section30.fm 5 Close the belt unit, and push at the top of the unit until it clicks. 6 Close the front cover. D E L L C ON F I D E N T I A L - P R E L I M I N A RY 9 / 1 3 / 1 0 - F O R P R O O F O N LY Clearing Jams 667 - Dell 2155CDN | User Manual - Page 670
the tray or the inside of the printer. Clearing Paper Jams From the Standard 250Sheet Tray NOTICE: Protect the drums of the Print Head Device (PHD) against bright light. If the front cover remains open for more than three minutes, print quality may deteriorate. NOTE: To resolve the error displayed - Dell 2155CDN | User Manual - Page 671
\section30.fm 2 Remove all the jammed and/or creased paper from the tray. 3 Pull the jammed paper out carefully to avoid tearing it. If you are still unable to remove the paper, go to the next step to remove the jammed paper from the inside of the printer. 4 Push the side button to open - Dell 2155CDN | User Manual - Page 672
LOCATION: C:\Users\fxstdpcadmin\Desktop\0630_UG??\Mioga_AIO_UG_FM\Mioga_AIO_UG_FM\section30.fm 5 Open the belt unit until it stops and remove the jammed paper. Confirm that there are no scraps of paper remaining inside the printer. 6 Close the belt unit, and push at the top of the unit until it - Dell 2155CDN | User Manual - Page 673
C:\Users\fxstdpcadmin\Desktop\0630_UG??\Mioga_AIO_UG_FM\Mioga_AIO_UG_FM\section30.fm 7 Close the front cover. 8 Insert the standard 250-sheet tray into the printer, and push until it stops. D E L L C ON F I D E N T I A L - P R E L I M I N A RY 9 / 1 3 / 1 0 - F O R P R O O F O N LY Clearing Jams - Dell 2155CDN | User Manual - Page 674
printer. Clearing Paper Jams From the Fuser NOTICE: Ensure nothing touches or scratches the surface (black-colored film) of the belt unit. Scratches, dirt, or oil from your hands on the film of the belt unit may reduce print quality. NOTICE: Protect the drums of the Print Head Device (PHD) against - Dell 2155CDN | User Manual - Page 675
FILE LOCATION: C:\Users\fxstdpcadmin\Desktop\0630_UG??\Mioga_AIO_UG_FM\Mioga_AIO_UG_FM\section30.fm 3 Open the belt unit. 4 Lift the levers at both ends of the fuser, and remove the jammed paper. If you are still unable to remove the paper, go to the next step. D E L L C ON F I D E N T I A L - P R - Dell 2155CDN | User Manual - Page 676
: C:\Users\fxstdpcadmin\Desktop\0630_UG??\Mioga_AIO_UG_FM\Mioga_AIO_UG_FM\section30.fm CAUTION: The fuser is hot. Do not touch it, doing so may cause burns. 5 Open the cover of the fuser and remove the jammed paper. 6 Close the cover of the fuser and press down the levers at both ends of the fuser - Dell 2155CDN | User Manual - Page 677
\0630_UG??\Mioga_AIO_UG_FM\Mioga_AIO_UG_FM\section30.fm 7 Confirm that there are no scraps of paper remaining inside the printer, and then close the belt unit. 8 Close the front cover. D E L L C ON F I D E N T I A L - P R E L I M I N A RY 9 / 1 3 / 1 0 - F O R P R O O F O N LY Clearing Jams 675 - Dell 2155CDN | User Manual - Page 678
.fm Clearing Paper Jams From the Duplexer NOTE: To resolve the error displayed on the operator panel, you must clear all print media from the print media path. 1 Push the side button to open the front cover. 2 Open the cover of the duplexer. 3 Remove the jammed paper from the duplexer. DE LL - Dell 2155CDN | User Manual - Page 679
Paper Jams From the Optional 250-Sheet Feeder NOTE: To resolve the error displayed on the operator panel, you must clear all print media from the print media path. 1 Pull the optional 250-sheet feeder out of the printer carefully. Hold the feeder with both hands, and remove it from the printer - Dell 2155CDN | User Manual - Page 680
paper jammed in the standard 250-sheet tray can block the optional 250-sheet feeder in the printer, preventing you from opening it. Look for the jammed paper sequentially, starting with the optional 250-sheet feeder. 2 Remove all jammed and/or creased paper from the feeder. 3 Pull the jammed paper - Dell 2155CDN | User Manual - Page 681
FILE LOCATION: C:\Users\fxstdpcadmin\Desktop\0630_UG??\Mioga_AIO_UG_FM\Mioga_AIO_UG_FM\section30.fm 4 Push the side button to open the front cover. 5 Open the belt unit until it stops and remove the jammed paper. Confirm that there are no scraps of paper remaining inside the printer. D E L L C ON F - Dell 2155CDN | User Manual - Page 682
FILE LOCATION: C:\Users\fxstdpcadmin\Desktop\0630_UG??\Mioga_AIO_UG_FM\Mioga_AIO_UG_FM\section30.fm 6 Close the belt unit, and push at the top of the unit until it clicks. 7 Close the front cover. DE LL CONFIDENTIAL - PRE LIMINARY 9/13/10 - FOR PROOF ONLY 680 Clearing Jams - Dell 2155CDN | User Manual - Page 683
\Mioga_AIO_UG_FM\section30.fm NOTE: If the paper jam message is not cleared after closing the front cover, pull out the standard 250-sheet tray and check if there is a jammed paper in the opening of the tray. 8 Insert the optional 250-sheet feeder into the printer, and push until it stops. NOTICE - Dell 2155CDN | User Manual - Page 684
FILE LOCATION: C:\Users\fxstdpcadmin\Desktop\0630_UG??\Mioga_AIO_UG_FM\Mioga_AIO_UG_FM\section30.fm DE LL CONFIDENTIAL - PRE LIMINARY 9/13/10 - FOR PROOF ONLY 682 Clearing Jams - Dell 2155CDN | User Manual - Page 685
Troubleshooting D E L L C ON F I D E N T I A L - P R E L I M I N A RY 9 / 1 3 / 1 0 - F O R P R O O F O N LY 683 - Dell 2155CDN | User Manual - Page 686
FILE LOCATION: C:\Users\fxstdpcadmin\Desktop\0630_UG??\Mioga_AIO_UG_FM\Mioga_AIO_UG_FM\section31.fm DE LL CONFIDENTIAL - PRE LIMINARY 9/13/10 - FOR PROOF ONLY 684 - Dell 2155CDN | User Manual - Page 687
: C:\Users\fxstdpcadmin\Desktop\0630_UG??\Mioga_AIO_UG_FM\Mioga_AIO_UG_FM\section31.fm 31 Troubleshooting Guide Basic Printer Problems Some printer problems can be easily resolved. If a problem occurs with your printer, check each of the following: The power cable is plugged into the printer and - Dell 2155CDN | User Manual - Page 688
the spooler has not stalled. Check the printer's interface from the Admin Menu. Determine the host interface you are using. Print a panel settings page to verify that the current interface settings are correct. DE LL CONFIDENTIAL - PRE LIMINARY 9/13/10 - FOR PROOF ONLY 686 Troubleshooting Guide - Dell 2155CDN | User Manual - Page 689
the specifications for your printer. See "Supported Paper Types" for more information. Fan the print media before loading it in the standard 250-sheet tray. Ensure that the print media is loaded correctly. Ensure that the width and length guides of the print media sources are adjusted correctly - Dell 2155CDN | User Manual - Page 690
or Flip on Long Edge from the Duplex menu on the Paper/Output tab in the printer driver. Cannot print from the Load the print media into the single sheet feeder. standard 250-sheet tray because the print media in the tray is curled. Print Quality Problems NOTE: Some of the following procedures - Dell 2155CDN | User Manual - Page 691
cartridges, The task is disable the Non-Dell Toner option. complete. a Launch the Tool Box, and click Non-Dell Toner on the Printer Maintenance tab. b Ensure that the On check box is not selected. Does this solve your problem? 3 Disable the Toner Saving Mode in the printer The task is driver - Dell 2155CDN | User Manual - Page 692
"Supported Paper Types." If not, use the print complete. media recommended for the printer. Go to action 6. Does this solve your problem? 6 Ensure that the eight yellow ribbons are correctly The task is removed from the Print Head Device (PHD) unit. complete. See "Removing the Print Head Device - Dell 2155CDN | User Manual - Page 693
10. CAUTION: Using the Refresh Mode consumes extra toner. d After you complete the Toner Refresh Mode, select Chart Print from the list on the Diagnosis tab. e Click the 4 Colors Configuration Chart button. The 4 Colors Configuration Chart is printed. Does this solve your problem? D E L L C ON - Dell 2155CDN | User Manual - Page 694
the Print Head Device (PHD) Unit" and "Installing a PHD Unit." b After you replace the PHD unit, click Chart Print on the Diagnosis tab. c Click the 4 Colors Configuration Chart button. The task is complete. The 4 Colors Configuration Chart is printed. Does this solve your problem? Toner smears - Dell 2155CDN | User Manual - Page 695
the PHD unit. See "Replacing the Print Head Device (PHD) Unit" and "Installing a PHD Unit." b After you replace the PHD unit, test print your document again. Does this solve your problem? Yes The task is complete. Random spots/Blurred images No Contact Dell. Action Yes 1 Ensure that the toner - Dell 2155CDN | User Manual - Page 696
Users\fxstdpcadmin\Desktop\0630_UG??\Mioga_AIO_UG_FM\Mioga_AIO_UG_FM\section31.fm Action Yes 3 Replace the PHD unit if you have a spare unit. a Replace the PHD unit. See "Replacing the Print Head Device (PHD) Unit" and "Installing a PHD Unit." The task is complete. b After you replace the PHD - Dell 2155CDN | User Manual - Page 697
Paper Types." If not, use the print complete. media recommended for the printer. Go to action 6. Does this solve your problem? 6 Ensure that eight yellow ribbons are correctly The task is removed from the PHD unit. See "Replacing the complete. Print Head Device (PHD) Unit" and "Installing a PHD - Dell 2155CDN | User Manual - Page 698
Replacing the Print Head Device (PHD) Unit" and complete. "Installing a PHD Unit." b After you replace the PHD unit, click Chart Print on the Diagnosis tab. c Click the 4 Colors Configuration Chart button. Contact Dell. The 4 Colors Configuration Chart is printed. Does this solve your problem - Dell 2155CDN | User Manual - Page 699
, and click Non-Dell Toner on the Printer Maintenance tab. b Ensure that the On check box is not selected. Does this solve your problem? 3 Replace the PHD unit if you have a spare unit. a Replace the PHD unit. See "Replacing the Print Head Device (PHD) Unit" and "Installing a PHD Unit." The task - Dell 2155CDN | User Manual - Page 700
is the printer driver. complete. a On the Graphics tab, ensure that the Output Color is set to Color (Auto). Does this solve your problem? 2 Replace the PHD unit if you have a spare unit. a Replace the PHD unit. See "Replacing the Print Head Device (PHD) Unit" and "Installing a PHD Unit." The - Dell 2155CDN | User Manual - Page 701
Is the cause of the problem located? • Fuser Contact Dell and replace the fuser. • Main unit of the printer - Contact Dell. 2 Replace the PHD unit if you have a spare unit. a Replace the PHD unit. See "Replacing the Print Head Device (PHD) Unit" and "Installing a PHD Unit." The task is complete - Dell 2155CDN | User Manual - Page 702
Configuration Chart is printed. Does this solve your problem? 2 Replace the PHD unit if you have a spare unit. a Replace the PHD unit. See "Replacing the Print Head Device (PHD) Unit" and "Installing a PHD Unit." The task is complete. b After you replace the PHD unit, click Chart Print on the - Dell 2155CDN | User Manual - Page 703
Chart is printed. 2a Is the type of the problem identified? Negative ghost - 2b 2a Replace the PHD unit if you have a spare unit. a Replace the PHD unit. See "Replacing the Print Head Device (PHD) Unit" and "Installing a PHD Unit." b After you replace the PHD unit, click Chart Print on the - Dell 2155CDN | User Manual - Page 704
the operator panel, press the (Menu) button and select System Setup Admin MenuMaintenance Adjust BTR. The task is complete. b Adjust the setting for the type of print media being used. c Launch the Tool Box, and click Chart Print on the Diagnosis tab. d Click the Ghost Configuration Chart - Dell 2155CDN | User Manual - Page 705
the Drum Refresh Mode, click Chart Print on the Diagnosis tab. c Click the 4 Colors Configuration Chart button. The 4 Colors Configuration Chart is printed. Does this solve your problem? 3 Replace the PHD unit if you have a spare unit. See "Replacing the Print Head Device (PHD) Unit" and "Installing - Dell 2155CDN | User Manual - Page 706
have a spare unit. See "Replacing the Print Head Device (PHD) Unit" and "Installing a PHD Unit." Does this solve your problem? Yes The task is complete. The task is complete. No Go to action 2. Contact Dell. DE LL CONFIDENTIAL - PRE LIMINARY 9/13/10 - FOR PROOF ONLY 704 Troubleshooting Guide - Dell 2155CDN | User Manual - Page 707
printer, operating system, complete. and the application being used. Does this solve your problem? No Go to action 2. Go to action 3. Go to action 4. Go to action 5. Contact Dell. D E L L C ON F I D E N T I A L - P R E L I M I N A RY 9 / 1 3 / 1 0 - F O R P R O O F O N LY Troubleshooting Guide - Dell 2155CDN | User Manual - Page 708
is printed. • PHD unit - 2 Is the cause of the problem located? • Fuser Contact Dell and replace the fuser. • Main unit of the printer Contact Dell. 2 Replace the PHD unit if you have a spare unit. a Replace the PHD unit. See "Replacing the Print Head Device (PHD) Unit" and "Installing a PHD - Dell 2155CDN | User Manual - Page 709
spare unit. See "Replacing the Print Head Device (PHD) Unit" and "Installing a PHD Unit." The task is complete. Contact Dell. Does this solve your problem? Wrinkled/Stained paper D E L L C ON F I D E N T I A L - P R E L I M I N A RY 9 / 1 3 / 1 0 - F O R P R O O F O N LY Troubleshooting Guide - Dell 2155CDN | User Manual - Page 710
the Paper Wrinkle Check Mode. Contact Dell. a Launch the Tool Box, and click Paper Wrinkle Check Mode on the Diagnosis tab. b Click the Start button. Contact Dell to replace fuser. Is the paper wrinkled? DE LL CONFIDENTIAL - PRE LIMINARY 9/13/10 - FOR PROOF ONLY 708 Troubleshooting Guide - Dell 2155CDN | User Manual - Page 711
? 3 Use any of other tray in place of the SSF. Does this solve your problem? The task is complete. No (SSF) Go to action 2. (trays) Contact Dell. Go to action 3. Contact Dell. D E L L C ON F I D E N T I A L - P R E L I M I N A RY 9 / 1 3 / 1 0 - F O R P R O O F O N LY Troubleshooting Guide 709 - Dell 2155CDN | User Manual - Page 712
"Dell Printer Configuration Web Tool." • The top and side margins are incorrect • Color registration is out of alignment • Images are skewed • Standard 250-Sheet Tray Misfeed Jam • SSF Misfeed Jam • Optional 250-Sheet Feeder Misfeed Jam • Regi Jam (Exit Sensor On JAM) • Exit Jam (Exit Sensor Off JAM - Dell 2155CDN | User Manual - Page 713
. Does this solve your problem? 2 Do you have a spare PHD unit? Go to action 3a. Go to action 3b. 3a Replace the PHD unit if you have a spare unit. The task is a Replace the PHD unit. See "Replacing the Print Head Device (PHD) Unit" and "Installing a PHD Unit." complete. b Launch the Tool - Dell 2155CDN | User Manual - Page 714
task is complete. Images are skewed No Contact Dell. Action 1 Adjust the paper guides properly. Does this solve your problem? Yes The task is complete. No Contact Dell. Standard 250-Sheet Tray Misfeed Jam DE LL CONFIDENTIAL - PRE LIMINARY 9/13/10 - FOR PROOF ONLY 712 Troubleshooting Guide - Dell 2155CDN | User Manual - Page 715
250-Sheet Tray and the Optional 250-Sheet Feeder." Does this solve your problem? No Proceed to the action corresponding to the type of the print media being used: • Thick - 2a • Thin - 2b • Coated - 2c • Envelope - 2d If performing manual duplex printing, go to action 2e. If using paper other than - Dell 2155CDN | User Manual - Page 716
or use another envelope. Does this solve your problem? 3d Turn over the print media. Does this solve your problem? 4a Use print media that is not damp. Does this solve your problem? 4b Replace the PHD unit if you have a spare unit. Does this solve your problem? Yes The task is complete. No Go to - Dell 2155CDN | User Manual - Page 717
to the action corresponding to the type of the print media being used: • Thick - 2a • Thin - 2b • Coated - 2c • Envelope 2d If performing manual duplex printing, go to action 2e. 2a Use thick paper that is 216 g/m2 or less. Does this solve your problem? 2b Use thin paper that is 60 g/m2 or - Dell 2155CDN | User Manual - Page 718
that is not damp. Does this solve your problem? The task is complete. Go to action 3a. 4b Replace the PHD unit if you have a spare unit. Does this solve your problem? The task is complete. Contact Dell. Optional 250-Sheet Feeder Misfeed Jam Action 1 Ensure that the optional 250-sheet feeder - Dell 2155CDN | User Manual - Page 719
action 4a. Regi Jam (Exit Sensor On JAM) Action 1 Ensure that the PHD unit is installed correctly. Does this solve your problem? 2 Replace the PHD unit if you have a spare unit. See "Replacing the Print Head Device (PHD) Unit." Does this solve your problem? Exit Jam (Exit Sensor Off JAM) Yes The - Dell 2155CDN | User Manual - Page 720
FILE LOCATION: C:\Users\fxstdpcadmin\Desktop\0630_UG??\Mioga_AIO_UG_FM\Mioga_AIO_UG_FM\section31.fm Action 1 Ensure the fuser is installed correctly. Does this solve your problem? Yes The task is complete. No Contact Dell. Standard 250-Sheet Tray/Optional 250-Sheet Feeder Multi-feed Jam Action - Dell 2155CDN | User Manual - Page 721
the PHD unit if you have a spare unit. Does this solve your problem? 3 Replace the toner cartridge (K). See "Replacing the Toner Cartridges." 4 Replace the toner cartridge (Y). See "Replacing the Toner Cartridges." Yes No Go to action 2. Go to action 3. The task is complete. Contact Dell. The - Dell 2155CDN | User Manual - Page 722
one.) 6 Replace the toner cartridge (C). See "Replacing the Toner Cartridges." The task is Contact Dell. complete. (The toner cartridge (C) you are using has been damaged. Replace it with a new one.) Copy Problem Problem A document loaded in the ADF cannot be copied. Fax Problems Action - Dell 2155CDN | User Manual - Page 723
in poor quality. Check your printer by making a copy. The toner cartridge may be empty. Replace the toner cartridge, see "Replacing the Toner Cartridges." A noisy phone line can cause line errors. Set the fax modem speed to a slower speed. The fax machine sending you the fax may be faulty. Some - Dell 2155CDN | User Manual - Page 724
Speed. The printer receive faxes, but Check the toner level. it does not print. Ensure that there is paper in the paper tray. Ensure that Sent Fax Fwd is set to off. Ensure that Junk Fax Setup is set to off. Ensure that Secure Receive Set is set to disabled. Execute Reset Defaults. DE LL - Dell 2155CDN | User Manual - Page 725
Ensure that the scanner sharing feature is disabled when you use Mac OS X before you scan documents via an ICA compatible application such as Image Capture. The printer does not support the scanner sharing feature of Mac OS X. Select a printer which is directly connected to the computer via USB or - Dell 2155CDN | User Manual - Page 726
Users\fxstdpcadmin\Desktop\0630_UG??\Mioga_AIO_UG_FM\Mioga_AIO_UG_FM\section31.fm Document misfeeds or multiple feeds occur in the Automatic Document Feeder (ADF). Check whether the ADF roller assembly is installed properly. Ensure the document's paper type meets the specifications for the printer - Dell 2155CDN | User Manual - Page 727
Address: • Server Address • Share Name • Server Path • Login Name • Login Password Scan to E-mail Check the following setting under Address BookEMail Address: • Address D E L L C ON F I D E N T I A L - P R E L I M I N A RY 9 / 1 3 / 1 0 - F O R P R O O F O N LY Troubleshooting Guide 725 - Dell 2155CDN | User Manual - Page 728
Tools, and then click Services. 2 Right-click Windows Image Acquisition (WIA), and then click Start. Cannot scan using TWAIN or Install the Desktop Experience feature on the computer. WIA on a Windows Server To install Desktop Experience: 2008 or Windows Server 2008 R2 computer. 1 Click - Dell 2155CDN | User Manual - Page 729
the suggested corrective action does not correct the problem, call customer service. Problem 250-sheet feeder Memory module Wireless printer adapter Action • Ensure the 250-sheet feeder is correctly installed on the printer. Re-install the feeder. See "Removing the Optional 250-Sheet Feeder" and - Dell 2155CDN | User Manual - Page 730
Manager. Install the scanner driver. If the scanner driver is installed, uninstall it and then re-install it again. After the installation of the scanner driver is completed, reinstall the ScanButton Manager. DE LL CONFIDENTIAL - PRE LIMINARY 9/13/10 - FOR PROOF ONLY 728 Troubleshooting Guide - Dell 2155CDN | User Manual - Page 731
then try scanning again. Network connection cannot be used. Connect with the USB cable. Uninstall ScanButton Manager from Control Panel Add or Remove Programs (Programs and Features in Windows Vista and Windows 7) on your computer and then re-install it again. Failed to create an image file via - Dell 2155CDN | User Manual - Page 732
the printer. "CTD Sensor Error Error 009-340 Code:xx Restart Printer", "Check CTD Unit 092-910 Clean CTD Sensor", or "Check CTD Unit 092-310" is displayed. "No Documents" is displayed on the operator panel when you are selecting a file for Printing from USB Memory feature. "Authentication error has - Dell 2155CDN | User Manual - Page 733
. Printable page limit reached, cannot print. Please contact the system administrator. 016759" is displayed on the Status Monitor. Contact your system administrator. "Multifunction printer error. Check the PHD unit and the Toner Cartridge. Contact customer support if this failure is repeated. 093 - Dell 2155CDN | User Manual - Page 734
: C:\Users\fxstdpcadmin\Desktop\0630_UG??\Mioga_AIO_UG_FM\Mioga_AIO_UG_FM\section31.fm Problem Action "Multifunction printer error. Check the PHD unit and the Toner Cartridge. Contact customer support if this failure is repeated. 093-921" is displayed on the Status Monitor. Replace the toner - Dell 2155CDN | User Manual - Page 735
FILE LOCATION: C:\Users\fxstdpcadmin\Desktop\0630_UG??\Mioga_AIO_UG_FM\Mioga_AIO_UG_FM\section31.fm D E L L C ON F I D E N T I A L - P R E L I M I N A RY 9 / 1 3 / 1 0 - F O R P R O O F O N LY Troubleshooting Guide 733 - Dell 2155CDN | User Manual - Page 736
FILE LOCATION: C:\Users\fxstdpcadmin\Desktop\0630_UG??\Mioga_AIO_UG_FM\Mioga_AIO_UG_FM\section31.fm DE LL CONFIDENTIAL - PRE LIMINARY 9/13/10 - FOR PROOF ONLY 734 Troubleshooting Guide - Dell 2155CDN | User Manual - Page 737
FILE LOCATION: C:\Users\fxstdpcadmin\Desktop\0630_UG??\Mioga_AIO_UG_FM\Mioga_AIO_UG_FM\section31.fm D E L L C ON F I D E N T I A L - P R E L I M I N A RY 9 / 1 3 / 1 0 - F O R P R O O F O N LY Troubleshooting Guide 735 - Dell 2155CDN | User Manual - Page 738
FILE LOCATION: C:\Users\fxstdpcadmin\Desktop\0630_UG??\Mioga_AIO_UG_FM\Mioga_AIO_UG_FM\section31.fm DE LL CONFIDENTIAL - PRE LIMINARY 9/13/10 - FOR PROOF ONLY 736 Troubleshooting Guide - Dell 2155CDN | User Manual - Page 739
Appendix D E L L C ON F I D E N T I A L - P R E L I M I N A RY 9 / 1 3 / 1 0 - F O R P R O O F O N LY 737 - Dell 2155CDN | User Manual - Page 740
FILE LOCATION: C:\Users\fxstdpcadmin\Desktop\0630_UG??\Mioga_AIO_UG_FM\Mioga_AIO_UG_FM\sectionAP.fm DE LL CONFIDENTIAL - PRE LIMINARY 9/13/10 - FOR PROOF ONLY 738 - Dell 2155CDN | User Manual - Page 741
drivers to the original default configuration as shipped from Dell, as well as the verification of appropriate functionality of the printer and all Dell-installed hardware. In addition to this technician assisted technical support, online technical support is available at Dell Support. Additional - Dell 2155CDN | User Manual - Page 742
your password. Warranty and Return Policy Dell Computer Corporation ("Dell") manufactures its hardware products from parts and components that are new or equivalent to new in accordance with industry-standard practices. For information about the Dell warranty for your printer, see support.dell.com - Dell 2155CDN | User Manual - Page 743
.ca (Canada only) • Anonymous file transfer protocol (FTP) ftp.dell.com Log in as user: anonymous, and use your email address as your password. • Electronic Support Service [email protected] [email protected] [email protected] (Latin America and Caribbean countries only) apsupport - Dell 2155CDN | User Manual - Page 744
FILE LOCATION: C:\Users\fxstdpcadmin\Desktop\0630_UG??\Mioga_AIO_UG_FM\Mioga_AIO_UG_FM\sectionAP.fm DE LL CONFIDENTIAL - PRE LIMINARY 9/13/10 - FOR PROOF ONLY 742 Appendix - Dell 2155CDN | User Manual - Page 745
Configuration Chart, 464 802.1x, 220, 243 (Backspace) button, 286 (Cancel) button, 286 A (Color Mode) button, 286 A4, 270 (Contacts) button, 286 A5, 270 (Copy) button, 285 About printer, 39 (Fax) button, 285 Access List, 244 (Menu) button, 287 Address Book, 164, 170, 194, 248 (Redial - Dell 2155CDN | User Manual - Page 746
Banner Sheet Specify Tray, 182, 196, 424 Auto IP, 487 Base memory, 605 Auto Log Print, 181, 196, 424, Base Tone, 181, 196, 423, 436 437, 506 Basic Information, 222 Auto Rec Ans/Fax, 431, 460, 491 Basic printer problem, 685 Auto Rec Fax, 431, 460, 490 Belt unit, 41 Auto Rec Fax/Tel, 431 - Dell 2155CDN | User Manual - Page 747
, 428-429, 452 Color Button, 190, 208 Color Button Set, 454 Color Button Set (Black & White Button), 429 Canceling print job From your computer, 293 Color Button Set (Color Button), 430 Carbonless copy paper, 263 Color Mode, 466 CCP, 263 Certificate Details, 241-242 Change printer settings, 306 - Dell 2155CDN | User Manual - Page 748
Panel Tone, 195, 422 Default Color, 183, 198, 479 Copy Color Balance, 186, 202 Default Print Paper Size, 181, Copy Completed, 435 196, 424, 438 Copy Completed Tone, 181, 423 Default Setup, 249 Copy Defaults, 185, 427 Delayed Start, 187, 204, 430, 457, 549 Copy Printer Settings, 164, 170 - Dell 2155CDN | User Manual - Page 749
a-AIO-UGIX.fm Dell technical support policy, 739 Drum Refresh Configuration Chart, 464 Details, 177 Drum Refresh Mode, 467 Determining Values, 644 DHCP, 487 Dimensions, 605 Duplex Print, 189, 206, 432, 462, 497 Duplexer, 40, 660 DIMM Size, 605 Direct connection setup, 115 E Direct Fax, 396 - Dell 2155CDN | User Manual - Page 750
FILE LOCATION: C:\Users\fxstdpc-admin\Desktop\0630_UG??\Mioga_AIO_UG_FM\Mioga_AIO_UG_FM\Miog a-AIO-UGIX.fm environment settings of your web browser, 165 Error History, 194, 427, 470 FAX Group, 249, 257-258 Fax Header, 188, 206, 432, 461, 494 Error-Code, 590 Ethernet, 215, 223, 607 Ethernet port, - Dell 2155CDN | User Manual - Page 751
Enabled - Copy, 199 Function Enabled - Fax, 199 H T T P- S S L / T L S Communication, 241 Function Enabled - Scan, 199 Fuser, 660 I Fuser Motor Operation Check, 465 ID, 178-179 Identifying print media, 270 G Gateway Address, 225, 427, 447, 487 Identifying print paper, 270 Image Compression - Dell 2155CDN | User Manual - Page 752
FILE LOCATION: C:\Users\fxstdpc-admin\Desktop\0630_UG??\Mioga_AIO_UG_FM\Mioga_AIO_UG_FM\Miog a-AIO-UGIX.fm Interfaces, 606 Invalid Key, 435 Junk Fax Setup, 188, 206, 432, 461, 493 Invalid Key Tone, 180, 195, 422 IP Address, 103, 162-163, 169, 216, 225, 234, 239, 243-244, 427, 446, - Dell 2155CDN | User Manual - Page 753
FILE LOCATION: C:\Users\fxstdpc-admin\Desktop\0630_UG??\Mioga_AIO_UG_FM\Mioga_AIO_UG_FM\Miog a-AIO-UGIX.fm Loading paper, 109 Loading print media, 273 SSF, 280 standard 250-sheet tray and optional 250-sheet feeder, 273 Margin Left/Right, 186, 190, 203, 208, 429-430, 453, 456, 541, 547 Margin - Dell 2155CDN | User Manual - Page 754
\Miog a-AIO-UGIX.fm N NCR, 263 Network, 94 Network connection setup, 118 Network Firmware Version, 178 Network TWAIN, 218, 223, 227 Network Type, 236 New Password, 199 No Account User Print, 193, 246 No carbon required, 263 No. of Sheets, 179 Non-Dell Toner, 192, 425, 443, 518 Numeric keypad - Dell 2155CDN | User Manual - Page 755
, 513 Paper jam location, 660 Paper Size, 182, 197, 466, 472 Paper Tray, 182 Paper Type, 271, 466 Paper Used, 246 Parts name, 39 Password, 227, 235, 238, 240, 244 PCL, 472 Font, 475 PCL 5/PCL 6, 585 PCL Fonts List, 194, 426, 469 PCL Macro List, 194, 427, 469 Play of Sound, 465 Point and Print, 133 - Dell 2155CDN | User Manual - Page 756
LOCATION: C:\Users\fxstdpc-admin\Desktop\0630_UG??\Mioga_AIO_UG_FM\Mioga_AIO_UG_FM\Miog a-AIO-UGIX.fm Print Color Regi Chart, 441 Printer paper, 261 Print Drivers / Remote Client Account, 235 Print from USB, 199 Print from USB Defaults, 191, 431 Print ID, 182, 196, 424, 437, 507 Print media, 261 - Dell 2155CDN | User Manual - Page 757
-enter Password, 199 Refresh, 172 REGI CLUTCH Operation Check, 465 Removing toner cartridge, 616 Removing wireless adapter, 654 Replacing the retard roller, 627 Reports, 194 Resend Delay, 188, 206, 432, 461, 493 Reset Defaults, 213, 442 Reset Print Server, 238 Resetting Defaults, 308 Registration - Dell 2155CDN | User Manual - Page 758
, 431, 460, 492 Selecting pre-punched paper, 264 RSA BSAFE, 28 Sending print job, 292 Sent Fax Forward, 189, 206 S Safety information, 32 Scalable font, 583 Scan Defaults, 190, 429 Scan to Application, 543 Scan to E-mail, 542 Scan To Network, 429 Scan to Network, 190, 208, 235, 454, 543 Sent - Dell 2155CDN | User Manual - Page 759
LOCATION: C:\Users\fxstdpc-admin\Desktop\0630_UG??\Mioga_AIO_UG_FM\Mioga_AIO_UG_FM\Miog a-AIO-UGIX.fm Software update, 558 Supported print paper, 270 Speed Dial, 194 SUSE, 605 SSF Paper Size, 185, 191, 201, 317, 428, 431, 448, 458, 535 SUSE Linux Enterprise Desktop 10, 150 SSF Paper Type, 185 - Dell 2155CDN | User Manual - Page 760
, 246 User setup disk creating tool, 558 Using Dell Printer Configuration Web Tool, 163 Tray 2 Display Popup, 259, 426, 445 V Tray 2 Paper Size, 259, 426, 445 Verifying IP settings, 106 Tray 2 Paper Type, 259, 426, 445 Tray Settings, 164, 171, 193, 259, 426, 526 Troubleshooting, 560 - Dell 2155CDN | User Manual - Page 761
641 Width guide, 110, 275 WINS, 217, 226 Wired Network Ethernet, 482 IP Filter, 489 Protocol, 487 Reset LAN, 489 TCP/IP, 486 Wireless Adapter, 64 Wireless adapter socket, 41 Wireless Settings, 216, 236 WPA-PSK, 237 WSD, 218, 223, 226, 601 X XPS printer driver, 115, 120 Y Yellow terminator, 96 DELL
-
 1
1 -
 2
2 -
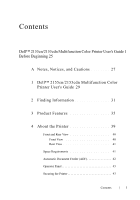 3
3 -
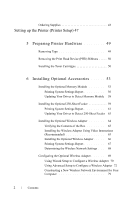 4
4 -
 5
5 -
 6
6 -
 7
7 -
8
-
9
-
10
-
11
-
12
-
13
-
14
-
15
-
16
-
17
-
18
-
19
-
20
-
21
-
22
-
23
-
24
-
25
-
26
-
27
-
28
-
29
-
30
-
31
-
32
-
33
-
34
-
35
-
36
-
37
-
38
-
39
-
40
-
41
-
42
-
43
-
44
-
45
-
46
-
47
-
48
-
49
-
50
-
51
-
52
-
53
-
54
-
55
-
56
-
57
-
58
-
59
-
60
-
61
-
62
-
63
-
64
-
65
-
66
-
67
-
68
-
69
-
70
-
71
-
72
-
73
-
74
-
75
-
76
-
77
-
78
-
79
-
80
-
81
-
82
-
83
-
84
-
85
-
86
-
87
-
88
-
89
-
90
-
91
-
92
-
93
-
94
-
95
-
96
-
97
-
98
-
99
-
100
-
101
-
102
-
103
-
104
-
105
-
106
-
107
-
108
-
109
-
110
-
111
-
112
-
113
-
114
-
115
-
116
-
117
-
118
-
119
-
120
-
121
-
122
-
123
-
124
-
125
-
126
-
127
-
128
-
129
-
130
-
131
-
132
-
133
-
134
-
135
-
136
-
137
-
138
-
139
-
140
-
141
-
142
-
143
-
144
-
145
-
146
-
147
-
148
-
149
-
150
-
151
-
152
-
153
-
154
-
155
-
156
-
157
-
158
-
159
-
160
-
161
-
162
-
163
-
164
-
165
-
166
-
167
-
168
-
169
-
170
-
171
-
172
-
173
-
174
-
175
-
176
-
177
-
178
-
179
-
180
-
181
-
182
-
183
-
184
-
185
-
186
-
187
-
188
-
189
-
190
-
191
-
192
-
193
-
194
-
195
-
196
-
197
-
198
-
199
-
200
-
201
-
202
-
203
-
204
-
205
-
206
-
207
-
208
-
209
-
210
-
211
-
212
-
213
-
214
-
215
-
216
-
217
-
218
-
219
-
220
-
221
-
222
-
223
-
224
-
225
-
226
-
227
-
228
-
229
-
230
-
231
-
232
-
233
-
234
-
235
-
236
-
237
-
238
-
239
-
240
-
241
-
242
-
243
-
244
-
245
-
246
-
247
-
248
-
249
-
250
-
251
-
252
-
253
-
254
-
255
-
256
-
257
-
258
-
259
-
260
-
261
-
262
-
263
-
264
-
265
-
266
-
267
-
268
-
269
-
270
-
271
-
272
-
273
-
274
-
275
-
276
-
277
-
278
-
279
-
280
-
281
-
282
-
283
-
284
-
285
-
286
-
287
-
288
-
289
-
290
-
291
-
292
-
293
-
294
-
295
-
296
-
297
-
298
-
299
-
300
-
301
-
302
-
303
-
304
-
305
-
306
-
307
-
308
-
309
-
310
-
311
-
312
-
313
-
314
-
315
-
316
-
317
-
318
-
319
-
320
-
321
-
322
-
323
-
324
-
325
-
326
-
327
-
328
-
329
-
330
-
331
-
332
-
333
-
334
-
335
-
336
-
337
-
338
-
339
-
340
-
341
-
342
-
343
-
344
-
345
-
346
-
347
-
348
-
349
-
350
-
351
-
352
-
353
-
354
-
355
-
356
-
357
-
358
-
359
-
360
-
361
-
362
-
363
-
364
-
365
-
366
-
367
-
368
-
369
-
370
-
371
-
372
-
373
-
374
-
375
-
376
-
377
-
378
-
379
-
380
-
381
-
382
-
383
-
384
-
385
-
386
-
387
-
388
-
389
-
390
-
391
-
392
-
393
-
394
-
395
-
396
-
397
-
398
-
399
-
400
-
401
-
402
-
403
-
404
-
405
-
406
-
407
-
408
-
409
-
410
-
411
-
412
-
413
-
414
-
415
-
416
-
417
-
418
-
419
-
420
-
421
-
422
-
423
-
424
-
425
-
426
-
427
-
428
-
429
-
430
-
431
-
432
-
433
-
434
-
435
-
436
-
437
-
438
-
439
-
440
-
441
-
442
-
443
-
444
-
445
-
446
-
447
-
448
-
449
-
450
-
451
-
452
-
453
-
454
-
455
-
456
-
457
-
458
-
459
-
460
-
461
-
462
-
463
-
464
-
465
-
466
-
467
-
468
-
469
-
470
-
471
-
472
-
473
-
474
-
475
-
476
-
477
-
478
-
479
-
480
-
481
-
482
-
483
-
484
-
485
-
486
-
487
-
488
-
489
-
490
-
491
-
492
-
493
-
494
-
495
-
496
-
497
-
498
-
499
-
500
-
501
-
502
-
503
-
504
-
505
-
506
-
507
-
508
-
509
-
510
-
511
-
512
-
513
-
514
-
515
-
516
-
517
-
518
-
519
-
520
-
521
-
522
-
523
-
524
-
525
-
526
-
527
-
528
-
529
-
530
-
531
-
532
-
533
-
534
-
535
-
536
-
537
-
538
-
539
-
540
-
541
-
542
-
543
-
544
-
545
-
546
-
547
-
548
-
549
-
550
-
551
-
552
-
553
-
554
-
555
-
556
-
557
-
558
-
559
-
560
-
561
-
562
-
563
-
564
-
565
-
566
-
567
-
568
-
569
-
570
-
571
-
572
-
573
-
574
-
575
-
576
-
577
-
578
-
579
-
580
-
581
-
582
-
583
-
584
-
585
-
586
-
587
-
588
-
589
-
590
-
591
-
592
-
593
-
594
-
595
-
596
-
597
-
598
-
599
-
600
-
601
-
602
-
603
-
604
-
605
-
606
-
607
-
608
-
609
-
610
-
611
-
612
-
613
-
614
-
615
-
616
-
617
-
618
-
619
-
620
-
621
-
622
-
623
-
624
-
625
-
626
-
627
-
628
-
629
-
630
-
631
-
632
-
633
-
634
-
635
-
636
-
637
-
638
-
639
-
640
-
641
-
642
-
643
-
644
-
645
-
646
-
647
-
648
-
649
-
650
-
651
-
652
-
653
-
654
-
655
-
656
-
657
-
658
-
659
-
660
-
661
-
662
-
663
-
664
-
665
-
666
-
667
-
668
-
669
-
670
-
671
-
672
-
673
-
674
-
675
-
676
-
677
-
678
-
679
-
680
-
681
-
682
-
683
-
684
-
685
-
686
-
687
-
688
-
689
-
690
-
691
-
692
-
693
-
694
-
695
-
696
-
697
-
698
-
699
-
700
-
701
-
702
-
703
-
704
-
705
-
706
-
707
-
708
-
709
-
710
-
711
-
712
-
713
-
714
-
715
-
716
-
717
-
718
-
719
-
720
-
721
-
722
-
723
-
724
-
725
-
726
-
727
-
728
-
729
-
730
-
731
-
732
-
733
-
734
-
735
-
736
-
737
-
738
-
739
-
740
-
741
-
742
-
743
-
744
-
745
-
746
-
747
-
748
-
749
-
750
-
751
-
752
-
753
-
754
-
755
-
756
-
757
-
758
-
759
-
760
-
761
 |
 |

www.dell.com | support.dell.com
Dell™ 2155cn/2155cdn Multifunction
Color Printer User's Guide