Dell 2350D User Guide - Page 81
Set IP Address Utility, TCP/IP, IP Address, Netmask, Gateway, Apply, Configuration
 |
View all Dell 2350D manuals
Add to My Manuals
Save this manual to your list of manuals |
Page 81 highlights
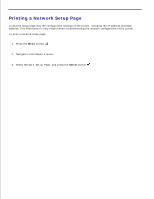
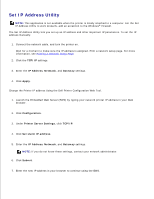
Set IP Address Utility NOTE: This application is not available when the printer is locally attached to a computer. For the Set IP Address Utility to work properly, add an exception to the Windows® Firewall. The Set IP Address Utility lets you set up an IP address and other important IP parameters. To set the IP address manually: 1. Connect the network cable, and turn the printer on. Wait for a moment to make sure the IP address is assigned. Print a network setup page. For more information, see Printing a Network Setup Page. 2. Click the TCP/IP settings. 3. Enter the IP Address, Netmask, and Gateway settings. 4. Click Apply. Change the Printer IP address Using the Dell Printer Configuration Web Tool. 1. Launch the Embedded Web Server (EWS) by typing your network printer IP address in your Web browser. 2. Click Configuration. 3. Under Printer Server Settings, click TCP/IP. 4. Click Set static IP address. 5. Enter the IP Address, Netmask, and Gateway settings. NOTE: If you do not know these settings, contact your network administrator. 6. Click Submit. 7. Enter the new IP address in your browser to continue using the EWS.
-
 1
1 -
2
-
3
-
4
-
5
-
6
-
7
-
8
-
9
-
10
-
11
-
12
-
13
-
14
-
15
-
16
-
17
-
18
-
19
-
20
-
21
-
22
-
23
-
24
-
25
-
26
-
27
-
28
-
29
-
30
-
31
-
32
-
33
-
34
-
35
-
36
-
37
-
38
-
39
-
40
-
41
-
42
-
43
-
44
-
45
-
46
-
47
-
48
-
49
-
50
-
51
-
52
-
53
-
54
-
55
-
56
-
57
-
58
-
59
-
60
-
61
-
62
-
63
-
64
-
65
-
66
-
67
-
68
-
69
-
70
-
71
-
72
-
73
-
74
-
75
-
 76
76 -
 77
77 -
 78
78 -
 79
79 -
 80
80 -
 81
81 -
 82
82 -
 83
83 -
 84
84 -
 85
85 -
 86
86 -
87
-
88
-
89
-
90
-
91
-
92
-
93
-
94
-
95
-
96
-
97
-
98
-
99
-
100
-
101
-
102
-
103
-
104
-
105
-
106
-
107
-
108
-
109
-
110
-
111
-
112
-
113
-
114
-
115
-
116
-
117
-
118
-
119
-
120
-
121
-
122
-
123
-
124
-
125
-
126
-
127
-
128
-
129
-
130
-
131
-
132
-
133
-
134
-
135
-
136
-
137
-
138
-
139
-
140
-
141
-
142
-
143
-
144
-
145
-
146
-
147
-
148
-
149
-
150
-
151
-
152
-
153
-
154
-
155
-
156
-
157
-
158
-
159
-
160
-
161
-
162
-
163
-
164
-
165
-
166
-
167
-
168
-
169
-
170
-
171
-
172
-
173
-
174
-
175
-
176
-
177
-
178
-
179
-
180
-
181
 |
 |
