Dell A960 All In One Personal Printer User's Guide - Page 65
Document Does Not Print, Scanner lock, Loading Paper, Remove and Install the Software
 |
View all Dell A960 All In One Personal Printer manuals
Add to My Manuals
Save this manual to your list of manuals |
Page 65 highlights
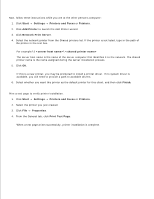
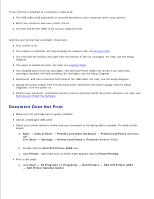
If your printer is attached to a computer, make sure: The USB cable (sold separately) is securely attached to your computer and to your printer. Both your computer and your printer are on. The Dell AIO Printer A960 is set as your default printer. Anytime your printer has a problem, make sure: Your printer is on. The scanner is unlocked. For help locating the scanner lock, see Scanner lock. You removed the stickers and tape from the bottom of the ink cartridges. For help, see the Setup Diagram. The paper is loaded correctly. For help, see Loading Paper. You installed both of the ink cartridges. The Dell AIO Printer A960 only works if you have both cartridges installed. For help installing the cartridges, see the Setup Diagram. Disconnect, and then reconnect both ends of the USB cable. For help, see the Setup Diagram. Unplug the power supply from the electrical outlet. Reconnect the power supply (see the Setup Diagram). Turn the power on. Restart your computer. If problems persist, remove and then install the printer software. For help, see Remove and Install the Software. Document Does Not Print Make sure the cartridges are properly installed. Use an undamaged USB cable. Check your printer status to make sure your document is not being held or paused. To check printer status: a. Start Control Panel XP). Click Start Settings Printers and Other Hardware Printers and Faxes (Windows Printers and Faxes or Printers (Windows 2000). b. Double-click the Dell AIO Printer A960 icon. c. Click Printer., and make sure no check mark appears next to Pause Printing. Print a test page: a. Click Start All Programs (or Programs) Dell Printers Dell AIO Printer A960 Dell Printer Solution Center. b. c.
-
 1
1 -
2
-
3
-
4
-
5
-
6
-
7
-
8
-
9
-
10
-
11
-
12
-
13
-
14
-
15
-
16
-
17
-
18
-
19
-
20
-
21
-
22
-
23
-
24
-
25
-
26
-
27
-
28
-
29
-
30
-
31
-
32
-
33
-
34
-
35
-
36
-
37
-
38
-
39
-
40
-
41
-
42
-
43
-
44
-
45
-
46
-
47
-
48
-
49
-
50
-
51
-
52
-
53
-
54
-
55
-
56
-
57
-
58
-
59
-
 60
60 -
 61
61 -
 62
62 -
 63
63 -
 64
64 -
 65
65 -
 66
66 -
 67
67 -
 68
68 -
 69
69 -
 70
70 -
71
-
72
-
73
-
74
-
75
-
76
-
77
-
78
-
79
-
80
-
81
-
82
-
83
-
84
-
85
-
86
-
87
-
88
-
89
-
90
-
91
-
92
-
93
-
94
-
95
 |
 |
