Dell Dimension 4590T Service Manual - Page 17
Replacing the Hard Drives, Removing the Optical Drives
 |
View all Dell Dimension 4590T manuals
Add to My Manuals
Save this manual to your list of manuals |
Page 17 highlights
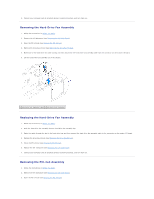
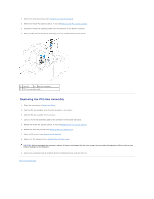
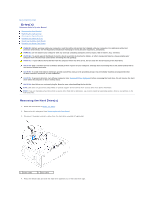
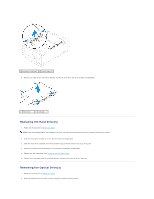
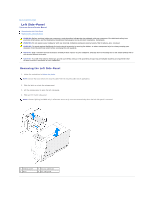
1 hard-drive assembly 2 release tabs (2) 5. Release the tabs on the hard-drive bracket and lift the hard drive out of the bracket (if applicable). 1 hard drive 2 tabs (4) Replacing the Hard Drive(s) 1. Follow the instructions in Before You Begin. NOTE: See the documentation that shipped with your new hard drive and ensure that the jumper positioning is correct. 2. Snap the hard-drive bracket on to the new hard drive (if applicable). 3. Slide the hard-drive assembly into the hard-drive cage until the release tabs snap into place. 4. Connect the power and data cables to the hard-drive assembly (if applicable). 5. Replace the left side-panel (see Replacing the Left Side-Panel). 6. Connect your computer and all attached devices to electrical outlets, and turn them on. Removing the Optical Drive(s) 1. Follow the instructions in Before You Begin. 2. Press the AlienHead on the front of your computer to lower the drive panel.
-
 1
1 -
2
-
3
-
4
-
5
-
6
-
7
-
8
-
9
-
10
-
11
-
 12
12 -
 13
13 -
 14
14 -
 15
15 -
 16
16 -
 17
17 -
 18
18 -
 19
19 -
 20
20 -
 21
21 -
 22
22 -
23
-
24
-
25
-
26
-
27
-
28
-
29
-
30
-
31
-
32
-
33
-
34
-
35
-
36
-
37
-
38
-
39
-
40
-
41
-
42
-
43
-
44
-
45
-
46
-
47
-
48
-
49
-
50
-
51
-
52
-
53
-
54
-
55
-
56
-
57
-
58
-
59
-
60
-
61
-
62
-
63
-
64
 |
 |
