Dell PowerEdge R910 Information Update
Dell PowerEdge R910 Manual
 |
View all Dell PowerEdge R910 manuals
Add to My Manuals
Save this manual to your list of manuals |
Dell PowerEdge R910 manual content summary:
- Dell PowerEdge R910 | Information Update - Page 1
Dell™ PowerEdge™ R910 Systems Information Update - Dell PowerEdge R910 | Information Update - Page 2
: A CAUTION indicates potential damage to hardware or loss of data if instructions are not followed. WARNING: A WARNING Dell, the DELL logo, and PowerEdge are trademarks of Dell Inc.; Intel is a registered trademark of Intel Corporation in the U.S. and other countries; Microsoft, Windows Server - Dell PowerEdge R910 | Information Update - Page 3
Microsoft Updates The following issues are documented on the Microsoft® Help and Support website at support.microsoft.com: • Systems running Microsoft Windows Server® 2003 or Windows Server 2008 cannot be set to hibernation if they have more than 4 GB of memory installed. For more information about - Dell PowerEdge R910 | Information Update - Page 4
the system power becomes non-redundant can lead to a system failure and results in loss of data. • Wake On LAN (WOL) is not supported on the 10 Gb SFP+ ports due to Broadcom 57711 design limitations. However, WOL is supported on the two 1 GbE ports available on the riser. 4 Information Update - Dell PowerEdge R910 | Information Update - Page 5
require more than 4 KB of I/O address space. The system does not complete POST if 64 KB I/O address space is exceeded. For more information on supported adapters, see the Dell™ PowerEdge™ R910 Hardware Owner's Manual at support.dell.com/manuals. Dell Update Package Information During the Dell Update - Dell PowerEdge R910 | Information Update - Page 6
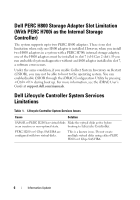
in slot 7, a software error occurs. Under the same condition Configuration Utility by pressing during boot up. For more information, see the iDRAC User's Guide at support.dell.com/manuals. Dell Lifecycle Controller System Services Limitations Table 1. Lifecycle Controller System Services - Dell PowerEdge R910 | Information Update - Page 7
Hardware Owner's Manual Updates BIOS Setup Options Default Settings Update Table 2. Default Settings for BIOS Setup Options Screen Memory Settings Power Management Integrated Devices SATA Settings Option System Memory Testing Power Management SR-IOV Global Enable Embedded SATA Default Option - Dell PowerEdge R910 | Information Update - Page 8
Table 3-2 in the Hardware Owner's Manual. 8 Press the four tabs and close the memory module cover. See Figure 2. 9 Install the memory risers. See "Installing a Memory Riser" in the Hardware Owner's Manual. 10 Close the system. See "Closing the System" in the Hardware Owner's Manual. 11 Reconnect the - Dell PowerEdge R910 | Information Update - Page 9
memory test in the system diagnostics. See "Running the Embedded System Diagnostics" in the Hardware Owner's Manual. Figure 1. Installing and Removing a Memory Module 2 3 1 4 6 1 release tabs (2) 3 memory riser 5 card guide 5 2 handle 4 release button 6 memory-riser connector Information Update - Dell PowerEdge R910 | Information Update - Page 10
the Hardware Owner's Manual. 4 Press the tabs in the direction of the arrows and lift the memory module cover. See Figure 2. CAUTION: Handle each memory module only on either card edge, making sure not to touch the middle of the memory module. 5 Press down and out on the ejectors on each end of the - Dell PowerEdge R910 | Information Update - Page 11
2 memory module cover 7 Install the memory risers. See "Installing a Memory Riser" in the Hardware Owner's Manual. 8 Close the system. See "Closing the System" in the Hardware Owner's Manual. 9 Reconnect the system and peripherals to their power sources, and turn them on. Information Update 11 - Dell PowerEdge R910 | Information Update - Page 12
12 Information Update - Dell PowerEdge R910 | Information Update - Page 13
Dell™ PowerEdge™ R910 系统 信息更新 - Dell PowerEdge R910 | Information Update - Page 14
2010 Dell Inc 未经 Dell Inc Dell、DELL 徽标和 PowerEdge 是 Dell Inc Intel 是 Intel Corporation Microsoft、Windows Server 和 Windows 是 Microsoft Corporation Broadcom 是 Broadcom Corporation Red Hat 和 Red Hat Enterprise Linux 是 Red Hat, Inc Dell Inc 2010 年 4 月 Rev. A00 - Dell PowerEdge R910 | Information Update - Page 15
support.microsoft.com Microsoft Windows Server® 2003 或 Windows Server 2008 4 GB 4 GB microsoft.com KB888575。 • Microsoft Windows Server 2008 R2 1 TB UEFI BIOS microsoft.com KB980598。 • 运行 Microsoft Windows Server 2008 SD SD iSCSI USB iSCSI microsoft.com KB968410。 Dell - Dell PowerEdge R910 | Information Update - Page 16
Windows Server 2003 R2 SP2 (x64) Edition(含 SP2)使用 1 TB RAS 使用 1 TB RAS sparing mirror boot.ini mem=1046528 或 /burnmemory= 2048 RAS 模式。 MAC NIC 和 iDRAC6 Enterprise MAC 10 Gb I/O 10 Gb I/O 1 GbE 10 Gb SFP Broadcom® 57711 10 Gb I/O 10 Gb I/O • 由于 Broadcom 57711 10 Gb - Dell PowerEdge R910 | Information Update - Page 17
support.dell.com/manuals 上的 Dell™ PowerEdge™ R910 Hardware Owner's Manual(Dell™ PowerEdge™ R910 Dell Update Package 信息 在安装 Dell Update Package (DUP • Request for system reboot before the DUP installation is complete (在 DUP • Windows hardware detection(Windows • Windows hardware configuration - Dell PowerEdge R910 | Information Update - Page 18
H800 H800 PERC H700i H800 H800 7(x16 第 2 H800 7 Collect System Inventory on Restart CSIOR Ctrl> - Dell PowerEdge R910 | Information Update - Page 19
BIOS 表 2. BIOS 屏幕 Memory Settings Power Management Integrated Devices SATA Settings (SATA 设置) 选项 System Memory Testing Power Management SR-IOV Global Enable (SR-IOV Embedded SATA SATA) Disabled Active Power Controller Disabled ATA Mode(ATA 模式) 10 Gb I/O 卡) 10 Gb - Dell PowerEdge R910 | Information Update - Page 20
4 1。 5 3-9 所示。 6 7 5 至步骤 7 3-1 和表 3-2。 8 2。 9 10 11 12 按 - Dell PowerEdge R910 | Information Update - Page 21
图 1 2 3 1 4 6 1 2 个) 3 5 5 2 手柄 4 6 信息更新 21 - Dell PowerEdge R910 | Information Update - Page 22
Dell 1 2 3 4 2 5 6 2。 22 信息更新 - Dell PowerEdge R910 | Information Update - Page 23
图 2 1 3 2 1 3 卡舌(4 个) 2 7 8 9 信息更新 23 - Dell PowerEdge R910 | Information Update - Page 24
24 信息更新 - Dell PowerEdge R910 | Information Update - Page 25
Systèmes Dell™ PowerEdge™ R910 Mise à jour des informations - Dell PowerEdge R910 | Information Update - Page 26
de données en cas de non-respect des instructions. AVERTISSEMENT : Un AVERTISSEMENT indique un risque d'endommagement Dell, le logo DELL et PowerEdge sont des marques de Dell Inc. ; Intel est une marque déposée d'Intel Corporation aux États-Unis et dans d'autres pays ; Microsoft, Windows Server - Dell PowerEdge R910 | Information Update - Page 27
Firmware Interface) ou en mode BIOS hérité. Pour plus d'informations, consultez l'article KB980598 à l'adresse microsoft.com. • Les systèmes exécutant Microsoft Windows Server à l'adresse microsoft.com. Mémoire flash Le support VFlash fourni par Dell n'est pas partitionné de sorte à pouvoir prendre - Dell PowerEdge R910 | Information Update - Page 28
mem=1024G n'est pas utilisé. Pour plus d'informations, consultez l'article de la base de connaissances kbase.redhat.com/faq/docs/DOC-25412. Microsoft Windows Server 2003 R2 SP2 (x64) Edition avec limitation SP2 s'il est doté d'une mémoire système de 1 To (lorsque le mode mémoire RAS n'est pas - Dell PowerEdge R910 | Information Update - Page 29
si l'espace d'adressage d'E/S de 64 Ko est dépassé. Pour plus d'informations sur les adaptateurs pris en charge, consultez Dell™ PowerEdge™ R910 Hardware Owner's Manual (Manuel du propriétaire du système Dell™ PowerEdge™ R910) à l'adresse support.dell.com/manuals. Mise à jour des informations 29 - Dell PowerEdge R910 | Information Update - Page 30
Dell, il est possible que des messages concernant ce qui suit apparaissent : • Demande de redémarrage du système avant la fin de l'installation du progiciel de mise à jour • Détection de matériel par Windows • Problème de configuration pendant l'exécution du progiciel de mise à jour Dell du BIOS. Le - Dell PowerEdge R910 | Information Update - Page 31
emplacement Gen 2 x16). Si vous exécutez des diagnostics système inté configuration iDRAC en appuyant sur pendant le démarrage. Pour plus d'informations, consultez iDRAC User's Guide (Guide d'utilisation d'iDRAC) à l'adresse support.dell.com/manuals. Limitations des services système de Dell - Dell PowerEdge R910 | Information Update - Page 32
Mises à jour du document Hardware Owner's Manual (Manuel du propriétaire) Mise à jour des paramètres par défaut des options de configuration du BIOS Tableau 2. Paramètres par défaut des options de configuration du BIOS Écran Memory Settings (Paramètres de la mémoire) Power Management (Gestion de - Dell PowerEdge R910 | Information Update - Page 33
produit et suivez les instructions fournies en ligne ou paration non autorisée par Dell est exclu de votre garantie de montage de mémoire. Voir "Removing a Memory Riser" (Retrait d'une carte de montage de figure 1. 5 Appuyez sur les éjecteurs du support de barrette de mémoire puis dégagez-les, - Dell PowerEdge R910 | Information Update - Page 34
programme de configuration du système, puis vérifiez le paramètre System Memory (Mémoire système) dans l'écran principal System Setup (Configuration du syst dans leurs supports. 15 Exécutez le test de mémoire des diagnostics du système. Voir "Running the Embedded System Diagnostics" (Exécution des - Dell PowerEdge R910 | Information Update - Page 35
Figure 1. Installation et retrait d'une barrette de mémoire 2 3 1 4 6 5 1 pattes de dégagement (2) 3 carte de montage de mémoire 5 guide de la carte 2 poignée 4 bouton de dégagement 6 connecteur de carte de montage de mémoire Mise à jour des informations 35 - Dell PowerEdge R910 | Information Update - Page 36
produit, et suivez les instructions fournies en ligne ou par paration non autorisée par Dell est exclu de votre cartes de montage de mémoire. Voir "Removing a Memory Riser" (Retrait d'une carte de montage de mémoire jection situées de part et d'autre du support pour éjecter la barrette de mémoire. 6 - Dell PowerEdge R910 | Information Update - Page 37
de mémoire 1 3 2 1 patte de dégagement 3 languettes (4) 2 capot de la barrette de mémoire 7 Installez les cartes de montage de mémoire. Voir "Installing a Memory Riser" (Installation d'une carte de montage de mémoire) dans le Manuel du propriétaire. 8 Refermez le système. Voir "Closing the - Dell PowerEdge R910 | Information Update - Page 38
38 Mise à jour des informations - Dell PowerEdge R910 | Information Update - Page 39
Dell™ PowerEdge™ R910Systeme Informationsaktualisierung - Dell PowerEdge R910 | Information Update - Page 40
. ist strengstens untersagt. In diesem Text verwendete Marken: Dell, das DELL Logo und PowerEdge sind Marken von Dell Inc.; Intel ist eine eingetragene Marke von Intel Corporation in den USA und anderen Ländern; Microsoft, Windows Server und Windows sind Marken oder eingetragene Marken der Microsoft - Dell PowerEdge R910 | Information Update - Page 41
Updates Die folgenden Probleme sind auf der Hilfe- und Support-Website von Microsoft® unter support.microsoft.com dokumentiert: • Systeme mit Microsoft Windows Server® 2003 oder Windows Server 2008 lassen sich nicht in den Ruhezustand versetzen (Hibernation), wenn mehr als 4 GB von Dell gelieferte - Dell PowerEdge R910 | Information Update - Page 42
Knowledge-Base-Artikel unter kbase.redhat.com/faq/docs/DOC-25412. Microsoft Windows Server 2003 R2 SP2 (x64) Edition mit SP2 - Adressbeschränkung bei 1 TB Systemspeicher kann das Betriebssystem nicht hochgefahren werden. Um das Problem zu lösen, setzen Sie den RASSpeichermodus auf Redundanz oder - Dell PowerEdge R910 | Information Update - Page 43
E/A-Adressbereich von 64 KB überschritten wird, kann das System den Einschaltselbsttest (POST) nicht abschließen. Weitere Informationen zu den unterstützten Adaptern finden Sie im Dell™ PowerEdge™ R910 Hardware-Benutzerhandbuch unter support.dell.com/manuals. Informationsaktualisierung 43 - Dell PowerEdge R910 | Information Update - Page 44
Dell Update Package Bei der Installation des Dell Update Package (DUP) werden möglicherweise folgende Meldungen angezeigt: • Aufforderung zum Systemneustart zum Abschluss der DUP-Installation • Windows-Hardwareerkennung • Problem • Der OS Watchdog Timer im System-BIOS ist aktiv. • Der Timer läuft ab - Dell PowerEdge R910 | Information Update - Page 45
. Weitere Informationen finden Sie im iDRAC-Benutzerhandbuch unter support.dell.com/manuals. Einschränkungen bei den Systemdiensten des Dell Lifecycle Controllers Tabelle 1. Probleme mit den Systemdiensten des Dell Lifecycle Controllers Ursache Lösung Virtuelle Laufwerke des SAS6/iR - Dell PowerEdge R910 | Information Update - Page 46
BIOS-Setup Tabelle 2. Vorgabeeinstellungen für die Optionen im BIOS-Setup Bildschirm Memory Settings Power Management Integrated Devices SATA Settings Option System Memory Testing Power aufgefordert werden. Schäden durch nicht von Dell genehmigte Wartungsversuche werden nicht durch die Garantie - Dell PowerEdge R910 | Information Update - Page 47
des Speichermodulsockels nach unten und außen wie in Abbildung 3-9 des Hardware-Benutzerhandbuchs gezeigt. 6 Richten Sie den Stecker des Speichermoduls an den , und überprüfen Sie die Einstellung System Memory (Systemspeicher) auf dem System-Setup-Bildschirm. Informationsaktualisierung 47 - Dell PowerEdge R910 | Information Update - Page 48
13 Das System sollte die Einstellung bereits auf den neuen Wert geändert haben. 14 Wenn der Wert nicht korrekt ist, sind möglicherweise nicht alle Speichermodule ordnungsgemäß installiert. Wiederholen Sie Schritt 2 bis Schritt 13, um sicherzustellen, dass die Speichermodule korrekt in den Sockeln - Dell PowerEdge R910 | Information Update - Page 49
Onlineoder Telefonsupports dazu aufgefordert werden. Schäden durch nicht von Dell genehmigte Wartungsversuche werden nicht durch die Garantie abgedeckt. Lesen Speicher-Riser. Siehe Abschnitt „Speicher-Riserkarte entfernen" im Hardware-Benutzerhandbuch. 4 Drücken Sie die Sperrklinken in Pfeilrichtung - Dell PowerEdge R910 | Information Update - Page 50
und installieren 1 3 2 1 Sperrklinke 3 Klinken (4) 2 Speichermodulabdeckung 7 Installieren Sie die Speicher-Riser. Siehe „Speicher-Reiserkarte installieren" im Hardware-Benutzerhandbuch. 8 Schließen Sie das System. Siehe „Schließen des Systems" im HardwareBenutzerhandbuch. 9 Verbinden Sie das - Dell PowerEdge R910 | Information Update - Page 51
Dell™ PowerEdge™ R910 - Dell PowerEdge R910 | Information Update - Page 52
2010 Dell Inc Dell Inc Dell、DELL PowerEdge は Dell Inc Intel Intel Corporation Microsoft、 Windows Server および Windows Microsoft Corporation Broadcom Broadcom Corporation Red Hat および Red Hat Enterprise Linux Red Hat, Inc Dell Inc 2010 年 4 月 Rev. A00 - Dell PowerEdge R910 | Information Update - Page 53
Microsoft Microsoft support.microsoft.com Microsoft Windows Server® 2003 または Windows Server 2008 で 4 GB 4 GB microsoft.com KB888575 • 1 TB Microsoft Windows Server 2008 R2 UEFI(Unified Extensible Firmware Interface BIOS microsoft.com KB980598 • Microsoft Windows Server 2008 で内蔵 SD - Dell PowerEdge R910 | Information Update - Page 54
1 TB Red Hat® Enterprise Linux® 5.4 Red Hat Enterprise Linux 5.4 mem=1024M mem=1024G OS kbase.redhat.com/faq/docs/DOC-25412 1 TB Microsoft Windows Server 2003 R2 SP2 (x64)Edition With SP2 RAS 1 TB OS RAS OS boot.ini mem=1046528 または /burnmemory=2048 RAS MAC NIC およ び iDRAC6 - Dell PowerEdge R910 | Information Update - Page 55
ポート 2 Broadcom® 57711 10 Gb SFP 2 10 Gb I/O AC 電源に 4 1 1 • Broadcom 57711 10 Gb SFP WOL(Wake On LAN WOL 2 個の 1 GbE PCIe PCIe PCIe 10 Intel® IA32 I/O 64 KB PCI I/O 単位が 4 KB 4 KB I/O I/O 64 KB の I/O POST support.dell.com/manuals で Dell™ PowerEdge™ R910 55 - Dell PowerEdge R910 | Information Update - Page 56
Dell Update Package Dell Update Package(DUP • DUP • Windows • Windows • Windows VFlash 注意:DUP を VFlash BIOS DUP BIOS で OS Watchdog Timer (OS BIOS で OS Watchdog Timer(OS NIC Broadcom 内蔵の NIC Intel Broadcom 56 - Dell PowerEdge R910 | Information Update - Page 57
H700i H800 2 H800 1 7(x16 Gen 2 7 に H800 CSIOR(Collect System Inventory on Restart OS Ctrl> - Dell PowerEdge R910 | Information Update - Page 58
BIOS 表 2. BIOS 画面 Memory Settings System Memory Testing Disabled(無効) Power Management Power Management Active Power Controller Integrated Devices SR-IOV Global Enable SR-IOV Disabled(無効) SATA Settings (SATA 設定) Embedded SATA (内蔵 SATA) ATA Mode(ATA 10 Gb - Dell PowerEdge R910 | Information Update - Page 59
1 1 2 3 4 2 1 5 3-9 6 59 - Dell PowerEdge R910 | Information Update - Page 60
7 手順 5 ~ 手順 7 3-1 3-2 8 4 2 9 10 11 12 - Dell PowerEdge R910 | Information Update - Page 61
図 1 2 3 1 4 6 1 2) 3 5 5 2 4 6 61 - Dell PowerEdge R910 | Information Update - Page 62
1 2 3 4 2 5 6 4 2 62 - Dell PowerEdge R910 | Information Update - Page 63
図 2 1 3 2 1 3 タブ(4) 2 7 8 9 63 - Dell PowerEdge R910 | Information Update - Page 64
64 - Dell PowerEdge R910 | Information Update - Page 65
Dell™ PowerEdge™ R910 시스템 - Dell PowerEdge R910 | Information Update - Page 66
2010 Dell Inc Dell Inc Dell, DELL 로고 및 PowerEdge는 Dell Inc Intel Intel Corporation Microsoft, Windows Server 및 Windows Microsoft Corporation Broadcom Broadcom Corporation Red Hat 및 Red Hat Enterprise Linux Red Hat, Inc Dell Inc 2010 년 4 월 Rev. A00 - Dell PowerEdge R910 | Information Update - Page 67
Microsoft Update Microsoft support.microsoft.com Microsoft Windows Server® 2003 또는 Windows Server 2008 4GB 4GB microsoft.com KB888575 • 1TB Microsoft Windows Server 2008 R2 UEFI(Unified Extensible Firmware Interface BIOS microsoft.com KB980598 • Microsoft Windows Server 2008 SD - Dell PowerEdge R910 | Information Update - Page 68
Microsoft Windows Server 2003 R2 SP2 (x64) Edition SP2 의 1TB RAS 1TB RAS를 Sparing Mirror RAS mem=1046528 boot.ini 파일에 /burnmemory=2048 MAC NIC 및 iDRAC6 Enterprise MAC 10Gb I/O - Dell PowerEdge R910 | Information Update - Page 69
® IA32 64KB I/O PCI 4KB의 I/O 4KB 이상의 I/O I/O 64KB I/O POST support.dell.com/manuals에서 Dell™ PowerEdge™ R910 Dell Dell Update Package(DUP DUP Windows Windows Windows의 VFlash 주의 : VFlash 에 DUP BIOS DUP BIOS에서 OS Watchdog BIOS에서 OS Watchdog NIC 티밍 Intel Broadcom NIC Broadcom - Dell PowerEdge R910 | Information Update - Page 70
1 PERC H700i H800 2 H800 7(x16 Gen 2 H800 7 CSIOR(Collect System Inventory on Restart Ctrl> - Dell PowerEdge R910 | Information Update - Page 71
BIOS 표 2. BIOS 화면 Memory Settings Power Management Integrated Devices SATA Settings (SATA 설정) 옵션 System Memory Testing Power Management SR-IOV Global Enable (SR-IOV Embedded SATA (내장형 SATA) Disabled Active Power Controller Disabled ATA Mode (ATA 모드) 10Gb I/O 10Gb I/O - Dell PowerEdge R910 | Information Update - Page 72
2 3 4 2 1 5 3-9 6 7 5단계 ~ 7 3-1 및 표 3-2 8 4 2 9 10 11 12 - Dell PowerEdge R910 | Information Update - Page 73
14 2단계 ~ 13 15 그림 1 2 3 1 4 6 1 2 개 ) 3 5 5 2 핸들 4 6 73 - Dell PowerEdge R910 | Information Update - Page 74
Dell 1 2 3 4 2 5 6 4 2 74 - Dell PowerEdge R910 | Information Update - Page 75
그림 2 1 3 2 1 분리 탭 3 탭 (4 개 ) 2 7 8 9 75 - Dell PowerEdge R910 | Information Update - Page 76
76 - Dell PowerEdge R910 | Information Update - Page 77
Sistemas Dell™ PowerEdge™ R910 Actualización de información - Dell PowerEdge R910 | Information Update - Page 78
de daños en el hardware o la pérdida de Dell Inc. Marcas comerciales utilizadas en este texto: Dell, el logotipo de DELL y PowerEdge son marcas comerciales de Dell Inc.; Intel es una marca comercial registrada de Intel Corporation en los Estados Unidos y en otros países; Microsoft, Windows Server - Dell PowerEdge R910 | Information Update - Page 79
support.microsoft.com) están documentados los problemas siguientes: • Los sistemas que ejecutan Microsoft Windows Server® 2003 o Windows Server 2008 no se pueden establecer en el modo de hibernación si tienen más de 4 GB tarjeta multimedia VFlash proporcionada por Dell no está particionada para - Dell PowerEdge R910 | Information Update - Page 80
=1024G. Para obtener más información, consulte el artículo de la base de conocimientos en kbase.redhat.com/faq/docs/DOC-25412. Limitación de Microsoft Windows Server 2003 R2 SP2 (x64) Edition con SP2 con una memoria del sistema de 1 TB (cuando no se utiliza el modo RAS de la memoria) El - Dell PowerEdge R910 | Information Update - Page 81
sistema no finaliza la POST si se excede el espacio de direcciones de E/S de 64 KB. Para obtener más información sobre los adaptadores admitidos, consulte el Manual del propietario del hardware de Dell™ PowerEdge™ R910 en support.dell.com/manuals. Actualización de información 81 - Dell PowerEdge R910 | Information Update - Page 82
Dell (DUP), es posible que aparezcan mensajes relativos a lo siguiente: • Petición de reinicio del sistema antes de que finalice la instalación de DUP • Detección de hardware de Windows • Problema de configuración de hardware operativo está habilitado en el BIOS del sistema. • El temporizador - Dell PowerEdge R910 | Information Update - Page 83
que haya un adaptador H800 instalado en la ranura 7, se producirá un error de software. En esas mismas condiciones, si habilita la recopilación de inventario del usuario de iDRAC en support.dell.com/manuals. Limitaciones de los servicios del sistema de Dell Lifecycle Controller Tabla 1. Problemas - Dell PowerEdge R910 | Information Update - Page 84
Manual del propietario del hardware Actualización de la configuración predeterminada de las opciones de configuración del BIOS Tabla 2. Configuración predeterminada de las opciones de configuración del BIOS Pantalla Memory Settings Power por reparaciones que Dell no haya autorizado. Lea - Dell PowerEdge R910 | Information Update - Page 85
del sistema" en el Manual del propietario del hardware. 11 Vuelva a conectar el sistema a la toma eléctrica y enciéndalo junto con los periféricos que tenga conectados. 12 Pulse para abrir el programa de configuración del sistema y compruebe el valor de System Memory (Memoria del sistema) en - Dell PowerEdge R910 | Information Update - Page 86
incluida en los diagnósticos del sistema. Consulte "Ejecución de los diagnósticos incorporados del sistema" en el Manual del propietario del hardware. Ilustración 1. Instalación y extracción de un módulo de memoria 2 3 1 4 6 5 1 Lengüetas de liberación (2) 3 Tarjeta vertical de memoria 5 Guía de - Dell PowerEdge R910 | Information Update - Page 87
La garantía no cubre los daños ocasionados por reparaciones que Dell no haya autorizado. Lea y siga las instrucciones de seguridad entregadas con Consulte "Extracción de una tarjeta vertical de memoria" en el Manual del propietario del hardware. 4 Presione las lengüetas en la dirección que indican - Dell PowerEdge R910 | Information Update - Page 88
de memoria. Consulte "Instalación de una tarjeta vertical de memoria" en el Manual del propietario del hardware. 8 Cierre el sistema. Consulte "Cierre del sistema" en el Manual del propietario del hardware. 9 Vuelva a conectar el sistema y los periféricos a las fuentes de energía correspondientes
-
 1
1 -
 2
2 -
 3
3 -
 4
4 -
 5
5 -
 6
6 -
 7
7 -
8
-
9
-
10
-
11
-
12
-
13
-
14
-
15
-
16
-
17
-
18
-
19
-
20
-
21
-
22
-
23
-
24
-
25
-
26
-
27
-
28
-
29
-
30
-
31
-
32
-
33
-
34
-
35
-
36
-
37
-
38
-
39
-
40
-
41
-
42
-
43
-
44
-
45
-
46
-
47
-
48
-
49
-
50
-
51
-
52
-
53
-
54
-
55
-
56
-
57
-
58
-
59
-
60
-
61
-
62
-
63
-
64
-
65
-
66
-
67
-
68
-
69
-
70
-
71
-
72
-
73
-
74
-
75
-
76
-
77
-
78
-
79
-
80
-
81
-
82
-
83
-
84
-
85
-
86
-
87
-
88
 |
 |

Dell™ PowerEdge™ R910
Systems
Information Update