Dell Precision R7600 Dell Precision Workstation R7610 Owner's Manual - Page 45
Removing the SAS (Serial attached SCSI) Backplane
 |
View all Dell Precision R7600 manuals
Add to My Manuals
Save this manual to your list of manuals |
Page 45 highlights
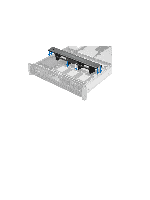
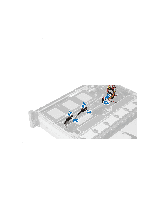
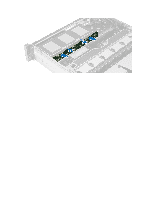
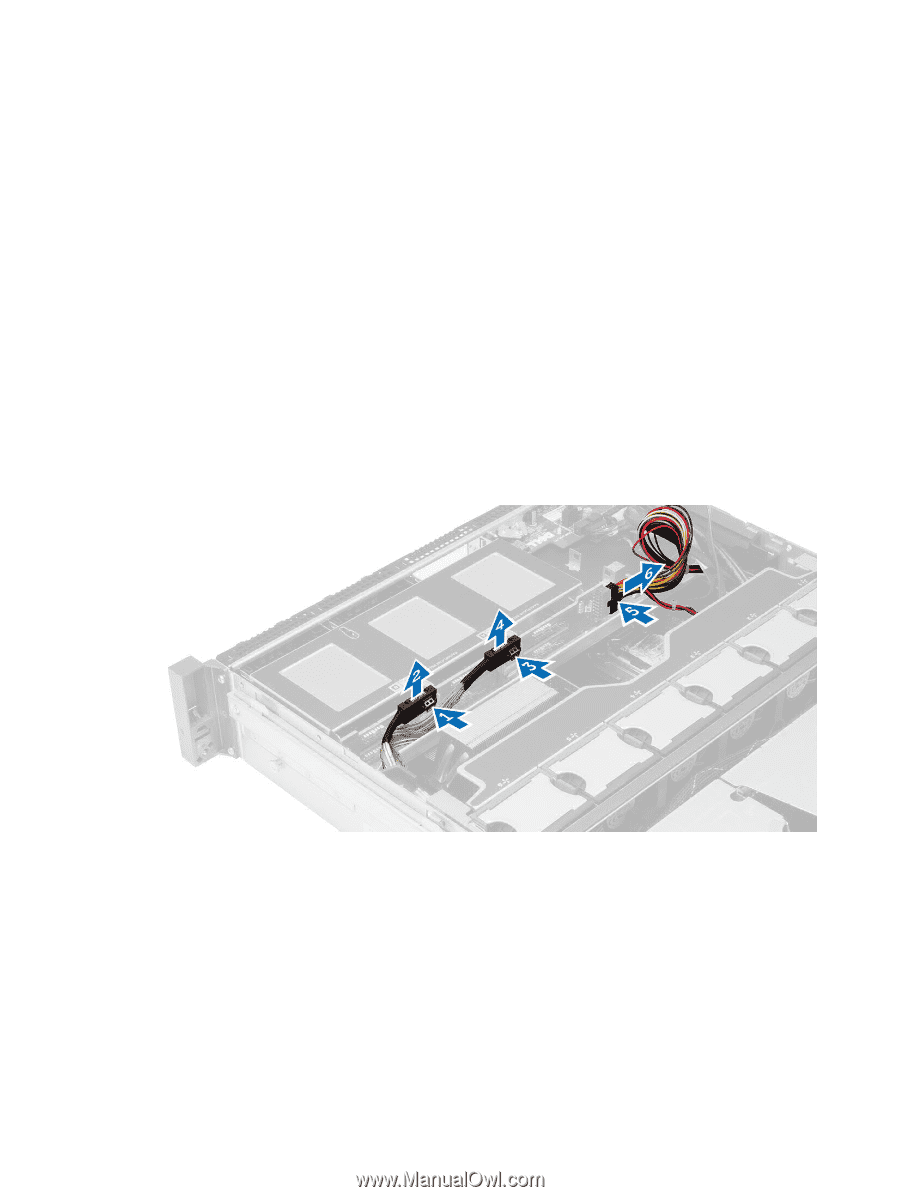
Removing the SAS (Serial attached SCSI) Backplane 1. Follow the procedures in Before Working Inside Your Computer. 2. Remove: - front bezel - cover - cooling shroud - optical drive - hard-drive carrier - hard-drive assembly 3. Disconnect all the SAS cables by pressing on their respective release tabs. 19 4. Push the blue release tabs in the direction of the arrows towards the hard-drive assembly to release the SAS backplane from the system board. a) Lift and remove the SAS backplane from the computer. 45
-
 1
1 -
2
-
3
-
4
-
5
-
6
-
7
-
8
-
9
-
10
-
11
-
12
-
13
-
14
-
15
-
16
-
17
-
18
-
19
-
20
-
21
-
22
-
23
-
24
-
25
-
26
-
27
-
28
-
29
-
30
-
31
-
32
-
33
-
34
-
35
-
36
-
37
-
38
-
39
-
 40
40 -
 41
41 -
 42
42 -
 43
43 -
 44
44 -
 45
45 -
 46
46 -
 47
47 -
 48
48 -
 49
49 -
 50
50 -
51
-
52
-
53
-
54
-
55
-
56
-
57
-
58
-
59
-
60
-
61
-
62
-
63
-
64
-
65
-
66
-
67
-
68
-
69
-
70
-
71
-
72
-
73
-
74
-
75
-
76
-
77
-
78
-
79
-
80
-
81
-
82
-
83
-
84
-
85
-
86
-
87
-
88
-
89
-
90
-
91
-
92
-
93
-
94
-
95
-
96
-
97
-
98
-
99
-
100
-
101
-
102
-
103
-
104
-
105
-
106
-
107
-
108
-
109
-
110
-
111
-
112
-
113
-
114
-
115
-
116
-
117
-
118
-
119
-
120
-
121
-
122
-
123
 |
 |
19
Removing the SAS (Serial attached SCSI)
Backplane
1.
Follow the procedures in
Before Working Inside Your Computer
.
2.
Remove:
–
front bezel
–
cover
–
cooling shroud
–
optical drive
–
hard-drive carrier
–
hard-drive assembly
3.
Disconnect all the SAS cables by pressing on their respective release tabs.
4.
Push the blue release tabs in the direction of the arrows towards the hard-drive assembly to release the SAS
backplane from the system board.
a)
Lift and remove the SAS backplane from the computer.
45