Dell S2500 Owner's Manual
Dell S2500 Manual
 |
View all Dell S2500 manuals
Add to My Manuals
Save this manual to your list of manuals |
Dell S2500 manual content summary:
- Dell S2500 | Owner's Manual - Page 1
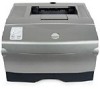
Dell™ Workgroup Laser Printer S2500 Owner's Manual Look Inside For: • Setting Up Your Printer www.dell.com/supplies | support.dell.com - Dell S2500 | Owner's Manual - Page 2
Order toner cartridges Dell™ toner cartridges are available only through Dell. You can order toner cartridges online at www.dell.com/supplies or by phone. USA Canada Mexico Puerto Rico UK Ireland France Italy Spain Germany Austria Netherlands Belgium Sweden Norway Denmark Finland Switzerland 877- - Dell S2500 | Owner's Manual - Page 3
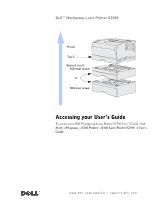
Laser Printer S2500 Printer Tray 1 Optional tray 2: 250-sheet drawer or 500-sheet drawer Accessing your User's Guide To access your Dell Workgroup Laser Printer S2500 User's Guide, click Start → Programs → Dell Printer → Dell Laser Printer S2500 → User's Guide. www.dell.com/supplies | support.dell - Dell S2500 | Owner's Manual - Page 4
the problem. CAUTION software Dell Computer Corporation, One Dell Way, Round Rock, Texas, 78682, USA. FCC emissions information This equipment has been tested and found to comply with the limits for a Class B digital device, pursuant to Part 15 of the FCC rules. Refer to the Drivers and Utilities - Dell S2500 | Owner's Manual - Page 5
than those described in the operating instructions, to a professional service person. • This product is designed to meet safety standards with the use of specific Dell-authorized components. The safety features of some parts may not always be obvious. Dell disclaims liability associated with use of - Dell S2500 | Owner's Manual - Page 6
www.dell.com/supplies | support.dell.com 6 - Dell S2500 | Owner's Manual - Page 7
Contents Accessing your User's Guide 3 CAUTION: Safety instructions 5 1 Unpack the printer 2 Install the optional drawer 3 Prepare the printer Positioning the printer 16 Raising the paper rest 17 Attaching an operator panel overlay 18 4 Install optional memory cards Removing the side cover 20 - Dell S2500 | Owner's Manual - Page 8
local printing Turning on the printer 43 Software overview 43 Status Monitor 44 Printing Status window 44 Toner Re-order window 44 Dell Local Printer Setup Utility 45 Dell Printer Software Uninstall 45 Driver Profiler 46 Installing printer drivers 46 If you purchased your Dell printer and - Dell S2500 | Owner's Manual - Page 9
Monitor Center 56 Printing Status window 57 Dell Toner Re-order Window 57 Dell Local Printer Setup Utility 57 Print Server TCP/IP Setup Utility 58 Dell Printer Software Uninstall 58 Driver Profiler 59 Dell Printer Configuration Web Tool 59 Connecting the printer to the network 59 Attaching - Dell S2500 | Owner's Manual - Page 10
America and the Caribbean Only 114 Dell Computer Corporation Ink and Toner Cartridges Limited Warranties 116 Ink and Toner Cartridges Limited Warranty (U.S. and Canada Only) 116 Ink and Toner Cartridges Limited Warranty (Latin America Only) . 117 Dell Software License Agreement 118 10 Contents - Dell S2500 | Owner's Manual - Page 11
1 SECTION 1 Unpack the printer - Dell S2500 | Owner's Manual - Page 12
Setup diagram • Setup diagram • Printer with one 250-sheet tray • Power cord • Print cartridge (shipped inside printer, wrapped in packaging) • Owner's Manual • Drivers and Utilities CD • Operator panel overlay (non-English only) If any items are missing or damaged, contact Dell at www.support.dell - Dell S2500 | Owner's Manual - Page 13
2 SECTION 2 Install the optional drawer - Dell S2500 | Owner's Manual - Page 14
www.dell.com/supplies | support.dell.com CAUTION: If you are adding an optional drawer sometime after setting up the printer, be sure to turn the printer off, unplug the power cord, and disconnect all cables from the back of the printer before completing these tasks. To increase paper capacity, you - Dell S2500 | Owner's Manual - Page 15
SECTION 3 Prepare the printer Positioning the printer Raising the paper rest Attaching an operator panel overlay 3 - Dell S2500 | Owner's Manual - Page 16
.dell.com/supplies | support.dell.com Positioning the printer Once you have selected a location and positioned an optional drawer (if you have one), you are ready to position the printer. NOTE: If you have optional memory to install, leave clearance on the left side of the printer. Lift the printer - Dell S2500 | Owner's Manual - Page 17
Raising the paper rest The paper rest holds printed jobs at an angle to keep them from sliding out of the output bin. Pull the paper rest forward to raise it. Prepare the printer 17 - Dell S2500 | Owner's Manual - Page 18
www.dell.com/supplies | support.dell.com Attaching an operator panel overlay If English is not your preferred language and your printer shipped with an operator panel overlay, attach the overlay that has the appropriately translated light and button names: 1 Peel the protective backing off the - Dell S2500 | Owner's Manual - Page 19
SECTION 4 Install optional memory cards Removing the side cover Removing the shield Installing a memory card Reattaching the shield Reattaching the side cover 4 - Dell S2500 | Owner's Manual - Page 20
dell.com/supplies | support.dell.com CAUTION: If you are installing memory cards sometime after setting up the printer, turn the printer off and unplug the power cord before continuing. NOTE: Memory options designed for other Dell printers may not work with your printer. Your printer has two memory - Dell S2500 | Owner's Manual - Page 21
3 Slide the side cover off of the back of the printer as you swing it out to remove it. Tab Tab 4 Set the cover aside. Install optional memory cards 21 - Dell S2500 | Owner's Manual - Page 22
www.dell.com/supplies | support.dell.com Removing the shield 1 Loosen the six screws. Do not remove them completely. Screw in keyhole 2 Slide the shield to the left until the screws fit into the keyholes on the cover. 3 Pull the shield straight out, and set it aside. 22 Install optional memory - Dell S2500 | Owner's Manual - Page 23
Installing a memory card Follow the instructions in this section to install either a printer memory card or a flash memory card. Memory cards must have 100-pin connectors. NOTICE: Memory cards are easily damaged by static electricity. Touch something metal on the printer before you touch a card. 1 - Dell S2500 | Owner's Manual - Page 24
www.dell.com/supplies | support.dell.com Reattaching the shield After installing your memory cards, you must reattach the shield. 1 Align the six keyholes on the shield with the six screws on the system board. 2 Press the shield against - Dell S2500 | Owner's Manual - Page 25
Reattaching the side cover 1 Align the three rear tabs on the side cover with the corresponding slots on the printer. 2 Guide the tabs on the top, bottom, and front of the cover into their corresponding slots. The top and front tabs snap into place. 3 Close the - Dell S2500 | Owner's Manual - Page 26
www.dell.com/supplies | support.dell.com 26 Install optional memory cards - Dell S2500 | Owner's Manual - Page 27
SECTION 5 Install printer supplies Removing the packaging Installing the print cartridge 5 - Dell S2500 | Owner's Manual - Page 28
www.dell.com/supplies | support.dell.com Removing the packaging 1 Open the upper front door. Finger grips 2 Grasp the print cartridge by the handle. Lift the cartridge out of the printer. Handle 28 Install printer supplies - Dell S2500 | Owner's Manual - Page 29
3 Remove the packaging material from the cartridge. Retain the packaging material. NOTICE: Do not touch the photoconductor drum on the bottom of the print cartridge. Install printer supplies 29 - Dell S2500 | Owner's Manual - Page 30
www.dell.com/supplies | support.dell.com Installing the print cartridge 1 Hold the print cartridge by the handle and gently shake it to distribute the toner. 2 Install the print cartridge: a Grasp the print cartridge by the handle. b Align the tabs on each side of the print cartridge with the slots - Dell S2500 | Owner's Manual - Page 31
SECTION 6 Load paper Loading the trays Loading the multipurpose feeder 6 - Dell S2500 | Owner's Manual - Page 32
increase the total printer sheet capacity (including the multipurpose feeder) to either 600 or 850 sheets if you install one of the optional drawers. The following table includes supported print media sizes and types, and page numbers where you can find loading instructions. Source Tray 1 Optional - Dell S2500 | Owner's Manual - Page 33
Loading the trays Follow these instructions to load the standard tray and any optional tray. 1 Remove the tray. Optional 250-sheet tray NOTE: The length guide on an optional 500-sheet tray is shaped differently than the length guide on the other trays, but the function is the same. 2 If you are - Dell S2500 | Owner's Manual - Page 34
support.dell.com 3 Press the metal plate down. NOTE: For any tray but the optional 500-sheet tray, the length guide extends beyond the end of the tray molding. 4 Squeeze the width guide tab and the width guide together, and then slide the guide all the way to the right. Length guide tab Width guide - Dell S2500 | Owner's Manual - Page 35
not exceed the maximum stack height indicated by the stack height indicator. Overfilling the tray may cause jams. 7 Place the print media against the left side of the tray, with the print side down and facing the front of the tray. Stack height indicator Metal stop Do not load bent or wrinkled - Dell S2500 | Owner's Manual - Page 36
www.dell.com/supplies | support.dell.com 9 Squeeze the width guide tab and the width guide together, and then slide the guide to the edge of the print media. 10 Squeeze the length guide tab and the length guide together, and then slide the guide to the edge of the print media. 11 If you are loading - Dell S2500 | Owner's Manual - Page 37
paper tray. • You can use it when you need to print a small quantity of a specific type or size of media, such as transparencies. The printer then prompts you to load the appropriate print media before it prints. Use the following instructions to load the multipurpose feeder. 1 Use the finger grips - Dell S2500 | Owner's Manual - Page 38
www.dell.com/supplies | support.dell.com 3 Unfold the extension. 4 Slide the width guide all the way to the right. 5 Flex the sheets back and forth to loosen them, and then fan them. Do not fold or crease the print media. Straighten the edges of the stack on a level surface. NOTE: When you load the - Dell S2500 | Owner's Manual - Page 39
, but do not force it. 8 Slide the width guide until it lightly touches the stack of print media. Refer to the Dell Workgroup Laser Printer S2500 User's Guide (Start → Programs → Dell Printers → Dell Laser Printer S2500 → User's Guide) for additional information on loading different types of media - Dell S2500 | Owner's Manual - Page 40
www.dell.com/supplies | support.dell.com 40 Load paper - Dell S2500 | Owner's Manual - Page 41
SECTION 7 Setting up for local printing Turning on the printer Software overview Installing printer drivers 7 - Dell S2500 | Owner's Manual - Page 42
. If your printer is attached to a network instead of your computer, skip this step and go on to "Setting up for network printing" on page 55. All Microsoft® Windows® operating systems support parallel connections. However, only the Windows 98 SE, Windows Me, Windows 2000, and Windows XP operating - Dell S2500 | Owner's Manual - Page 43
on your operating system. Operating System Status Monitor Windows 95, Y Windows 98, Windows Me Windows NT® 4.0 N Printing Status Window N Dell Toner Re-order Window N Local Printer Setup Utility Y N N Y Dell Printer Software Uninstall Y Driver Profiler Y Y Y Setting up for local - Dell S2500 | Owner's Manual - Page 44
www.dell.com/supplies | support.dell.com Operating System Windows 2000, Windows XP Status Monitor N Printing Status Window Y Dell Toner Re-order Window Y Local Printer Setup Utility Y Dell Printer Software Uninstall Y Driver Profiler Y NOTE: If you purchased your printer and computer - Dell S2500 | Owner's Manual - Page 45
when you install the Dell printer driver. Click Start → Programs → Dell Printers → Dell Laser Printer S2500 → Dell Local Printer Setup Utility. Dell Printer Software Uninstall Use the Uninstall software utility to remove any currently installed printer software or printer objects. You can access - Dell S2500 | Owner's Manual - Page 46
to print! If you purchased your Dell printer separately To obtain all the features described in the Software Overview, use the Drivers and Utilities CD to install them. Use the following table to find the instructions you need for your operating system. Computer operating system Windows XP Windows - Dell S2500 | Owner's Manual - Page 47
install the additional software for your printer. When all of the files are installed on your computer, the Congratulations screen appears. 8 Click Print a Test Page to verify printer setup. 9 Click Finish when the test page prints successfully. 10 Close the Drivers and Utilities CD screen. Setting - Dell S2500 | Owner's Manual - Page 48
) to install the additional software for your printer. When all the files are installed on your computer, the Congratulations screen appears. 9 Click Print a Test Page to verify printer setup. 10 Click Finish when the test page prints successfully. 11 Close the Drivers and Utilities CD screen. 48 - Dell S2500 | Owner's Manual - Page 49
Using Windows Me with a USB or parallel cable NOTE: Depending on the software and printers already installed on your computer, your screens may vary from those in the instructions. If you attached a USB cable, you must install both a USB port driver and a custom print driver. When you attached the - Dell S2500 | Owner's Manual - Page 50
for example, Dell Laser Printer S2500) or type a unique name for your printer, and then click Next. 6 A test page will print automatically. Click YES when the test page prints successfully. 7 Click Finish to complete the installation and close the wizard. 8 Launch the Drivers and Utilities CD: click - Dell S2500 | Owner's Manual - Page 51
Using Windows 98 with a USB or parallel cable NOTE: Depending on the software and printers already installed on your computer, your screens may vary from those in the instructions. If you attached a USB cable, you must install both a USB port driver and a custom print driver. When you attached the - Dell S2500 | Owner's Manual - Page 52
(for example, Dell Laser Printer S2500) or type a unique name for your printer, and then click Next. 13 Click Finish. 14 A test page will print automatically. Click YES when the test page prints successfully. 15 Click Finish to complete the installation. 16 Launch the Drivers and Utilities CD: click - Dell S2500 | Owner's Manual - Page 53
screen appears. 4 Use the default printer name (for example, Dell Laser Printer S2500), or type a unique name for your printer. 5 Select whether or not to use this printer as the default printer. 6 Click Next. 7 Click Finish. 8 A test page will print automatically. Click YES when the test - Dell S2500 | Owner's Manual - Page 54
drive letter of your CD). 15 Select SETUP.EXE, and then click OK. 16 When the Dell Drivers and Utilities screen appears, click Install the printer for Use on this Computer only (Personal Installation) to install the additional software for your printer. If you are prompted to restart your computer - Dell S2500 | Owner's Manual - Page 55
8 SECTION 8 Setting up for network printing Software overview Dell Printer Configuration Web Tool Connecting the printer to the network - Dell S2500 | Owner's Manual - Page 56
Window Local Printer Setup Utility* Windows 95, Y N Y Y Windows 98, Windows Me Windows NT N Y Y Y 4.0 Windows N Y Y Y 2000, Windows XP * Available only on the computer on which it is installed. Print Server TCP/IP Setup Utility Y Y Y Dell Printer Software Uninstall Driver - Dell S2500 | Owner's Manual - Page 57
on your computer when you install the Dell printer driver. Click Start → Programs → Dell Printers → Dell Laser Printer S2500 → Dell Local Printer Setup Utility. The Dell Local Printer Setup Utility only functions with printers connected directly to the computer. Setting up for network printing 57 - Dell S2500 | Owner's Manual - Page 58
www.dell.com/supplies | support.dell.com Print Server TCP/IP Setup Utility The Print Server TCP/IP Setup Utility lets you set up an IP address and other important IP parameters. See "Assign an IP address" on page 62 for instructions on running the Print Server TCP/IP Setup Utility. Dell Printer - Dell S2500 | Owner's Manual - Page 59
Dell Printer Configuration Web Tool, type the network printer IP address in your Web browser, and the printer configuration appears on the screen. Connecting the printer to the network Use the table below for instructions on connecting your Dell S2500n printer to the network. Attach your printer - Dell S2500 | Owner's Manual - Page 60
section you will: • Attach cables. • Print and check the network setup page. • Assign an IP address to the printer. • Verify the IP settings. • Install printer drivers on each client that needs to print to the new printer. Attach cables 1 Make sure the printer is turned off and unplugged. 2 Plug - Dell S2500 | Owner's Manual - Page 61
firmly plugged in at the back of the printer and at the electrical outlet. If the printer is on but nothing prints, or if print jobs are not printing and the Error light is on solid, make sure the toner cartridge is installed. Print and check the network setup page 1 When the Ready/Data light is on - Dell S2500 | Owner's Manual - Page 62
| support.dell.com Assign an IP address Recommended method If the printer is connected to a network which automatically supplies IP addresses (DHCP), you do not need to use the Print Server TCP/IP Setup Utility available on the Drivers and Utilities CD. Use the Dell Printer Configuration Web - Dell S2500 | Owner's Manual - Page 63
your network setup page in the Print Server Physical Address field and click Next. 5 If the network found the printer, enter the IP address, IP Netmask (or Subnet Mask), and IP Default Gateway values desired and click Apply. If the assignment was successful, you can access the printer using the Dell - Dell S2500 | Owner's Manual - Page 64
to store it 3 Make sure BOOTP is enabled. Check the network setup page. 4 Set up the printer host name in the computer. To do so, define the printer IP name and address in the /etc/hosts file or on the name server. This address must match the IP address. You may want to use a host name that is - Dell S2500 | Owner's Manual - Page 65
: 1 Determine the hardware address of the printer. Refer to the item labeled UAA on the network setup page. Use the number in the right column. 2 Make sure RARP is enabled. Check the network setup page. 3 Set up the RARP server. Follow the instructions provided by your host operating system. Use - Dell S2500 | Owner's Manual - Page 66
| support.dell.com Verify the IP settings 1 Press and release the Continue button on the operator panel to print another network setup page. 2 Look under the "TCP/IP" heading on the network setup page to make sure the IP address, netmask, and gateway are what you expected. 3 Ping the printer and - Dell S2500 | Owner's Manual - Page 67
Wizard. • Set up the queue on the server. • Install printer drivers for all clients connected to the server. Attach cables 1 Make sure the printer is turned off and unplugged. 2 Connect the printer to the server (or other computer) using a USB or parallel cable. Setting up for network printing 67 - Dell S2500 | Owner's Manual - Page 68
turned on, make sure the power cord is firmly plugged in at the back of the printer and at the electrical outlet. If the printer is on but nothing prints, or if print jobs are not printing and the Error light is on solid, make sure the toner cartridge is installed. 68 Setting up for network printing - Dell S2500 | Owner's Manual - Page 69
instructions for the operating system on the server. Computer operating system Go to page... Windows XP 69 Windows 2000 69 Windows Me 70 Windows NT 4.x 71 Windows 98 72 Windows 95 73 Linux 74 Novell 74 Using Windows XP with a USB or parallel cable 1 Insert the Drivers and Utilities - Dell S2500 | Owner's Manual - Page 70
the server" on page 74. Using Windows Me with a USB or parallel cable NOTE: Depending on the software and printers already installed on your computer, your screens may vary from those in the instructions. If you attached a USB cable, you must install both a USB port driver and a custom print driver - Dell S2500 | Owner's Manual - Page 71
, Dell Laser Printer S2500) or type a unique name for your printer, and then click Next. 8 Click Finish to complete the installation and close the wizard. 9 Go to "Set up the queue on the server" on page 74. Using Windows NT with a parallel cable NOTE: USB support is not available for Windows NT - Dell S2500 | Owner's Manual - Page 72
| support.dell.com Using Windows 98 with a USB or parallel cable NOTE: Depending on the software and printers already installed on your computer, your screens may vary from those in the instructions. If you attached a USB cable, you must install both a USB port driver and a custom print driver - Dell S2500 | Owner's Manual - Page 73
. 12 Use the default printer name (for example, Dell Laser Printer S2500) or type a unique name for your printer, and then click Next. 13 Click Finish to complete the installation. Using Windows 95 with a parallel cable NOTE: USB support is not available for Windows 95 operating systems. When - Dell S2500 | Owner's Manual - Page 74
queue on the server" on page 74. Installing drivers in a Linux environment Your printer supports Red Hat Linux versions 7.2, 7.3, and 8.0, and SuSE Linux 7.2, 7.3, and 8.0. Refer to the Unix/packages on the Drivers and Utilities CD for instructions on installing your printer in a Linux environment - Dell S2500 | Owner's Manual - Page 75
9 Click Finish. 10 Print a test page to verify the software is installed correctly. 11 Click Finish to exit. Install printer drivers for all clients If you are connecting clients to the server, run the Drivers and Utilities CD installer again: 1 Go to Start → Run → d:setup.exe (d: represents the CD - Dell S2500 | Owner's Manual - Page 76
you will: • Attach cables. • Print and check the network setup page. • Assign an IP address to the printer. • Verify the IP settings. • Set up the queue on the server. • Install printer drivers for all clients connected to the server. Attach cables 1 Make sure the printer is turned off and unplugged - Dell S2500 | Owner's Manual - Page 77
firmly plugged into the back of the printer. - Plug the Ethernet cable into another wall outlet. 3 Find the IP address located under the TCP/IP heading. If the IP address equals 0.0.0.0, wait a few minutes and print the network setup page again. If the IP address still shows 0.0.0.0., go to "Assign - Dell S2500 | Owner's Manual - Page 78
www.dell.com/supplies | support.dell.com Verify the IP settings 1 Look under the "TCP/IP" heading on the network setup page to make sure the IP address, netmask, and gateway are what you expected. 2 Ping the printer and verify that it responds. For example, at a command prompt on a network computer - Dell S2500 | Owner's Manual - Page 79
Dell Laser Printer S2500n printer. Browse or type each client's computer name or IP address. You can specify as many clients as you wish. 7 When you are finished adding clients, click Next. 8 Select the software or documentation you want your users to have access to. 9 Select the Universal Network - Dell S2500 | Owner's Manual - Page 80
www.dell.com/supplies | support.dell.com 80 Setting up for network printing - Dell S2500 | Owner's Manual - Page 81
9 SECTION 9 Setting up for shared printing Point and print Peer-to-peer - Dell S2500 | Owner's Manual - Page 82
www.dell.com/supplies | support.dell.com You can share your new printer on the network using the Drivers and Utilities CD that shipped with your printer (see "Set up the queue on the server" on page 74), or using Microsoft's point and print or peer-to-peer method. However, if you use one of the - Dell S2500 | Owner's Manual - Page 83
. If you use the point and print method, a subset of driver information is copied from the server to the client computer. This is just enough information to send a print job to the printer. 1 On the Windows desktop of the client computer, double-click Network Neighborhood. 2 Locate the host name of - Dell S2500 | Owner's Manual - Page 84
www.dell.com/supplies | support.dell.com Peer-to-peer If you use the peer-to-peer method, the printer driver is fully installed on each client computer. Network clients retain control of driver modifications. The client computer handles the print job processing. 1 Click Start → Settings → Printers. - Dell S2500 | Owner's Manual - Page 85
10 SECTION 10 Configure paper trays Dell Workgroup Laser Printer S2500 Dell Workgroup Laser Printer S2500n - Dell S2500 | Owner's Manual - Page 86
Setup Utility to reconfigure the tray. 9 Update your driver by following the instructions in the table. Windows XP Windows 2000 Windows NT 4.0 Windows Me Windows 95/98 1 Click Start → Control Panel → Printers and Other Hardware → Printers and Faxes. 2 Right-click the Dell Laser Printer S2500 - Dell S2500 | Owner's Manual - Page 87
the S2500n printer is done through the Dell Printer Configuration Web Tool. Use the following steps to change the S2500n printer paper size and type: 1 Type your network printer's IP address in your Web browser. NOTE: If you do not know what your printer's IP address is, print a network setup page - Dell S2500 | Owner's Manual - Page 88
www.dell.com/supplies | support.dell.com 12 Update your driver by following the instructions in the table. Windows XP Windows 2000 Windows NT 4.0 Windows Me Windows 95/98 1 Click Start → Control Panel → Printers and Other Hardware → Printers and Faxes. 2 Right-click the Dell Laser Printer S2500 - Dell S2500 | Owner's Manual - Page 89
11 SECTION 11 Verify printer setup Printing a menu settings page - Dell S2500 | Owner's Manual - Page 90
, ways to improve print quality, solutions for printing problems, and instructions for replacing supplies, refer to the Dell Workgroup Laser Printer S2500 User's Guide on the Drivers and Utilities CD (Start → Programs → Dell Printers →Dell Laser Printer S2500 →User's Guide). 90 Verify printer setup - Dell S2500 | Owner's Manual - Page 91
the instructions in the table. If the printer is on the network, update the driver for each client. Windows XP Windows 2000 Windows NT 4.0 Windows Me Windows 95/98 1 Click Start → Control Panel → Printers and Other Hardware → Printers and Faxes. 2 Right-click the Dell Laser Printer S2500 icon - Dell S2500 | Owner's Manual - Page 92
.dell.com/supplies | support.dell.com Restoring factory defaults You can make changes to printer settings or values by using the menus available through the Printer Settings Configuration sheet, PJL commands, or the Local Printer Setup Utility. For more information, see "Understanding the printer - Dell S2500 | Owner's Manual - Page 93
12 SECTION 12 Appendix Contacting Dell Limited Warranties and Return Policy Dell Computer Corporation Ink and Toner Cartridges Limited Warranties Dell Software License Agreement - Dell S2500 | Owner's Manual - Page 94
Country Code: 32 City Code: 2 Department Name or Service Area, Website and E-Mail Address Website: support.euro.dell.com E-mail: [email protected] E-mail for French Speaking Customers: support.euro.dell.com/be/fr/emaildell/ Technical Support Customer Care Corporate Sales Fax Switchboard Area Codes - Dell S2500 | Owner's Manual - Page 95
) Spare Parts Sales & Extended Service Sales Denmark (Copenhagen) Website: support.euro.dell.com International Access Code: 00 Country Code: 45 E-mail Support (portable computers): [email protected] E-mail Support (desktop computers): [email protected] E-mail Support (servers - Dell S2500 | Owner's Manual - Page 96
Name or Service Area, Website and E-Mail Address Finland (Helsinki) Website: support.euro.dell.com International Access Code: 990 E-mail: [email protected] Country Code: 358 City Code: 9 E-mail Support (servers): [email protected] Technical Support Technical Support Fax Relational - Dell S2500 | Owner's Manual - Page 97
International Access Code: 00 Country Code: 30 India Department Name or Service Area, Website and E-Mail Address Website: support.euro.dell.com E-mail: [email protected] Technical Support Home/Small Business Customer Care Global Segment Customer Care Preferred Accounts Customer - Dell S2500 | Owner's Manual - Page 98
Code: 00 Country Code: 39 City Code: 02 Department Name or Service Area, Website and E-Mail Address Website: support.euro.dell.com E-mail: [email protected] Ireland Technical Support U.K. Technical Support (dial within U.K. only) Home User Customer Care Small Business Customer Care - Dell S2500 | Owner's Manual - Page 99
(Technical Support and Customer Service) (Austin, Texas, U.S.A.) Sales (Austin, Texas, U.S.A.) SalesFax (Austin, Texas, U.S.A.) Luxembourg International Access Code: 00 Country Code: 352 Mexico International Access Code: 00 Country Code: 52 Website: support.euro.dell.com E-mail: [email protected] - Dell S2500 | Owner's Manual - Page 100
Sales Fax Switchboard Switchboard Fax Website: support.euro.dell.com E-mail Support (portable computers): [email protected] E-mail Support (desktop computers): [email protected] E-mail Support (servers): [email protected] Technical Support Relational Customer Care Home/Small - Dell S2500 | Owner's Manual - Page 101
City Code: 22 Customer Care Sales Customer Service Fax Reception Desk Fax Switchboard Portugal Website: support.euro.dell.com International Access Code: 00 E-mail: support.euro.dell.com/pt/en/emaildell/ Country Code: 351 Technical Support Customer Care Sales Fax Puerto Rico General - Dell S2500 | Owner's Manual - Page 102
Care Switchboard Fax Website: support.euro.dell.com E-mail: [email protected] E-mail Support for Latitude and Inspiron: [email protected] E-mail Support for OptiPlex: [email protected] E-mail Support for Servers: [email protected] Technical Support Relational Customer Care Home - Dell S2500 | Owner's Manual - Page 103
Department Name or Service Area, Website and E-Mail Address Area Codes, Local Numbers, and Toll-Free Numbers Website: support.euro.dell.com E-mail: [email protected] E-mail for French-speaking HSB and Corporate Customers: support.euro.dell.com/ch/fr/emaildell/ Technical Support (Home and Small - Dell S2500 | Owner's Manual - Page 104
1-800-289-3355 or toll-free: 1-800-879-3355 Dell Outlet Store (Dell refurbished computers) toll-free: 1-888-798-7561 Software and Peripherals Sales toll-free: 1-800-671-3355 Spare Parts Sales toll-free: 1-800-357-3355 Extended Service and Warranty Sales toll-free: 1-800-247-4618 Fax toll - Dell S2500 | Owner's Manual - Page 105
is not in accordance with product instructions - Failure to follow the product instructions or failure to perform preventive maintenance - Problems caused by using accessories, parts, or components not supplied by Dell • Products with missing or altered service tags or serial numbers • Products for - Dell S2500 | Owner's Manual - Page 106
is not extended if we repair or replace a warranted product or any parts. Dell may change the availability of limited warranties, at its discretion, but ): Technical Support and Customer Service Government and Education Customers: Technical Support and Customer Service Dell-Branded Memory U.S. Only - Dell S2500 | Owner's Manual - Page 107
on how to obtain service. How will you fix my product? We use new and refurbished parts made by various manufacturers in performing warranty repairs and in building replacement parts and systems. Refurbished parts and systems are parts or systems that have been returned to Dell, some of which were - Dell S2500 | Owner's Manual - Page 108
www.dell.com/supplies | support.dell.com What do I do if I am not satisfied? We pride ourselves on our great customer service. If you are not satisfied with the service you receive under this limited warranty, please let us know. We have found that the best way to resolve issues regarding our - Dell S2500 | Owner's Manual - Page 109
is not in accordance with product instructions - Failure to follow the product instructions or failure to perform preventive maintenance - Problems caused by using accessories, parts, or components not supplied by Dell • Products with missing or altered service tags or serial numbers • Products for - Dell S2500 | Owner's Manual - Page 110
dell.com/supplies | support.dell.com THIS WARRANTY GIVES YOU SPECIFIC LEGAL RIGHTS, AND YOU MAY ALSO HAVE OTHER RIGHTS WHICH VARY FROM PROVINCE TO PROVINCE. DELL extended if we repair or replace a warranted product or any parts. Dell may change the terms and availability of limited warranties, at - Dell S2500 | Owner's Manual - Page 111
Program: Technical Support Customer Service Dell-Branded Memory Canada Only 1- that the problem is not covered under this warranty, we will notify you and inform you of service alternatives that warranties: We will replace any defective part with new or refurbished parts, if we agree that it needs - Dell S2500 | Owner's Manual - Page 112
Dell owns all parts removed from repaired products. What do I do if I am not satisfied? We pride ourselves on our great customer service. If you are not satisfied with the service limited warranty on Dell-branded memory may not be transferred. You may record your transfer by going to Dell's website: - Dell S2500 | Owner's Manual - Page 113
also be available from the manufacturer or publisher. While Dell offers a wide selection of software and peripheral products, we do not specifically test or guarantee that all of the products we offer work with any or all of the various models of Dell computers, nor do we test or guarantee all of - Dell S2500 | Owner's Manual - Page 114
Dell Customer Service at 1-800-387-5759 to receive a Credit Return Authorization Number. You must ship the Dell Software and Peripherals products back to Dell products must be in as-new condition, software products must be unopened, and all of the manuals, floppy disk(s), CD(s), power cables, and - Dell S2500 | Owner's Manual - Page 115
and address of the customer, and details of symptoms and configuration at the time of malfunction, including peripherals and software used. Otherwise, Dell may refuse the guarantee claim. Upon diagnosis of a warranted defect, Dell will make arrangements and pay for ground freight and insurance to - Dell S2500 | Owner's Manual - Page 116
Dell's sole option. This limited warranty does not apply to ink or toner cartridges that have been refilled or improperly stored or due to problems resulting from misuse, abuse, accident, neglect, mishandling, incorrect environments, or wear from ordinary use. THIS WARRANTY GIVES YOU SPECIFIC LEGAL - Dell S2500 | Owner's Manual - Page 117
original purchaser of genuine Dell-branded toner cartridges that the cartridges will be free from defects resulting from material or manufacturing process for the life of the cartridge. For the original purchaser of genuine Dell-branded ink cartridges, Dell warrants that the cartridges will be free - Dell S2500 | Owner's Manual - Page 118
, you may use as many copies at any time as you have licenses. "Use" means loading the Software in temporary memory or permanent storage on the computer. Installation on a network server solely for distribution to other computers is not "use" if (but only if) you have a separate license for each - Dell S2500 | Owner's Manual - Page 119
are limited to ninety (90) days from the date you receive the Software. Some jurisdictions do not allow limits on the duration of an implied resulted from accident, abuse, misapplication, or service or modification by someone other than Dell. Any replacement disk is warranted for the remaining - Dell S2500 | Owner's Manual - Page 120
212 and 48 C.F.R. 227.7202-1 through 227.7202-4, all U.S. Government end users acquire the software and documentation with only those rights set forth herein. Contractor/manufacturer is Dell Products, L.P., One Dell Way, Round Rock, Texas 78682. General This license is effective until terminated. It - Dell S2500 | Owner's Manual - Page 121
72 using Windows Me, 49, 70 using Windows NT, 50, 71 using Windows XP, 47, 69 toner cartridge, 30 IP address setting manually using BOOTP, 63 using RARP server and telnet, 65 using static ARP entry and telnet, 65 using the Print Server TCP/IP Setup Utility, 62 verifying, 66, 78 L Linux, drivers, 74 - Dell S2500 | Owner's Manual - Page 122
, 16 print server TCP/IP setup utility, using, 58 printer memory, 19 paper rest, 17 positioning, 16 turning on, 43, 68 unpack, 12 printer configuration Web tool, using, 59 printer software uninstall, using, 45, 58 printing local, 41 menu settings page, 61, 77, 90 network, 41 network setup page, 61 - Dell S2500 | Owner's Manual - Page 123
www.dell.com/supplies | support.dell.com - Dell S2500 | Owner's Manual - Page 124
www.dell.com/supplies | support.dell.com
-
 1
1 -
 2
2 -
 3
3 -
 4
4 -
 5
5 -
 6
6 -
 7
7 -
8
-
9
-
10
-
11
-
12
-
13
-
14
-
15
-
16
-
17
-
18
-
19
-
20
-
21
-
22
-
23
-
24
-
25
-
26
-
27
-
28
-
29
-
30
-
31
-
32
-
33
-
34
-
35
-
36
-
37
-
38
-
39
-
40
-
41
-
42
-
43
-
44
-
45
-
46
-
47
-
48
-
49
-
50
-
51
-
52
-
53
-
54
-
55
-
56
-
57
-
58
-
59
-
60
-
61
-
62
-
63
-
64
-
65
-
66
-
67
-
68
-
69
-
70
-
71
-
72
-
73
-
74
-
75
-
76
-
77
-
78
-
79
-
80
-
81
-
82
-
83
-
84
-
85
-
86
-
87
-
88
-
89
-
90
-
91
-
92
-
93
-
94
-
95
-
96
-
97
-
98
-
99
-
100
-
101
-
102
-
103
-
104
-
105
-
106
-
107
-
108
-
109
-
110
-
111
-
112
-
113
-
114
-
115
-
116
-
117
-
118
-
119
-
120
-
121
-
122
-
123
-
124
 |
 |

www.dell.com/supplies | support.dell.com
Dell™ Workgroup Laser Printer S2500
Owner’s Manual
Look Inside For:
• Setting Up Your Printer