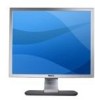
Dell SE197FP User Guide
Dell SE197FP - 19" LCD Monitor Manual
 |
View all Dell SE197FP manuals
Add to My Manuals
Save this manual to your list of manuals |
Dell SE197FP manual content summary:
- Dell SE197FP | User Guide - Page 1
Using the Front Panel Buttons Using the OSD Using the Dell™ Soundbar (Optional) Product Specific Problems Monitor Specific Troubleshooting Common Problems Product Specific Problems Appendix FCC Notice (U.S. Only) CAUTION: Safety Instruction Contacting Dell Your Monitor Set-up Guide Notes, Notices - Dell SE197FP | User Guide - Page 2
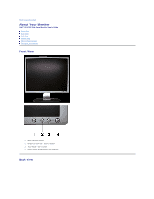
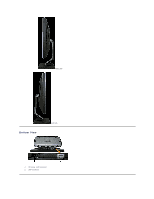
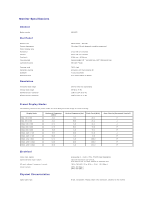
Back to Contents Page About Your Monitor Dell™ SE197FP Flat Panel Monitor User's Guide Front View Back View Side View Bottom View Monitor Specifications Caring for your Monitor Front View 1 Menu selection button 2 Brightness Contrast / Down(-) button 3 Auto-Adjust / Up(+) button 4 Power button On/ - Dell SE197FP | User Guide - Page 3
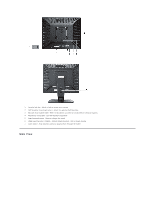
to this label if you need to contact Dell for technical support. 4 Regulatory rating label - List the regulatory approvals. 5 Stand removal button - Press to release the stand. 6 VESA mounting holes ( 100mm - behind attached stand) - Use to mount monitor. 7 Cable holder - Help organize cables by - Dell SE197FP | User Guide - Page 4
Right side Bottom View Left side 1 AC power cord connector 2 VGA connector - Dell SE197FP | User Guide - Page 5
Monitor Specifications General Model number Flat Panel Screen type Screen dimensions Preset display area: Horizontal Vertical Pixel pitch Viewing angle Luminance output Contrast ratio Faceplate coating Backlight Response Time Resolution Horizontal scan range Vertical scan range Optimal preset - Dell SE197FP | User Guide - Page 6
Dimensions (with stand): Height Width Depth Weight Monitor (Stand and Head) Monitor Flat panel only (VESA Mode) Weight with packaging 401.3 mm (15.8 inches) 412.7 mm (16.2 inches) - Dell SE197FP | User Guide - Page 7
are automatic; you can select different settings, if desired. Caring for your Monitor CAUTION: Read and follow the Safety Instruction before cleaning the monitor. CAUTION: Before cleaning the monitor, unplug the monitor from the electrical outlet. l To clean your antistatic screen, slightly dampen - Dell SE197FP | User Guide - Page 8
Appendix Dell™ SE197FP Flat Panel Monitor User's Guide FCC Notice (U.S. Only) CAUTION: Safety Instruction Contacting Dell Your Monitor Set-up Guide FCC to the ranges defined in the "Electrical Specifications" section. l Do not store or use the LCD monitor in locations that are exposed to heat, - Dell SE197FP | User Guide - Page 9
or Service Area, Website and E-Mail Address Website: www.dell.com.ai E-mail: [email protected] Antigua and Barbuda Aomen Argentina (Buenos Aires) International Access Code: 00 Country Code: 54 City Code: 11 Aruba Australia (Sydney) International Access Code: 0011 General Support Website - Dell SE197FP | User Guide - Page 10
877-335-5767 Sales (Home Sales/Small Business) Sales (med./large bus., government) Spare Parts Sales & Extended Service Sales E-mail: [email protected] General Support Website: www.dell.com/cl E-mail: [email protected] toll-free: 1-800-387-5752 toll-free: 1-800-387-5755 1 866 440 3355 - Dell SE197FP | User Guide - Page 11
West Large Corporate Accounts Spare Parts Website: www.dell.com/cl E-mail: [email protected] General Support Website: www.dell.com/cr E-mail: [email protected] General Support Website: support.euro.dell.com E-mail: [email protected] Technical Support Customer Care Fax Technical Fax - Dell SE197FP | User Guide - Page 12
Code: 39 City Code: 02 Technical Support for all other Dell computers Home/Small Business Customer Care Global Segment Customer Care Preferred Accounts Customer Care Large Accounts Customer Care Public Accounts Customer Care Switchboard Website: support.euro.dell.com Technical Support Gold Service - Dell SE197FP | User Guide - Page 13
Code: 60 City Code: 4 Mexico International Access Code: 00 Country Code: 52 Technical Support Customer Care Fax Switchboard E-mail: [email protected] General Support (dial from within Jamaica only) Website: support.jp.dell.com Technical Support (XPS) Technical Support (0)2 481 91 19 26 25 77 - Dell SE197FP | User Guide - Page 14
(Singapore) International Access Code: 005 Country Code: 65 Main E-mail: [email protected] General Support E-mail: [email protected] General Support Website: support.euro.dell.com Technical Support for XPS Technical Support for all other Dell computers Technical Support Fax Home/Small - Dell SE197FP | User Guide - Page 15
Code: 00 Country Code: 41 City Code: 22 Taiwan International Access Code: 002 Country Code: 886 Thailand International Access Code: 001 Country Code: 66 Trinidad/Tobago Turks and Caicos Islands U.K. (Bracknell) Transaction Sales Corporate Sales Website: support.euro.dell.com E-mail: czech_dell@dell - Dell SE197FP | User Guide - Page 16
Service and Support Employee Purchase Program (EPP) Customers Dell Sales Dell Outlet Store (Dell refurbished computers) Software and Peripherals Sales Spare Parts Sales Extended Service and Warranty Sales Fax Dell Services 702-4360 0800-100-4752 Your Monitor Set-up Guide To view PDF files (files - Dell SE197FP | User Guide - Page 17
Back to Contents Page - Dell SE197FP | User Guide - Page 18
Using the OSD Dell™ SE197FP Flat Panel Monitor User's Guide Connecting Your Monitor Using the Front Panel Buttons Using the OSD Using the Dell™ Soundbar (Optional) Connecting Your Monitor CAUTION: Before you begin any of the procedures in this section, follow the Safety Instruction. 1. Turn off - Dell SE197FP | User Guide - Page 19
LED indicates DPMS power save mode. The Power button turns the monitor on and off. Power Button & Indicator On Screen Menu/Display ' adjustment menu. The 'Brightness' function adjusts the luminance of the flat panel. Adjust 'Brightness' first, then adjust 'Contrast' only if further adjustment - Dell SE197FP | User Guide - Page 20
occur to the size of the viewing area; the image Vertical will simply be shifted in response to your selection/change. Minimum is '0' (-). Maximum is '100' (+). Image settings: Auto Adjust Even though your computer system can recognize your new flat panel monitor on startup, the 'Auto Adjustment - Dell SE197FP | User Guide - Page 21
Phase If satisfactory results are not obtained using the Phase adjustment, use the Pixel Clock'adjustment and then use 'Phase' again. Color Settings: NOTE: This function may change the width of the display image. Use the 'Horizontal' function of the 'Position' menu to center the display image on - Dell SE197FP | User Guide - Page 22
, color, balance, etc.) via software applications on your PC. You can disable this feature by selecting "Disable". For best user experience and optimum performance of your monitor, keep this feature enabled. NOTE:If user select 'disable' for DDC/CI,the warning message will appear on screen.Then - Dell SE197FP | User Guide - Page 23
blank. This could also indicate that the monitor is not synchronizing with the computer. See Troubleshooting for more information. Using the Dell™ Soundbar (Optional) The Dell Soundbar is a stereo two channel system adaptable to mount on Dell Flat Panel Displays. The Soundbar has a rotary volume and - Dell SE197FP | User Guide - Page 24
the Soundbar aligning the two slots with the two tabs along the bottom rear of the monitor. 2. Slide the Soundbar to the left until it snaps into place. 3. Connect the . NOTE: Soundbar Power Connector - 12V DC output is for optional Dell Soundbar only. NOTICE: Do not use with any device other than - Dell SE197FP | User Guide - Page 25
Contents Page Product Specific Problems Dell™ SE197FP Flat Panel Monitor User's Guide Monitor Specific Troubleshooting Common Problems Product Specific Problems CAUTION: Before you begin any of the procedures in this section, follow the Safety Instruction. Monitor Specific Troubleshooting Self-Test - Dell SE197FP | User Guide - Page 26
the screen l For cleaning instruction, see Caring for your Monitor. l Do not perform any troubleshooting steps l Monitor needs to be replaced l Ensure monitor is in proper video mode l Ensure video cable connection to computer and to the flat panel is secure l Perform monitor reset on "All Settings - Dell SE197FP | User Guide - Page 27
No Input Signal when user controls pressed No picture, the LED light is green. When press "+", "-" or "Menu" key, the message " No input signal " will appear. OSD Lock All buttons are locked except the "menu" button. No user adjustments are allowed. Back to Contents Page l Check the signal - Dell SE197FP | User Guide - Page 28
Contents Page Using Your Monitor Stand DellT SE197FP Flat Panel Monitor User's Guide Attaching the Stand Organizing Your Cables Using the Tilt Removing the Stand Attaching the Stand NOTE: Stand is detached when the monitor is shipped from the factory. 1. Place the stand on a flat surface. 2. Fit the - Dell SE197FP | User Guide - Page 29
viewing angle. Removing the Stand After placing the monitor panel on a soft cloth or cushion, press and hold the LCD removal button, and then remove the stand. NOTE: To prevent scratches on the LCD screen while removing the stand, ensure that the monitor is placed on a clean surface. Back to
-
 1
1 -
 2
2 -
 3
3 -
 4
4 -
 5
5 -
 6
6 -
 7
7 -
8
-
9
-
10
-
11
-
12
-
13
-
14
-
15
-
16
-
17
-
18
-
19
-
20
-
21
-
22
-
23
-
24
-
25
-
26
-
27
-
28
-
29
 |
 |
Dell™ SE197FP Flat Panel Monitor User's Guide
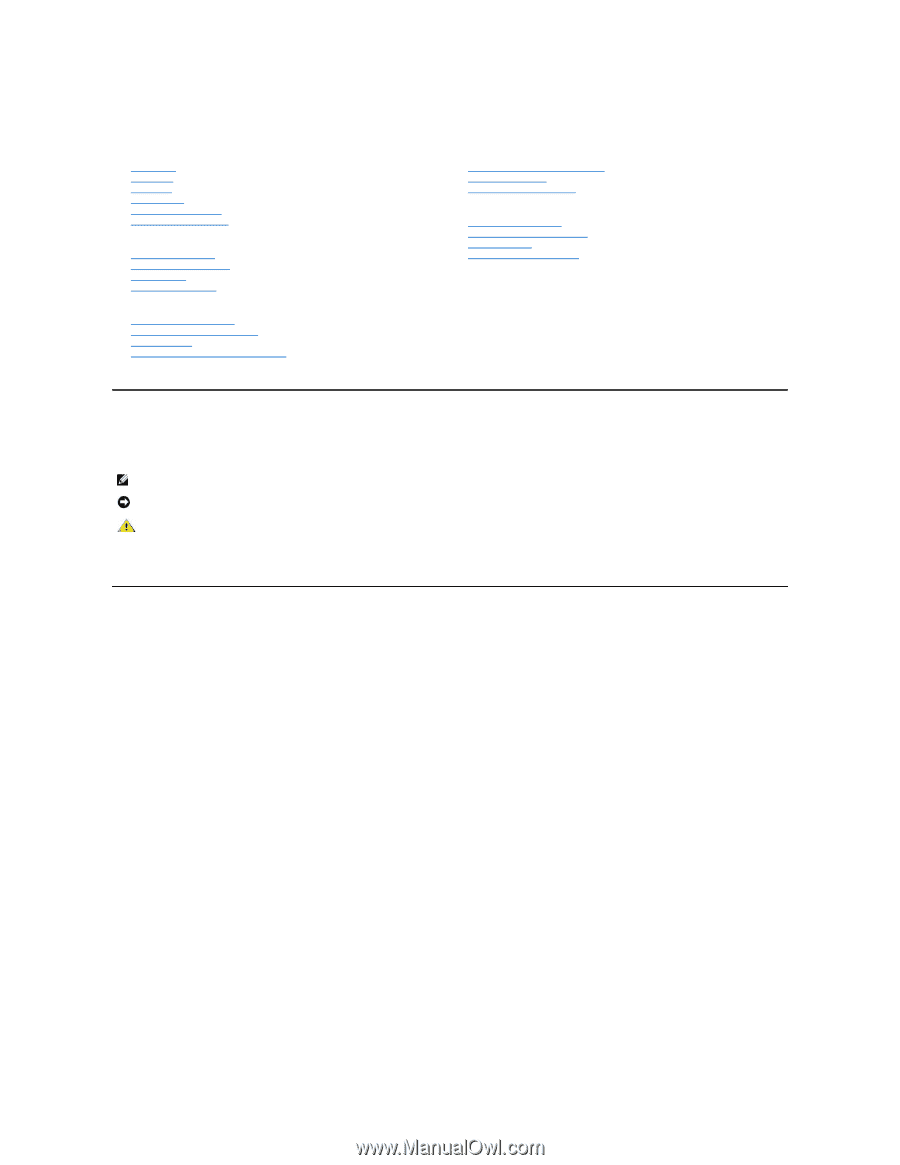
Notes, Notices, and Cautions
Throughout this guide, blocks of text may be accompanied by an icon and printed in bold type or in italic type. These blocks are notes, notices, and cautions,
and they are used as follows:
Some warnings may appear in alternate formats and may be unaccompanied by an icon. In such cases, the specific presentation of the caution is mandated by
regulatory authority.
Information in this document is subject to change without notice.
©
2006 Dell Inc. All rights reserved.
Reproduction in any manner whatsoever without the written permission of Dell Inc. is strictly forbidden.
Trademarks used in this text:
Dell
, the
DELL
logo,
Inspiron
,
Dell Precision
,
Dimension
,
OptiPlex
,
Latitude, PowerEdge, PowerVault, PowerApp, and Dell OpenManage
are trademarks of
DellInc
Microsoft
and
Windows
are registered trademarks of Microsoft Corporation
ENERGY STAR
is a registered trademark of the U.S. Environmental Protection Agency. As an ENERGY
STAR partner, Dell Inc. has determined that this product meets the ENERGY STAR guidelines for energy efficiency.
Other trademarks and trade names may be used in this document to refer to either the entities claiming the marks and names or their products. Dell Inc. disclaims any
proprietary interest in trademarks and trade names other than its own.
October 2006
Rev. A00
About Your Monitor
Front View
Back View
Side View
Bottom View
Monitor specifications
Caring for your Monitor
Using Your Adjustable Monitor Stand
Attaching the Stand
Organizing Your Cables
Using the Tilt
Removing the Stand
Using the OSD
Connecting Your Monitor
Using the Front Panel Buttons
Using the OSD
Using the Dell™ Soundbar (Optional)
Product Specific Problems
Monitor Specific Troubleshooting
Common Problems
Product Specific Problems
Appendix
FCC Notice (U.S. Only)
CAUTION: Safety Instruction
Contacting Dell
Your Monitor Set
-
up Guide
NOTE: A NOTE indicates important information that helps you make better use of your computer.
NOTICE: A NOTICE indicates either potential damage to hardware or loss of data and tells you how to avoid the problem.
CAUTION: A CAUTION indicates the potential for property damage, personal injury, or death.