Dell SE197FP User Guide - Page 18
Using the OSD - flat panel monitor
 |
View all Dell SE197FP manuals
Add to My Manuals
Save this manual to your list of manuals |
Page 18 highlights
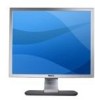
Back to Contents Page Using the OSD Dell™ SE197FP Flat Panel Monitor User's Guide Connecting Your Monitor Using the Front Panel Buttons Using the OSD Using the Dell™ Soundbar (Optional) Connecting Your Monitor CAUTION: Before you begin any of the procedures in this section, follow the Safety Instruction. 1. Turn off your computer and unplug its power cable. 2. Connect the blue (analog D-sub) display connector cable to the corresponding video port on the back of your computer. (The graphic is for illustration only. System appearance may vary). 3. Connect the power cable for your display to the power port on the back of the display. 4. Plug the power cables of your computer and your display into a nearby outlet. Your monitor is equipped with an automatic power supply for a voltage range from 100 to 240 Volt at a frequency of 50/60 Hz. Be sure that your local power is within the supported range. If you are unsure, ask your electricity supplier. 5. Turn on your display and computer. If your monitor displays an image, installation is complete. If it does not display an image, see Troubleshooting. Using the Front Panel Buttons Use the control buttons on the front of the monitor to adjust the characteristics of the image being displayed. As you use these buttons to adjust the controls, an OSD shows their numeric values as they change. The following table describes the front panel buttons: A The 'MENU' button is used to open the on-screen display (OSD), select function icons, exit from menus and sub-menus, and to exit the OSD. See Accessing the Menu System. MENU B Use this button for direct access to the 'Brightness' and 'Contrast' control menu.
-
 1
1 -
2
-
3
-
4
-
5
-
6
-
7
-
8
-
9
-
10
-
11
-
12
-
 13
13 -
 14
14 -
 15
15 -
 16
16 -
 17
17 -
 18
18 -
 19
19 -
 20
20 -
 21
21 -
 22
22 -
 23
23 -
24
-
25
-
26
-
27
-
28
-
29
 |
 |
