Dell Vostro A840 Service Manual - Page 15
Display Bezel, Display Panel
 |
View all Dell Vostro A840 manuals
Add to My Manuals
Save this manual to your list of manuals |
Page 15 highlights
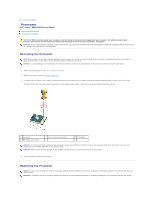
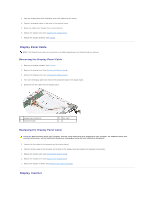
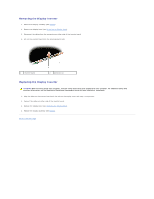
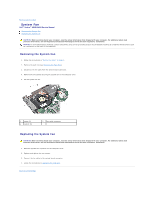
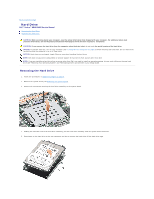
Display Bezel Removing the Display Bezel NOTICE: The display bezel is extremely fragile. Be careful when removing it to prevent damaging the bezel. 1. Remove the display assembly (see Display). 2. Remove the four rubber bumpers from the top and mylar tapes from the bottom of the display bezel. 3. Remove the six screws on the display bezel. 4. Using your fingertips, carefully pry up the inside edge of the display bezel. 5. Remove the display bezel. 1 rubber bumper (4) 3 display bezel 2 screw (6) 4 display panel Replacing the Display Bezel CAUTION: Before working inside your computer, read the safety information that shipped with your computer. For additional safety best practices information, see the Regulatory Compliance Homepage at www.dell.com/regulatory_compliance. 1. Align the display bezel over the display panel, and gently snap into place. 2. Replace and tighten the six screws. 3. Replace the display assembly (see Replacing the Display Assembly). Display Panel Removing the Display Panel
-
 1
1 -
2
-
3
-
4
-
5
-
6
-
7
-
8
-
9
-
 10
10 -
 11
11 -
 12
12 -
 13
13 -
 14
14 -
 15
15 -
 16
16 -
 17
17 -
 18
18 -
 19
19 -
 20
20 -
21
-
22
-
23
-
24
-
25
-
26
-
27
-
28
-
29
-
30
-
31
-
32
-
33
-
34
-
35
-
36
 |
 |