Dell W5300 Workgroup Dell™ Workgroup Laser Printer W5300 User's Guid
Dell W5300 Workgroup Manual
 |
View all Dell W5300 Workgroup manuals
Add to My Manuals
Save this manual to your list of manuals |
Dell W5300 Workgroup manual content summary:
- Dell W5300 Workgroup | Dell™ Workgroup Laser Printer W5300 User's Guid - Page 1
Dell™ Workgroup Laser Printer W5300 User's Guide Click the links to the left for information on the features, options, and operation of your printer. For information on other documentation included with your - Dell W5300 Workgroup | Dell™ Workgroup Laser Printer W5300 User's Guid - Page 2
, see Express Service Code and Service Tag number. Notes, Notices, and Cautions NOTE: A NOTE indicates important information that helps you make better use of your printer. NOTICE: A NOTICE indicates either potential damage to hardware or loss of data and tells you how to avoid the problem. CAUTION - Dell W5300 Workgroup | Dell™ Workgroup Laser Printer W5300 User's Guid - Page 3
Refer to the Drivers and Utilities CD for details. July 2003 Rev. A00 - Dell W5300 Workgroup | Dell™ Workgroup Laser Printer W5300 User's Guid - Page 4
What are you looking for? Drivers for my printer My User's Guide Find it here Drivers and Utilities CD Safety information How to use users or technicians. Owner's Manual How to set up my printer CAUTION: Read and follow all safety instructions in your Owner's Manual prior to setting up and - Dell W5300 Workgroup | Dell™ Workgroup Laser Printer W5300 User's Guid - Page 5
to technical service and support questions Documentation for my printer The Express Service Code and Service Tag numbers are located inside the front door of your printer. Dell Support Website The Dell Support Website provides several online tools, including: Solutions - Troubleshooting hints and - Dell W5300 Workgroup | Dell™ Workgroup Laser Printer W5300 User's Guid - Page 6
Operating System Status Monitor Status Monitor Center Dell Toner Reorder Window Dell Printer Software Uninstall Driver Profiler Windows 2000, Y Y Y Y Y Windows XP Windows NT Y Y N Y Y Windows 95, Windows Y N N Y Y 98, Windows Me NOTE: If you purchased your printer and - Dell W5300 Workgroup | Dell™ Workgroup Laser Printer W5300 User's Guid - Page 7
field provided. Your Service Tag number is located inside the front door of your printer. c. Click Visit Dell's cartridge ordering website. 3. If ordering by phone, call the number that appears under the By Telephone heading. Print Server TCP/IP Setup Refer to your Owner's Manual for information on - Dell W5300 Workgroup | Dell™ Workgroup Laser Printer W5300 User's Guid - Page 8
c. Driver Profiler The Driver Profiler program and printer drivers located on the Drivers and Utilities CD are used to create driver profiles that contain custom driver settings. A driver profile can contain a group of saved printer driver settings and other data for things such as: Print - Dell W5300 Workgroup | Dell™ Workgroup Laser Printer W5300 User's Guid - Page 9
C39 Wide (3 of 9) - Dell W5300 Workgroup | Dell™ Workgroup Laser Printer W5300 User's Guid - Page 10
Dell Printer Configuration Web Tool Have you ever sent a print job to the network printer down the hall, only to find it didn't print because of a paper jam or an empty paper tray? One of the features of the Dell Printer Configuration Web Tool is the Email Alert Setup, which sends you, or the key - Dell W5300 Workgroup | Dell™ Workgroup Laser Printer W5300 User's Guid - Page 11
as paper usage and types of jobs being printed. Printer information Get the information you need for service calls, inventory reports, or the status of current memory and engine code levels. Email alert setup this feature. Online Help Click Help to visit the Dell website for printer troubleshooting. - Dell W5300 Workgroup | Dell™ Workgroup Laser Printer W5300 User's Guid - Page 12
printer with options printer 1 Standard output 5 Optional envelope feeder bin 2 Operator panel 6 Optional duplex unit 3 Multipurpose feeder 7 Optional trays (250 or 500 sheets). The printer supports up to four optional trays. 4 Standard tray (500 sheets) - Dell W5300 Workgroup | Dell™ Workgroup Laser Printer W5300 User's Guid - Page 13
Unpacking the printer 1. Select a location for your printer. CAUTION: The printer requires at least two people to lift it safely. Leave enough room to open the printer trays, covers, doors, and options. It is also important to allow space around the printer for proper ventilation. Provide the proper - Dell W5300 Workgroup | Dell™ Workgroup Laser Printer W5300 User's Guid - Page 14
1 Printer with 4 Drivers standard and tray Utilities CD 2 Wire bail 5 Owner's Manual 3 Power cord 6 Setup diagram If any items are missing or damaged, contact Dell at support.dell.com. Save the carton and packing material in case you need to repack the printer. - Dell W5300 Workgroup | Dell™ Workgroup Laser Printer W5300 User's Guid - Page 15
Installing the toner cartridge 1. Press latch 1 to open the lower door. Press latch 2 to open the upper door. 2. Grasp the toner cartridge by the handle and pull it up and out. 3. Pull on the tabs on each side of the red plastic to remove the packaging from the toner cartridge. - Dell W5300 Workgroup | Dell™ Workgroup Laser Printer W5300 User's Guid - Page 16
3. NOTICE: Do not touch the photoconductor drum on the underside of the toner cartridge. 1 Photoconductor drum 4. Gently shake the cartridge to distribute the toner evenly. 5. Align the tabs on each side of the toner cartridge with the slots on each side of the cartridge cradle. Use the arrows - Dell W5300 Workgroup | Dell™ Workgroup Laser Printer W5300 User's Guid - Page 17
1 Tab 2 Slot 6. Guide the cartridge in until it snaps into place. 7. Close the upper door, and then the lower door. - Dell W5300 Workgroup | Dell™ Workgroup Laser Printer W5300 User's Guid - Page 18
Attaching cables Choosing the right cable Connecting the printer locally Connecting the printer to the network Choosing the right cable Your Dell Workgroup Laser Printer W5300 interconnection cable must meet the following requirements: Connection USB 10/100BaseT Ethernet Cable certification USB - Dell W5300 Workgroup | Dell™ Workgroup Laser Printer W5300 User's Guid - Page 19
and go on to Connecting the printer to the network. Microsoft® Windows® 98 SE, Windows Me, Windows 2000, and Windows XP operating systems support USB connections. Some UNIX® and Linux computers also support USB connections. Refer to your computer operating system documentation to see if your system - Dell W5300 Workgroup | Dell™ Workgroup Laser Printer W5300 User's Guid - Page 20
2. Turn on the computer and the printer. Print and check the menu settings page The Menu Settings page lists all the options you purchased or installed. If a feature or an option is not listed, you need to check your installation. 1. Press Menu until you see Utilities Menu, and then press Select. 2. - Dell W5300 Workgroup | Dell™ Workgroup Laser Printer W5300 User's Guid - Page 21
2. 3. Select the Device tab, and then select the option. 4. Click Update, and then click Apply. Connecting the printer to the network To attach the printer to a computer: 1. Make sure the printer, computer, and any other attached devices are turned off and unplugged. 2. Remove the red plug from the - Dell W5300 Workgroup | Dell™ Workgroup Laser Printer W5300 User's Guid - Page 22
to Verify the IP settings. Assign an IP address Print Server TCP/IP Setup If an IP address wasn't assigned automatically, refer to your Owner's Manual for information on establishing a printer IP address. - Dell W5300 Workgroup | Dell™ Workgroup Laser Printer W5300 User's Guid - Page 23
You can also assign an IP address using: BOOTP, or a RARP server and telnet, or static ARP entry and telnet. Use BOOTP BOOTP (Bootstrap Protocol) is an internet standard protocol that lets users on a local area network find their IP address. The BOOTP server, or a forwarding agent, must be attached - Dell W5300 Workgroup | Dell™ Workgroup Laser Printer W5300 User's Guid - Page 24
, and the server responds. 5. Turn the printer off, and then on again. 6. From a command prompt, use the telnet command to access the printer. 7. Follow the instructions that appear on the screen after entering the command to set the netmask, and gateway. Use Static ARP entry and telnet ARP (Address - Dell W5300 Workgroup | Dell™ Workgroup Laser Printer W5300 User's Guid - Page 25
Ping the printer and verify that it responds. For example, at a command prompt on a network computer, type ping followed by the new printer IP address (for example, 192.168.0.11): ping xxx.xxx.xxx.xxx If the printer is active on the network, you will receive a reply. - Dell W5300 Workgroup | Dell™ Workgroup Laser Printer W5300 User's Guid - Page 26
that is installed. A drawer consists of a tray and a support unit. The 250-sheet drawer and the 500-sheet drawer are installed the same way. 1. Remove the tray from the support unit. Remove all packing material, tape, and decals. 2. Place the support unit on top of the table or printer cabinet - Dell W5300 Workgroup | Dell™ Workgroup Laser Printer W5300 User's Guid - Page 27
1 Tab 2 Round peg 3 Square hole 3. Attach decals to the trays. Decals showing the number "1" are on your printer and the standard tray. These decals keep the standard tray paired with the printer. Use the decals shipped with any optional drawer to mark it appropriately. Peel the decals from - Dell W5300 Workgroup | Dell™ Workgroup Laser Printer W5300 User's Guid - Page 28
Features." e. If it is not listed, turn the printer off, unplug the power cord, and reinstall the tray. 5. Update your driver by following the instructions in the table. If the printer is on the network, update the driver for each client. Windows XP Windows 2000 Windows NT 4.0 Windows Me Windows - Dell W5300 Workgroup | Dell™ Workgroup Laser Printer W5300 User's Guid - Page 29
b. c. Press Menu until you see Tray Type, and then press Select. d. Press Menu until you see the paper type you loaded in the tray, and then press Select. e. Repeat for each installed tray. The printer is now configured for the correct paper type in each installed drawer. When printing, you will - Dell W5300 Workgroup | Dell™ Workgroup Laser Printer W5300 User's Guid - Page 30
Attaching the wire bail The wire bail keeps paper from sliding out of the output bin. 1. Remove the printer top cover and slide the plastic bracket onto the static brush holder. Adjust the bracket so it is centered over the area where print media exits. 1 Static brush holder 2 Plastic bracket 2. - Dell W5300 Workgroup | Dell™ Workgroup Laser Printer W5300 User's Guid - Page 31
Installing an optional duplex unit CAUTION: Use a printer stand with cabinet if the printer needs to reside at table height or if increased height is desired for input option access. Do not exceed the maximum recommended configuration of four 250- or 500-sheet drawers. The duplex unit attaches under - Dell W5300 Workgroup | Dell™ Workgroup Laser Printer W5300 User's Guid - Page 32
." e. If it is not listed, turn the printer off, unplug the power cord, and reinstall the duplex unit. 3. Update your driver by following the instructions in the table. If the printer is on the network, update the driver for each client. Windows XP Windows 2000 Windows NT 4.0 Windows Me Windows - Dell W5300 Workgroup | Dell™ Workgroup Laser Printer W5300 User's Guid - Page 33
To make duplexing the default, follow the steps below. 1. For Windows XP only: Click Start Control Panel Printers and Other Hardware Printers and Faxes. For all others: Click Start Settings Printers. 2. Right-click the Dell Laser Printer W5300 icon. 3. For Windows XP and Windows 2000: Click Printing - Dell W5300 Workgroup | Dell™ Workgroup Laser Printer W5300 User's Guid - Page 34
Installing an optional envelope feeder The envelope feeder attaches to the front of your printer behind the lower front door. It can be removed when you are not using it, making the printer more compact. NOTE: It is normal for the envelope feeder to make a loud tapping sound while printing. See - Dell W5300 Workgroup | Dell™ Workgroup Laser Printer W5300 User's Guid - Page 35
Features." e. If it is not listed, turn the printer off, unplug the power cord, and reinstall the envelope feeder. 5. Update your driver by following the instructions in the table. If the printer is on the network, update the driver for each client. - Dell W5300 Workgroup | Dell™ Workgroup Laser Printer W5300 User's Guid - Page 36
Windows XP Windows 2000 Windows NT 4.0 Windows Me Windows 95/98 1. Click Start Control Panel Printers and Other Hardware Printers and Faxes. 2. Right-click the Dell Laser Printer W5300 icon. 3. Click Properties Device (or Options) Update (or Update Now). 4. Click OK OK. Close the Printers folder. - Dell W5300 Workgroup | Dell™ Workgroup Laser Printer W5300 User's Guid - Page 37
and loading the multipurpose feeder for detailed loading instructions. Paper characteristics The following paper characteristics affect of print media to curve at its edges. Excessive curl can cause paper feeding problems. Curl usually occurs after the paper passes through the printer, where it is - Dell W5300 Workgroup | Dell™ Workgroup Laser Printer W5300 User's Guid - Page 38
made from 100% chemically pulped wood. This content provides the paper with a high degree of stability resulting in fewer paper feeding problems and better print quality. Paper containing fibers such as cotton possess characteristics that can result in degraded paper handling. Recommended paper To - Dell W5300 Workgroup | Dell™ Workgroup Laser Printer W5300 User's Guid - Page 39
or documents Selecting paper Proper paper loading helps prevent jams and ensure trouble-free printing. To help avoid jams or poor print quality: Always to change the Paper Size setting when you use a source that does not support auto size sensing. Do not remove trays while a job is printing or Busy - Dell W5300 Workgroup | Dell™ Workgroup Laser Printer W5300 User's Guid - Page 40
Selecting preprinted forms and letterhead Use the following guidelines when selecting preprinted forms and letterhead paper for the printer: Use grain long papers for best results. Use only forms and letterhead printed using an offset lithographic or engraved printing process. Choose papers that - Dell W5300 Workgroup | Dell™ Workgroup Laser Printer W5300 User's Guid - Page 41
Tray 2 (optional 250-sheet or 500sheet drawer) Duplex printing using tray 1 Face up or tray 2 Multipurpose feeder Face up (including feeding individual sheets) Duplex printing using the multipurpose feeder Face down Logo faces rear of Not tray applicable Logo enters the Left side of - Dell W5300 Workgroup | Dell™ Workgroup Laser Printer W5300 User's Guid - Page 42
Use the following guidelines to select and use prepunched paper: Test paper from several manufacturers before ordering and using large quantities of pre-punched paper. Paper should be punched at the paper manufacturer and not drilled into paper already packaged in a ream. Drilled paper can cause - Dell W5300 Workgroup | Dell™ Workgroup Laser Printer W5300 User's Guid - Page 43
instructions on loading an envelope. When printing on envelopes: To achieve the best possible print quality, use only high-quality envelopes that are designed for use in laser printers. Set the Paper Source in the Paper Menu to MP Feeder, Manual supplier. Adjust the width guide to fit the width of - Dell W5300 Workgroup | Dell™ Workgroup Laser Printer W5300 User's Guid - Page 44
Smooth, and Label Weight to Heavy. Do not load labels together with paper or transparencies in the same source; mixing print media can cause feeding problems. Do not use label sheets with a slick backing material. Do not print within 1 mm (0.04 in.) of the die cut. Use full label sheets. Partial - Dell W5300 Workgroup | Dell™ Workgroup Laser Printer W5300 User's Guid - Page 45
the use of grain short card stock. Storing print media Use the following guidelines for proper print media storage. These help avoid print media feeding problems and uneven print quality: For best results, store print media in an environment where the temperature is approximately 21°C (70°F) and the - Dell W5300 Workgroup | Dell™ Workgroup Laser Printer W5300 User's Guid - Page 46
weights. NOTE: If you use a print media size not listed, select the next larger size. Print media sizes and support Legend Yindicates support 500- 250- 500- Multipurpose Envelope Duplex Standard sheet sheet sheet feeder feeder unit output tray drawer drawer (option) (option) bin (option - Dell W5300 Workgroup | Dell™ Workgroup Laser Printer W5300 User's Guid - Page 47
Executive 184.2 x Y Y Y Y 266.7 mm (7.25 x 10.5 in.) Folio1 216 x 330 Y Y Y Y mm (8.5 x 13 in.) Statement1 139.7 x Y Y Y Y 215.9 mm (5.5 x 8.5 in.) Universal2 139.7 x 210 Y Y Y Y mm to 215.9 x 355.6 mm (5.5 x 8.27 in. to 8.5 x 14 in.) 69.85 x 127 Y mm to 215.9 x - Dell W5300 Workgroup | Dell™ Workgroup Laser Printer W5300 User's Guid - Page 48
size setting formats the page for 215.9 x 355.6 mm (8.5 x 14 in.) unless the size is specified by the software application. Print media supported Print media Paper Card stock Transparencies Vinyl labels Paper labels Polyester labels Dual-web and integrated labels 250-sheet 500-sheet Multipurpose - Dell W5300 Workgroup | Dell™ Workgroup Laser Printer W5300 User's Guid - Page 49
Print media types and weights Print media Type Print media weight Standard 500sheet tray and optional 500-sheet drawer Multipurpose Envelope feeder and feeder optional 250-sheet drawer Paper Xerographic or business paper 60 to 135 g/m2 grain long (16 to 36 lb bond) 60 to 135 g/m2 grain - Dell W5300 Workgroup | Dell™ Workgroup Laser Printer W5300 User's Guid - Page 50
the duplex function Using the output bin Using the support extension This section provides information about loading the various input jams and helps make your printing trouble-free. To avoid paper jams, do not remove trays while a job prints. Complete these instructions to load print media into the - Dell W5300 Workgroup | Dell™ Workgroup Laser Printer W5300 User's Guid - Page 51
and the side of the guide as shown. Slide the width guide to the far right side of the tray. 3. Squeeze the length guide lever and slide the length guide to the correct position for the size of print media you are loading. Notice the size indicators on the left side of the tray - Dell W5300 Workgroup | Dell™ Workgroup Laser Printer W5300 User's Guid - Page 52
1 Size indicators 4. Flex the sheets back and forth to loosen them, and then fan them. Do not fold or crease the print media. Straighten the edges on a level surface. 5. Place the print media into the tray with the recommended print side face down for single-sided printing and face up for duplex - Dell W5300 Workgroup | Dell™ Workgroup Laser Printer W5300 User's Guid - Page 53
1 Load line 6. Squeeze the width guide tab and the side of the guide together. Slide the width guide to the left until it lightly rests against the edge of the stack. 7. For optional trays only, adjust the knob to show the size of - Dell W5300 Workgroup | Dell™ Workgroup Laser Printer W5300 User's Guid - Page 54
For duplex printing on letterhead, place the printed side face up as shown. NOTE: The Paper Loading menu item lets you print simplex jobs on letterhead (or other preprinted media) that has been loaded specifically for duplex printing. See Paper Loading for more information. Using and loading the - Dell W5300 Workgroup | Dell™ Workgroup Laser Printer W5300 User's Guid - Page 55
in.) to 229 mm (9.01 in.) Length-127 mm (5 in.) to 355.6 mm (14 in.) Trouble-free printing Load only one size and type of print media at a time in the multipurpose feeder. To achieve and duplex printing. See Loading letterhead for detailed instructions on loading documents printed on letterhead. - Dell W5300 Workgroup | Dell™ Workgroup Laser Printer W5300 User's Guid - Page 56
1 Simplex letterhead 2 Duplex letterhead 3 Envelope NOTE: The Paper Loading menu item in the Paper Menu lets you print simplex jobs on letterhead (or other preprinted media) that has been loaded specifically for duplex printing. For more information, see Paper Loading. Loading the multipurpose - Dell W5300 Workgroup | Dell™ Workgroup Laser Printer W5300 User's Guid - Page 57
2. 3. Slide the width guide to the far right. 4. Prepare the print media for loading. Flex paper or fan envelopes back and forth. Do not fold or crease the paper. - Dell W5300 Workgroup | Dell™ Workgroup Laser Printer W5300 User's Guid - Page 58
5. Use the stack height limiter as a guide for stack height when loading print media. 1 Stack height limiter 6. Load one type of print media in the multipurpose feeder. Do not mix types. Click a topic for loading instructions: Loading paper and transparencies Loading envelopes Loading letterhead - Dell W5300 Workgroup | Dell™ Workgroup Laser Printer W5300 User's Guid - Page 59
Continue with step 2. Loading envelopes Load envelopes flap side down with the stamp area and flap on the left. The end of the envelope with the stamp area enters the multipurpose feeder first. NOTICE: Never use envelopes with stamps, clasps, snaps, windows, coated linings, or self-stick adhesives. - Dell W5300 Workgroup | Dell™ Workgroup Laser Printer W5300 User's Guid - Page 60
the print media into the multipurpose feeder as far as it will go. Forcing the print media may cause it to buckle. 3. Slide the width guide to the left until it lightly touches the stack of print media. Do not bend the print media. 4. Select the source, size, and type from - Dell W5300 Workgroup | Dell™ Workgroup Laser Printer W5300 User's Guid - Page 61
4. from the printer operator panel. Make sure the Paper Size and Paper Type for the multipurpose feeder (MP Feeder Size and MP Feeder Type) are set to the correct value for the print media you are loading. (See Paper Size and Paper Type for detailed information about these settings.) Press Go to - Dell W5300 Workgroup | Dell™ Workgroup Laser Printer W5300 User's Guid - Page 62
1. Gently adjust the envelope support for the size you are loading: Fully closed (pushed in toward the printer) for short envelopes Extended to the middle it or applying excessive force. 2. Lift the envelope weight back toward the printer. It stays in place. 3. Slide the width guide to the far right. - Dell W5300 Workgroup | Dell™ Workgroup Laser Printer W5300 User's Guid - Page 63
4. Flex a stack of envelopes back and forth and then straighten the edges on a level surface. Press down the corners to flatten them. Fan the envelopes. This prevents the edges of the envelopes from sticking together and helps them feed properly. NOTE: When you load envelopes, do not exceed the - Dell W5300 Workgroup | Dell™ Workgroup Laser Printer W5300 User's Guid - Page 64
NOTE: Do not try to load more envelopes by forcing them under the envelope weight. This results in jams. 6. Slide the width guide to the left until it lightly touches the stack. Make sure the envelopes do not buckle. 7. Lower the envelope weight to touch the stack. 8. Select - Dell W5300 Workgroup | Dell™ Workgroup Laser Printer W5300 User's Guid - Page 65
) lets you print on both sides of a sheet of paper. For sizes that are acceptable for duplex printing, see Print media sizes and support. Select Duplex from your printer driver to print individual duplex jobs. Duplex printing on letterhead When duplex printing on letterhead from the multipurpose - Dell W5300 Workgroup | Dell™ Workgroup Laser Printer W5300 User's Guid - Page 66
When duplex printing on letterhead from the trays, load it with the logo face up and entering the printer first. Using Duplex Bind When you select duplex bind printing in the printer driver, you must select either long edge or short edge binding, which are the values for this setting. The purpose - Dell W5300 Workgroup | Dell™ Workgroup Laser Printer W5300 User's Guid - Page 67
to: 250 sheets (75 g/m2) of plain paper or 300 transparencies or 200 labels or 50 envelopes (75 g/m2) Using the support extension The standard bin has a print media support which keeps print media from sliding into the gap been the standard bin and the upper front door when the door is - Dell W5300 Workgroup | Dell™ Workgroup Laser Printer W5300 User's Guid - Page 68
1. Gently lift the support. 2. Pull the support extension down and then forward. 1 Support 2 Support extension 3. Gently releasing the support extension drops it to its open position. - Dell W5300 Workgroup | Dell™ Workgroup Laser Printer W5300 User's Guid - Page 69
- Dell W5300 Workgroup | Dell™ Workgroup Laser Printer W5300 User's Guid - Page 70
Understanding the operator panel Using the operator panel buttons Printing a menu settings page Printing a printer network setup page Using the operator panel to change printer settings Using the Dell Printer Configuration Web Tool to change printer settings Restoring factory default settings Using - Dell W5300 Workgroup | Dell™ Workgroup Laser Printer W5300 User's Guid - Page 71
1 LCD display 2 Select button 3 Return button 4 Stop button 5 Go button 6 Indicator light 7 Menu button Press Menu to: Enter and scroll through the menus Press Select to: Select the item on the second line of the display Save the selection as the new default setting Press Return to: Return to - Dell W5300 Workgroup | Dell™ Workgroup Laser Printer W5300 User's Guid - Page 72
media you loaded. When you add or remove an option, remember to update the printer's configuration through your printer driver. The following instructions may vary, depending on your operating system. 1. For Windows XP only: Click Start Control Panel Printers and Other Hardware Printers and Faxes - Dell W5300 Workgroup | Dell™ Workgroup Laser Printer W5300 User's Guid - Page 73
setup page to verify connection to your network. Using the operator panel to change printer settings From the operator panel, you can select menu items and associated values to print your jobs successfully. You can also use the panel to alter the setup and operating environment of the printer. See - Dell W5300 Workgroup | Dell™ Workgroup Laser Printer W5300 User's Guid - Page 74
An asterisk (*) next to a value indicates the factory default setting. Factory defaults may differ for different countries. Factory defaults are the function settings in effect the first time you turn your printer on. These remain in effect until you change them. Factory defaults are restored if you - Dell W5300 Workgroup | Dell™ Workgroup Laser Printer W5300 User's Guid - Page 75
When you select a new setting from the operator panel, the Saved message appears. When the Saved message disappears, an asterisk appears next to the setting to identify it as the current user default setting. These settings are active until new ones are stored or the factory defaults are restored. - Dell W5300 Workgroup | Dell™ Workgroup Laser Printer W5300 User's Guid - Page 76
Understanding printer menus Using the printer menus Disabling operator panel menus Enabling menus If your printer is configured as a network printer available to a number of users, it is possible that Menus Disabled appears on the display when you press Menu from the Ready state. Disabling the menus - Dell W5300 Workgroup | Dell™ Workgroup Laser Printer W5300 User's Guid - Page 77
marked by an asterisk (*) are the factory default settings. Paper Source Purpose: To identify the default source. Values: Tray (Tray 1*) MP Feeder Env Feeder Manual Paper Manual Env If you loaded the same size and type of paper in two sources (and the Paper Size and Paper Type menu items are - Dell W5300 Workgroup | Dell™ Workgroup Laser Printer W5300 User's Guid - Page 78
Purpose: To identify the type of paper installed in each source. Values: First select a source: Tray Type Manual Pap Type Then select a value: Env Feeder Type Manual Env Type MP Feeder Type Plain Paper Labels Preprinted Card Stock Bond Custom Type Transparency Letterhead Envelope - Dell W5300 Workgroup | Dell™ Workgroup Laser Printer W5300 User's Guid - Page 79
NOTE: If a user-defined name is available, it is displayed instead of Custom Type . The userdefined name is truncated to 14 characters. If two or more custom types share the same name, the name only appears once in the Paper Type value list. Use this menu item to: Optimize print quality for the - Dell W5300 Workgroup | Dell™ Workgroup Laser Printer W5300 User's Guid - Page 80
Height Feed Direction =3.00-14.17 in. (8.5 in.*) =3.00-14.17 in. (14.00 in.*) =Short Edge* =Long Edge See also: Print media sizes and support Substitute Size Purpose: =76-360 mm (216 mm*) =76-360 mm (360 mm*) To have the printer substitute the specified size if the requested size - Dell W5300 Workgroup | Dell™ Workgroup Laser Printer W5300 User's Guid - Page 81
in the multipurpose feeder, the printer pulls paper from the multipurpose feeder for the job. Printer treats the multipurpose feeder like a manual feed tray, and displays Load Manual when you need to insert a single sheet of paper in the feeder. Printer pulls paper from the multipurpose feeder until - Dell W5300 Workgroup | Dell™ Workgroup Laser Printer W5300 User's Guid - Page 82
Smooth Normal* Rough NOTE: The default for Bond Texture is Rough instead of Normal. If a user-defined name is available for a custom Type, then the name is displayed instead of Custom Texture. The name is truncated to 14 characters. Use Paper Texture in connection with the Paper Type and Paper - Dell W5300 Workgroup | Dell™ Workgroup Laser Printer W5300 User's Guid - Page 83
To properly handle preprinted paper loaded in a tray, whether the job is a duplexed job or a single-sided job. NOTE: The Paper Loading menu item is only available when a duplex option has been installed on the printer. Values: First select a paper type: Card Stock Load Labels Loading Then select a - Dell W5300 Workgroup | Dell™ Workgroup Laser Printer W5300 User's Guid - Page 84
NOTE: Values marked by an asterisk (*) are the factory default settings. Duplex Purpose: To set duplexing as the default for all print jobs. (Select Duplex from the printer driver to duplex only specific jobs.) The Duplex menu item is only available when a duplex option has been installed on the - Dell W5300 Workgroup | Dell™ Workgroup Laser Printer W5300 User's Guid - Page 85
Purpose: To set the number of copies you want for the printer default value. (Set the number of copies required for a specific job from the printer driver. Values selected from the printer driver always override values selected from the operator panel.) Values: 1...999 (1*) See also: Collation - Dell W5300 Workgroup | Dell™ Workgroup Laser Printer W5300 User's Guid - Page 86
Purpose: To insert blank separator sheets between jobs, between multiple copies of a job, or between each page of a job. Values: None* Between Copies Between Jobs Between Pages Does not insert separator sheets. Inserts a blank sheet between each copy of a job. If Collation is Off, a blank page is - Dell W5300 Workgroup | Dell™ Workgroup Laser Printer W5300 User's Guid - Page 87
To print multiple page images on one side of a sheet of paper. Also called N-Up or Paper Saver. Values: Off* Prints 1 page image per side. 2 Up Prints 2 page images per side. 3 Up Prints 3 page images per side. 4 Up Prints 4 page images per side. 6 Up 9 Up 12 Up 16 Up Prints 6 page images per - Dell W5300 Workgroup | Dell™ Workgroup Laser Printer W5300 User's Guid - Page 88
relating to available printer resources, printer settings, and print jobs. Other menu items let you set up printer hardware and troubleshoot printer problems. Select a menu item for more details: Factory Defaults Print Menus Hex Trace Print Net Setup Print Fonts NOTE: Values marked - Dell W5300 Workgroup | Dell™ Workgroup Laser Printer W5300 User's Guid - Page 89
To print a listing of the current user default values, the installed options, the amount of installed printer memory, and the status of printer supplies. Print Net Setup Purpose: To print information relating to the internal print server and the network settings defined by the Network Setup - Dell W5300 Workgroup | Dell™ Workgroup Laser Printer W5300 User's Guid - Page 90
and symbol sets) in printer memory (RAM) are deleted. User-defined settings remain. Hex Trace Purpose: To help isolate the source of a print job problem. With Hex Trace selected, all data sent to the printer is printed in hexadecimal and character representation. Control codes are not executed. To - Dell W5300 Workgroup | Dell™ Workgroup Laser Printer W5300 User's Guid - Page 91
Then select a value: Print All Prints all jobs associated with your PIN. Jobs Print A Prints the specified confidential job. Press Menu to scroll through the list of confidential jobs Job associated with your PIN. Press Select to print a specific job. Delete Deletes all jobs associated with - Dell W5300 Workgroup | Dell™ Workgroup Laser Printer W5300 User's Guid - Page 92
Cancel Job Purpose: To cancel the current print job. NOTE: Cancel Job is only displayed if the printer is processing a job or has a job in printer memory. See also: Canceling a print job Reset Printer Purpose: To reset the printer to the user default value for each menu item, delete all downloaded - Dell W5300 Workgroup | Dell™ Workgroup Laser Printer W5300 User's Guid - Page 93
NOTE: Values marked by an asterisk (*) are the factory default settings. Print Resolution Purpose: To define the number of dots printed per inch (dpi). The higher the value, the sharper the clarity of printed characters and graphics. Values: 300 dpi Offers a lower resolution printing option when - Dell W5300 Workgroup | Dell™ Workgroup Laser Printer W5300 User's Guid - Page 94
of printer features. Select a menu item for more details: Alarm Control Power Saver Asset Tag Print Timeout Auto Continue Printer Language Dell Service Tag Resource Save Display Language Toner Alarm Jam Recovery Wait Timeout Page Protect Quick Start NOTE: Values marked by an asterisk - Dell W5300 Workgroup | Dell™ Workgroup Laser Printer W5300 User's Guid - Page 95
at all times. 1...240 Specifies the amount of time after a print job before the printer goes into Power Saver mode. (Your printer may not support the entire range of values.) The factory default Power Saver setting depends on your printer model. Print the menu settings page to determine the current - Dell W5300 Workgroup | Dell™ Workgroup Laser Printer W5300 User's Guid - Page 96
a Form Feed command. You select Print Buffer from the Job Menu. The printer prints the last page after the specified time. (Your printer may not support the entire range of values.) See also: Print Buffer Wait Timeout - Dell W5300 Workgroup | Dell™ Workgroup Laser Printer W5300 User's Guid - Page 97
Purpose: To specify the amount of time (in seconds) the printer waits to receive additional bytes of data from the computer. When this timeout expires, the print job is canceled. Values: Disabled Disables Wait Timeout. 15...65535 (40*) Specifies the amount of time the printer waits for - Dell W5300 Workgroup | Dell™ Workgroup Laser Printer W5300 User's Guid - Page 98
Page Protect Purpose: To successfully print a page that may otherwise generate Complex Page errors. Values: Off* Prints a partial page of data if memory is insufficient to process the entire page. On Ensures that an entire page is processed before it prints. If, after selecting On, you still cannot - Dell W5300 Workgroup | Dell™ Workgroup Laser Printer W5300 User's Guid - Page 99
menu item is only available through the Dell Printer Configuration Web Tool. For more information, see Dell Printer Configuration Web Tool. Dell Service Tag Purpose: The service tag number is required when calling for service. Enter the service tag number from the label on the back of the printer. - Dell W5300 Workgroup | Dell™ Workgroup Laser Printer W5300 User's Guid - Page 100
NOTE: The Dell Service Tag menu item is only available through the Dell Printer Configuration Web Tool. For more information, see Dell Printer Configuration Web Tool. PCL Emul Menu - Dell W5300 Workgroup | Dell™ Workgroup Laser Printer W5300 User's Guid - Page 101
To choose a specific font from the specified font source. Values: R0 Courier 10* The font name and font ID for all fonts in the selected font source are displayed. The font source abbreviation is R for resident and D for download. See also: Font Source Point Size Purpose: To change the point size - Dell W5300 Workgroup | Dell™ Workgroup Laser Printer W5300 User's Guid - Page 102
default values) A symbol set is a set of alphabetic and numeric characters, punctuation, and special symbols used when printing with a selected font. Symbol sets support the different requirements for languages or specific applications, such as math symbols for scientific text. Only the symbol sets - Dell W5300 Workgroup | Dell™ Workgroup Laser Printer W5300 User's Guid - Page 103
Lines per Page Purpose: To determine the number of lines that print on each page. Values: 1...255 60* (country-specific factory default values) 64* (country-specific factory default values) The printer sets the amount of space between each line (vertical line spacing) based on the Lines per Page, - Dell W5300 Workgroup | Dell™ Workgroup Laser Printer W5300 User's Guid - Page 104
Assign Tray Assign MP Feeder Then select a value: Assign Env Feeder Assign Man Paper Assign Man Env Off* Printer uses factory default source assignments. 0...199 Select a numeric value to assign a custom value to a source. None Source ignores the Select Paper Feed command. Other Tray Renumber - Dell W5300 Workgroup | Dell™ Workgroup Laser Printer W5300 User's Guid - Page 105
Use the PostScript Menu to change printer settings that only affect jobs using the PostScript emulation printer language. Select a menu item for more details: Print PS Error NOTE: Values marked by an asterisk (*) are the factory default settings. Print PS Error Purpose: To print a page defining the - Dell W5300 Workgroup | Dell™ Workgroup Laser Printer W5300 User's Guid - Page 106
Values: On* Printer examines data on the network interface and selects PCL emulation if the data indicates that is the required printer language. Off Printer does not examine the incoming data. The printer uses PostScript emulation to process the job if PS SmartSwitch is On, or uses the default - Dell W5300 Workgroup | Dell™ Workgroup Laser Printer W5300 User's Guid - Page 107
On Printer performs NPA processing. If data is not in NPA format, it is rejected as bad data. Off Printer does not perform NPA processing. Auto* Printer examines the data to determine the format and then processes it appropriately. NOTE: Changing this menu item automatically resets the printer. - Dell W5300 Workgroup | Dell™ Workgroup Laser Printer W5300 User's Guid - Page 108
Purpose: To configure an internal print server. Values: Values for this menu item are supplied by the specific print server. Select the menu item to see the available values. Refer to the documentation on the Drivers and Utilities CD for more information. USB Menu Use the USB Menu to change - Dell W5300 Workgroup | Dell™ Workgroup Laser Printer W5300 User's Guid - Page 109
PS SmartSwitch; Printer Language PS SmartSwitch Purpose: To configure the printer so it automatically switches to PostScript emulation when a print job received through the USB port requires it, regardless of the default printer language. Values: On* Printer examines data on the USB interface and - Dell W5300 Workgroup | Dell™ Workgroup Laser Printer W5300 User's Guid - Page 110
To configure the size of the USB input buffer. Values: Disabled Job buffering is disabled. Auto* Printer automatically calculates the USB Buffer size (recommended setting). 3K to maximum size allowed User specifies the USB Buffer size. The maximum size depends on the amount of memory in your - Dell W5300 Workgroup | Dell™ Workgroup Laser Printer W5300 User's Guid - Page 111
2. Press and hold Select and Return and turn the printer on. 3. Release the buttons when you see Performing Self Test. Config Menu appears on the first line of the display. 4. Press Menu until you see Panel Menus, and then press Select. Disable appears on the second line of the display. 5. Press - Dell W5300 Workgroup | Dell™ Workgroup Laser Printer W5300 User's Guid - Page 112
media (paper, transparencies, labels, and card stock), you are assisting in trouble-free printing. See Tips for avoiding jams for more information. NOTE: , you are able to avoid most jams. See the following for instructions on loading print media: Loading print media in standard and optional trays - Dell W5300 Workgroup | Dell™ Workgroup Laser Printer W5300 User's Guid - Page 113
To support all of the printer features, use the custom printer drivers. When you choose Print from a software application, a window representing the printer driver opens. Select the - Dell W5300 Workgroup | Dell™ Workgroup Laser Printer W5300 User's Guid - Page 114
1. A list of print jobs appears in the printer window. 2. Select the job you want to cancel. 3. Press the Delete key on the keyboard. Canceling a job from the desktop 1. Minimize all programs to reveal the desktop. 2. Double-click the My Computer icon. 3. Double-click the Printers icon. A list of - Dell W5300 Workgroup | Dell™ Workgroup Laser Printer W5300 User's Guid - Page 115
Printing a font sample list To print samples of all the fonts currently available for your printer: 1. Make sure the printer is on and the Ready message appears. 2. Press and release Menu until you see Utilities Menu, and then press Select. 3. Press and release Menu until Print Fonts appears, and - Dell W5300 Workgroup | Dell™ Workgroup Laser Printer W5300 User's Guid - Page 116
From either the Confidential Job or the Held Jobs menu items, you have five choices: Print All Jobs Print A Job Delete All Jobs Delete A Job Print Copies Accessing held jobs from the operator panel 1. To access held jobs from the operator panel: If the printer is Busy, press Menu and the Job Menu - Dell W5300 Workgroup | Dell™ Workgroup Laser Printer W5300 User's Guid - Page 117
Recognizing when format errors occur If the symbol appears on the display, it indicates that the printer had trouble formatting one or more of the held jobs. These formatting problems are most commonly the result of insufficient printer memory or invalid data that might cause the printer to flush - Dell W5300 Workgroup | Dell™ Workgroup Laser Printer W5300 User's Guid - Page 118
Confidential jobs When you send a job to the printer, you can enter a personal identification number (PIN) from the driver. The PIN must be four digits using the numbers 1-6. The job is then held in printer memory until you enter the same four-digit PIN from the printer operator panel and choose to - Dell W5300 Workgroup | Dell™ Workgroup Laser Printer W5300 User's Guid - Page 119
1. 2. The printer performs its power-on sequence, and then Config Menu appears on the first line of the display. 3. Press and release Menu until you see Size Sensing, and then press Select. Tray 1 Sensing appears on the second line of the display. 4. Press and release Menu to select the input option - Dell W5300 Workgroup | Dell™ Workgroup Laser Printer W5300 User's Guid - Page 120
Setting up for shared printing Point and print Peer-to-peer You can share your new printer on the network using the Drivers and Utilities CD that shipped with your printer, or using Microsoft's point and print or peer-to-peer method. However, if you use one of the Microsoft methods, you will not - Dell W5300 Workgroup | Dell™ Workgroup Laser Printer W5300 User's Guid - Page 121
job processing. This lets network clients return to their programs much faster. If you use the point and print method, a subset of driver information is copied from the server to the client computer. This is just enough information to send a print job to the printer. 1. On the Windows desktop of the - Dell W5300 Workgroup | Dell™ Workgroup Laser Printer W5300 User's Guid - Page 122
For example: \\\ The server host name is the name of the server computer that identifies it to the network. The shared printer name is the name assigned during the server installation process. 5. Click OK. If this is a new printer, you may be prompted to - Dell W5300 Workgroup | Dell™ Workgroup Laser Printer W5300 User's Guid - Page 123
Understanding fonts Typefaces and fonts A font is a set of characters and symbols created with a distinct design. The distinct design is called a typeface. The typefaces you select add personality to a document. Well-chosen typefaces make a document easier to read. The printer has numerous resident - Dell W5300 Workgroup | Dell™ Workgroup Laser Printer W5300 User's Guid - Page 124
proportional. In fixed space fonts, each character has the same width. Pitch is used to specify the size of fixed space fonts. It is a measure of the number of characters that will print in one horizontal inch of type. For example, all 10pitch fonts print 10 characters per inch (cpi) and all 12- - Dell W5300 Workgroup | Dell™ Workgroup Laser Printer W5300 User's Guid - Page 125
The printer uses both bitmapped and scalable fonts. Bitmapped fonts are stored in printer memory as predefined patterns of bits that represent a typeface at a specific size, style, and resolution. The following illustration shows an example of a character from a bitmapped font. Bitmapped fonts are - Dell W5300 Workgroup | Dell™ Workgroup Laser Printer W5300 User's Guid - Page 126
Roman, are available for all printer languages. The following table lists all the fonts resident in your printer. See Printing a font sample list for instructions on how to print samples of the fonts. You can select the resident fonts from your software application, or from the operator panel if you - Dell W5300 Workgroup | Dell™ Workgroup Laser Printer W5300 User's Guid - Page 127
CourierPS Oblique CourierPS Bold CourierPS Bold Italic CG Omega CG Omega Bold CG Omega Italic CG Omega Bold Italic Garamond Antiqua Garamond Halbfett Garamond Kursiv Garamond Kursiv Halbfett Helvetica Light Helvetica Light Oblique Helvetica Black Helvetica Black Oblique Helvetica Helvetica Italic - Dell W5300 Workgroup | Dell™ Workgroup Laser Printer W5300 User's Guid - Page 128
Courier Bold Italic Letter Gothic Letter Gothic Italic Letter Gothic Bold Marigold Century Schoolbook Roman Century Schoolbook Italic Century Schoolbook Bold Century Schoolbook Bold Italic Palatino Roman Palatino Italic Palatino Bold Palatino Bold Italic SymbolPS Symbol Times Roman Times Italic - Dell W5300 Workgroup | Dell™ Workgroup Laser Printer W5300 User's Guid - Page 129
Univers Condensed Bold Univers Condensed Bold Italic Wingdings ITC Zapf Chancery Medium Italic ITC Zapf Dingbats Univers-CondensedBold Univers-CondensedBoldOblique Wingdings-Regular ZapfChancery-MediumItalic ZapfDingbats Univers-Extended Univers-ExtendedObl Univers-BoldExt Univers-BoldExtObl - Dell W5300 Workgroup | Dell™ Workgroup Laser Printer W5300 User's Guid - Page 130
Bodoni-BoldItalic Bodoni-Poster Bodoni-PosterCompressed CooperBlack CooperBlack-Italic Copperplate-ThirtyTwoBC Copperplate-ThirtyThreeBC Eurostile Eurostile-Bold Eurostile-ExtendedTwo Eurostile-BoldExtendedTwo GillSans GillSans-Italic GillSans-Bold GillSans-BoldItalic GillSans-Condensed GillSans- - Dell W5300 Workgroup | Dell™ Workgroup Laser Printer W5300 User's Guid - Page 131
for each key on the keyboard (or more specifically, for each code point). Some applications require different characters at some code points. To support multiple applications and languages, your printer has 83 symbol sets for the resident PCL 6 emulation fonts. Symbol sets for PCL 6 emulation Not - Dell W5300 Workgroup | Dell™ Workgroup Laser Printer W5300 User's Guid - Page 132
ABICOMP Brazil/Portugal ABICOMP International DeskTop Legal MC Text Microsoft Publishing Russian-GOST Ukrainian PCL ITC Zapf Dingbats PS ITC Zapf Dingbats PS Math PS Text Pi Font Symbol Wingdings POSTNET Barcode ISO : German ISO : Spanish ISO 2: IRV (Int'l Ref Version) ISO 4: United Kingdom ISO 6: - Dell W5300 Workgroup | Dell™ Workgroup Laser Printer W5300 User's Guid - Page 133
Understanding printer messages The printer operator panel displays messages describing the current state of the printer and indicates possible printer problems you must resolve. This topic provides a list of all printer messages, explains what they mean, and tells you how to clear the messages. 1 - Dell W5300 Workgroup | Dell™ Workgroup Laser Printer W5300 User's Guid - Page 134
hardware failure, turn the printer off and back on. If the error recurs, turn the printer off, remove the specified device, and call for service. Close the upper front door. Install the toner cartridge. Delete All Jobs Go/Stop? The printer is requesting confirmation to delete all held jobs. Press - Dell W5300 Workgroup | Dell™ Workgroup Laser Printer W5300 User's Guid - Page 135
code to the printer internal print server. NOTE: You can download network code while this message is displayed. Invalid Standard Network Code Load Manual A request for a manual feed job has been sent to the printer. The Load a sheet of the paper specified in the second line of the display in - Dell W5300 Workgroup | Dell™ Workgroup Laser Printer W5300 User's Guid - Page 136
a single sheet into the manual feed slot. the manual feed tray or multipurpose feeder. Press Select or Go to ignore the manual feed request and print on paper top performance and to avoid print quality and paper feed problems. Replace the maintenance items and reset the printer maintenance counter - Dell W5300 Workgroup | Dell™ Workgroup Laser Printer W5300 User's Guid - Page 137
Network , No Jobs Found. Retry? A network interface is the active communication link, where represents the active communication link and represents the channel. The four-digit personal identification number (PIN) you entered is not associated with any confidential print job. Press - Dell W5300 Workgroup | Dell™ Workgroup Laser Printer W5300 User's Guid - Page 138
off and back on. If the error recurs, turn the printer off, remove the envelope feeder, and call Dell at support.dell.com. The output bin is full. See also: Contacting service Remove the stack of paper from the standard bin to clear the message. Res Reduced Resetting Maint Cnt Value The - Dell W5300 Workgroup | Dell™ Workgroup Laser Printer W5300 User's Guid - Page 139
toner cartridge. Press Go to clear the message and continue printing. NOTE: If you do not replace the toner cartridge, you may experience print quality problems. Order more toner at www.dell.com/supplies. Tray Empty The specified tray is out of paper. Load paper in the tray to clear the - Dell W5300 Workgroup | Dell™ Workgroup Laser Printer W5300 User's Guid - Page 140
printer to another. the download emulator on the firmware card. Contact Dell at support.dell.com. The printer detects a jam. Clear the paper path. 2 formatted data. For auto-size sensing trays, this error occurs if the guides are not in the correct position. Press Go to clear the message - Dell W5300 Workgroup | Dell™ Workgroup Laser Printer W5300 User's Guid - Page 141
37 Insufficient Defrag Memory The printer cannot defragment flash memory, because the printer memory used to store undeleted flash resources is full. Delete fonts, macros, and other data in printer memory. Install additional printer memory. 37 Insufficient Memory The printer memory is full and - Dell W5300 Workgroup | Dell™ Workgroup Laser Printer W5300 User's Guid - Page 142
4 Unsupported Firmware Card Setup Menu. Install additional printer memory. The printer detects an unsupported version of firmware on the installed firmware card during the power-on cycle. See also: Setup Menu Turn the printer off, and then press and hold Go while turning it on. The printer - Dell W5300 Workgroup | Dell™ Workgroup Laser Printer W5300 User's Guid - Page 143
The Supplies message is displayed until you replace the toner cartridge. 900-999 Service See also: Replacing the toner cartridge Messages labeled 900-999 relate to printer problems that may require printer service. Turn the printer off and check all cable connections. Turn the printer - Dell W5300 Workgroup | Dell™ Workgroup Laser Printer W5300 User's Guid - Page 144
print media (paper, transparencies, labels, and card stock) to help ensure trouble-free printing. See Print media guidelines for more information. NOTE: We recommend you are able to avoid most jams. See the following for instructions on loading print media: Loading print media in standard and - Dell W5300 Workgroup | Dell™ Workgroup Laser Printer W5300 User's Guid - Page 145
remove trays during a print job. Push all trays in firmly after loading them. Make sure the guides in the trays are properly positioned for the size of print media you have loaded. Make sure the guides are not placed too tightly against the stack of print media. Make sure all cables that - Dell W5300 Workgroup | Dell™ Workgroup Laser Printer W5300 User's Guid - Page 146
rear door NOTE: Jams in the standard output bin and the duplex unit are either paper or card stock. Use the following table to locate instructions for a particular jam: - Dell W5300 Workgroup | Dell™ Workgroup Laser Printer W5300 User's Guid - Page 147
Jam message 200 and 201 Paper Jam Remove Cartridge 202 Paper Jam Open Rear Door 23x Paper Jam 231 Paper Jam Check Duplex 232 Paper Jam Check Duplex and 233 Paper Jam Check Duplex 234 Paper Jam Check Duplex, 235 Paper Jam Check Duplex,and 238 Paper Jam Check Duplex 236 Paper Jam Check Duplex 237 - Dell W5300 Workgroup | Dell™ Workgroup Laser Printer W5300 User's Guid - Page 148
CAUTION: The rear portion of the inside of the printer is hot. 2. While grasping the toner cartridge by the hand grip, pull the cartridge up toward the upper front door, and then pull it straight out toward you. NOTICE: Never touch the photoconductor drum on the underside of the cartridge. Use the - Dell W5300 Workgroup | Dell™ Workgroup Laser Printer W5300 User's Guid - Page 149
3. 4. Pull the print media up and toward you. NOTE: The print media may be covered with unfused toner, which can stain garments and skin. If the print media does not move immediately when you pull, stop pulling. You need to access the print media from the printer rear door. Otherwise, continue with - Dell W5300 Workgroup | Dell™ Workgroup Laser Printer W5300 User's Guid - Page 150
6. Remove any print media based on what part is visible. If the middle section of print media is visible, grasp it on both sides and gently pull it straight out. If print media is still in the fuser area, open the upper front door and remove the print media. If the end of the print media is visible, - Dell W5300 Workgroup | Dell™ Workgroup Laser Printer W5300 User's Guid - Page 151
message require opening the printer rear door. NOTE: To resolve the message, you must clear all print media from the print media path. For instructions on clearing the jam, click the area where the jam occurred: Before reaching the standard output bin While exiting to the standard output bin Before - Dell W5300 Workgroup | Dell™ Workgroup Laser Printer W5300 User's Guid - Page 152
2. Remove the print media based on what part is visible. If the middle section of print media is visible, grasp it on both sides and gently pull it straight out. If print media is still in the fuser area, open the upper front door and remove the print media. If the end of the print media is visible, - Dell W5300 Workgroup | Dell™ Workgroup Laser Printer W5300 User's Guid - Page 153
If the print media does not move immediately when you pull, stop pulling. Remove the toner cartridge, and then pull the print media out. 3. Close the printer rear door. While exiting to the standard output bin Pull the print media straight out. If the print media does not move immediately when you - Dell W5300 Workgroup | Dell™ Workgroup Laser Printer W5300 User's Guid - Page 154
23x Paper Jam Jams in the optional duplex unit result in a 23x message, where x represents specific jam areas. The second line of the operator panel indicates the jam area. 231 Paper Jam Check Duplex NOTE: To resolve the message, you must clear all print media from the print media path. 1. Open the - Dell W5300 Workgroup | Dell™ Workgroup Laser Printer W5300 User's Guid - Page 155
printer, do not pull it out; it may be easier to access from inside the printer. See 200 and 201 Paper Jam Remove Cartridge for instructions. If most of the print media is visible, continue with the following: - Dell W5300 Workgroup | Dell™ Workgroup Laser Printer W5300 User's Guid - Page 156
Pull the print media up and out toward you if the print media is in this position. Pull down and out if the print media is in this position. 6. Close the duplex rear door. Make sure it snaps into place. - Dell W5300 Workgroup | Dell™ Workgroup Laser Printer W5300 User's Guid - Page 157
printer, do not pull it out; it may be easier to access from inside the printer. See 200 and 201 Paper Jam Remove Cartridge for instructions. If most of the print media is visible, continue with the following: Pull the print media up and out toward you if the print media - Dell W5300 Workgroup | Dell™ Workgroup Laser Printer W5300 User's Guid - Page 158
Pull down and out if the print media is in this position. 3. Close the duplex rear door. Make sure it snaps into place. - Dell W5300 Workgroup | Dell™ Workgroup Laser Printer W5300 User's Guid - Page 159
printer, do not pull it out; it may be easier to access from inside the printer. See 200 and 201 Paper Jam Remove Cartridge for instructions. If most of the print media is visible, pull the print media up and out toward you. - Dell W5300 Workgroup | Dell™ Workgroup Laser Printer W5300 User's Guid - Page 160
3. Close the duplex rear door. Make sure it snaps into place. 4. Remove the standard tray. - Dell W5300 Workgroup | Dell™ Workgroup Laser Printer W5300 User's Guid - Page 161
5. Locate the recessed areas on each side of the duplex front access cover. 6. Slowly pull the duplex front access cover straight out. 7. If the edge of the print media is visible, pull the print media straight up and out. - Dell W5300 Workgroup | Dell™ Workgroup Laser Printer W5300 User's Guid - Page 162
If the print media is not visible, continue with step 8. Otherwise, close the duplex front access cover. 8. Remove any sheets of print media lying in the duplex front access cover. 9. Hold the duplex front access cover level while you slide it back into the duplex unit. Make sure it snaps into place - Dell W5300 Workgroup | Dell™ Workgroup Laser Printer W5300 User's Guid - Page 163
3. If the edge of the print media is visible, pull the print media straight up and out. If the print media is not visible, continue with step 4. Otherwise, close the duplex front access cover. 4. Slide the standard tray out. 5. Remove any sheets of print media lying in the duplex front access cover. - Dell W5300 Workgroup | Dell™ Workgroup Laser Printer W5300 User's Guid - Page 164
6. Hold the duplex front access cover level while you slide it back into the duplex unit. Make sure it snaps into place. 7. Slide the standard tray back into the printer. 237 Paper Jam Check Duplex NOTE: To resolve the message, you must clear all print media from the print media path. 1. Press latch - Dell W5300 Workgroup | Dell™ Workgroup Laser Printer W5300 User's Guid - Page 165
1 Photoconductor drum Lay the cartridge aside. NOTE: Do not leave the cartridge exposed to light for extended periods. 3. Gently push the feed roller release lever toward the back of the printer. 4. Pull the print media up and toward you. CAUTION: The print media may be covered with unfused toner, - Dell W5300 Workgroup | Dell™ Workgroup Laser Printer W5300 User's Guid - Page 166
5. Reinstall the toner cartridge. 6. Close the upper door, and then the lower door. 7. Locate the recessed areas on each side of the duplex front access cover. 8. Slowly pull the duplex front access cover straight out. 9. If the edge of the print media is visible, pull the print media straight up - Dell W5300 Workgroup | Dell™ Workgroup Laser Printer W5300 User's Guid - Page 167
11. 12. Hold the duplex front access cover level while you slide it back into the duplex unit. Make sure it snaps into place. 13. Slide the standard tray back into the printer. 239 Paper Jam Check Duplex NOTE: To resolve the message, you must clear all print media from the print media path. 1. Open - Dell W5300 Workgroup | Dell™ Workgroup Laser Printer W5300 User's Guid - Page 168
If print media is still in the fuser area, open the upper front door and remove the print media. If the end of the print media is visible, pull the print media straight out. If the print media does not move immediately when you pull, stop pulling. Remove the toner cartridge, and then pull the print - Dell W5300 Workgroup | Dell™ Workgroup Laser Printer W5300 User's Guid - Page 169
printer, do not pull it out; it may be easier to access from inside the printer. See 200 and 201 Paper Jam Remove Cartridge for instructions. If most of the print media is visible, continue with the following: Pull the print media up and out toward you if the print media - Dell W5300 Workgroup | Dell™ Workgroup Laser Printer W5300 User's Guid - Page 170
6. Close the duplex rear door. Make sure it snaps into place. 7. Press latch 1 to open the lower door. Press latch 2 to open the upper door. - Dell W5300 Workgroup | Dell™ Workgroup Laser Printer W5300 User's Guid - Page 171
CAUTION: The rear portion of the inside of the printer is hot. 8. While grasping the toner cartridge by the hand grip, pull the cartridge up toward the upper front door, and then pull it straight out toward you. NOTICE: Never touch the photoconductor drum on the underside of the cartridge. Use the - Dell W5300 Workgroup | Dell™ Workgroup Laser Printer W5300 User's Guid - Page 172
9. Gently push the feed roller release lever toward the back of the printer. 10. Pull the print media up and toward you. NOTE: The print media may be covered with unfused toner, which can stain garments and skin. 11. Reinstall the toner cartridge. 12. Close the upper door, and then the lower door. - Dell W5300 Workgroup | Dell™ Workgroup Laser Printer W5300 User's Guid - Page 173
15. If the edge of the print media is visible, pull the print media straight up and out. If the print media is not visible, continue with step 16. Otherwise, close the duplex front access cover. 16. Slide the standard tray out. 17. Remove any sheets of print media lying in the duplex front access - Dell W5300 Workgroup | Dell™ Workgroup Laser Printer W5300 User's Guid - Page 174
the message, you must clear all print media from the print media path. For instructions on clearing the jam, click the area where the jam occurred: On the incline of a tray or across two trays 1. Pull the tray halfway out of the support unit. 2. Remove the print media based on how it is jammed: If - Dell W5300 Workgroup | Dell™ Workgroup Laser Printer W5300 User's Guid - Page 175
. If you do not see either end of the print media, see Across three trays to remove the jam. 3. Slide the tray back into the support unit. Across three trays This type of jam may occur if you are using legal-size print media in the trays or if you have - Dell W5300 Workgroup | Dell™ Workgroup Laser Printer W5300 User's Guid - Page 176
of the print media is visible, do not pull down to remove the print media. 2. Gently slide the tray back into the support unit. 3. Pull the tray out of the support unit that is above the tray you just closed. 4. Pull the print media either up or down. If it does not - Dell W5300 Workgroup | Dell™ Workgroup Laser Printer W5300 User's Guid - Page 177
jammed print media, and then reinstall the cartridge. Across an optional tray, the duplex unit, and the standard tray 1. Pull the tray out of the support unit. If only a short section of the print media is visible, do not pull down to remove the print media. 2. Slowly pull the duplex front - Dell W5300 Workgroup | Dell™ Workgroup Laser Printer W5300 User's Guid - Page 178
3. If you see the edge of the print media in the standard tray: a. Pull the print media down and out. b. Slide the tray all the way into the printer. c. Slide the duplex front access cover back into the duplex unit. Make sure it snaps into place. If you do not see the edge of the print media in the - Dell W5300 Workgroup | Dell™ Workgroup Laser Printer W5300 User's Guid - Page 179
c. Remove the toner cartridge. NOTICE: Do not touch the photoconductor drum on the underside of the toner cartridge. Use the handhold on the cartridge to avoid touching this area. 1 Photoconductor drum You should see the leading edge of the print media now. NOTE: The print media may be covered with - Dell W5300 Workgroup | Dell™ Workgroup Laser Printer W5300 User's Guid - Page 180
the toner cartridge. Align the slides on the cartridge with the slots on the toner cartridge cradle. Use the arrows inside the printer for placement. Guide the cartridge in until it snaps into place. g. Close the printer upper and lower front doors. h. Slide the tray all the way into the printer - Dell W5300 Workgroup | Dell™ Workgroup Laser Printer W5300 User's Guid - Page 181
Env Feeder Envelope jams may occur in two areas. NOTE: To resolve the message, you must clear all envelopes from the print media path. For instructions on clearing the jam, click the area where the jam occurred: At entry into the envelope feeder Between the envelope feeder and the printer At - Dell W5300 Workgroup | Dell™ Workgroup Laser Printer W5300 User's Guid - Page 182
in the envelope feeder. 6. Adjust the envelope edge guide. 7. Lower the envelope weight to the stack. NOTE: If envelope jams continue to occur, repeat these steps and feed a single envelope between steps 4 and 5. This may correct the problem. Between the envelope feeder and the printer 1. Lift - Dell W5300 Workgroup | Dell™ Workgroup Laser Printer W5300 User's Guid - Page 183
straight out of the printer. NOTE: You may have to remove the toner cartridge to get the envelope out. See reinstall the toner cartridge for instructions. 8. Reinstall the envelope feeder. Make sure it snaps into place. 9. Close the printer upper front door. 10. Replace the stack of envelopes in the - Dell W5300 Workgroup | Dell™ Workgroup Laser Printer W5300 User's Guid - Page 184
Troubleshooting Solving basic printer problems Checking an unresponsive printer Solving display problems Solving printing problems Solving print quality problems Solving option problems Solving network printing problems Contacting service The sections in this chapter help you solve problems with the - Dell W5300 Workgroup | Dell™ Workgroup Laser Printer W5300 User's Guid - Page 185
messages do not appear, turn the printer off and contact Dell at support.dell.com. Menu settings changed from the Settings in the software application, you can change settings from the operator panel. Solving printing problems Problem Job did not print or incorrect characters printed. Action Make - Dell W5300 Workgroup | Dell™ Workgroup Laser Printer W5300 User's Guid - Page 186
are correct. See Solving network printing problems. Make sure you are using Windows the specifications for your printer. See Print media supported for more details. Flex print media before loading correctly. Make sure the width and length guides on the print media sources are adjusted correctly - Dell W5300 Workgroup | Dell™ Workgroup Laser Printer W5300 User's Guid - Page 187
Menu. See Paper Type. Verify that the print media is within the printer specifications. See Print media supported for more details. If the problem continues, turn the printer off and contact Dell at support.dell.com. Toner appears on the back Toner is on the transfer roller. To help prevent this - Dell W5300 Workgroup | Dell™ Workgroup Laser Printer W5300 User's Guid - Page 188
the Print Resolution setting in the Quality Menu to 600 dpi or 1200 dpi. If you are using downloaded fonts, verify that the fonts are supported by the printer, the host computer, and the software application. - Dell W5300 Workgroup | Dell™ Workgroup Laser Printer W5300 User's Guid - Page 189
. Make sure the Paper Size setting in the Paper Menu is correct. Make sure the margins are set correctly in your software application. Solving option problems If an option does not operate correctly after it is installed or if it quits working: Turn the printer off, wait for about 10 seconds - Dell W5300 Workgroup | Dell™ Workgroup Laser Printer W5300 User's Guid - Page 190
is connected. For Novell users: Make sure the NT (no tabs) flag is included in the capture statement. Contacting service When you call for printer service, be prepared to describe the problem you are experiencing or the error message on the display. You need to know your printer model type and - Dell W5300 Workgroup | Dell™ Workgroup Laser Printer W5300 User's Guid - Page 191
near the power cord for this information. The serial number is also listed on the menu settings page you can print from the Utilities Menu. See Printing a menu settings page for more information. For information about obtaining service, contact Dell at support.dell.com for more information. - Dell W5300 Workgroup | Dell™ Workgroup Laser Printer W5300 User's Guid - Page 192
print quality. If several people are using the printer, you may want to designate a key operator to maintain your printer. Refer printing problems and maintenance tasks to this key operator. Determining the status of supplies If your printer is connected to the network, the Dell Configuration Web - Dell W5300 Workgroup | Dell™ Workgroup Laser Printer W5300 User's Guid - Page 193
Conserving supplies Several settings in your application software or on the display let you conserve toner and paper: Supply Setting Toner Toner Darkness in the Quality Menu Print Multipage Print media Duplex Use your software application or printer driver to send a Verify Print job. Use Held Jobs - Dell W5300 Workgroup | Dell™ Workgroup Laser Printer W5300 User's Guid - Page 194
Cartridges window appears: a. Choose your printer model from the drop-down list on the screen. b. Enter your Dell printer Service Tag number in the field provided. Your Service Tag number is located inside the front door of your printer. c. Click Visit Dell's cartridge ordering website. 3. Order - Dell W5300 Workgroup | Dell™ Workgroup Laser Printer W5300 User's Guid - Page 195
for proper print media storage. These help avoid paper feeding problems and uneven print quality: For best results, store print any of the following procedures, read and follow the safety information in your Owner's Manual. Whenever you send a job to print, the Status Monitor posts a message on - Dell W5300 Workgroup | Dell™ Workgroup Laser Printer W5300 User's Guid - Page 196
Order a new toner cartridge so you will have it on hand when the current cartridge no longer prints satisfactorily. See Ordering supplies for information on ordering toner cartridges. CAUTION: Dell does not recommend that you use toner cartridges from a third-party refiller. Print quality and - Dell W5300 Workgroup | Dell™ Workgroup Laser Printer W5300 User's Guid - Page 197
CAUTION: The rear portion of the inside of the printer is hot. 3. While grasping the toner cartridge by the hand grip, pull the cartridge up toward the upper front door, and then pull it straight out toward you. NOTICE: Never touch the photoconductor drum on the underside of the cartridge. Use the - Dell W5300 Workgroup | Dell™ Workgroup Laser Printer W5300 User's Guid - Page 198
Using a clean, lint-free cloth, gently clean the shaded areas by wiping toward the front of the printer. NOTICE: Do not touch the transfer roller. 1 Transfer roller CAUTION: The rear portion of the inside of the printer is hot due to the fuser. Allow time for the printer to cool before attempting to - Dell W5300 Workgroup | Dell™ Workgroup Laser Printer W5300 User's Guid - Page 199
1 Photoconductor drum 2. Hold the toner cartridge by the handle and gently shake it side-to-side to distribute the toner. 3. Align the tabs on each side of the toner cartridge with the slots on each side of the cartridge cradle. Use the arrows inside the printer for placement. 4. - Dell W5300 Workgroup | Dell™ Workgroup Laser Printer W5300 User's Guid - Page 200
1 Tab 2 Slot 4. Guide the toner cartridge in until it snaps into place. 5. Close the upper door, and then the lower door. 6. Turn the printer on. Replacing the charge - Dell W5300 Workgroup | Dell™ Workgroup Laser Printer W5300 User's Guid - Page 201
1 Tab 7. Pull down on the charge roll until it is loose. 8. Pull the charge roll to the right to loosen the left side. - Dell W5300 Workgroup | Dell™ Workgroup Laser Printer W5300 User's Guid - Page 202
9. Pull the charge roll straight out of the printer and set it aside. 1 Metal tab 2 Cylinder part 10. Remove any packaging from the new charge roll. 11. - Dell W5300 Workgroup | Dell™ Workgroup Laser Printer W5300 User's Guid - Page 203
10. NOTICE: Do not touch the cylinder part of the charge roll when installing the unit. You may touch the metal tabs on each end to help you in the installation. Touching the cylinder part will contaminate the charge roll and affect printing. 11. Align the metal tab on the left side of the new - Dell W5300 Workgroup | Dell™ Workgroup Laser Printer W5300 User's Guid - Page 204
15. Release the metal arm-like tab. 16. Reinstall the toner cartridge and close the front doors. 17. Plug the printer power cord into a properly grounded electrical outlet. 18. Reset the maintenance counter. See Resetting the maintenance counter. Replacing the transfer roller Order a new transfer - Dell W5300 Workgroup | Dell™ Workgroup Laser Printer W5300 User's Guid - Page 205
5. Pull the transfer roller to the left to loosen the right side and then pull it straight out of the printer. Set it aside. - Dell W5300 Workgroup | Dell™ Workgroup Laser Printer W5300 User's Guid - Page 206
6. Remove any packaging from the new transfer roller. 7. Grasp the transfer roller on the left side as shown. 8. Locate the small hole and insert the metal tab on the right side of the transfer roller into the hole. - Dell W5300 Workgroup | Dell™ Workgroup Laser Printer W5300 User's Guid - Page 207
9. Lower the transfer roller gently until the left metal tab fits into the slot. You may have to push it down for a secure fit. - Dell W5300 Workgroup | Dell™ Workgroup Laser Printer W5300 User's Guid - Page 208
10. Reinstall the toner cartridge and close the front doors. 11. Plug the printer power cord into a properly grounded electrical outlet. 12. Reset the maintenance counter. See Resetting the maintenance counter. Replacing the pick rollers 1. Remove the standard tray. 2. Look underneath the printer - Dell W5300 Workgroup | Dell™ Workgroup Laser Printer W5300 User's Guid - Page 209
3. Press on the end of the tab and pull the pick roller off the arm. 1 Tab 4. Repeat step 3 on the other side to remove the other pick roller. 5. 6. - Dell W5300 Workgroup | Dell™ Workgroup Laser Printer W5300 User's Guid - Page 210
4. 5. Gently release the pick roller arm. 6. Discard the used pick rollers. To install the new pick rollers: 1. Remove the two pick rollers from the packaging. 2. Pull the pick roller arm down. 3. Locate the recessed area on the pick roller and align it with the tab on the arm. NOTE: There are two - Dell W5300 Workgroup | Dell™ Workgroup Laser Printer W5300 User's Guid - Page 211
5. Repeat step 3and step 4 to install the other pick roller. 6. Gently release the pick roller arm. 7. Insert the standard tray. Resetting the maintenance counter After replacing all the items in the maintenance kit, reset the maintenance counter: 1. Press and hold the Select and Return buttons - Dell W5300 Workgroup | Dell™ Workgroup Laser Printer W5300 User's Guid - Page 212
5. Press Menu until you see Exit Config Menu, and then press Select. Activating Menu Changes appears briefly, followed by Performing Self Test. The printer returns to the Ready state. Printer maintenance when printing on card stock After printing approximately 10,000 pages of card stock (or each - Dell W5300 Workgroup | Dell™ Workgroup Laser Printer W5300 User's Guid - Page 213
on the printer before you touch a card. CAUTION: Before performing any of the procedures listed below, read and follow the safety instructions in your Owner's Manual. 1. Access the system board: a. Turn the printer power off, unplug the printer power cord, and disconnect all cables from the back - Dell W5300 Workgroup | Dell™ Workgroup Laser Printer W5300 User's Guid - Page 214
c. Press down on the side door latches and open the side door. d. Loosen, but do not remove, the six screws on the shield. NOTE: You need a small Phillips screwdriver to loosen these screws. - Dell W5300 Workgroup | Dell™ Workgroup Laser Printer W5300 User's Guid - Page 215
e. Use the tabs to slide the shield up until the top three screws fit into the three keyholes on the shield. f. Hold the shield by the tabs and lift it off. 2. Locate the option card you want to remove. NOTICE: Electronic components are easily damaged by static electricity. Touch something metal on - Dell W5300 Workgroup | Dell™ Workgroup Laser Printer W5300 User's Guid - Page 216
install a replacement optional card on the system board, refer to the Owner's Manual. Reattaching the shield and closing the doors After you have installed any type of option card on the printer system board, follow these instructions to attach the shield and close the doors. 1. Grasp the shield by - Dell W5300 Workgroup | Dell™ Workgroup Laser Printer W5300 User's Guid - Page 217
2. Close the side door. 3. Close the upper door, and then the lower door. Removing the envelope feeder 1. Remove envelopes from the envelope feeder. 2. Push the envelope support to the closed position. - Dell W5300 Workgroup | Dell™ Workgroup Laser Printer W5300 User's Guid - Page 218
front doors. Removing the printer from the duplex unit, removing a duplex unit from a drawer and removing a drawer from another drawer NOTE: These same instructions work for removing the printer from the optional 250- or 500-sheet drawer. 1. Ask someone to help you lift the printer by the handholds - Dell W5300 Workgroup | Dell™ Workgroup Laser Printer W5300 User's Guid - Page 219
2. Carefully lift the optional drawer straight up until it is completely disconnected from the option below it. Set it aside. - Dell W5300 Workgroup | Dell™ Workgroup Laser Printer W5300 User's Guid - Page 220
Uninstalling drivers Uninstall software utility The Drivers and Utilities CD contains drivers and utilities for your printer and optional devices. Dell ships your computer to you with required drivers and utilities already installed-no further installation or configuration is needed. The CD also has - Dell W5300 Workgroup | Dell™ Workgroup Laser Printer W5300 User's Guid - Page 221
Printer specifications Dimensions Memory Emulation, compatibility, and connectivity Cartridge and printer life Environmental Choosing the right print media Media types and sizes Cables Certifications Dimensions Height: 421 mm (16.5 in.) Width: 509 mm (20 in.) Depth: 384 mm (15.1 in.) Weight ( - Dell W5300 Workgroup | Dell™ Workgroup Laser Printer W5300 User's Guid - Page 222
MIB compatibility A Management Information Base (MIB) is a database containing information about network devices (such as adapters, bridges, routers, or computers). This information helps network administrators manage the network (analyze performance, traffic, errors, and so on). The Dell Workgroup - Dell W5300 Workgroup | Dell™ Workgroup Laser Printer W5300 User's Guid - Page 223
right print media Selecting the right paper or other media reduces printing problems. For best print quality, try a sample of the print media release emissions. You must understand the section in your operating instructions that discusses the guidelines for selecting appropriate print media to - Dell W5300 Workgroup | Dell™ Workgroup Laser Printer W5300 User's Guid - Page 224
Source Print media supported Sizes supported Weight Capacity Tray 1 (standard 500-sheet tray) Paper, card stock, transparencies A4, A5, JIS B5, letter, legal, executive, folio1, statement1 universal2 Paper: 60-176 g/m2 - Dell W5300 Workgroup | Dell™ Workgroup Laser Printer W5300 User's Guid - Page 225
Connection 1 USB Cable certification USB 2.0 2 10/100BaseT Ethernet CAT-5E Certifications Novell USB-IF - Dell W5300 Workgroup | Dell™ Workgroup Laser Printer W5300 User's Guid - Page 226
Information CAUTION: Read and follow all safety instructions in your Owner's Manual prior to setting up and operating your printer to which the receiver is connected. Consult your point of purchase or service representative for additional suggestions. The manufacturer is not responsible for any radio - Dell W5300 Workgroup | Dell™ Workgroup Laser Printer W5300 User's Guid - Page 227
or modifications could void the user's authority to operate this equipment. NOTE: To assure compliance with FCC regulations on electromagnetic interference for a Class B computing device, use a properly shielded and grounded cable. Use of a substitute cable not properly shielded and grounded may - Dell W5300 Workgroup | Dell™ Workgroup Laser Printer W5300 User's Guid - Page 228
are designed so there is never any human access to laser radiation above a Class I level during normal operation, user maintenance, or prescribed service condition. Class I laser products are not considered to be hazardous. The printer contains internally a Class IIIb (3b) laser that is nominally - Dell W5300 Workgroup | Dell™ Workgroup Laser Printer W5300 User's Guid - Page 229
Companies participating in this program introduce products that power down when they are not being used. This feature will cut the energy used by up to 50 percent. Dell is proud to be a participant in this program. As an ENERGY STAR Partner, Dell Computer Corporation has determined that this product - Dell W5300 Workgroup | Dell™ Workgroup Laser Printer W5300 User's Guid - Page 230
policy Contacting Dell Warranty and Return Policy Dell technical support policy Technician-assisted technical support requires the cooperation and participation of the customer in the troubleshooting process and provides for restoration of the Operating System, application software and hardware - Dell W5300 Workgroup | Dell™ Workgroup Laser Printer W5300 User's Guid - Page 231
Electronic Information Service [email protected] Warranty and Return Policy Dell Computer Corporation ("Dell") manufactures its hardware products from parts and components accordance with industry-standard practices. For information about the Dell warranty for your printer, refer to the Owner's Manual. - Dell W5300 Workgroup | Dell™ Workgroup Laser Printer W5300 User's Guid - Page 232
Licensing notice The printer resident software contains: Software developed and copyrighted by Dell and/or third parties Dell modified software licensed under the provisions of the GNU General Public License version 2 and the GNU Lesser General Public License version 2.1 Software licensed under the
-
 1
1 -
 2
2 -
 3
3 -
 4
4 -
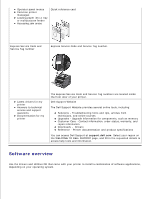 5
5 -
 6
6 -
 7
7 -
8
-
9
-
10
-
11
-
12
-
13
-
14
-
15
-
16
-
17
-
18
-
19
-
20
-
21
-
22
-
23
-
24
-
25
-
26
-
27
-
28
-
29
-
30
-
31
-
32
-
33
-
34
-
35
-
36
-
37
-
38
-
39
-
40
-
41
-
42
-
43
-
44
-
45
-
46
-
47
-
48
-
49
-
50
-
51
-
52
-
53
-
54
-
55
-
56
-
57
-
58
-
59
-
60
-
61
-
62
-
63
-
64
-
65
-
66
-
67
-
68
-
69
-
70
-
71
-
72
-
73
-
74
-
75
-
76
-
77
-
78
-
79
-
80
-
81
-
82
-
83
-
84
-
85
-
86
-
87
-
88
-
89
-
90
-
91
-
92
-
93
-
94
-
95
-
96
-
97
-
98
-
99
-
100
-
101
-
102
-
103
-
104
-
105
-
106
-
107
-
108
-
109
-
110
-
111
-
112
-
113
-
114
-
115
-
116
-
117
-
118
-
119
-
120
-
121
-
122
-
123
-
124
-
125
-
126
-
127
-
128
-
129
-
130
-
131
-
132
-
133
-
134
-
135
-
136
-
137
-
138
-
139
-
140
-
141
-
142
-
143
-
144
-
145
-
146
-
147
-
148
-
149
-
150
-
151
-
152
-
153
-
154
-
155
-
156
-
157
-
158
-
159
-
160
-
161
-
162
-
163
-
164
-
165
-
166
-
167
-
168
-
169
-
170
-
171
-
172
-
173
-
174
-
175
-
176
-
177
-
178
-
179
-
180
-
181
-
182
-
183
-
184
-
185
-
186
-
187
-
188
-
189
-
190
-
191
-
192
-
193
-
194
-
195
-
196
-
197
-
198
-
199
-
200
-
201
-
202
-
203
-
204
-
205
-
206
-
207
-
208
-
209
-
210
-
211
-
212
-
213
-
214
-
215
-
216
-
217
-
218
-
219
-
220
-
221
-
222
-
223
-
224
-
225
-
226
-
227
-
228
-
229
-
230
-
231
-
232
 |
 |

Dell™ Workgroup Laser Printer W5300 User's
Guide
Click the links to the left for information on the features, options, and operation of your printer. For
information on other documentation included with your printer, see
Finding information
.
1
Printer
2
Multipurpose feeder
3
Standard 500-sheet tray
4
Optional envelope feeder
5
Optional duplex unit
6
Optional 250-sheet drawer with tray
7
Optional 500-sheet drawer with tray
To order replacement toner cartridges or supplies from Dell:
Double-click the icon on your desktop.
1.