Dell XPS 15z Setup Guide - Page 18
Set Up 3D TV (Optional
 |
View all Dell XPS 15z manuals
Add to My Manuals
Save this manual to your list of manuals |
Page 18 highlights
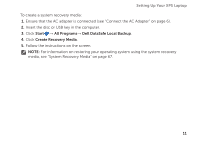
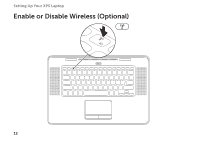
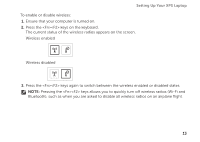
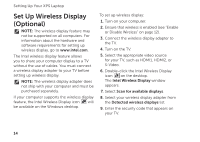
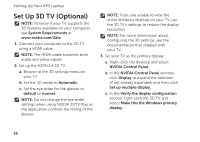
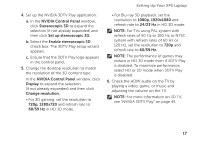
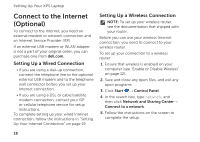
Setting Up Your XPS Laptop Set Up 3D TV (Optional) NOTE: To know if your TV supports the 3D features available on your computer, see System Requirements at www.nvidia.com/3dtv. 1. Connect your computer to the 3D TV using a HDMI cable. NOTE: The HDMI cable transmits both audio and video signals. 2. Set up the HDMI 1.4 3D TV: a. Browse to the 3D settings menu on your TV. b. Set the 3D mode to Automatic. c. Set the eye order for the glasses to default or normal. NOTE: Do not change the eye order settings when using NVIDIA 3DTV Play as the application controls the timing of the glasses. NOTE: If you are unable to view the entire Windows desktop on your TV, use the 3D TV's settings to reduce the display resolution. NOTE: For more information about configuring the 3D settings, see the documentation that shipped with your TV. 3. Set your TV as the primary display: a. Right-click the desktop and select NVIDIA Control Panel. b. In the NVIDIA Control Panel window, click Display to expand the selection (if not already expanded) and then click Set up multiple display. c. In the Verify the display configuration section, right-click the 3D TV and select Make this the Windows primary display. 16
-
 1
1 -
2
-
3
-
4
-
5
-
6
-
7
-
8
-
9
-
10
-
11
-
12
-
 13
13 -
 14
14 -
 15
15 -
 16
16 -
 17
17 -
 18
18 -
 19
19 -
 20
20 -
 21
21 -
 22
22 -
 23
23 -
24
-
25
-
26
-
27
-
28
-
29
-
30
-
31
-
32
-
33
-
34
-
35
-
36
-
37
-
38
-
39
-
40
-
41
-
42
-
43
-
44
-
45
-
46
-
47
-
48
-
49
-
50
-
51
-
52
-
53
-
54
-
55
-
56
-
57
-
58
-
59
-
60
-
61
-
62
-
63
-
64
-
65
-
66
-
67
-
68
-
69
-
70
-
71
-
72
-
73
-
74
-
75
-
76
-
77
-
78
-
79
-
80
-
81
-
82
-
83
-
84
-
85
-
86
-
87
-
88
-
89
-
90
-
91
-
92
-
93
-
94
 |
 |
