Denon AVR-3312CI AVR3312CIE3_GettingStarted - Page 8
Network Setup, Remote Setup, Source Setup, Speaker Calibration, Speaker Connection, Language Select - receiver
 |
UPC - 883795002042
View all Denon AVR-3312CI manuals
Add to My Manuals
Save this manual to your list of manuals |
Page 8 highlights
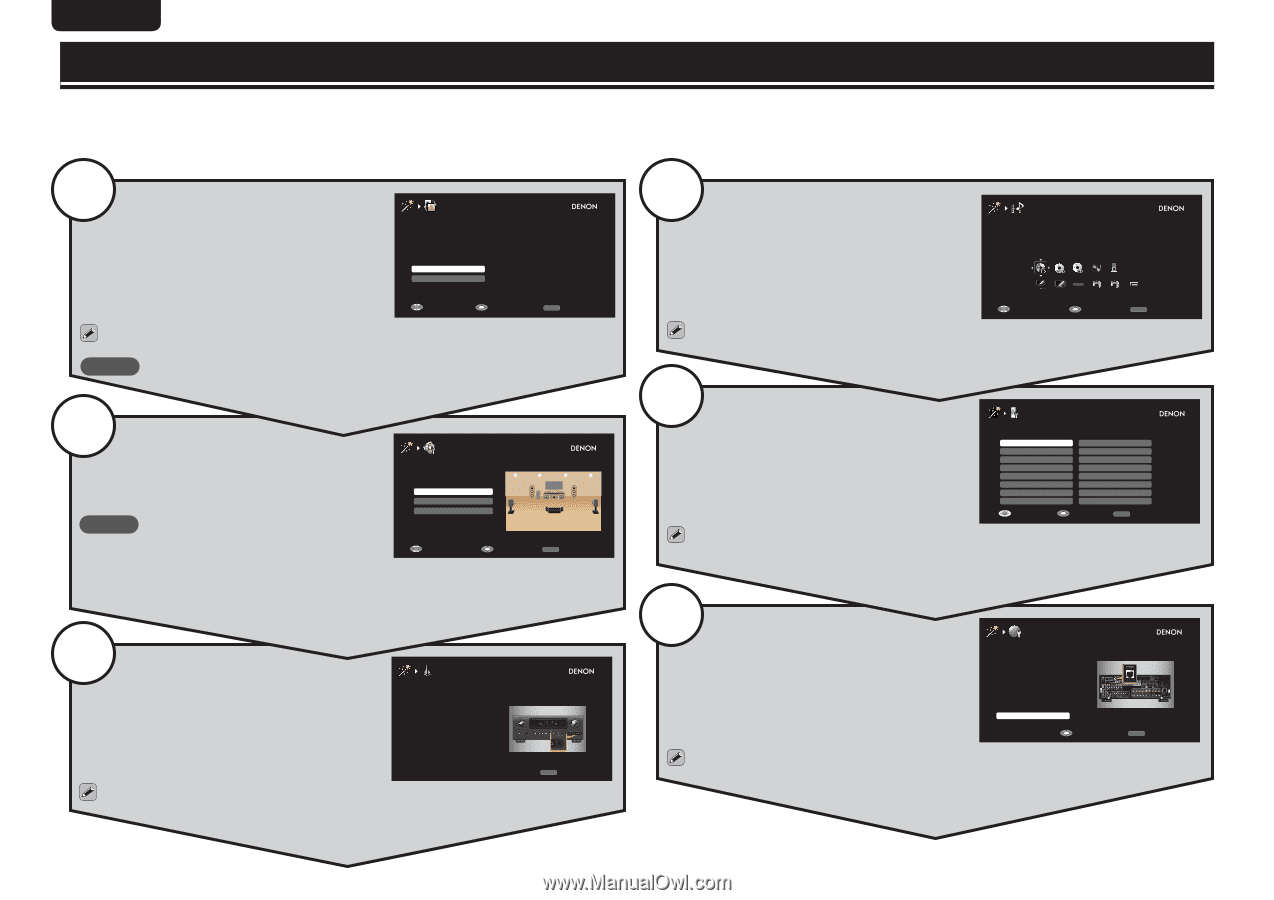
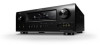
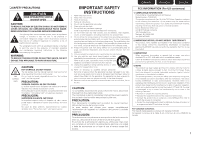
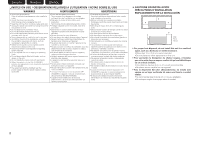
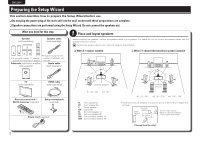
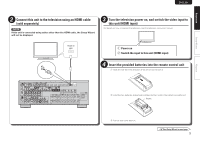
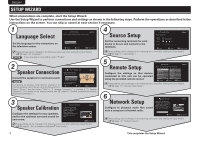
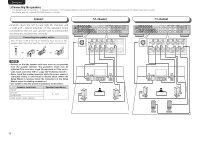
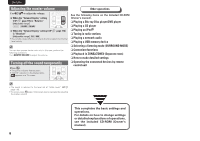
ENGLISH DEUTSCH FRANÇAIS ITALIANO ESPAÑOL NEDERLANDS SVENSKA SETUP WIZARD When preparations are complete, start the Setup Wizard. Use the Setup Wizard to perform connections and settings as shown in the following steps. Perform the operations as described in the instructions on the screen. You can skip or cancel at each section if necessary. 1 Language Select LANGUAGE SELECT Please select the language for the on screen menu. Set the language for the instructions on the television screen. English Español Select Enter RETURN Back to TOP These settings can be changed in the following menu even after setting the Setup Wizard (vm page 119 "Language"). NOTE If your language is not available, select "English". 2 Speaker Connection SPEAKER CONNECTION Please select the speaker configuration to be used. Connect the speakers for surround sound. 5.1ch 7.1ch Others NOTE 5.1ch is the most popular Connections for speakers other than 5.1 channel or 7.1 channel speakers cannot be set using the Setup Wizard. surround system. Select Enter RETURN Back to TOP Select "Others", and then select "Skip" in "2. Speaker Connection" to proceed to "3. Speaker Calibration". (For details on the setting method, see m page 61 "Speaker installation/connection (Advanced connection)".) 3 Speaker Calibration Configure the settings for your speakers, and for the optimum surround sound for your room. SPEAKER CALIBRATION For preparation, the setup microphone which included in the box is required. Please connect the microphone connector to the SETUP MIC jack on front panel. 1 2 3 4 RETURN Back to TOP These settings can be changed in the following menu even after setting the Setup Wizard (vm page 21 "Set up speakers (Audyssey® Auto Setup)"). 4 Source Setup Set the connecting terminals for each device to be set, and connect to the terminals. SOURCE SETUP Please select device. Source Device BD Blu-ray Disc player Player Video Select Enter RETURN Back to TOP These settings can be changed in the following menu even after setting the Setup Wizard (vm page 91 "Input Assign"). 5 Remote Setup Configure the settings so that devices connected to this unit can be operated using the provided remote control. REMOTE SETUP Please select the device you want to control. Blu-ray CABLE CABLE/PVR CD CD Recorder DVD DVD Recorder HD DVD Select IPTV STB PVR SAT SAT/PVR TV TV/DVD TV/VCR VCR Enter RETURN Return These settings can be changed in the following menu even after setting the Setup Wizard (vm page 117 "Remote Setup Guide"). 6 Network Setup Configure to playback audio files saved onto a computer or Internet radio. NETWORK SETUP Please connect LAN cable to ETHERNET port on rear panel of receiver, and other side of cable to network router. When connection is complete, press "Next" to continue. Next Enter RETURN Back to TOP These settings can be changed in the following menu even after setting the Setup Wizard (vm page 111 "Network Setup"). 4 This completes the Setup Wizard.
-
 1
1 -
2
-
 3
3 -
 4
4 -
 5
5 -
 6
6 -
 7
7 -
 8
8 -
 9
9 -
 10
10 -
 11
11 -
 12
12 -
 13
13 -
14
-
15
-
16
 |
 |