Dewalt DCF897P2 Instruction Manual - Page 13
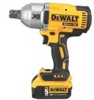
Proper Hand Position Fig. 2, 5, Variable Speed Trigger Switch Fig. 2
 |
View all Dewalt DCF897P2 manuals
Add to My Manuals
Save this manual to your list of manuals |
Page 13 highlights
English 75-100% charged 51-74% charged < 50% charged Proper Hand Position (Fig. 2, 5) WARNING: To reduce the risk of serious personal injury, ALWAYS use proper hand position as shown. WARNING: To reduce the risk of serious personal injury, ALWAYS hold securely in anticipation of a sudden reaction. Proper hand position requires one hand on the main handle (D). FIG. 5 Pack needs to be charged To actuate the fuel gauge, press and hold the fuel gauge button (L). A combination of the three green LED lights will illuminate designating the level of charge left. When the level of charge in the battery is below the usable limit, the fuel gauge will not illuminate and the battery will need to be recharged. FIG. 4 L NOTE: The fuel gauge is only an indication of the charge left on the battery pack. It does not indicate tool functionality and is subject to variation based on product components, temperature and end-user application. For more information regarding fuel gauge battery packs, please call 1-800-4-DeWALT (1-800-433-9258) or visit our website www.dewalt. com. Variable Speed Trigger Switch (Fig. 2) To turn the tool on, squeeze the trigger switch (A). To turn the tool off, release the trigger switch. Your tool is equipped with a brake. The anvil will stop when the trigger switch is fully released. The variable speed switch enables you to select the best speed for a particular application. The more you squeeze the trigger, the faster the tool will operate. For maximum tool life, use variable speed only for starting holes or fasteners. NOTE: Continuous use in variable speed range is not recommended. It may damage the switch and should be avoided. 11
-
 1
1 -
2
-
3
-
4
-
5
-
6
-
7
-
 8
8 -
 9
9 -
 10
10 -
 11
11 -
 12
12 -
 13
13 -
 14
14 -
 15
15 -
 16
16 -
 17
17 -
 18
18 -
19
-
20
-
21
-
22
-
23
-
24
-
25
-
26
-
27
-
28
-
29
-
30
-
31
-
32
-
33
-
34
-
35
-
36
-
37
-
38
-
39
-
40
-
41
-
42
-
43
-
44
-
45
-
46
-
47
-
48
-
49
-
50
-
51
-
52
-
53
-
54
-
55
-
56
-
57
-
58
-
59
-
60
 |
 |
