Dymo LabelWriter® 450 Professional Label Printer for PC and Mac® Use - Page 5
Installing the Software
 |
View all Dymo LabelWriter® 450 Professional Label Printer for PC and Mac® manuals
Add to My Manuals
Save this manual to your list of manuals |
Page 5 highlights
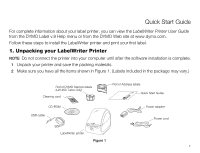
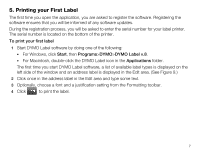
2. Installing the Software Do not connect the printer to your computer until after the software installation is complete. Windows Depending on your system configuration, the software installation could take some time while the required Microsoft .NET™ software is installed. To install the software on a Windows system 1 Close all open Microsoft Office applications. 2 Insert the DYMO LabelWriter CD into your CD-ROM/DVD drive. After a few seconds, the installation screen appears. 3 Click Install and follow the instructions in the installer. QuickBooks If you have QuickBooks 2007 or later, you will be prompted to install the DYMO Label Add-in for QuickBooks. (US Only.) To install the software on a Mac OS system 1 Insert the DYMO LabelWriter CD into the CD-ROM/DVD drive. After a few seconds, the DYMO Label Installer icon appears. 2 Double-click the Installer icon and follow the instructions. 3
-
 1
1 -
 2
2 -
 3
3 -
 4
4 -
 5
5 -
 6
6 -
 7
7 -
 8
8 -
 9
9 -
 10
10 -
 11
11 -
12
-
13
-
14
 |
 |
