EVGA Classified SR-X User Guide
EVGA Classified SR-X Manual
 |
View all EVGA Classified SR-X manuals
Add to My Manuals
Save this manual to your list of manuals |
EVGA Classified SR-X manual content summary:
- EVGA Classified SR-X | User Guide - Page 1
User Guide EVGA Classified SR-X 1 - EVGA Classified SR-X | User Guide - Page 2
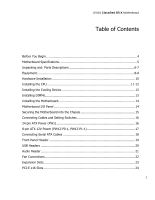
EVGA Classified SR-X Motherboard Table of Contents Before You Begin 4 Motherboard Specifications 5 Unpacking and Parts Descriptions 6-7 Equipment ...8-9 Hardware Installation 10 Installing the CPU 11-12 Installing the Cooling Device 13 Installing DIMMs 13 Installing the Motherboard 14 - EVGA Classified SR-X | User Guide - Page 3
EVGA Classified SR-X Motherboard Onboard Buttons 25 Post Port Debug LED and LED Status Indicators 26 PCIE-E Disable Swtiches 27 CPU1 Disable Swtiches 28 DIMM Disable Swtiches 29 Voltage Measure Point 30 Installing Drivers and Software 31 POST Codes 32-33 EVGA Glossary of Terms 34-36 - EVGA Classified SR-X | User Guide - Page 4
for purchasing the EVGA Classified SR-X Motherboard. This is the premier dual socket enthusiast class motherboard. With this purchase you not only receive the best dual Xeon® motherboard built for the enthusiast, by the enthusiast, you also receive our industry leading 24/7 technical support. If you - EVGA Classified SR-X | User Guide - Page 5
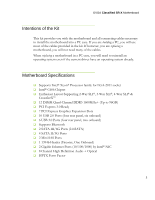
EVGA Classified SR-X Motherboard Intentions of the Kit This kit provides you with the motherboard and all connecting cables necessary to install the motherboard into a PC case. If you are building a PC, you will use most of the cables provided in the kit. If however, you are replacing a motherboard, - EVGA Classified SR-X | User Guide - Page 6
are included with EVGA Classified - motherboard. The EVGA Classified SR-X Motherboard This motherboard contains the Intel® C606 chipset and is SLI® ready for 2-way, Quad, 3-way, 3-way SLI® w/ PhysX and 4-way SLI® configurations. Visual Guide Helps to quickly and visually guide you through the - EVGA Classified SR-X | User Guide - Page 7
EVGA Classified SR-X Motherboard I/O Shield Installs in the system case to block radio frequency transmissions, protect internal components from dust, foreign objects, and aids in proper airflow within the chassis. 3 - 2-Port SATA Power Cables Allows a Molex power connector to adapt to a SATA power - EVGA Classified SR-X | User Guide - Page 8
EVGA Classified SR-X Motherboard Figure 1. EVGA Classified SR-X Motherboard Layout 4 2 26 1 16 7 25 23 22 7 15 24 21 1. Primary CPU socket 2. Secondary CPU socket 3. 1394B header 4. CPU Fan headers 5. Intel® C606 Chipset 6. 24-pin ATX power connector 7. Fan headers 8. PCI-E/DIMM disable - EVGA Classified SR-X | User Guide - Page 9
EVGA Classified SR-X Motherboard Figure 2. Motherboard I/O Panel Connectors 8 7 7 10 1 2 3 4 2 5 1. Bluetooth 2. USB 2.0 ports (Four) 3. CMOS Clear Button 4. EVBot Connector 5. E-SATA ports (Two) 6. USB 3.0/2.0 ports (Four) 7. Dual Lan Ports with LEDs to indicate status 8. PS/2 - EVGA Classified SR-X | User Guide - Page 10
EVGA Classified SR-X Motherboard Hardware Installation This section will guide you through the installation of the motherboard. The topics covered in this section are: Preparing the motherboard Installing the CPUs Installing the CPU fans Installing the memory Installing the motherboard - EVGA Classified SR-X | User Guide - Page 11
EVGA Classified SR-X Motherboard Preparing the Motherboard Installing the CPU Be very careful when handling the CPU. Hold the processor only by the edges and do not touch the bottom of the processor. Use the following procedure to install the CPU onto the motherboard. Please ensure that with single - EVGA Classified SR-X | User Guide - Page 12
EVGA Classified SR-X Motherboard Align the notches on the CPU to the notches in the socket. Lower the processor straight down into the socket. Note: Make sure the CPU is fully seated and level in the socket. Lower the load plate so it is resting on the CPU. Press the right socket lever down - EVGA Classified SR-X | User Guide - Page 13
EVGA Classified SR-X Motherboard Installing the Cooling Device There are many different cooling devices that can be used with this motherboard. Follow the instructions that came with your cooling assembly. Installing DIMMs Your new motherboard has twelve (12) 240-pin slots for DDR3 DIMMs (ECC or Non - EVGA Classified SR-X | User Guide - Page 14
EVGA Classified SR-X Motherboard 2. Align the memory module to the DIMM slot, and insert the module vertically into the DIMM slot. The plastic clips at both sides of the DIMM slot automatically lock the DIMM into the connector. Installing the Motherboard The sequence of installing the motherboard - EVGA Classified SR-X | User Guide - Page 15
EVGA Classified SR-X Motherboard Securing the Motherboard into the Chassis Most computer chassis have a base with mounting studs or spacers to allow the motherboard to be secured to the chassis and help to prevent short circuits. If there are studs that do not align with a mounting hole on the - EVGA Classified SR-X | User Guide - Page 16
EVGA Classified SR-X Motherboard Connecting Cables and Setting Switches This section takes you through all the connections and switch settings on the motherboard. This will include: Power Connections 24-pin ATX power (PW1) 8-pin ATX 12V power (PW12-P0-1, PW12-P1-1) Internal Headers Front - EVGA Classified SR-X | User Guide - Page 17
EVGA Classified SR-X Motherboard Table 1. PW1 Pin Assignments Connector Pin Signal Board edg1e +3.3V 24 13 2 +3.3V 3 GND 4 +5V 5 GND 12 1 6 +5V 7 GND 8 PWROK 9 +5V_AUX 10 +12V 11 +12V 12 +3.3V Pin Signal 13 +3.3V 14 -12V 15 GND 16 PS_ON 17 GND 18 GND 19 GND 20 RSVD 21 +5V 22 +5V - EVGA Classified SR-X | User Guide - Page 18
EVGA Classified SR-X Motherboard Connecting Serial ATA Cables The Serial ATA II connector is used to connect a Serial ATA II device to the motherboard. These connectors support the thin Serial ATA II cables for primary storage devices. The Serial ATA II interface allows up to 300MB/s data transfer - EVGA Classified SR-X | User Guide - Page 19
EVGA Classified SR-X Motherboard Connecting Internal Headers Front Panel Header The front panel header on this motherboard is used to connect the following four cables. (see Table 2 for pin definitions): PWRLED Attach the front panel power LED cable to these two pins of the connector. The Power - EVGA Classified SR-X | User Guide - Page 20
EVGA Classified SR-X Motherboard USB Headers This motherboard contains four (4) USB 2.0 ports that are exposed on the back panel of the chassis. It also supports four (4) USB 3.0 ports on the back panel which can operate at USB 2.0 or USB 3.0 specifications. The motherboard also contains three 10- - EVGA Classified SR-X | User Guide - Page 21
EVGA Classified SR-X Motherboard Audio Header The audio connector supports HD audio standard and provides two kinds of audio output choices: The Front Audio & the Rear Audio. The front Audio supports re-tasking function. Table 4. Front Audio Header Connector Front Audio Connector 10 9 8 7 6 - EVGA Classified SR-X | User Guide - Page 22
EVGA Classified SR-X Motherboard Fan Connections There are seven fan connections on the motherboard. The fan speed can be detected and viewed on select ports in the PC Health Status section of the CMOS Setup. The fans are automatically turned off after the system enters S3, S4 or S5 mode. Note: the - EVGA Classified SR-X | User Guide - Page 23
EVGA Classified SR-X Motherboard Expansion Slots The EVGA Classified SR-X motherboard contains seven (7) PCI-E expansion slots. 1 2 3 4 5 6 7 PCI-E Slot Listing 1 - PCI-E x16/8 slot 2 - PCI-E x8 slot 3 - PCI-E x16/8 slot 4 - PCI-E x8 slot 5 - PCI-E x16/8 slot 6 - PCI-E x4 - EVGA Classified SR-X | User Guide - Page 24
EVGA Classified SR-X Motherboard E 3.0 graphics card. The design of this motherboard supports up to Four PCI-E graphics cards using NVIDIA's SLI® technology. When installing a PCI-E x16 card, be sure the retention clip snaps and locks the card - EVGA Classified SR-X | User Guide - Page 25
EVGA Classified SR-X Motherboard Onboard Buttons These onboard buttons include RESET, POWER and Clear CMOS. These functions allow you to easily reset the system, turn on/off the system, or clear the CMOS. Clear CMOS Button The motherboard uses the CMOS to store all the set parameters. The CMOS can - EVGA Classified SR-X | User Guide - Page 26
EVGA Classified SR-X Motherboard 26Post Port Debug LED and LED Status Indicators Post Port Debug LED The Debug LED provides two-digit POST codes to show why the system may be failing to boot. It is useful during troubleshooting situations. This Debug LED will also display current CPU temperatures - EVGA Classified SR-X | User Guide - Page 27
EVGA Classified SR-X Motherboard Jumper Settings PCI-E Disable Switches For the ease of troubleshooting multiple graphics cards or testing an individual graphics card's overclocking, EVGA right above the reset button and BIOS selector. In default shipping configurations, all slots are enabled - EVGA Classified SR-X | User Guide - Page 28
EVGA Classified SR-X Motherboard CPU1 Disable Switch For the ease of troubleshooting Dual CPUs, EVGA has implemented one switch you can use to disable CPU1. You don't need to remove the CPU to disable it. You see the location of the switch in the above diagram. It is located at the top middle of the - EVGA Classified SR-X | User Guide - Page 29
EVGA Classified SR-X Motherboard DIMM Disable Switches For the ease of troubleshooting memory or testing individual slots, EVGA has implemented switches to disable any DIMM slot. To disable a DIMM slot move the switch to the right position. You see the location of the - EVGA Classified SR-X | User Guide - Page 30
EVGA Classified SR-X Motherboard Voltage Measure Point The motherboard is equipped with thirteen voltage measure point pads. You can use a voltmeter or multimeter to measure the voltage at each pad. CPU 0 Vcore voltage CPU 0 VSA voltage CPU 1 DIMM1 voltage CPU 1 DIMM2 voltage CPU 1 IOH PLL voltage - EVGA Classified SR-X | User Guide - Page 31
in the kit, you need to load your operating system. The motherboard supports Windows 7/Vista. The kit comes with a CD that contains utilities, drivers. The CD that has been shipped with your EVGA Classified SR-X motherboard contains the following software and drivers: Chipset Drivers Audio - EVGA Classified SR-X | User Guide - Page 32
EVGA Classified SR-X Motherboard AMI POST Code Code 03 04 05 06 07 08 C0 C1 C2 C5 C6 C7 0A 0B 0C 0E 13 20 24 2A 2C 2E 31 33 37 38 39 Description Initialize BIOS. Check Battery Power and CMOS Initialize interrupt controlling hardware/vector table Initialize system timer Fixes CPU POST interface - EVGA Classified SR-X | User Guide - Page 33
EVGA Classified SR-X Motherboard Code 3A 3B 3C 40 52 60 75 78 7C 84 85 87 8C 8D 8E 90 A1 A2 A4 A7 A9 AA AB AC B1 00 (will vary) Description Initialize real time clock Test system memory Initialization of chipset registers Detect coprocessor Update CMOS memory size Initialize NUM-LOCK Initialize - EVGA Classified SR-X | User Guide - Page 34
and Power Interface BCLK - Base Clock (or operating frequency of base system bus) BIOS - Basic Input Output System CD-ROM - Compact Disc Read-Only Memory CMOS - Complementary Metal-Oxide Semiconductor CPU - Central Processing Unit DDR - Double Data Rate DIMM - Dual In-line Memory Module - EVGA Classified SR-X | User Guide - Page 35
EVGA Classified SR-X Motherboard HT - Hyper-Threading HSF - Heat Sink Fan I/O - Input/Output IDE - Integrated Drive Electronics IEEE - Institute of Electrical and Electronics Engineers IGP - Integrated Graphics Processors IMC - Integrated memory controller IRQ - Interrupt Request JBOD - Just a Bunch - EVGA Classified SR-X | User Guide - Page 36
EVGA Classified SR-X Motherboard POST - Power on Self Test PWM - Pulse Width Modulation QDR - Quad Data Rate QPI - Quick Path Interconnect RAID - Redundant Array of Inexpensive Disks RAM - Random Access Memory ROM - Read Only Memory RGB - Red Interconnect Format SPP - System Platform Processors SSD - - EVGA Classified SR-X | User Guide - Page 37
EVGA Classified SR-X Motherboard manufacturer's instructions, may shielded cables for connection of peripheral devices to the PC systems this product may cause radio interference in which case the user may be required to take adequate service names may be trademarks or service marks of others. EVGA
-
 1
1 -
 2
2 -
 3
3 -
 4
4 -
 5
5 -
 6
6 -
 7
7 -
8
-
9
-
10
-
11
-
12
-
13
-
14
-
15
-
16
-
17
-
18
-
19
-
20
-
21
-
22
-
23
-
24
-
25
-
26
-
27
-
28
-
29
-
30
-
31
-
32
-
33
-
34
-
35
-
36
-
37
 |
 |

1
User Guide
EVGA Classified
SR-X