EVGA Classified SR-X User Guide - Page 11
Installing the CPU - motherboard
 |
View all EVGA Classified SR-X manuals
Add to My Manuals
Save this manual to your list of manuals |
Page 11 highlights
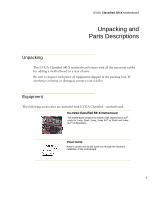
EVGA Classified SR-X Motherboard Preparing the Motherboard Installing the CPU Be very careful when handling the CPU. Hold the processor only by the edges and do not touch the bottom of the processor. Use the following procedure to install the CPU onto the motherboard. Please ensure that with single processor usage you are using CPU socket 0 and the adjacent ram slots. Unhook the left socket lever by pushing down and away from the socket. Unhook the right socket lever by pushing down and away from the socket. Gently press the left socket lever and the load plate will lift from the socket. Open the load plate and make sure not to damage any of the pins inside of the socket. Note: After removing the CPU socket cover, it is recommended to store it in case you ever need to transport your motherboard. If you ever remove the CPU, it is highly recommended to reinstall the socket cover. 11
-
 1
1 -
2
-
3
-
4
-
5
-
 6
6 -
 7
7 -
 8
8 -
 9
9 -
 10
10 -
 11
11 -
 12
12 -
 13
13 -
 14
14 -
 15
15 -
 16
16 -
17
-
18
-
19
-
20
-
21
-
22
-
23
-
24
-
25
-
26
-
27
-
28
-
29
-
30
-
31
-
32
-
33
-
34
-
35
-
36
-
37
 |
 |
