Edimax AR-7211A V2 Quick Install Guide - Page 6
Step 4, Check the ADSL LED status, Step 5, Firewall settings, Step 6, PC LAN IP configuration
 |
View all Edimax AR-7211A V2 manuals
Add to My Manuals
Save this manual to your list of manuals |
Page 6 highlights
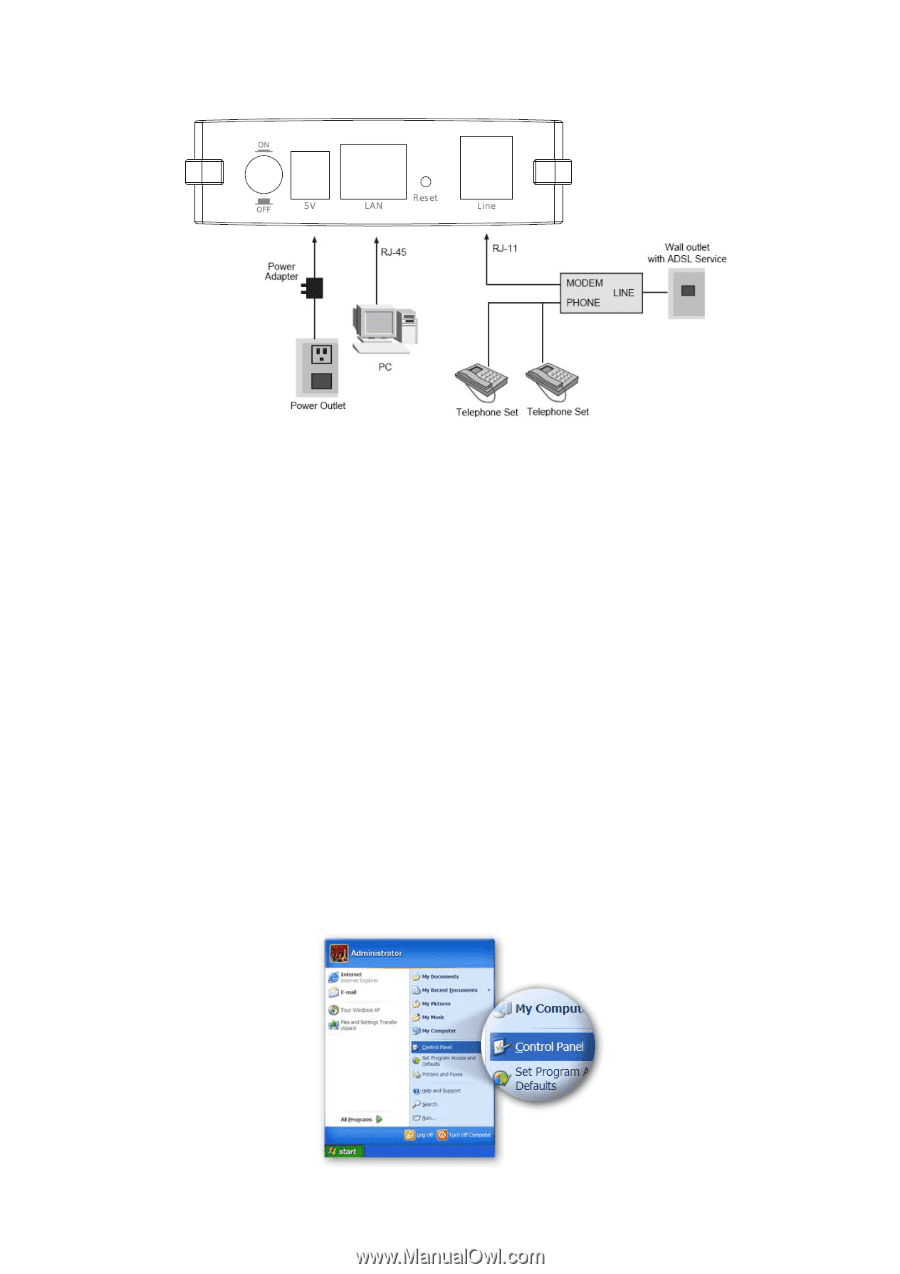
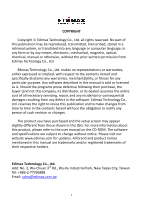
Step 4: Check the ADSL LED status Please check the ADSL LED on the front panel. This light indicates the status of your ADSL broadband through your telephone line. If the light is on, you can continue setup. However if the light is flashing, there is no broadband line detected. Please call your Internet Service Provider (ISP) and inform them about the flashing ADSL light to resolve the issue. Step 5: Firewall settings Please turn off all personal firewalls before you continue the setup - firewalls can block communication between your PC and router. Note: You must use the power adapter included in the package with the router, do NOT attempt to use a third-party power adapter. Step 6: PC LAN IP configuration Configure your PC's LAN settings to automatically obtain an IP address from the router by following the steps below: 1. Click "Start" and then select "Control Panel". 5
-
 1
1 -
 2
2 -
 3
3 -
 4
4 -
 5
5 -
 6
6 -
 7
7 -
 8
8 -
 9
9 -
 10
10 -
 11
11 -
 12
12
 |
 |