Edimax IR-113E Quick Install Guide - Page 5
Accessing The Network Camera's Management Interface - camera ip poe
 |
View all Edimax IR-113E manuals
Add to My Manuals
Save this manual to your list of manuals |
Page 5 highlights
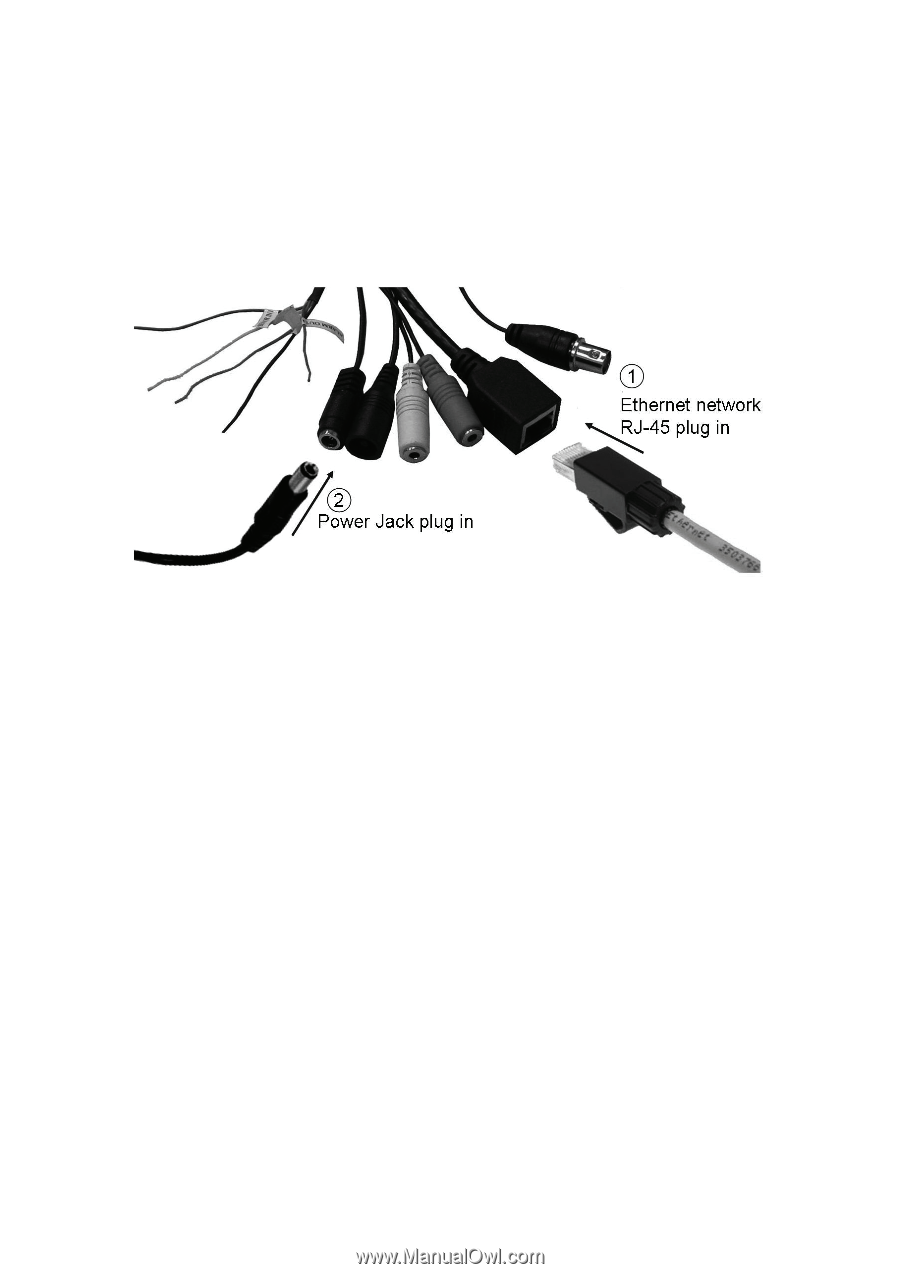
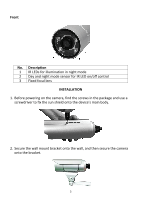
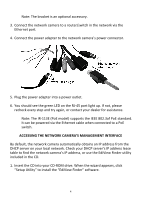
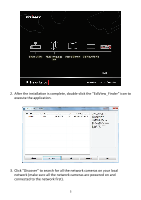
Note: The bracket is an optional accessory. 3. Connect the network camera to a router/switch in the network via the Ethernet port. 4. Connect the power adapter to the network camera's power connector. 5. Plug the power adapter into a power outlet. 6. You should see the green LED on the RJ‐45 port light up. If not, please recheck every step and try again, or contact your dealer for assistance. Note: The IR‐113E (PoE model) supports the IEEE 802.3af PoE standard. It can be powered via the Ethernet cable when connected to a PoE switch. ACCESSING THE NETWORK CAMERA'S MANAGEMENT INTERFACE By default, the network camera automatically obtains an IP address from the DHCP server on your local network. Check your DHCP server's IP address lease table to find the network camera's IP address, or use the EdiView Finder utility included in the CD. 1. Insert the CD into your CD‐ROM drive. When the wizard appears, click "Setup Utility" to install the "EdiView Finder" software. 4
-
 1
1 -
 2
2 -
 3
3 -
 4
4 -
 5
5 -
 6
6 -
 7
7 -
 8
8 -
 9
9 -
 10
10 -
 11
11 -
12
-
13
-
14
 |
 |