Electrolux E30MC75PPS Complete Owners Guide English
Electrolux E30MC75PPS Manual
 |
View all Electrolux E30MC75PPS manuals
Add to My Manuals
Save this manual to your list of manuals |
Electrolux E30MC75PPS manual content summary:
- Electrolux E30MC75PPS | Complete Owners Guide English - Page 1
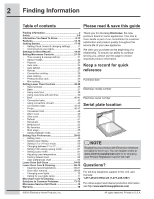
EN Wall Oven & Microwave Combination Use & Care Guide 807574610 Rev. A (June 2016) - Electrolux E30MC75PPS | Complete Owners Guide English - Page 2
Results 19-20 Setting Microwave Controls 21-35 • Time cooking & manual defrost 21 • Sensor modes 22 • Popcorn 24 • Auto cook Problems 73-75 Microwave Service Call Check 76 Warranty 79 Thank you for choosing Electrolux, the new premium brand in home appliances. This Use & Care Guide is part - Electrolux E30MC75PPS | Complete Owners Guide English - Page 3
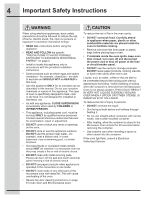
Warning and Important Instructions appearing in this guide are not meant to cover all possible conditions and situations that may occur. Common sense, caution and care must be exercised when installing, maintaining or operating a microwave. ALWAYS contact your dealer, distributor, service agent or - Electrolux E30MC75PPS | Complete Owners Guide English - Page 4
its intended use as described in this manual. Do not use corrosive chemicals or serviced ONLY by qualified service personnel. Contact nearest Electrolux Authorized Servicer part of the microwave oven with metal foil. This will cause overheating of the oven. • Review the door cleaning instructions - Electrolux E30MC75PPS | Complete Owners Guide English - Page 5
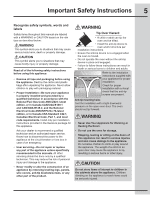
injury or property damage. Read all of the following safety instructions before using this appliance: • Remove all tape and packaging emergency. • User servicing-Do not repair or replace any part of the appliance unless specifically recommended in the manuals. All other servicing should be done - Electrolux E30MC75PPS | Complete Owners Guide English - Page 6
6 Important Safety Instructions • Protective liners-Do not use aluminum foil to line the oven bottom, except as suggested in the manual. Improper installation of in use. They should never be allowed to sit or stand on any part of the appliance. • DO NOT TOUCH HEATING ELEMENTS OR INTERIOR SURFACES OF - Electrolux E30MC75PPS | Complete Owners Guide English - Page 7
-Grease should not be allowed to accumulate on the hood or filter. Follow manufacturer's instructions for cleaning. Self cleaning ovens • Clean in the self-cleaning cycle only the parts listed in this Use & Care Manual. Before self cleaning the oven, remove the broiler pan and any utensils or foods - Electrolux E30MC75PPS | Complete Owners Guide English - Page 8
and used properly, that is in strict accordance with the manufacturer's instructions, may cause interference to radio and television reception. It has been tested and found to comply with limits for ISM Equipment pursuant to part 18 of FCC Rules, which are designed to provide reasonable protection - Electrolux E30MC75PPS | Complete Owners Guide English - Page 9
Guide is valuable: read it carefully and always save it for reference. A good microwave cookbook is a valuable asset. Check it for microwave cooking principles, techniques, hints and recipes. NEVER use the Microwave Oven without the turntable and support is a normal part of microwave cooking. - Electrolux E30MC75PPS | Complete Owners Guide English - Page 10
10 Information You Need To Know About microwave cooking • Arrange food carefully. Place thickest areas towards outside of dish. • Watch cooking time. Cook for the shortest amount of time indicated and add more as needed. Food severely overcooked can smoke or ignite. • Cover foods while cooking. - Electrolux E30MC75PPS | Complete Owners Guide English - Page 11
Information You Need To Know 11 About utensils and coverings for microwave cooking It is not necessary to buy all new cookware. Many pieces already in your kitchen can be used successfully in your Convection Microwave Oven. The chart below will help you decide what utensils and coverings should be - Electrolux E30MC75PPS | Complete Owners Guide English - Page 12
-safe thermometer will assist you in determining correct doneness and assure you that foods have been cooked to safe temperatures when using microwave-only cooking. Electrolux is not responsible for any damage to the oven when accessories are used. - Electrolux E30MC75PPS | Complete Owners Guide English - Page 13
Oven features & options Features 13 1 2 3 5 4 7 1. Oven light 2. Standard cooking • Bake • Broil • Convection bake • Convection roast • Convection broil • Warm oven 3. Control lock 4. Multi stage 5. Specialized cooking • Slow cook • Defrost • Dehydrate • Bread proof 6. Fresh cleaning 7. - Electrolux E30MC75PPS | Complete Owners Guide English - Page 14
14 Features Oven control display & keys 8 9 13 10 11 12 14 8. Perfect-Pair™ oven key pads • Microwave upper oven • Sure-2-fit™ Lower oven 9. Oven display 10.User preferences The following options are available under User Preferences: • Clock setting • Clock display setting • 12 hr/ 24 hr • - Electrolux E30MC75PPS | Complete Owners Guide English - Page 15
. Auto defrost 20. Reheat 21. Add 30 seconds 22. Convection bake 23. Convection broil 24. Auto bake 25. Auto roast 26. Auto broil 27. Help guide 29. Preheat 30. Slow cook 31. Lo mix bake 32. Hi mix bake Auto Bake 1 Bundt Cake 2 Cookies 3 Muffins 4 French Fries Auto Broil 1 Hamburgers 2 Chicken - Electrolux E30MC75PPS | Complete Owners Guide English - Page 16
Extendable telescoping offset interior oven rack. 16 12. Color coordinated or stainless steel oven exterior panels & trim. 13. L adder oven rack supports with oven rack sensors. 14. Broil element. 15. H idden bake element. 16. Automatic interior oven door light switch. 17. S elf-cleaning - Electrolux E30MC75PPS | Complete Owners Guide English - Page 17
Getting Started 17 Setting clock at power up Timers You will be prompted to enter the time of day in the event of a power failure or when you first provide electric power to your appliance. • When your appliance is first powered up, 12:00 will flash in the display. • Enter the time of day using - Electrolux E30MC75PPS | Complete Owners Guide English - Page 18
18 Getting Started Preheat Temperature Display Control lock Once a cooking feature has been started in the lower oven, the control will display the actual oven temperature while preheating. Once the oven reaches the oven set temperature only the oven set temperature will display. The preheat - Electrolux E30MC75PPS | Complete Owners Guide English - Page 19
rack into the top holes, aligning the bottom prongs with the bottom holes (Arrow 2). 3. Once the upper prongs are in place, hold the oven rack support flush with the oven side and insert the bottom prongs into the bottom holes (Arrow 3). 4. Slide the bottom prongs down into the lower holes. Some - Electrolux E30MC75PPS | Complete Owners Guide English - Page 20
and slide out. • To replace - place the oven rack on the rack guides on the oven walls. Tilt the front of the rack upward slightly and slide rack can be easily moved while the rack frame remains locked into the ladder supports. This allows bakeware to remain in place on the Luxury Glide™ rack and - Electrolux E30MC75PPS | Complete Owners Guide English - Page 21
Setting Microwave Controls 21 Time cooking Manual defrost Your Microwave Oven can be programmed for above or below the limits in the "Amount" column on the Defrost chart, you need to defrost manually. You can defrost any frozen food, either raw or previously cooked, by using Power level 30. - Electrolux E30MC75PPS | Complete Owners Guide English - Page 22
on the display. Do not open the oven door during this part of the cycle. The measurement of vapor will be interrupted. If this occurs, an error message will appear. To continue cooking, press the CANCEL/off pad and cook manually. When the sensor detects the vapor emitted from the food, remainder - Electrolux E30MC75PPS | Complete Owners Guide English - Page 23
Setting Microwave Controls 23 Sensor Cook chart Food 1. Ground Meat Amount 0.25 - 2.00 lb 2. Baked Potato 1 - 8 med. 3. Frozen Veggies 0.25 - 1.25 lb 4. Fresh Veggies, Soft Broccoli Brussels sprouts Cabbage Cauliflower (flowerets) Cauliflower (whole) Spinach Zucchini Baked apples 5. Fresh - Electrolux E30MC75PPS | Complete Owners Guide English - Page 24
the food condition (e.g. initial temperature, shape, quality). Check food for temperature after heating. If additional time is needed, continue to heat manually. 2. Popcorn can be programmed with More or less time adjustment. 7. Press 2 for 1/2 cup. 8. Press START. NOTES 1. All Auto Cook settings - Electrolux E30MC75PPS | Complete Owners Guide English - Page 25
Setting Microwave Controls 25 Auto Cook chart Food 1. Pizza Amount 1 - 6 slices (6 - 8 oz) Default 1 slice Procedure Use this setting to reheat refrigerated leftover pizza, 1 slice is approximately 1/8th of a 12-inch pizza or 1/12th of a 16-inch pizza. If possible, place on paper towel on a - Electrolux E30MC75PPS | Complete Owners Guide English - Page 26
, covered. NOTES 1. To defrost other food or foods above or below the weights allowed on the Defrost chart, use time and 30% power. See Manual defrost. 2. Auto Defrost can be programmed with More or less time adjustment. Touch the power level pad once or twice before touching START pad. 3. Touch - Electrolux E30MC75PPS | Complete Owners Guide English - Page 27
OVEN 2. Press REHEAT. 3. Press number 2 for auto reheat. NOTES 1. To reheat different foods or foods above or below the quantity allowed, use manual operation. 2. Reheat settings can be programmed with More or less time adjustment. 4. Press START to confirm. 5. Press number 1 for fresh rolls or - Electrolux E30MC75PPS | Complete Owners Guide English - Page 28
Microwave Controls This section gives you specific convection cooking instructions and procedures. The oven should not be used a higher or lower temperature. The oven cabinet, cavity, door, turntable, turntable support, racks and dishes will become hot. To PREVENT BURNS, use thick oven gloves when - Electrolux E30MC75PPS | Complete Owners Guide English - Page 29
the oven if additional cooking time is needed. Simply close the oven door and touch START to continue. The oven cabinet, cavity, door, turntable, turntable support, racks and dishes will become hot. To PREVENT BURNS, use thick oven gloves when removing the food or turntable from the oven. - Electrolux E30MC75PPS | Complete Owners Guide English - Page 30
Press MICRO OVEN. 2. Press AUTO BAKE. 3. Select desired setting. Ex: for bundt cake, press number 1. The oven cabinet, cavity, door, turntable, turntable support, racks and dishes will become hot. To PREVENT BURNS, use thick oven gloves when removing the food or turntable from the oven. 4. Press - Electrolux E30MC75PPS | Complete Owners Guide English - Page 31
will sound. 2. Press AUTO ROAST. 3. Select desired setting. Ex: for chicken, touch number 1. 4. Press START. The oven cabinet, cavity, door, turntable, turntable support, racks and dishes will become hot. To PREVENT BURNS, use thick oven gloves when removing the food or turntable from the oven - Electrolux E30MC75PPS | Complete Owners Guide English - Page 32
2. Should you attempt to enter more or less than the allowed amount, an error beep will sound. The oven cabinet, cavity, door, turntable, turntable support, racks and dishes will become hot. To PREVENT BURNS, use thick oven gloves when removing the food or turntable from the oven. Auto Broil Chart - Electrolux E30MC75PPS | Complete Owners Guide English - Page 33
Setting Microwave Controls 33 Preheat Slow Cook Your oven can be programmed to preheat. This feature is preset at 350˚F. The temperature can be changed to from 100˚F to 450˚F. • Suppose you want to preheat to 375˚F. Step Example Press 1. Press MICRO OVEN. 2. Press PREHEAT. 3. Select - Electrolux E30MC75PPS | Complete Owners Guide English - Page 34
34 Setting Microwave Controls Mix Cooking To Cook with Mix Cooking This oven has two pre-programmed settings that make it easy to cook with both convection heat and microwave automatically. Hi Mix Roast Lo Mix Bake Oven temperature 300˚F 325˚F Microwave power 30% 10% • Suppose you want to - Electrolux E30MC75PPS | Complete Owners Guide English - Page 35
Most setting has a cooking hint. If you wish to check, touch help whenever the pad is lighted in the Interactive Display for these and other manual operation hints. Step Example Press 1. Press MICRO OVEN. 2. Press number 2 pad. The oven will start after 5 seconds and will signal then turn off - Electrolux E30MC75PPS | Complete Owners Guide English - Page 36
36 Setting Lower Oven Controls About rapid preheat Use the rapid preheat option on single rack baking to quickly bring the lower oven to baking temperature. The rapid preheat option may be set with the following cooking features: • Bake • Conv bake The following temperature settings apply to the - Electrolux E30MC75PPS | Complete Owners Guide English - Page 37
Setting Oven Lower Controls 37 About baking in lower oven Use the bake feature to cook most food items that require normal cooking temperatures. Bake may be set with the following options: • Rapid preheat • Cook duration • Cook duration with end time • Probe If your recipe requires a different - Electrolux E30MC75PPS | Complete Owners Guide English - Page 38
38 Setting Lower Oven Controls Using cook duration in lower oven Adding a cook time when baking is beneficial when a recipe requires a specific temperature and period of time to cook. Following the recipe cook time helps insure the best possible results. Cook time may be set with the following - Electrolux E30MC75PPS | Complete Owners Guide English - Page 39
Setting Lower Oven Controls 39 Using cook duration with end time in lower oven Adding a cook duration along with a specific end time gives the same benefits as the cook duration option in addition to controlling exactly when the cooking process will begin and end. Cook duration and end time may be - Electrolux E30MC75PPS | Complete Owners Guide English - Page 40
40 Setting Lower Oven Controls Broiling in lower oven Setting broil Use the broil feature to cook meats that require direct exposure to radiant heat for optimum browning results. Use the conv broil feature to cook thicker cuts of meats that require direct exposure to radiant heat and the - Electrolux E30MC75PPS | Complete Owners Guide English - Page 41
pan to a different rack position to suit for doneness. If the food you are broiling is not listed in the table, follow the instructions provided in your recipe and watch the item closely. Insert 8 7 6 5 4 3 2 1 Fig. 2 Broil pan Fig. 1 Food Rack position Steak 1" thick 7th 7th 7th Pork - Electrolux E30MC75PPS | Complete Owners Guide English - Page 42
About convection bake Setting convection bake Convection bake is part of the Perfect-Convect³™ system. Convection bake uses feature should ONLY be used when your recipe instructions have been written for use with convection baking. If your recipe instructions are for normal baking and you wish to - Electrolux E30MC75PPS | Complete Owners Guide English - Page 43
Setting Lower Oven Controls 43 Using convection convert Setting convection convert The conv convert option allows you to convert any normal baking recipe using the convection bake feature. The control uses the normal recipe settings and adjusts to a lower temperature for convection baking. Conv - Electrolux E30MC75PPS | Complete Owners Guide English - Page 44
44 Setting Lower Oven Controls About convection roast Setting convection roast How convection roast works Convection roast is part of the Perfect-Convect³™ system. Convection roast combines a cook cycle with the convection fan and element to rapidly roast meats and poultry. Heated air circulates - Electrolux E30MC75PPS | Complete Owners Guide English - Page 45
Setting Lower Oven Controls 45 Roasting recommendations Roasting rack instructions When preparing meats for convection roasting, you may use the broiler pan, insert and the roasting rack supplied with your appliance. The broiler pan will - Electrolux E30MC75PPS | Complete Owners Guide English - Page 46
°F/54°C • Maximum: 210°F/98°C Setting the probe Proper probe placement • Always insert the probe so that the tip rests in the center of the thickest part of the meat. Do not allow the probe to touch bone, fat, gristle or the pan. -Fig. 1-. • For bone-in ham or lamb, insert the - Electrolux E30MC75PPS | Complete Owners Guide English - Page 47
Setting Lower Oven Controls 47 Setting the probe See the example below to set the probe target temperature to180°F/82°C when using the convection roast feature with oven set temperature for 325°F/162°C. Example Step Press 1. Insert the probe into the food and place the food into the oven -Fig. - Electrolux E30MC75PPS | Complete Owners Guide English - Page 48
48 Setting Lower Oven Controls About convection broiling Setting convection broil Convection broiling is part of the PerfectConvect³™ system. Use the conv broil feature to cook thicker cuts of meats that require direct exposure to radiant heat and the convection - Electrolux E30MC75PPS | Complete Owners Guide English - Page 49
Setting Lower Oven Controls 49 About warm oven Setting warm oven Use the warm oven feature to keep hot foods warm. Warm oven may be set with the following options: • Cook duration • Cook duration with end time The following temperature settings apply to the warm oven feature: • Auto-suggest ( - Electrolux E30MC75PPS | Complete Owners Guide English - Page 50
50 Setting Lower Oven Controls About slow cook Setting slow cook The slow cook feature may be used to cook foods more slowly at lower oven temperatures. The cooking results will be like that of a Slow Cooker or Crock-Pot. This feature is ideal for roasting beef, pork & poultry. Slow cooking meats - Electrolux E30MC75PPS | Complete Owners Guide English - Page 51
Setting Lower Oven Controls 51 About defrost Use the defrost feature to thaw small portions of delicate items such as cream cakes, frozen cream pies and cheesecake at room temperature. While in the defrost mode, the convection fan will operate to circulate room temperature air around the food - Electrolux E30MC75PPS | Complete Owners Guide English - Page 52
52 Setting Lower Oven Controls About dehydrate The dehydrate feature dries with heat from the elements. The heat is circulated throughout the oven by the convection fan. Use dehydrate to dry and/or preserve foods such as fruits, vegetables, herbs and very thin slices of meat. The Convection fan - Electrolux E30MC75PPS | Complete Owners Guide English - Page 53
Setting Lower Oven Controls 53 About bread proof The bread proof feature maintains a warm environment useful for rising yeast-leavened products. The following temperature settings apply to the bread proof feature: • Auto-suggest (default) setting: 100°F/38°C • Min. bread proof setting: 85°F/30°C • - Electrolux E30MC75PPS | Complete Owners Guide English - Page 54
a red light will display above the selected favorite to indicate that your favorite recipe has been stored. *If you wish to store the cooking instructions but not start the oven. 1. Press LOWER OVEN 2. Press and hold the available MY FAVORITE for 3 seconds. The favorite key will disappear from the - Electrolux E30MC75PPS | Complete Owners Guide English - Page 55
Setting Lower Oven Controls 55 Perfect Program™ multi stage Multi stage will allow you to program up to 3 stages of cooking. Each stage may be programmed with a cooking feature, set temperature and a cook time. Multi stage is ideal when you want to add a keep warm after a cooking function. - Electrolux E30MC75PPS | Complete Owners Guide English - Page 56
56 Setting Lower Oven Controls Setting multi stage See the example to program a multi stage feature for a casserole. For stage 1, bake at 350°F for 1 hr. For stage 2, to brown, broil for at 500°F for 4 minutes. For stage 3, warm oven for 15 minutes. Step Example for 3 stages 1. Press LOWER OVEN - Electrolux E30MC75PPS | Complete Owners Guide English - Page 57
Setting Lower Oven Controls 57 Sabbath mode This appliance provides special settings for use when observing the Jewish Sabbath/Holidays. This mode will turn off all audible tones or visual display changes normally provided by the oven control. BAKE is the only cooking features available while in - Electrolux E30MC75PPS | Complete Owners Guide English - Page 58
58 Setting Lower Oven Controls Setting Sabbath mode The example below shows setting the oven to observe the Sabbath (and Jewish holidays). Example Step 1. Press LOWER OVEN Press 2. Press BAKE. Be sure to make any additional oven setting changes before going to step 3 3. Press START 4. To - Electrolux E30MC75PPS | Complete Owners Guide English - Page 59
you to turn the clock display on or off. See the example below to change the clock display to OFF. Please read the following instructions before changing the user preferences functions: • Press and continue to press USER PREF to navigate through the preferences. • Press or to toggle between - Electrolux E30MC75PPS | Complete Owners Guide English - Page 60
60 Setting Your Preferences Setting 12 or 24 hour mode Changing between F° or C° The clock display mode allows you to choose between 12 and 24 hour mode. The factory preset clock display mode is 12 hour. See the example below to change the default mode to 24 hour. Your control has the ability to - Electrolux E30MC75PPS | Complete Owners Guide English - Page 61
Setting Your Preferences 61 Setting 12hr energy saving mode The oven control has a factory preset built-in 12 hour energy saving feature that will shut off the appliance if the oven has been heating for more than 11 hours and 59 minutes. The oven can be programmed to override this feature for - Electrolux E30MC75PPS | Complete Owners Guide English - Page 62
62 Setting Your Preferences Adjusting oven temperature User preference offset Your appliance has been factory calibrated and tested to ensure an accurate baking temperature. For the first few uses, follow your recipe times and temperature recommendations carefully. If you feel your oven is too hot - Electrolux E30MC75PPS | Complete Owners Guide English - Page 63
Setting Your Preferences 63 User preferences chart The following chart will help you navigate through the user preferences. Preference User Preferences Options 1st option Setting clock 2nd option Clock display 12 or 24 hour mode F° or C° 12hr energy save mode Audio mode User Programmable - Electrolux E30MC75PPS | Complete Owners Guide English - Page 64
hot to the touch. DO NOT leave small children unattended near the appliance. • DO NOT line the oven walls, oven racks, bottom or any other part of the appliance with aluminum foil. Doing so will stop heat distribution, produce poor baking results and cause permanent damage to the oven interior - Electrolux E30MC75PPS | Complete Owners Guide English - Page 65
medium (3 hour) setting: Example Step Press 1. Remove racks and supports and press LOWER OVEN 2. Press FRESH CLEAN 3. Select MED or message (Fig. 2) will display during this period. After cooling the DOOR lock icon will flash and disappear indicating that the door has unlocked. You may wish to - Electrolux E30MC75PPS | Complete Owners Guide English - Page 66
Recommendation • Aluminum (trim pieces) & vinyl Use hot, soapy water and a cloth. Dry with a clean cloth. • Painted and plastic control knobs • Body parts, • Painted decorative trim For general cleaning, use hot, soapy water and a cloth. For more difficult soils and built-up grease, apply - Electrolux E30MC75PPS | Complete Owners Guide English - Page 67
broiler pan and insert (if equipped) • Door liner & body parts Gentle scouring with a soapy scouring pad will remove most spots. Clean by using a mild, abrasive cleaner following manufacturer's instructions. Rinse with clean water and dry. For instructions on how to care for your glide racks, see " - Electrolux E30MC75PPS | Complete Owners Guide English - Page 68
remove the oven door until the oven has completely cooled. • To avoid possible injury to hands when removing or replacing the oven door, follow the instructions below carefully and always hold the oven door with hands positioned away from the door hinge area (See Fig. 3). IMPORTANT The oven door is - Electrolux E30MC75PPS | Complete Owners Guide English - Page 69
arms fully and evenly into the door hinge slots. Carefully let the weight of the door transfer from your hands so that the oven now supports the oven door. 3. Open the oven door down to the fully open position -Fig. 2-. 4. With the door in the fully open position, push both oven - Electrolux E30MC75PPS | Complete Owners Guide English - Page 70
Lower Oven Care and Cleaning Special door care instructions Changing lower oven lights IMPORTANT Most oven doors clean during the Self-clean cycle. • Be sure the appliance is unplugged and all parts are COOL before replacing oven light. Wear a leather-faced glove for protection against possible - Electrolux E30MC75PPS | Complete Owners Guide English - Page 71
on the glide rack extension tracks. Use only the graphite lubrication in this area. To order graphite lubrication, contact your installer, servicer or dealer. • It is important that the parts of the rack that contact the oven sides always have a light coating of vegetable oil. Apply a thin layer of - Electrolux E30MC75PPS | Complete Owners Guide English - Page 72
sides with a damp cloth to remove any spills or spatters. Metal parts will be easier to maintain if wiped frequently with a damp cloth. cool. Wipe interior with a soft cloth. Turntable/Turntable Support/Racks The turntable, turntable support and racks can be removed for easy cleaning. Wash them - Electrolux E30MC75PPS | Complete Owners Guide English - Page 73
See "Changing lower oven lights" sections in this Use & Care Guide. • Make sure the oven door is closed. • Make sure you have removed the oven racks and the oven rack supports from the oven. • Controls not set properly. Follow instructions under "Using the Self-Clean Feature". Flames inside oven or - Electrolux E30MC75PPS | Complete Owners Guide English - Page 74
Problems Problem not set properly. Follow broiling instructions under Setting Oven Controls. • Meat the fault recurs, record fault and call for service. • Many factors affect baking results. Make Setting Your Preferences section of this Use & Care Guide. • Oven racks left in oven cavity during clean - Electrolux E30MC75PPS | Complete Owners Guide English - Page 75
from your previous appliance. BAKING PROBLEMS Baking Problems and Solutions Chart CAUSES CORRECTIONS the oven rack. If the water level is uneven, refer to the installation instructions for leveling the range. • Be sure to allow 5.1 cm to 10.2 service call: 1-877-4ELECTROLUX (1-877-435-3287) - Electrolux E30MC75PPS | Complete Owners Guide English - Page 76
questions, please check electrical outlet, fuse and/ or circuit breaker. If they are functioning properly, CONTACT YOUR NEAREST ELECTROLUX AUTHORIZED SERVICER. A microwave oven should never be serviced by a "do-it-yourself" repair person. NOTE If time appearing in the display is counting down very - Electrolux E30MC75PPS | Complete Owners Guide English - Page 77
Notes 77 - Electrolux E30MC75PPS | Complete Owners Guide English - Page 78
78 Notes - Electrolux E30MC75PPS | Complete Owners Guide English - Page 79
in accordance with the provided instructions. Service calls to correct the installation of your appliance or to instruct you how to use services performed by unauthorized service companies; use of parts other than genuine Electrolux parts or parts obtained from persons other than authorized service - Electrolux E30MC75PPS | Complete Owners Guide English - Page 80
electrolux.com/shop
-
 1
1 -
 2
2 -
 3
3 -
 4
4 -
 5
5 -
 6
6 -
 7
7 -
8
-
9
-
10
-
11
-
12
-
13
-
14
-
15
-
16
-
17
-
18
-
19
-
20
-
21
-
22
-
23
-
24
-
25
-
26
-
27
-
28
-
29
-
30
-
31
-
32
-
33
-
34
-
35
-
36
-
37
-
38
-
39
-
40
-
41
-
42
-
43
-
44
-
45
-
46
-
47
-
48
-
49
-
50
-
51
-
52
-
53
-
54
-
55
-
56
-
57
-
58
-
59
-
60
-
61
-
62
-
63
-
64
-
65
-
66
-
67
-
68
-
69
-
70
-
71
-
72
-
73
-
74
-
75
-
76
-
77
-
78
-
79
-
80
 |
 |

807574610 Rev. A (June 2016)
EN
Wall Oven & Microwave Combination
Use & Care Guide