Epson 1640XL User Manual - Page 42
directly towards the center, adjust pin's arrow faces
 |
UPC - 010343833548
View all Epson 1640XL manuals
Add to My Manuals
Save this manual to your list of manuals |
Page 42 highlights
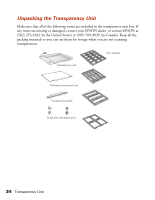
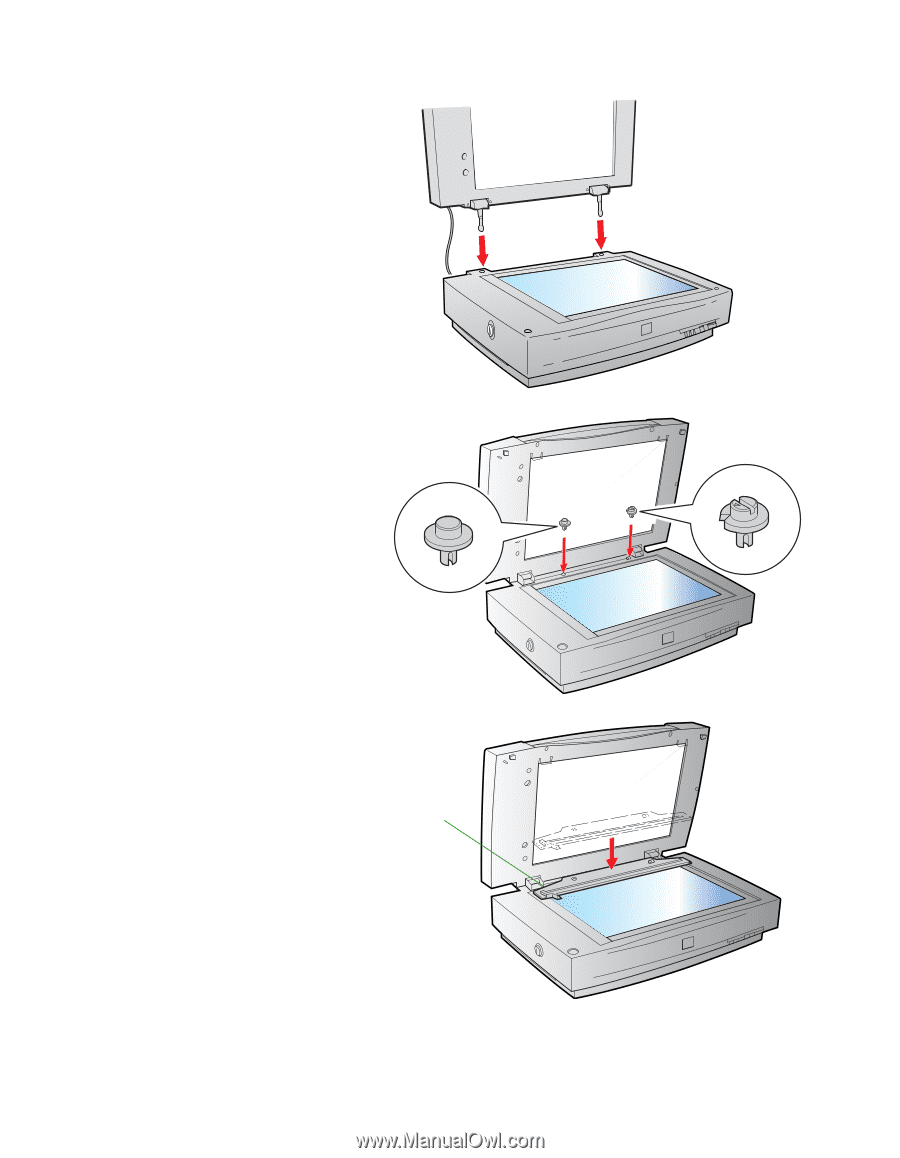
4. Align the transparency unit's pins with the holes in the scanner and lower the unit until it rests securely. 5. Insert the guide pin and adjust pin that came with the transparency unit into the screw holes. Make sure the adjust pin's arrow faces directly towards the center of the guide pin. Guide pin 6. Place the transparency guide on the scanner's document table. 7. Gently close the transparency Transparency guide unit. Adjust pin 36 Transparency Unit
-
 1
1 -
2
-
3
-
4
-
5
-
6
-
7
-
8
-
9
-
10
-
11
-
12
-
13
-
14
-
15
-
16
-
17
-
18
-
19
-
20
-
21
-
22
-
23
-
24
-
25
-
26
-
27
-
28
-
29
-
30
-
31
-
32
-
33
-
34
-
35
-
36
-
 37
37 -
 38
38 -
 39
39 -
 40
40 -
 41
41 -
 42
42 -
 43
43 -
 44
44 -
 45
45 -
 46
46 -
 47
47 -
48
-
49
-
50
-
51
-
52
-
53
-
54
-
55
-
56
-
57
-
58
-
59
-
60
-
61
-
62
-
63
-
64
-
65
-
66
-
67
-
68
-
69
-
70
-
71
-
72
-
73
-
74
-
75
-
76
-
77
-
78
-
79
-
80
-
81
-
82
-
83
-
84
-
85
-
86
-
87
-
88
-
89
-
90
-
91
-
92
-
93
-
94
-
95
-
96
 |
 |
36
Transparency Unit
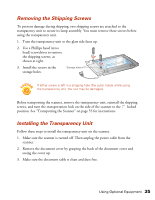
4.
Align the transparency unit’s
pins with the holes in the
scanner and lower the unit
until it rests securely.
5.
Insert the guide pin and
adjust pin that came with the
transparency unit into the
screw holes. Make sure the
adjust pin’s arrow faces
directly towards the center
of the guide pin.
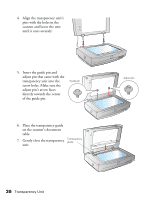
6.
Place the transparency guide
on the scanner’s document
table.
7.
Gently close the transparency
unit.
Guide pin
Adjust pin
Transparency
guide