Epson ActionScanner II PC User Setup Information - PC
Epson ActionScanner II PC - ActionScanning System II Manual
 |
View all Epson ActionScanner II PC manuals
Add to My Manuals
Save this manual to your list of manuals |
Epson ActionScanner II PC manual content summary:
- Epson ActionScanner II PC | User Setup Information - PC - Page 1
EPSON ® ACTION SCANNER™ II Color Scanner Getting Started for Windows @ Printed on recycled paper with at least 20% post-Consumer content - Epson ActionScanner II PC | User Setup Information - PC - Page 2
damages or problems arising from the use of any options or any consumable products other than those designated as Original EPSON Products or EPSON Approved Products by Seiko Epson Corporation. EPSON and EPSON Stylus are registered trademarks of Seiko Epson Corporation. ActionScanner is a trademark - Epson ActionScanner II PC | User Setup Information - PC - Page 3
the Card 6 Setting Up the Scanner 7 Connecting the Scanner to the Computer 9 Configuring Parallel Port LPT2 for Windows 95 . . . . 10 Installing the EPSON Scanning Utilities 11 Installing Image-In 13 Scanning Images 15 Putting It Together 17 Calibrating Your System 18 Selecting the Correct - Epson ActionScanner II PC | User Setup Information - PC - Page 4
EPSON Scan! II and EPSON TWAIN), which let you capture scanned images, export the images in a variety of formats, calibrate your scanner, and use the scanner's advanced features with software programs that support individual manuals for the ActionScanner II, EPSON Scanning Utilities, and Image-In. - Epson ActionScanner II PC | User Setup Information - PC - Page 5
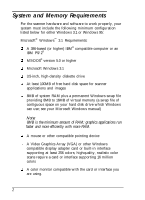
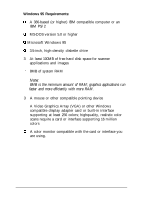
your hard disk drive which Windows can use; see your Microsoft Windows manual) Note: 8MB is the minimum amount of RAM; graphics applications run or built-in interface supporting at least 256 colors; highquality, realistic color scans require a card or interface supporting 16 million colors cl - Epson ActionScanner II PC | User Setup Information - PC - Page 6
J A Video Graphics Array (VGA) or other Windows compatible display adapter card or built-in interface supporting at least 256 colors; highquality, realistic color scans require a card or interface supporting 16 million colors Ll A color monitor compatible with the card or interface you are using. - Epson ActionScanner II PC | User Setup Information - PC - Page 7
) it uses. You may need to change the jumper settings if there is a conflict with your computer's parallel port settings. See your computer manual for information about the port address and interrupt used by its parallel port. The bidirectional parallel interface card default settings are: Cl Port - Epson ActionScanner II PC | User Setup Information - PC - Page 8
1. Carefully remove the interface card from its packaging, holding it only by its top edges. Then place it on a flat, clean surface. m Caution: Avoid touching the components or the gold contacts on the interface card; they can be damaged by static electricity. 2. Locate jumpers Jl and J2 on the - Epson ActionScanner II PC | User Setup Information - PC - Page 9
the cover from your computer. If you need detailed instructions, see your computer manual. 4. Before you touch any of the computer's you remove the interface card later. 7. Insert the interface card into the slot, guiding it straight down. Push the card down firmly (but carefully); you should feel it - Epson ActionScanner II PC | User Setup Information - PC - Page 10
Setting Up the Scanner Follow these steps to set up the scanner: 1. Take the scanner out of its box and place it on a flat, stable surface with the rear panel facing you. 2. Remove the tape securing the scanner cover and pull out the paper underneath the cover. 3. Locate the round screw in the - Epson ActionScanner II PC | User Setup Information - PC - Page 11
5. Connect one end of the power cable to the power inlet on the rear of the scanner and plug the other end into an appropriately grounded electrical outlet as shown below. If the scanner comes on when you plug it in, turn it off by pressing the OPERATE button. Warning: Whenever you turn off the - Epson ActionScanner II PC | User Setup Information - PC - Page 12
Connecting the Scanner to the Computer Follow these steps to connect the scanner to your computer and, for Windows 95, to configure the scanner port: 1. Turn off your computer, scanner, and any other peripheral devices. e Caution: Be sure that your computer, scanner, and other peripheral devices are - Epson ActionScanner II PC | User Setup Information - PC - Page 13
icon. 3. Double-click the Control Panel icon. 4. Double-click the Add New Hardware icon. Follow the instructions on the screen to detect new hardware on your system and add port LPT2 as a printer port. 5. When . Now follow the steps in the next section to install the EPSON Scanning Utilities. - Epson ActionScanner II PC | User Setup Information - PC - Page 14
Installing the EPSON Scanning Utilities The EPSON Scanning Utilities include EPSON Scan! II and EPSON TWAIN. Scan! uses TWAIN to identical to the originals. EPSON TWAIN is a set of drivers designed to access your scanner's advanced features for any software that supports TWAIN. TWAIN drivers are - Epson ActionScanner II PC | User Setup Information - PC - Page 15
is correct, choose OK. (Otherwise enter the correct drive and directory.) The installation program copies the files to your hard disk drive. 7. When the EPSON Scanner Setup dialog box opens, click on the arrow in the Interface box. Select BiD Parallel as the interface type. The program supplies the - Epson ActionScanner II PC | User Setup Information - PC - Page 16
does not appear, choose Cancel and repeat all the scanner setup steps, beginning on page 9. 10. Choose OK to close the EPSON Scanner Setup dialog box. 11. Remove the EPSON scanning Utilities diskette. 12. Exit and then restart Windows. Installing Image-In Follow these steps to install the Image-In - Epson ActionScanner II PC | User Setup Information - PC - Page 17
diskettes. Follow these instructions later to install FotoTune. For now, choose OK. 10. At the next screen, choose OK again and remove the last diskette from the drive (or the CD from the CD-ROM drive). 11. If you are running Windows 3.1, double-click the Image-h for Epson icon in the Image - Epson ActionScanner II PC | User Setup Information - PC - Page 18
. Click the Image-h Easy Pack folder and then select Image-h for Epson. 12. From the File menu, choose Setup Scanner. 13. On the Scanner Setup screen, Epson Twain is selected. Choose Setup. 14. On the Select Source screen, choose EPSON Scanners and click Select. 15. Choose OK to close the Scanner - Epson ActionScanner II PC | User Setup Information - PC - Page 19
glass surface. 2. Carefully close the document cover so that you do not disturb the position of the photograph on the glass. 3. Select Image-In for Epson in the Image-In Easy Pack program group or folder. 4. Choose Scan in the File menu. You see the - Epson ActionScanner II PC | User Setup Information - PC - Page 20
the images on paper. The next sections discuss basic calibration techniques and resolution settings you can use in EPSON Scan! II to help you achieve the results you want. See your EPSON Scanning Utilities User's Guide for information on other, more sophisticated methods of modifying your scan. 17 - Epson ActionScanner II PC | User Setup Information - PC - Page 21
printed results. For example, an image printed on an electronic color printer looks dramatically different when printed on a printing press. EPSON Scan! II calibrates your scanner with your monitor, application, and printer by analyzing the results of a calibration sample at each stage of the - Epson ActionScanner II PC | User Setup Information - PC - Page 22
. 4. Choose OK. Enabling screen calibration Now follow these steps to enable screen calibration so EPSON TWAIN can use it when you scan images: 1. From the File menu, choose Acquire to start EPSON TWAIN. 2. Choose Advanced. You see the advanced TWAIN screen. 3. Select Configuration; you see the - Epson ActionScanner II PC | User Setup Information - PC - Page 23
printer calibration profiles for you so you do not have to create them: EPSON Stylus COLOR EPSON Stylus COLOR IIs EPSON Stylus Pro XL EPSON Stylus COLOR II EPSON Stylus Pro See page 22 now for steps on scanning using these profiles. Follow these steps to export a calibration chart: 1. Select - Epson ActionScanner II PC | User Setup Information - PC - Page 24
you want to use for the calibration chart file, such as COLORl.BMP. 4. Choose OK to export the calibration chart. 5. Exit EPSON Scan! II. 6. Select the Image-In for Epson icon from the Image-In Easy Pack program group or folder. 7. Open the calibration on chart file you exported. The chart contains - Epson ActionScanner II PC | User Setup Information - PC - Page 25
Follow these steps to use a calibration profile when you scan: 1. Choose Acquire from the File menu of EPSON Scan! II or choose Scan from the File menu of Image-In. You see the EPSON TWAIN advanced screen. (If you see the easy screen, select Advanced.) 2. Choose the Destination button; you see - Epson ActionScanner II PC | User Setup Information - PC - Page 26
6. Choose OK. You see the EPSON TWAIN advanced screen. 7. Select the Scan button. The scanner scans using the information in the calibration profile to produce the best possible image for your - Epson ActionScanner II PC | User Setup Information - PC - Page 27
150-350 Color - 150-240 150-350 You can change resolutions using EPSON TWAIN by choosing the Destination button on the advanced screen. In the For more information on resolution, see your scanner User's Guide and the EPSON Scanning Utilities User's Guide. Now that you know the basics, you're
-
 1
1 -
 2
2 -
 3
3 -
 4
4 -
 5
5 -
 6
6 -
 7
7 -
8
-
9
-
10
-
11
-
12
-
13
-
14
-
15
-
16
-
17
-
18
-
19
-
20
-
21
-
22
-
23
-
24
-
25
-
26
-
27
 |
 |

EPSON
®
ACTION SCANNER
™
II
Color Scanner
Getting Started
for Windows
@
Printed on recycled paper
with at
least
20% post-Consumer content