Epson CX4800 Product Information Guide - Page 5
Envelopes, than the other side. - printer
 |
UPC - 010343855090
View all Epson CX4800 manuals
Add to My Manuals
Save this manual to your list of manuals |
Page 5 highlights
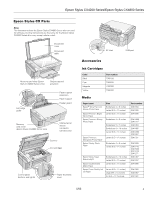
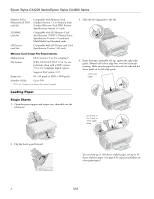
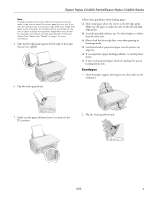
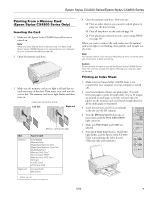
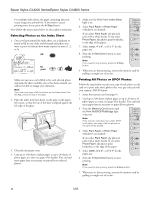
Epson Stylus CX4200 Series/Epson Stylus CX4800 Series Note: The type of paper you choose affects the way your printout looks, so be sure to select the correct paper for your job. If you are just making a copy or printing a rough draft of an image, plain paper is fine. However, for the best results, you'll want to use one of Epson's special ink jet papers designed for your printer. For example, your photos will look great printed on Premium Glossy Photo Paper. See "Media" on page 1 for more information. 5. Slide the left edge guide against the left edge of the paper (but not too tightly). Follow these guidelines when loading paper: ❏ Don't load paper above the arrow on the left edge guide. Make sure the paper is under the tabs on the left and right edge guides. ❏ Load the printable side face-up. It's often brighter or whiter than the other side. ❏ Always load the short edge first, even when printing in landscape mode. ❏ Load letterhead or preprinted paper into the printer top edge first. ❏ If you experience paper feeding problems, try loading fewer sheets. ❏ If you're using special paper, check the package for special loading instructions. Envelopes 1. Open the paper support and output tray, then slide out the extensions. 6. Flip the feeder guard back. 7. Make sure the paper thickness lever is set down to the m L position. 2. Flip the feeder guard forward. 5/05 5
-
 1
1 -
 2
2 -
 3
3 -
 4
4 -
 5
5 -
 6
6 -
 7
7 -
 8
8 -
 9
9 -
 10
10 -
 11
11 -
12
-
13
-
14
-
15
-
16
-
17
 |
 |
