Epson EX-800 User Manual - Page 19
Installing the Paper Guide, Second, install the guide itself. Hold the paper guide vertically
 |
View all Epson EX-800 manuals
Add to My Manuals
Save this manual to your list of manuals |
Page 19 highlights
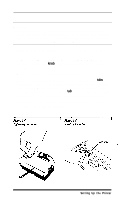
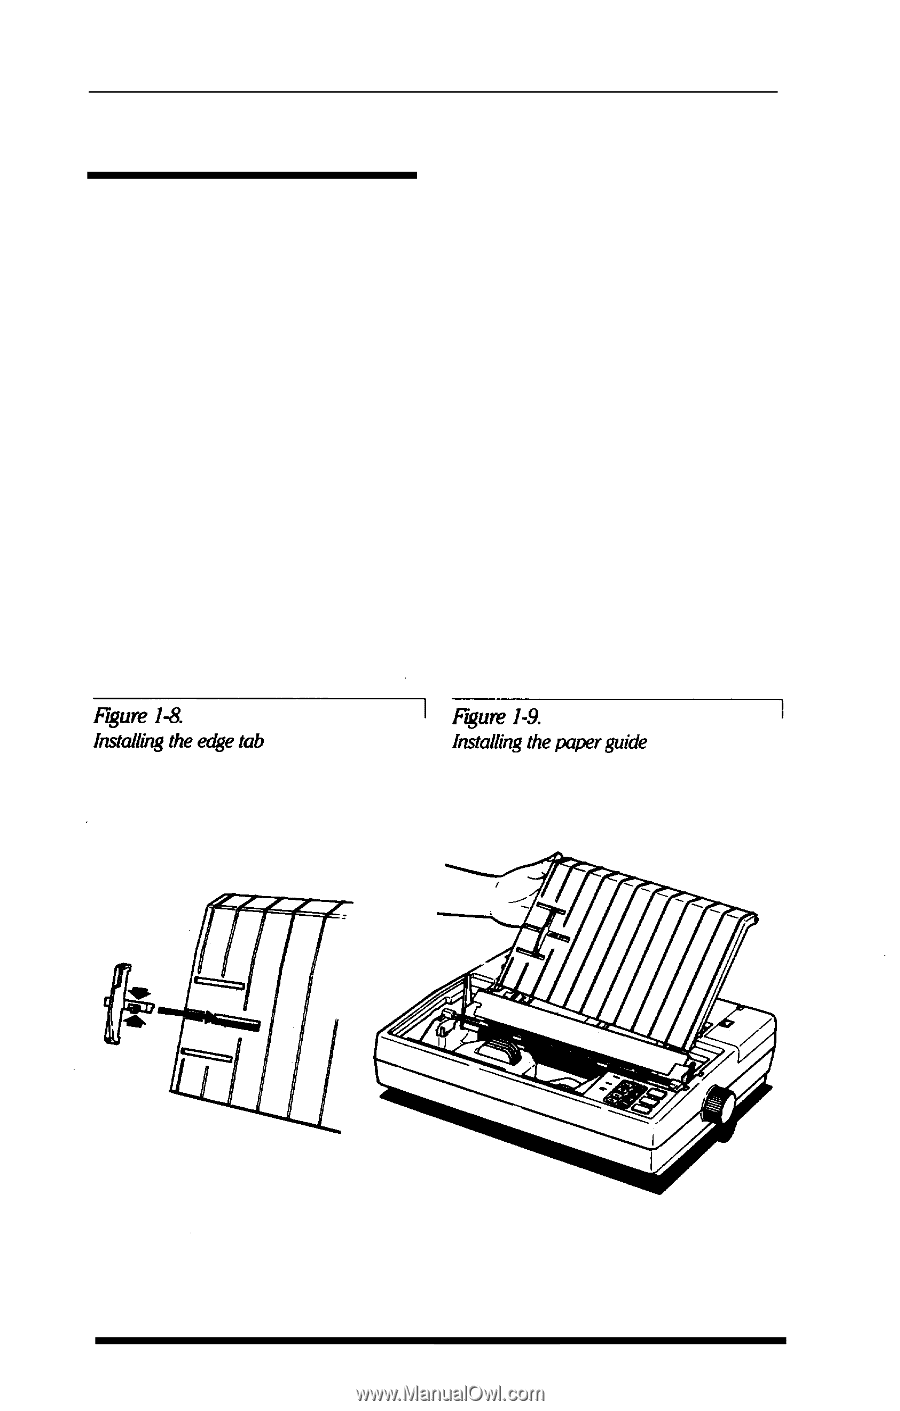
6 Installing the Paper Guide You can install the paper guide in two different positions. Right now you need to install it to support a single sheet. Before you begin, remove the dust cover so that you can see what you are doing. The edge tab First, put the edge tab into the guide. Squeeze it together as shown in Figure 1-8 and insert the tab into the groove. Then move the edge tab so that it is about 1 ¾-inch from the left edge of the paper guide. The paper guide Second, install the guide itself. Hold the paper guide vertically and lower it so that the slots on either side fit onto the two pins as shown in Figure 1-9 below. Then tilt the. paper guide back until it rests at an angle. 1-8 Setting Up the Printer
-
 1
1 -
2
-
3
-
4
-
5
-
6
-
7
-
8
-
9
-
10
-
11
-
12
-
13
-
 14
14 -
 15
15 -
 16
16 -
 17
17 -
 18
18 -
 19
19 -
 20
20 -
 21
21 -
 22
22 -
 23
23 -
 24
24 -
25
-
26
-
27
-
28
-
29
-
30
-
31
-
32
-
33
-
34
-
35
-
36
-
37
-
38
-
39
-
40
-
41
-
42
-
43
-
44
-
45
-
46
-
47
-
48
-
49
-
50
-
51
-
52
-
53
-
54
-
55
-
56
-
57
-
58
-
59
-
60
-
61
-
62
-
63
-
64
-
65
-
66
-
67
-
68
-
69
-
70
-
71
-
72
-
73
-
74
-
75
-
76
-
77
-
78
-
79
-
80
-
81
-
82
-
83
-
84
-
85
-
86
-
87
-
88
-
89
-
90
-
91
-
92
-
93
-
94
-
95
-
96
-
97
-
98
-
99
-
100
-
101
-
102
-
103
-
104
-
105
-
106
-
107
-
108
-
109
-
110
-
111
-
112
-
113
-
114
-
115
-
116
-
117
-
118
-
119
-
120
-
121
-
122
-
123
-
124
-
125
-
126
-
127
-
128
-
129
-
130
-
131
-
132
-
133
-
134
-
135
-
136
-
137
-
138
-
139
-
140
-
141
-
142
-
143
-
144
-
145
-
146
-
147
-
148
-
149
-
150
-
151
-
152
-
153
-
154
-
155
-
156
-
157
-
158
-
159
-
160
-
161
-
162
-
163
-
164
-
165
-
166
-
167
-
168
-
169
-
170
-
171
-
172
-
173
-
174
-
175
-
176
-
177
-
178
-
179
-
180
-
181
-
182
-
183
-
184
-
185
-
186
-
187
-
188
-
189
-
190
-
191
-
192
 |
 |
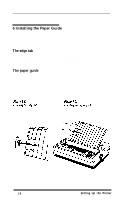
6 Installing the Paper Guide
You can install the paper guide in two different positions. Right now
you need to install it to support a single sheet. Before you begin,
remove the dust cover so that you can see what you are doing.
The edge tab
First, put the edge tab into the guide. Squeeze it together as shown in
Figure 1-8 and insert the tab into the groove. Then move the edge tab
so that it is about 1 ¾-inch from the left edge of the paper guide.
The paper guide
Second, install the guide itself. Hold the paper guide vertically and
lower it so that the slots on either side fit onto the two pins as shown in
Figure 1-9 below. Then tilt the. paper guide back until it rests at an
angle.
1-8
Setting Up the Printer