Epson PictureMate Snap - PM 240 Basics - Page 16
Do More With Your Photos, Identifying Screen Icons
 |
View all Epson PictureMate Snap - PM 240 manuals
Add to My Manuals
Save this manual to your list of manuals |
Page 16 highlights
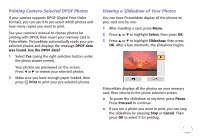
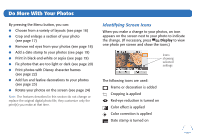
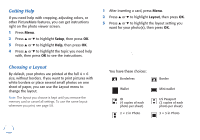
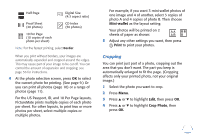
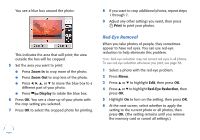
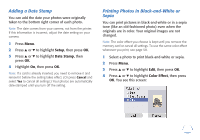
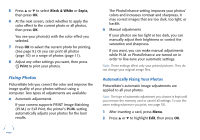
Do More With Your Photos By pressing the Menu button, you can: ● Choose from a variety of layouts (see page 16) ● Crop and enlarge a section of your photo (see page 17) ● Remove red eyes from your photos (see page 18) ● Add a date stamp to your photos (see page 19) ● Print in black-and-white or sepia (see page 19) ● Fix photos that are too light or dark (see page 20) ● Print photos with Disney character frames (see page 22) ● Add fun and festive decorations to your photos (see page 23) ● Rotate your photos on the screen (see page 24) Note: The features described in this section do not change or replace the original digital photo file; they customize only the print(s) you make at that time. Identifying Screen Icons When you make a change to your photos, an icon appears on the screen next to your photo to indicate the change. (If necessary, press Display to view one photo per screen and show the icons.) Icons showing selected settings The following icons are used: Frame or decoration is added Cropping is applied Red-eye reduction is turned on Color effect is applied Color correction is applied Date stamp is turned on 15
-
 1
1 -
2
-
3
-
4
-
5
-
6
-
7
-
8
-
9
-
10
-
 11
11 -
 12
12 -
 13
13 -
 14
14 -
 15
15 -
 16
16 -
 17
17 -
 18
18 -
 19
19 -
 20
20 -
 21
21 -
22
-
23
-
24
-
25
-
26
-
27
-
28
-
29
-
30
-
31
-
32
-
33
-
34
-
35
-
36
-
37
-
38
-
39
-
40
-
41
-
42
-
43
-
44
-
45
-
46
-
47
-
48
-
49
-
50
-
51
-
52
-
53
-
54
-
55
-
56
-
57
-
58
-
59
-
60
-
61
-
62
-
63
-
64
-
65
-
66
-
67
-
68
-
69
-
70
-
71
-
72
-
73
-
74
-
75
-
76
-
77
-
78
-
79
-
80
-
81
-
82
-
83
-
84
-
85
-
86
-
87
-
88
-
89
-
90
-
91
 |
 |
