Epson PowerLite Pro Cinema 6010 User's Guide - Page 38
Sharpness and Picture Quality Settings, for watching videos
 |
View all Epson PowerLite Pro Cinema 6010 manuals
Add to My Manuals
Save this manual to your list of manuals |
Page 38 highlights
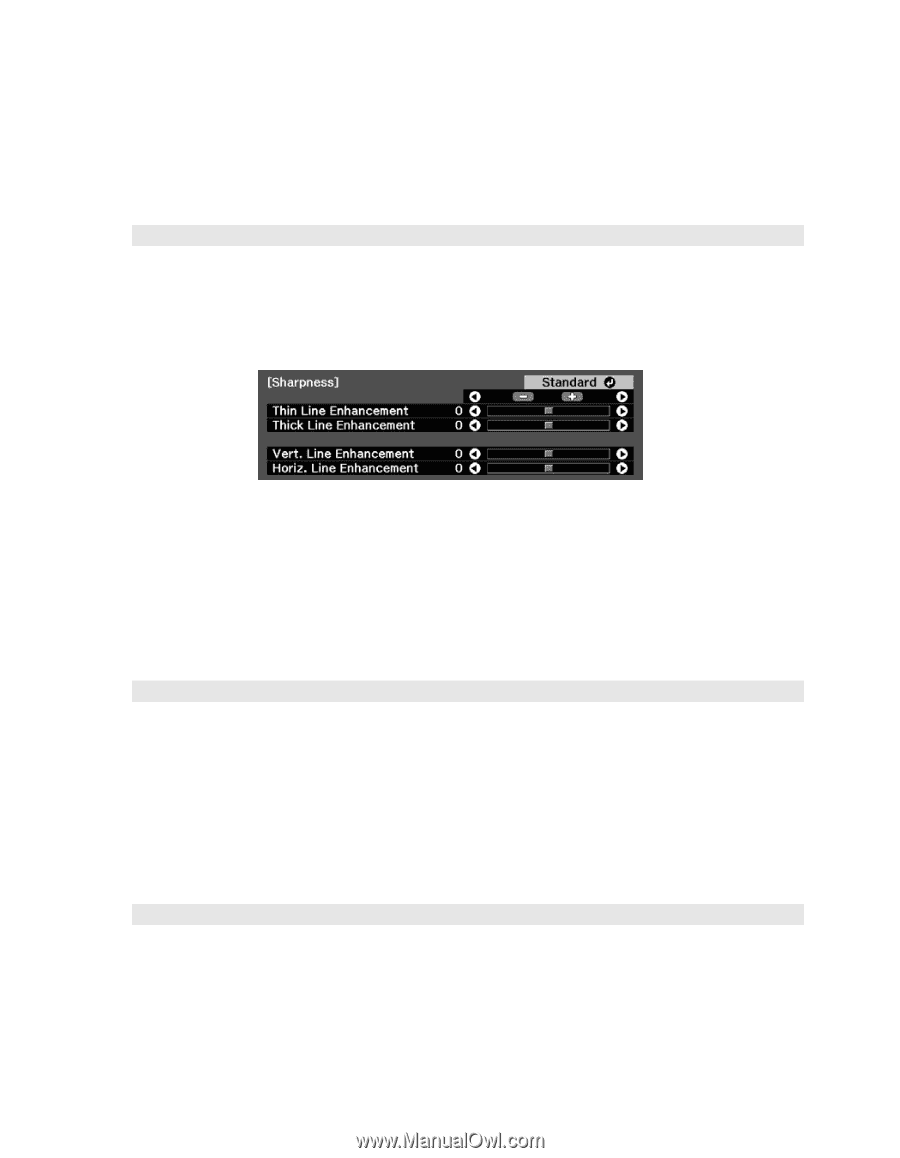
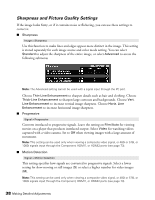
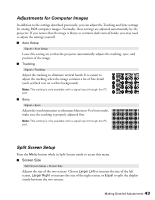
Sharpness and Picture Quality Settings If the image looks fuzzy, or if it contains noise or flickering, you can use these settings to correct it. ■ Sharpness Image > Sharpness Use this function to make lines and edges appear more distinct in the image. This setting is stored separately for each image source and color mode setting. You can select Standard to adjust the sharpness of the entire image, or select Advanced to access the following submenu: Note: The Advanced setting cannot be used with a signal input through the PC port. Choose Thin-Line Enhancement to sharpen details such as hair and clothing. Choose Thick-Line Enhancement to sharpen large contours and backgrounds. Choose Vert. Line Enhancement to increase vertical image sharpness. Choose Horiz. Line Enhancement to increase horizontal image sharpness. ■ Progressive Signal > Progressive Converts interlaced to progressive signals. Leave the setting on Film/Auto for viewing movies on a player that produces interlaced output. Select Video for watching videos captured with a video camera. Set to Off when viewing images with a large amount of movement. Note: This setting can be used only when viewing a composite video signal, or 480i or 576i, or 1080i signals input through the Component, HDMI1, or HDMI2 ports (see page 73). ■ Motion Detection Signal > Motion Detection This setting specifies how signals are converted to progressive signals. Select a lower setting for slow-moving or still images (S) or select a higher number for video images (M). Note: This setting can be used only when viewing a composite video signal, or 480i or 576i, or 1080i signals input through the Component, HDMI1, or HDMI2 ports (see page 73). 38 Making Detailed Adjustments
-
 1
1 -
2
-
3
-
4
-
5
-
6
-
7
-
8
-
9
-
10
-
11
-
12
-
13
-
14
-
15
-
16
-
17
-
18
-
19
-
20
-
21
-
22
-
23
-
24
-
25
-
26
-
27
-
28
-
29
-
30
-
31
-
32
-
 33
33 -
 34
34 -
 35
35 -
 36
36 -
 37
37 -
 38
38 -
 39
39 -
 40
40 -
 41
41 -
 42
42 -
 43
43 -
44
-
45
-
46
-
47
-
48
-
49
-
50
-
51
-
52
-
53
-
54
-
55
-
56
-
57
-
58
-
59
-
60
-
61
-
62
-
63
-
64
-
65
-
66
-
67
-
68
-
69
-
70
-
71
-
72
-
73
-
74
-
75
-
76
-
77
-
78
-
79
 |
 |