Epson PowerLite500c User Manual - Page 92
Adjusting Image Appearance, Adjusting Image Color, repeatedly to select one of the following options
 |
View all Epson PowerLite500c manuals
Add to My Manuals
Save this manual to your list of manuals |
Page 92 highlights
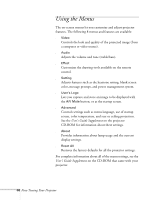
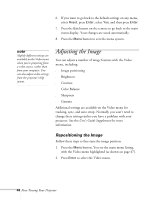
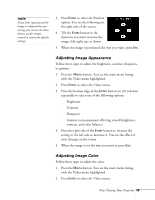
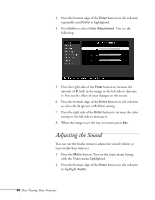
note If you have repositioned the image or adjusted the sync setting, you can use the Auto button on the remote control to restore the default settings. 3. Press Enter to select the Position option. You see the following on the right side of the screen: 4. Tilt the Enter button in the direction you want to move the image: left, right, up, or down. 5. When the image is positioned the way you want, press Esc. Adjusting Image Appearance Follow these steps to adjust the brightness, contrast, sharpness, or gamma: 1. Press the Menu button. You see the main menu listing, with the Video menu highlighted. 2. Press Enter to select the Video menu. 3. Press the bottom edge of the Enter button (or tilt it down) repeatedly to select one of the following options: s Brightness s Contrast s Sharpness s Gamma (a measurement affecting overall brightness, contrast, and color balance) 4. Press the right side of the Enter button to increase the setting or the left side to decrease it. You see the effect of your changes on the screen. 5. When the image is set the way you want it, press Esc. Adjusting Image Color Follow these steps to adjust the color: 1. Press the Menu button. You see the main menu listing, with the Video menu highlighted. 2. Press Enter to select the Video menu. Fine-Tuning Your Projector 49
-
 1
1 -
2
-
3
-
4
-
5
-
6
-
7
-
8
-
9
-
10
-
11
-
12
-
13
-
14
-
15
-
16
-
17
-
18
-
19
-
20
-
21
-
22
-
23
-
24
-
25
-
26
-
27
-
28
-
29
-
30
-
31
-
32
-
33
-
34
-
35
-
36
-
37
-
38
-
39
-
40
-
41
-
42
-
43
-
44
-
45
-
46
-
47
-
48
-
49
-
50
-
51
-
52
-
53
-
54
-
55
-
56
-
57
-
58
-
59
-
60
-
61
-
62
-
63
-
64
-
65
-
66
-
67
-
68
-
69
-
70
-
71
-
72
-
73
-
74
-
75
-
76
-
77
-
78
-
79
-
80
-
81
-
82
-
83
-
84
-
85
-
86
-
 87
87 -
 88
88 -
 89
89 -
 90
90 -
 91
91 -
 92
92 -
 93
93 -
 94
94 -
 95
95 -
 96
96 -
 97
97 -
98
-
99
-
100
-
101
-
102
-
103
-
104
-
105
-
106
-
107
-
108
-
109
-
110
-
111
-
112
-
113
-
114
-
115
-
116
-
117
-
118
-
119
-
120
-
121
-
122
-
123
-
124
 |
 |
