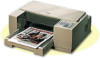
Epson Stylus Pro User Manual - Birmy PC
Epson Stylus Pro - Stylus Color Pro Ink Jet Printer Manual
 |
View all Epson Stylus Pro manuals
Add to My Manuals
Save this manual to your list of manuals |
Epson Stylus Pro manual content summary:
- Epson Stylus Pro | User Manual - Birmy PC - Page 1
Version 3.1 Windows 3.11 Windows 95 Windows NT 3.51 (Intel) for EPSON Stylus Color EPSON Stylus Pro EPSON Stylus Pro XL INSTALLATION & OPERATION MANUAL - Epson Stylus Pro | User Manual - Birmy PC - Page 2
PowerRIp" The Software Program That Turns Your Printer Into A True Adobe PostScript" Level 2 lmager Gila Adobe PostSaipt - Epson Stylus Pro | User Manual - Birmy PC - Page 3
Q 1995 Birmy Graphics Corporation. All Rights Reserved This manual may not, in whole, or in part, be copied, Intel is a registered trademark of Intel Corporation. EPSON and EPSON Stylus are registered trademarks of Seiko Epson Corporation. This program was written for Windows based systems - Epson Stylus Pro | User Manual - Birmy PC - Page 4
Section 1 Installation System Requirements 1 Operational Overview 2 PANTONE 3 Birmy Technical Support 3 Installing the Software 5 Windows 3.11 Printer Driver 9 Windows 95 Printer Driver 12 Windows NT Printer Driver 17 Operating PowerRIP 21 Printing from a Network 22 Registering - Epson Stylus Pro | User Manual - Birmy PC - Page 5
letter size and 80 MB free for ledger size paper. Keyboard LPT printer output port SOFTWARE Windows 3.1 or higher, Windows 95, or Windows NT 3.51 or higher (Intel version) NOTE: Before installation A. Ensure that printer port (LPT) is installed and active. B. Ensure that 40 MB free - Epson Stylus Pro | User Manual - Birmy PC - Page 6
image and sends that image to the printer. PowerRlP processes PostScript code and drives the EPSON Stylus series printer. Text, EPS, tiffs and applications files must be sent to PowerRIP through applications, like Pagemaker, using the PowerRlP PostScript Driver in Windows when printing. How PowerRIP - Epson Stylus Pro | User Manual - Birmy PC - Page 7
used applications so the user can have printer calibrated versions of all PANTONE Colors for the EPSON Stylus Pro and Pro XL models. The file is a Technical Support For technical assistance with the installation, configuration and operation of Birmy PowerRIP, please call Birmy Customer Support at - Epson Stylus Pro | User Manual - Birmy PC - Page 8
your system and its configuration, the serial number of your copy of PowerRIP, and a description of the problems you are encountering. Please refer to the Troubleshooting Section for solutions before calling Technical Support. Birmy Graphics: Voice Fax Email 407-723-2893 407-768-9669 PowerRIP - Epson Stylus Pro | User Manual - Birmy PC - Page 9
Installer automatically loads the following l 32 Bit (WIN32S) Windows libraries if not already loaded l PowerRlP software User manually installs l PowerRIP Windows Printer Drivers To install PowerRIP 1. Turn on the computer and start Windows. 2. Insert the floppy disk labeled PowerRlP Disk 1 into - Epson Stylus Pro | User Manual - Birmy PC - Page 10
4. In the command line type A:\SETUP and click OK. (If you are loading from drive B type B:\SETUP.) NOTE: If you are loading from Windows 95 click on Start, select Run, then type A:\SETUP (or B:\SETUP); or use the Add software option in Windows 95. 5. The PowerRlP program will now start to load and - Epson Stylus Pro | User Manual - Birmy PC - Page 11
6. The program will then ask you to choose the drive and directory you want PowerRlP to be installed on. The default is C:\PowerRIP. You may leave the default directory or change it if desired and then click NEXT. Note: If you choose not to install PowerRlP at this time, click CANCEL to stop the - Epson Stylus Pro | User Manual - Birmy PC - Page 12
Remove Disk 4 from the floppy drive. 10. You must now install the Printer Driver using Windows Print Manager. See the next section on how to do this. Note turned off. It may interfere with the print process. See your Windows Users Manual if you do not know how to do this. PowerRlP runs from Windows - Epson Stylus Pro | User Manual - Birmy PC - Page 13
Installation For Windows 95 or Windows NT see the appropriate section. 1. For Windows 3.11 put the PowerRlP Windows 3.11 Printers Drivers Disk into drive A or B. Then from Program Manager go to File, Run, then type A:\Setup or B if your drive is B. ammand Line: A:\SETUP.EXE 0 Run - Epson Stylus Pro | User Manual - Birmy PC - Page 14
. Then select your EPSON printer and click on install. 5. Your printer should successfully install. Now close and go to Control Panel and select Printers and select PowerRIP as your default printer. 6. Now select PowerRlP and click on Connect. c Default Printer PowerRIP For Stylus Color on LPTl: 10 - Epson Stylus Pro | User Manual - Birmy PC - Page 15
7. Select FILE. PowerRIP Fen Stylus Cdor 'I r,rw:rai.: :kr, Ewtrv Fast Printina Direct to Port 8. Then select OK. The program installation is now complete. PowerRIP must be registered before you - Epson Stylus Pro | User Manual - Birmy PC - Page 16
PowerRlP Windows 95 Printer Driver Installation 1. Click on Start, Settings, Printers section of Windows 95. 2. Click on Add Printer, then Next. 12 Birmy Graphics Corporation - Epson Stylus Pro | User Manual - Birmy PC - Page 17
3. Click on Local Printer, then Next. Note: You may not see this screen if you are not on a network. 4. Click on Have Disk. Birmy Graphics Corporation - Epson Stylus Pro | User Manual - Birmy PC - Page 18
disk in drive A or B. If drive B, you must change to that drive designation. Click OK. Note: You may need your Windows 95 CD or master diskette #1 0 to install the Windows 95 PostScript drivers. 6. Select your printer and click Next. 7. Then select print to "File: Creates a file on disk" Click - Epson Stylus Pro | User Manual - Birmy PC - Page 19
Windows 95 CD or master diskette # 10 for the Windows Drivers. 10. The program installation is now complete. PowerRlP must be registered before you can use it. Go to the section Registering your Software. If you would like to share your printer on a network complete step 12 and the section about - Epson Stylus Pro | User Manual - Birmy PC - Page 20
installed. Output File Name: C:\BIRMYUOB 12. If you would like to share your printer on a network, you just have to share on your computer the C:\BIRMM drive letter where PowerRIP is installed. You should refer to your Windows user manual on how to do this. Other users on the network that are given - Epson Stylus Pro | User Manual - Birmy PC - Page 21
Installation 1. Click on Print Manager in the Main Folder. Select Printer and Create Printer. 2. Enter PowerRlP under printer name and go to driver and select Other. Printer tima: PWWRIP I Qtir: Glher.. I D~miplian: I hint ,o: LPTl ad! 3. You will then be prompted to put the PowerRlP - Epson Stylus Pro | User Manual - Birmy PC - Page 22
4. Select your printer and click OK. Prinlar Drivw: 5. Now go to Print to and select Other. 6. Select Local Port. &ailablm Print Moniton: Digknl Nelvork Poll I cnher. I I 7. Type C:\BIRMY\ - Epson Stylus Pro | User Manual - Birmy PC - Page 23
from Workstations on a Network. 9. Now go back to Print Manager and create another printer. 10. Name it LPT. Select the PowerRlP driver that is now in the system under printers. Select the Print to as LPTl port or the LPT port that your EPSON is connected to and click OK. Do not share this - Epson Stylus Pro | User Manual - Birmy PC - Page 24
. Here is where you can cancel, pause, or purge the jobs before they are sent to the printer. Note: PowerRIP sends a small 30 byte file r beforeeachprintjob.This30 bytefilecontains information for the printer to setup resolution and other options. This 30 byte file does not print a page. 12. The - Epson Stylus Pro | User Manual - Birmy PC - Page 25
Operating PowerRIP To operate PowerRlP just click on the PowerRlP icon. PowerRlP will minimize itself at the bottom of the screen. This is the mode in which PowerRlP runs. If you double click on the Birmy PowerRlP icon at the bottom of the screen it will maximize itself. From this screen you can - Epson Stylus Pro | User Manual - Birmy PC - Page 26
computer connected to the EPSON Stylus, all networked workstations running Windows for Workgroups, Windows 95 or Windows NT can print to PowerRlP providing the printer or directory is shared as then only need to load PowerRlP print drivers and not the PowerRlP program. Birmy Graphics Corporation - Epson Stylus Pro | User Manual - Birmy PC - Page 27
95 and Windows NT The workstations only need to load the appropriate Windows Drivers. If PowerRlP is running under Windows NT, instead of printing to a Local Printer, select a Network Printer or Connect to a Network printer depending on your version of Windows. If PowerRlP is running under Windows - Epson Stylus Pro | User Manual - Birmy PC - Page 28
Registering Your Software You must register your copy of PowerRlP before you can use it. Follow these steps. 1. Click on the registration icon. 2. When you see the prompt, insert Disk 1 into Drive A or B and click OK. 24 Birmy Graphics Corporation - Epson Stylus Pro | User Manual - Birmy PC - Page 29
Printer Code found on the Registration Screen. Do not call this phone number for technical support. Call the numbers listed on page 3 for technical support. 4. When given the unlock code, type it in the Unlock Code box and click OK. Your PowerRlP is now ready to use. See Section 2 for instructions - Epson Stylus Pro | User Manual - Birmy PC - Page 30
may also be present. 4. Double click on the Birmy PowerRlP icon. You see the Birmy PowerRlP window shown below, which has two menus, File and Printer. See the following two sections for descriptions of these options. 26 Birmy Graphics Corporation - Epson Stylus Pro | User Manual - Birmy PC - Page 31
pull down menu will appear. Select Allows you to select different EPSON Stylus printers. NOTE: The display shows only the printer for which you purchased PowerRIP. If you want to purchase support for additional printers, call Birmy Graphics Corporation at 407-723-2893 Options Allows you - Epson Stylus Pro | User Manual - Birmy PC - Page 32
quality for the individual Epson special paper stocks. Microweave A printing method in which images are printed in finer increments to reduce the possibility of banding (white lines) and produce laser-like images. Bi-directional When this option is selected, the printer prints one line from - Epson Stylus Pro | User Manual - Birmy PC - Page 33
Uni-directional The printer prints right to left on all lines. This mode reduces the possibility detail than fixed screen rulings. LPT The LPT port that the printer is con- nected to. NOTE: For the EPSON Stylus, the Stochastic Always feature should be selected. Birmy Graphics Corporation 29 - Epson Stylus Pro | User Manual - Birmy PC - Page 34
File Menu When you click on File, you see the following pulldown menu: Open log and Close log allows you to keep track of PostScript messages that occur during a print job. When you select Open, an open window will appear. In this window, you can select a file name for the log, as well as a drive - Epson Stylus Pro | User Manual - Birmy PC - Page 35
0 Bead Only About gives you information about PowerRIP. The product version and revision should be included on all information sent to Birmy Graphics Corporation with support questions. Exit quits the program. Birmy Graphics Corporation 31 - Epson Stylus Pro | User Manual - Birmy PC - Page 36
Testing PowerRlP 1. Set up your EPSON Stylus printer using the instructions in your EPSON User's Guide. 2. Turn on the computer and start Windows. 3. Turn on your Stylus printer. 4. Double click on the Birmy icon in the PowerRlP window. When the program has finished loading and the cursor returns - Epson Stylus Pro | User Manual - Birmy PC - Page 37
8. Click OK. 9. To open a PostScript file box, click on File click on Print. Birmy Graphics Corporation 33 - Epson Stylus Pro | User Manual - Birmy PC - Page 38
10. In the PostScript File box, click on PowerRIP. Then select examples. You should see the PostScript example cgolfer.ps in the left box. File Name: '.PS Qirectorier: I c:\pow&p\emmpter List Filer d Jjpe: Porttcript Filel'.PS I I D riyat: mc:bob 11. Click on cgolfer.ps, then click OK. 12. The - Epson Stylus Pro | User Manual - Birmy PC - Page 39
Adobe Level 2 PostScript Raster Image Processor. A true Adobe Level 2 PostScript RIP has the ability to use color rendering dictionaries when the RIP is driving a color printer. These color rendering dictionaries are automatically accessed by the Adobe Photoshop program when printing directly to the - Epson Stylus Pro | User Manual - Birmy PC - Page 40
a long time to process that you increase your RAM. PowerRIP will have performance increases with up to 64 MB of RAM. Once full EPSON Stylus printer speed is obtained an increase in RAM will not improve performance. Quark If you have the Eficolor profile option, select none. 36 Birmy Graphics - Epson Stylus Pro | User Manual - Birmy PC - Page 41
ink jet printer. l Papers designed for ink jet printers have special coatings to evenly distribute the ink, and are different than uncoated bond papers used in laser printers and copiers. l Birmy Graphics has balanced the stochastic halftone screening and color technology to work with Epson's inks - Epson Stylus Pro | User Manual - Birmy PC - Page 42
Cancelling a print job. Windows 3.11: To cancel a print job in Windows 3.1 you must reboot your system. Re-enter Windows and click on the Birmy Delete Pending Jobs icon or go to File Manager and go to the directory c:\Birmy and delete the files in this directory. Now restart PowerRIP. Windows 95: - Epson Stylus Pro | User Manual - Birmy PC - Page 43
Windows NT: To cancel in Windows NT, go to Print Manager. Select the LPT Queue that we created when we loaded the PowerRIP Windows NT Drivers. Then delete the files in this Queue. Then run the Birmy Delete Pending Jobs icon by click on it. Now restart PowerRIP. Also you can - Epson Stylus Pro | User Manual - Birmy PC - Page 44
Troubleshooting Problem Solution Printer prints out illegible type or characters. On Windows 3.11 and 95 . On Windows NT make sure printer driver prints to the Birmy directory and not an LPT port. See Printer Driver section for more information. Problem Solution PowerRIP not registered. Register - Epson Stylus Pro | User Manual - Birmy PC - Page 45
Problem Solution Problem Solution Problem Solution Problem Solution EPS files do not print. EPS file are designed to be placed into . Tiffs, simple text files do not print. Tiffs and simple text files are designed to be placed into other documents. They can not be processed directly by PowerRIP. - Epson Stylus Pro | User Manual - Birmy PC - Page 46
Problem Solution Problem Solution Problem Solution PowerRIP receives a error "Cannot open C:\BIRMY\PRPCTEMP.PS" upon startup. Run Delete Pending Jobs icon before starting PowerRIP. This will delete and files in - Epson Stylus Pro | User Manual - Birmy PC - Page 47
is a file type that may contain complex graphics. It is designed as a universal format to include complex graphics in other applications. A device capable of printing an image on a physical medium, e.g., a printer, imagesetter, ink jet printer, etc. A set of software functions to convert PostScript - Epson Stylus Pro | User Manual - Birmy PC - Page 48
Render RAM RIP TIFF The process by which PostScript language operators and operands are interpreted and a raster image is produced. Random Access Memory. Almost all PCs ship with 8 megabytes of RAM today, and many with 16 MB as minimum. You can add more RAM to most computers. See your computer
-
 1
1 -
 2
2 -
 3
3 -
 4
4 -
 5
5 -
 6
6 -
 7
7 -
8
-
9
-
10
-
11
-
12
-
13
-
14
-
15
-
16
-
17
-
18
-
19
-
20
-
21
-
22
-
23
-
24
-
25
-
26
-
27
-
28
-
29
-
30
-
31
-
32
-
33
-
34
-
35
-
36
-
37
-
38
-
39
-
40
-
41
-
42
-
43
-
44
-
45
-
46
-
47
-
48
 |
 |

Version
3.1
Windows
3.11
Windows
95
Windows NT
3.51
(Intel)
for
EPSON Stylus Color
EPSON Stylus Pro
EPSON Stylus Pro XL
INSTALLATION
&
OPERATION
MANUAL