Epson WF-M1030 Start Here - Installation Guide - Page 2
Load paper - mac
 |
View all Epson WF-M1030 manuals
Add to My Manuals
Save this manual to your list of manuals |
Page 2 highlights
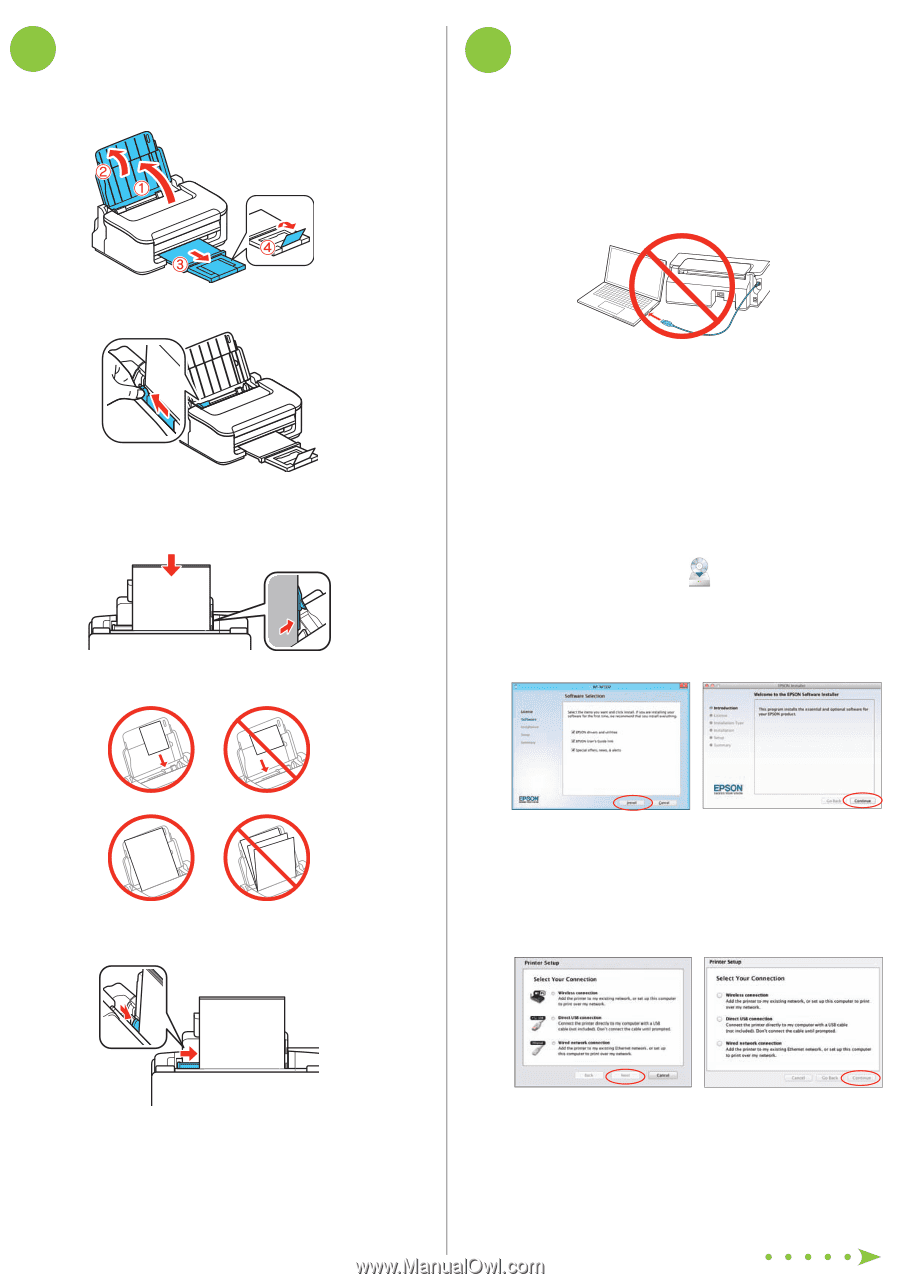
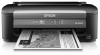
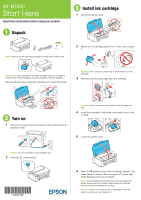
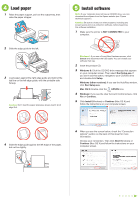
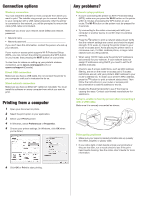
4 Load paper 1 Raise the paper support, pull out the output tray, then raise the paper stopper. 5 Install software Note: If your computer does not have a CD/DVD drive, you can download the software from the Epson website (see "Epson technical support"). Caution: Be sure to close your other programs, including any screen savers and virus protection software, before beginning this software installation. 1 Make sure the printer is NOT CONNECTED to your computer. 2 Slide the edge guide to the left. 3 Load paper against the right edge guide and behind the tab line on the left edge guide, with the printable side faceup. Caution: Don't load the paper sideways; always load it short edge first. Windows®: If you see a Found New Hardware screen, click Cancel and disconnect the USB cable. You can't install your software that way. 2 Insert the product CD. 3 Windows 8: Click the CD/DVD drive message that appears on your computer screen. Then select Run Setup.exe. If you don't see this option, navigate to your CD/DVD drive and double-click Setup. Windows (other versions): If you see the AutoPlay window, click Run Setup.exe. Mac OS X: Double-click the EPSON icon. 4 Windows: If you see the User Account Control screen, click Yes or Continue. 5 Click Install (Windows) or Continue (Mac OS X) and follow the instructions on your computer screen. 4 Slide the edge guide against the left edge of the paper, but not too tightly. 6 When you see the screen below, check the "Connection options" section on the back of this sheet for more information. Choose your connection. Then click Next (Windows) or Continue (Mac OS X) and follow the instructions on your computer screen.
-
 1
1 -
 2
2 -
 3
3 -
 4
4
 |
 |