Fluke 789 Calibration Manual - Page 22
Current Measurement, terminals on the UUT.
 |
View all Fluke 789 manuals
Add to My Manuals
Save this manual to your list of manuals |
Page 22 highlights
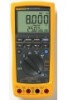
789 Calibration Manual Current Measurement 1. Put the calibrator in Standby (STBY) mode. W 2. Put the UUT rotary switch in the position. 3. Connect the calibrator to the COM and mA terminals on the UUT as shown in Figure 4. 4. Apply the values from the calibrator shown in Table 5 and compare the readings on the UUT to the acceptable readings shown. 5. Connect the calibrator to the COM and A terminals on the UUT. 6. Apply the values from the calibrator shown in Table 5 and Table 6 and compare the readings on the UUT to the acceptable readings shown. 7. Press J (BLUE) on the UUT to toggle to ac amps. 8. Apply the values from the calibrator shown in Table 7 and compare the readings on the UUT to the acceptable readings shown. UUT 5500A Figure 4. Current Measurement Test Connections adm003F.EPS 14
-
 1
1 -
2
-
3
-
4
-
5
-
6
-
7
-
8
-
9
-
10
-
11
-
12
-
13
-
14
-
15
-
16
-
 17
17 -
 18
18 -
 19
19 -
 20
20 -
 21
21 -
 22
22 -
 23
23 -
 24
24 -
 25
25 -
 26
26 -
 27
27 -
28
-
29
-
30
-
31
-
32
-
33
-
34
-
35
-
36
-
37
-
38
-
39
-
40
 |
 |
