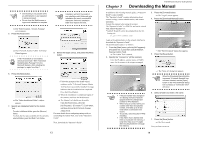
Fujitsu 6010N Getting Started Guide - Page 14
Appendix - 6010ns scanner
 |
UPC - 097564307683
View all Fujitsu 6010N manuals
Add to My Manuals
Save this manual to your list of manuals |
Page 14 highlights
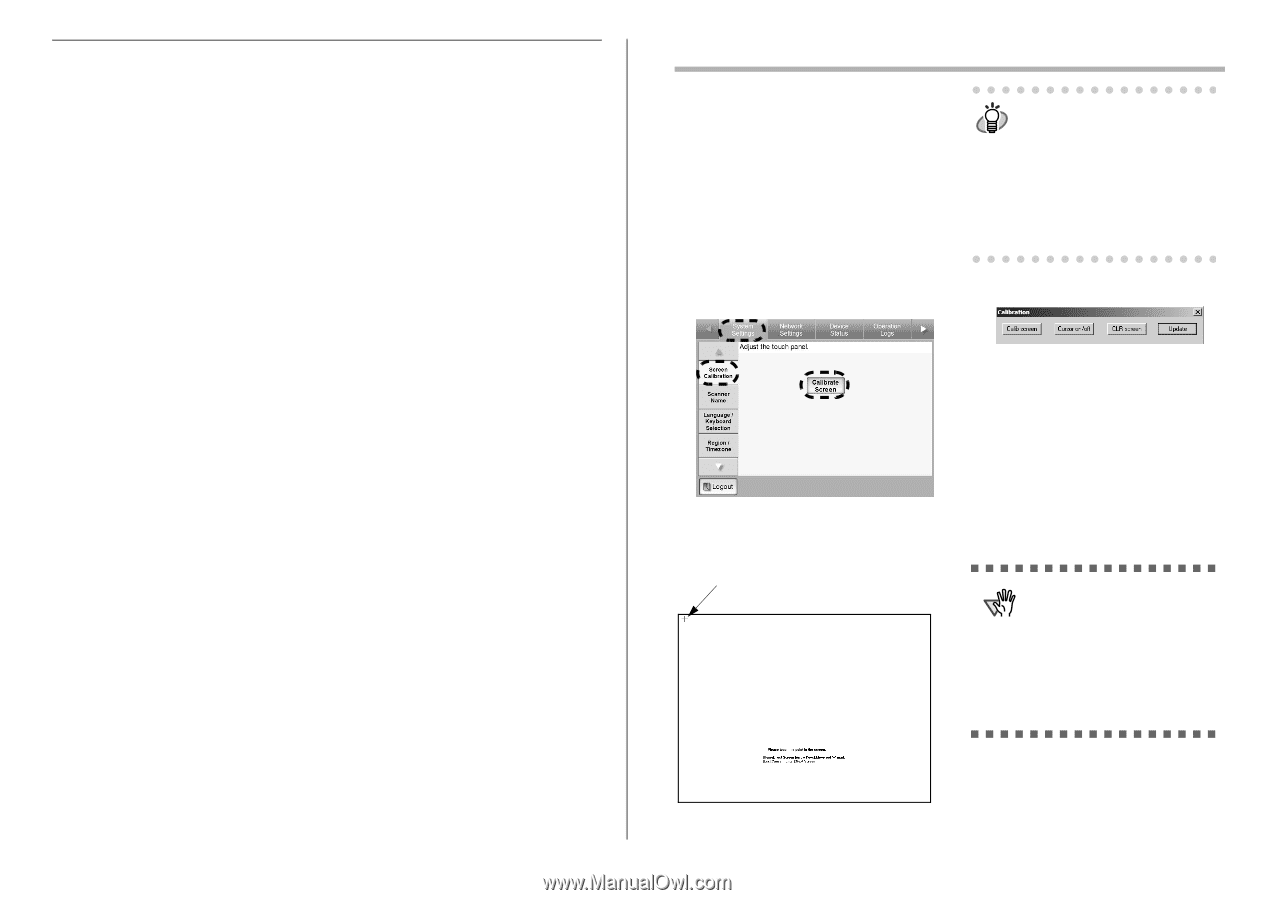
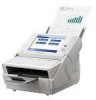
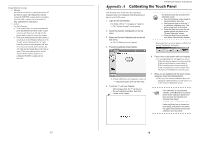
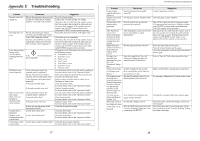
If some other error occurs • Message An error has occurred. Try turning the power off and back on again. The administrator should contact the FUJITSU scanner dealer or an authorized FUJITSU scanner service provider for help. [alphanumeric eight digits] • Action Try the following: • If the scanner does not restart automatically, press the [Shutdown] button on the "Login" screen to turn the power off, and turn the power back on again to restart the scanner. • If the error status persists after the scanner is restarted, press the [Shutdown] button on the "Login" screen, disconnect the AC cable from the scanner to turn the power off, wait for at least ten seconds, then reconnect the AC cable and try turning the power back on again. If the error status persists, contact your FUJITSU scanner dealer or an authorized FUJITSU scanner service provider. 17 Appendix A fi-6010N Network Scanner Getting Started Calibrating the Touch Panel This should be done if and when the touch panel responses seem out of alignment with the positions of objects on the LCD screen. 1. Login as the administrator. For details, refer to "3.1 Logging in" (page 6). ⇒ The "System Settings" screen appears. 2. Select the [System Settings] tab on the top menu. 3. Select the [Screen Calibration] tab on the left side menu. ⇒ The "Calibration Screen" appears. 4. Press the [Calibrate Screen] button. The keyboard may also be used on the HINT calibration screen: • Press the [Home] key to jump straight to the post-calibration test screen. • Use the arrow keys to move the "+" to a different calibration point. This allows a bad touch to be redone. • Press the [Esc] key to stop the cali- bration process and return to the "Screen Calibration" screen. • Press the [Enter] key to close the error dialog. (Not normally needed.) Repeat until the test screen appears, with the following "Calibration" dialog box: ⇒ A blank calibration screen appears, with a red "+" (adjustment mark) in the top-left corner. 5. Touch the "+" with your fingertip. After being touched, the "+" will move to the next calibration position. Each time it stops, touch it again. 6. Trace a line on the screen with your fingertip. ⇒ A corresponding line will appear on-screen. If the line does not appear correctly, press the [Calib screen] button to return to Step 5. If the screen becomes cluttered, press the [CLR screen] button to remove all the lines. The [Cursor on/off] button cannot be used. 7. When you are satisfied with the touch screen response, press the [Update] button. ⇒ This saves the current calibration data, completing the calibration process, and returns you to the "Screen Calibration" screen. ATTENTION If the calibration is not performed carefully, or the [Enter] key is pressed before all the calibration points have been touched, the following error message may appear: Parameter Error. Please input, again Press the [Enter] key to dismiss the error dialog, and perform the calibration again, being careful to touch each calibration point accurately. 18
-
 1
1 -
2
-
3
-
4
-
5
-
6
-
7
-
8
-
 9
9 -
 10
10 -
 11
11 -
 12
12 -
 13
13 -
 14
14 -
 15
15 -
 16
16 -
 17
17 -
 18
18 -
 19
19 -
20
-
21
 |
 |