Fujitsu ST6012 User Guide
Fujitsu ST6012 - Stylistic Tablet PC Manual
 |
UPC - 611343084604
View all Fujitsu ST6012 manuals
Add to My Manuals
Save this manual to your list of manuals |
Fujitsu ST6012 manual content summary:
- Fujitsu ST6012 | User Guide - Page 1
User's Guide Learn how to use your Fujitsu Stylistic ST6012 Tablet PC - Fujitsu ST6012 | User Guide - Page 2
not constitute a warranty. Specifications are subject to change without knowledge. Fujitsu and the Fujitsu logo are registered trademarks of Fujitsu Limited; Stylistic is a registered trademark of Fujitsu Computer Systems Corporation. Microsoft, Windows, and Windows Vista are registered trademarks - Fujitsu ST6012 | User Guide - Page 3
OF CONFORMITY according to FCC Part 15 Responsible Party Name: Fujitsu Computer Systems Corporation Address: 1250 E. Arques Avenue, MS 122 Sunnyvale, CA 94085 Telephone: 408-746-6000 Declares that product: Model Series: Stylistic® ST6012 Tablet PC Complies with Part 15 of the FCC Rules This device - Fujitsu ST6012 | User Guide - Page 4
cord and batteries indicated in this manual. Do not dispose of batteries in a fire. They may explode. Check with local codes for possible special disposal instructions. • service provider. SAVE THESE INSTRUCTIONS For Authorized Repair Technicians Only DANGER OF EXPLOSION IF LITHIUM (CLOCK) BATTERY - Fujitsu ST6012 | User Guide - Page 5
future generations. * To order a new battery for your Fujitsu mobile computer, go to the Fujitsu shopping site at www.shopfujitsu.com in the US or www.fujitsu.ca/products/notebooks in Canada. ** RBRC is an independent third party to which Fujitsu provides funding for battery recycling; RBRC is in no - Fujitsu ST6012 | User Guide - Page 6
any active Ethernet network links. To "wake" the computer from Sleep mode, slide the Suspend/Resume switch. Energy saving benefits: Fujitsu ENERGY STAR qualified mobile PCs use about half as much electricity as standard equipment - saving half in utility costs. But more than that, ENERGY STAR also - Fujitsu ST6012 | User Guide - Page 7
Contents Preface Chapter 1 About This Guide 12 Conventions Used in the Guide 12 Fujitsu Contact Information 13 Getting to Know Your Tablet PC Overview 15 Locating the Connectors and Controls 16 Front Features 17 Back Features 18 Top Features 20 Left-Side Features 22 Right-Side Features - Fujitsu ST6012 | User Guide - Page 8
Security Panel Application 39 Installing Click Me 40 Fujitsu Driver Update Utility 40 Connectors and Peripheral Interfaces 41 Chapter 2 Using the Stylistic ST6000 Series Tablet PC System States 43 Proper Tablet PC Orientations 46 Starting the Tablet PC 46 Powering Up 46 Booting the First - Fujitsu ST6012 | User Guide - Page 9
of the Bridge Battery 65 Memory Stick/SD Card Slot 66 PC Card Slot 68 Memory 69 Care and Maintenance Caring for your Tablet PC 71 Precautions 72 Protecting the Display Screen 73 Storing the Tablet PC 74 Avoiding Overheating 75 Cleaning the Display Screen 75 Troubleshooting 76 Restoring - Fujitsu ST6012 | User Guide - Page 10
Popular Accessories 87 Included Software 88 Learning About Your Software 88 Regulatory Information 91 Appendix A: WLAN User's Guide Using Using Windows Vista 101 Configuring the WLAN Using Windows XP 102 Connection to the network 102 Troubleshooting the WLAN 103 WLAN Specifications 105 10 - Fujitsu ST6012 | User Guide - Page 11
109 Using Certified Wireless USB 109 Appendix B: Fingerprint Sensor Device Introducing the Fingerprint Sensor Device 110 Getting Started 111 Installing OmniPass 111 User Enrollment 114 Using OmniPass 117 Configuring OmniPass 122 OmniPass Control Center 124 Troubleshooting 127 Index 129 11 - Fujitsu ST6012 | User Guide - Page 12
Preface About This Guide The Stylistic® ST6000 Series Tablet PC is a high- performance, pen-based computer that has been designed to support Microsoft®Windows® Vista Business or Windows XP Tablet PC Edition. This manual explains how to operate your Stylistic ST6000 Series Tablet PC hardware and - Fujitsu ST6012 | User Guide - Page 13
ICON HIGHLIGHTS INFORMATION THAT CAN BE HAZARDOUS TO EITHER YOU, YOUR TABLET PC, OR YOUR FILES. PLEASE READ ALL WARNING INFORMATION CAREFULLY. Fujitsu Contact Information Service and Support You can contact Fujitsu Service and Support in the following ways: • Toll free: 1-800-8Fujitsu (1-800-838 - Fujitsu ST6012 | User Guide - Page 14
Shopping Online You can go directly to the online by going to the website at: www.shopfujitsu.com. YOU MUST HAVE AN ACTIVE INTERNET CONNECTION TO USE THE ONLINE URL LINKS. Limited Warranty Your Stylistic ST6012 Tablet PC is backed by a Fujitsu International Limited Warranty. Check the service - Fujitsu ST6012 | User Guide - Page 15
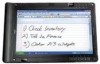
Series Tablet PC is a high-performance, pen-based computer that has been designed to support Microsoft® Windows® XP Tablet PC Edition or Windows Vista™ Business. This chapter provides an overview of the Stylistic ST6000 Series Tablet PC and its features. Figure 1. Stylistic ST6012 Tablet PC 15 - Fujitsu ST6012 | User Guide - Page 16
are provided later in this manual. System Status Indicators Navigation Buttons Fingerprint Sensor Speaker Built-in Microphone Application/ Security Buttons Built-in Microphone Display Infrared Keyboard/ Mouse Port Figure 2. Stylistic ST6000 Series Tablet PC Features (Front View) 16 - Locating - Fujitsu ST6012 | User Guide - Page 17
Tablet PC and hard disk drive, the charge level of the battery, and the security panel. See "Status Display" on page 25. Application/Security Buttons: Allow you to quickly launch pre-defined applications, utilities listen to audio files. Fingerprint Sensor: The fingerprint sensor allows you to start - Fujitsu ST6012 | User Guide - Page 18
Optional Web Camera System Interface Connector Fan Cover Memory Module Cover Battery Release Latch Battery Release Latch Removable Battery Figure 3. Stylistic ST6000 Series Tablet PC Features (Back View) Back Features: Fan Cover: The fan cover protects the fan and allows access to it in the - Fujitsu ST6012 | User Guide - Page 19
: Used to release the removable battery. Removable Battery: Can be removed and replaced with a charged battery. See "Lithium ion Battery" on page 63. System Interface Connector: Allows you to connect the optional Stylistic Tablet Dock. Thermal Suede: The back of the memory module is covered with - Fujitsu ST6012 | User Guide - Page 20
Memory Stick/SD Card Slot Infrared Port Smart Card Slot Pen Tether Attachment Point Figure 4. Stylistic ST6000 Series Tablet PC Features (Top View) Top Features: Power On/Suspend/Resume Switch: Allows you to turn on, off, sleep, resume, hibernate or wake the Tablet PC in order to optimize battery - Fujitsu ST6012 | User Guide - Page 21
in the system. See "PC Card Slot" on page 68. PC Card Eject Button: The PC Card eject button is used to remove a PC Card from the PC Card slot. Air flow Card/Memory Stick Slot: The Secure Digital (SD) card/Memory Stick slot allows you to insert a flash memory card for data storage. Flash memory cards - Fujitsu ST6012 | User Guide - Page 22
jack LAN jack (RJ-45) DC Input connector Figure 1-1. Stylistic ST6000 Series Tablet PC Features (Left Side View) Left-Side Features: Headphone Jack: Allows USB Standard Revision 2.0) to the Tablet PC. Additional USB ports are located on the optional Tablet Dock. External Monitor Connector: The - Fujitsu ST6012 | User Guide - Page 23
. DC input connector: Allows you to connect the AC adapter or auto adapter. LAN jack: Allows you to connect a standard RJ-45 connector to the Tablet PC's internal local area network (LAN). Microphone Jack: Allows you to connect an external microphone. 23 - Locating the Connectors and Controls - Fujitsu ST6012 | User Guide - Page 24
when not in use will help to extend battery life. See "Using the Bluetooth Device" on page 107. Pen holder: The pen is the main pointing device that you use to execute programs and enter data. A pen holder is built into the Tablet PC to store the pen when not in use. 24 - Locating the Connectors - Fujitsu ST6012 | User Guide - Page 25
Icons appear under each of the system status LEDs in the status display indicating the status of system functions such as system power and battery charge level. The location of icons in the Status display is shown in Figure 6. Table 1. explains how the LEDs associated with the individual icons - Fujitsu ST6012 | User Guide - Page 26
Charge/DC In • Off State • On State • Idle Mode • Sleep Amber Green AC adapter and battery are available and system is charging. • AC adapter and battery are available and system is not charging (battery fully charged). • Hibernate • Off State Amber, blinking Off • AC adapter is available but - Fujitsu ST6012 | User Guide - Page 27
; an LED that is "blinking, slow" flashes at the rate of one second on, five seconds off. Icon Mode/State LED State Remarks Battery • On State • Idle Mode • Sleep, without AC adapter • Sleep with AC adapter • Hibernate, with AC adapter Green, continuous Amber, continuous Red, continuous Red - Fujitsu ST6012 | User Guide - Page 28
A button Enter / App B button Function / Fujitsu Menu button Figure 7. Application buttons CTL-ALT-DEL IS THE ONLY APPLICATION BUTTON THAT CAN BE USED WHILE THE SYSTEM IS LOGGING ON OR WHEN THE SYSTEM IS LOCKED (I.E., WHEN YOU HAVE THE LOGON OR COMPUTER LOCKED WINDOW SHOWING ON YOUR DESKTOP). 28 - Fujitsu ST6012 | User Guide - Page 29
launch the Web browser. The default page to which you go is the Fujitsu home page. If you would like to change your home page, go to system screen orientation changes from portrait (vertical) to landscape (horizontal) or from landscape to portrait. When you would like to use the Tablet PC - Fujitsu ST6012 | User Guide - Page 30
in the Tablet Button Settings utility. (You can change the settings in Control Panel -> Tablet Button Settings Windows application. Fujitsu Menu Utility The Function button works in conjunction with the other application buttons to provide additional functionality for the buttons. Refer to specific - Fujitsu ST6012 | User Guide - Page 31
Navigation Buttons The four navigation buttons are located on the upper left-hand side of a vertically-oriented system. The buttons have dual functions. The secondary functions are activated by pressing the Function (Fn) button while pressing the application button*. The buttons also have separate - Fujitsu ST6012 | User Guide - Page 32
invoking the Advanced Options Menu, where you can enter different modes (such as Safe Mode). The BIOS is a program and a set of parameters that are stored in ROM, which tests and operates your Tablet PC from when you turn it on until it loads your installed operating system from disk. Information - Fujitsu ST6012 | User Guide - Page 33
keyboard. This feature is also functional in the operating system boot menu. Pressing the second navigation button from the bottom while the BIOS setup screen is open causes the BIOS setup screen to jump to the next menu. This is the same as if you had tapped Arrow Right on a keyboard. Pressing the - Fujitsu ST6012 | User Guide - Page 34
the password, and the fifth is used as an Enter button. Instructions for using the security feature follow the table. Button Icons Security Icons Application Buttons Setting up the Security Panel When you receive your Tablet PC, the security panel application is pre-installed without any passwords - Fujitsu ST6012 | User Guide - Page 35
The user and supervisor password may be set on this Tablet PC. A supervisor password is typically the same for all Tablet PC's and notebooks in a work group, office, or company to allow for system management. Individual computers in a group environment should not use a common password. A password - Fujitsu ST6012 | User Guide - Page 36
PASSWORD IS TO BE ABLE TO BYPASS THE USER PASSWORD IN CASE THE USER PASSWORD IS FORGOTTEN. THE SUPERVISOR PASSWORD ALONE WILL NOT Type in: C:\Program Files\Fujitsu\Security Panel Application\Supervisor\ FJSECS.EXE, then press [Enter] 4 Follow the on-screen instructions to set the supervisor password - Fujitsu ST6012 | User Guide - Page 37
will stop and the Tablet PC will resume normal PC after a password failure, you must slide the Power/Suspend/Resume switch, then enter a correct password. REMEMBER THE USER PASSWORD YOU SPECIFIED ON THE SECURITY PANEL APPLICATION. IF YOU FORGET THE PASSWORD YOU WILL NOT BE ABLE TO USE YOUR COMPUTER - Fujitsu ST6012 | User Guide - Page 38
Battery Operations If your Tablet PC has a low battery, sliding the power/suspend/resume switch does not unlock the Tablet PC. To resume normal operation, first attach a power supply to the system. Then you may unlock the Tablet PC the utility to set a password on their computer. In this case, if - Fujitsu ST6012 | User Guide - Page 39
. Follow instructions under Setting Passwords on page 36. If you forget both passwords, please contact Fujitsu Computer Systems Corporation Service and Support at 1-800-8Fujitsu (1-800-838-5487). Fujitsu Computer Systems Corporation charges a service fee for unlocking a password-restricted Tablet PC - Fujitsu ST6012 | User Guide - Page 40
. FOR MORE INFORMATION, REFER TO YOUR GETTING STARTED GUIDE. Fujitsu Driver Update Utility Your system has a convenient tool called the Fujitsu Driver Update (FDU) utility. With FDU, you can choose to automatically or manually go to the Fujitsu site to check for new updates for your system. For - Fujitsu ST6012 | User Guide - Page 41
peripheral interfaces on the Stylistic ST6000 Series Tablet PC allow the connection of a variety of devices. Specific locations are illustrated in Figures 1-2 through 1-5. Table 6 provides a description of each peripheral connector on the Stylistic ST6000 Series Tablet PC. Each of the illustrated - Fujitsu ST6012 | User Guide - Page 42
Lock slot Tablet PC Icon Purpose Connect the Stylistic ST6000 Series Tablet Dock or other approved docking device. Refer to documentation accompanying the docking device for more information. An infrared receiver built into the Tablet PC allows you to communicate with a Fujitsu wireless infrared - Fujitsu ST6012 | User Guide - Page 43
and use, and system functions of the Stylistic ST6000 Series Tablet PC. You should familiarize yourself with this information before you attempt to operate the system. PRIOR TO USING YOUR SYSTEM, BE SURE TO FULLY CHARGE THE BATTERY IF YOU PLAN TO RUN ON BATTERY POWER. FAILURE TO DO SO MAY RESULT - Fujitsu ST6012 | User Guide - Page 44
to memory is on, maintaining data in programs that were running before system operation was suspended. The system does not respond to the pen or some of these states automatically after a period of inactivity to conserve battery power. Icon Appearance Current State To Change State* Power icon On - Fujitsu ST6012 | User Guide - Page 45
system operation given later in this chapter. † Your system may be configured to use either Sleep mode or Hibernate mode. When you use your Tablet PC, you can change the current system state in a number of ways, depending on the system's current state. To determine the current system state, observe - Fujitsu ST6012 | User Guide - Page 46
Tablet PC Orientations Your computer can be used in two different orientations. Portrait Orientation: Hold the system with the fingerprint sensor positioned vertically on the left. Landscape Orientation: Hold the system with the fingerprint that the battery in your Tablet PC is sufficiently charged, - Fujitsu ST6012 | User Guide - Page 47
on sequence. When you turn on your tablet for the first time, it will display a Fujitsu logo on the screen. If you do nothing the system will load the operating system, and then the Windows Welcome will begin. Depending upon your operating system (Windows Vista or XP edition), there is a different - Fujitsu ST6012 | User Guide - Page 48
the downgrade, you will be instructed to load the drivers and applications for your system. Registering Windows XP with Microsoft In order to ensure that you receive the most benefits from the Windows operating system, it should be registered the first time you use it. 48 - Starting the Tablet PC - Fujitsu ST6012 | User Guide - Page 49
email address if desired. Click Next to complete registration. Registering Your Stylistic Tablet PC with Fujitsu You can register your tablet by going to our website at: us.fujitsu.com/computers You will need to be set up with an Internet Service Provider (ISP) to register online. 49 - Starting the - Fujitsu ST6012 | User Guide - Page 50
errors. The proper sequence is: Windows Vista: Click the [Start] button, and then move the mouse over the small arrow at the bottom right of the right-hand pane. Select Shut Down from the list. Windows XP Tablet PC: Click the [Start] button, click Turn Off Computer, and then select the Turn off - Fujitsu ST6012 | User Guide - Page 51
(NOTE THAT IF THE RESUME ON LAN FUNCTION IS ENABLED IN THE BIOS SETUP, YOU SHOULD NOT REMOVE THE BATTERY UNLESS THE SYSTEM IS SHUT DOWN. WHEN RESUME ON LAN IS ENABLED, THE BRIDGE BATTERY IS DISABLED IN ORDER TO OPTIMIZE BATTERY LIFE.) 3 Observe the Power icon in the Status display to determine which - Fujitsu ST6012 | User Guide - Page 52
down the system, or attach an external power source, such as the AC adapter, to the Tablet PC. • If the battery charge drops to a Critically Low level while the system is running, the system is forced into may block the system from suspending to prevent an interruption. 52 - Starting the Tablet PC - Fujitsu ST6012 | User Guide - Page 53
PC Card that allows you to connect to a wired or wireless network, you may be logged off the network after a period of inactivity while system operation is suspended. Contact a network administrator or help desk, or call Fujitsu Service and Support on shortly before the pen becomes active due to the - Fujitsu ST6012 | User Guide - Page 54
, Office OneNote® 2007 delivers the flexibility to gather and organize text, pictures, digital handwriting, audio and video recordings, and more - all in one digital notebook on your computer. Office OneNote® 2007 can help you become more productive by keeping the information you need at your - Fujitsu ST6012 | User Guide - Page 55
MAY STOP TEMPORARILY WHILE THE HDD HEAD IS RETRACTED. TO RESTART THE COMPUTER, KEEP THE SYSTEM HORIZONTAL. 1 Double-click the Shock Sensor Utility icon in the system tray at the bottom-right of the screen. The [Shock Sensor Utility] window appears. 2 Click the red [Setting] button. The [Shock Sensor - Fujitsu ST6012 | User Guide - Page 56
calibration is executed. Please position the computer as horizontally as possible, then click window closes. Using the Shock Sensor Monitor Window Right-click the Shock Sensor Utility icon in the system tray at the bottom-right of the screen, and select [Monitor] from the menu. The Monitor window - Fujitsu ST6012 | User Guide - Page 57
Close. Use [Esc] key. Display Profiles The Fujitsu Tablet Controls utility allows you to set different display configurations when the system is undocked, docked in portrait mode, and docked in landscape mode. When the tablet transitions between these three configurations, the selected configuration - Fujitsu ST6012 | User Guide - Page 58
"Change tablet and pen settings" is displayed.) When the Tablet and Pen Settings window appears, select the Display tab, and move the Screen Brightness slider to change the brightness. Windows Vista: Open the Windows Mobility Center control panel by right-clicking on the Power Options (battery) icon - Fujitsu ST6012 | User Guide - Page 59
Tablet PC. Programs that support handwriting recognition also allow you to write characters directly on the screen with the pen. You can also use the pen as a drawing tool. Barrel switch Eraser switches Tip switch Pen tether attachment point Figure 10. Stylistic ST6000 pen THE STYLISTIC ST6000 - Fujitsu ST6012 | User Guide - Page 60
-clicking Fujitsu Pen Settings (XP) or Pen and Input Devices (Vista) icon TABLET PC SCREEN BEFORE YOU USE THE PEN. THE WARRANTY DOES NOT COVER A SCRATCHED SCREEN. • USE ONLY THE PEN PROVIDED WITH YOUR TABLET PC. DO NOT USE SUBSTITUTES THAT WERE NOT DESIGNED FOR THE STYLISTIC ST6000 SERIES TABLET PC - Fujitsu ST6012 | User Guide - Page 61
the display resolution. To run the calibration utility: 1 Go to Start -> Control Panel and double-click on the Tablet and Pen Settings icon. 2 Click Calibrate.... 3 Adjust the display of your Tablet PC to a comfortable angle. 4 Using the pen, firmly touch the screen directly on the (+) symbol; the - Fujitsu ST6012 | User Guide - Page 62
foreign particles that can scratch the screen. A damaged or worn tip may not move freely, causing unpredictable results when using the pen. If your pen exhibits these problems, you should replace the pen tip. To do so, use the pen tip removal tool included with your pen. To remove the tip, position - Fujitsu ST6012 | User Guide - Page 63
User-Installable Features Lithium ion Battery Charging the Battery The Stylistic ST6000 Series battery can be charged while it is installed in the Tablet PC. To charge the battery: 1 Connect a DC power source, such as the AC adapter, to the DC input connector on the Tablet PC. The DC Input icon - Fujitsu ST6012 | User Guide - Page 64
, as shown in the illustration and remove the battery from the Tablet PC. If you are using an external battery charger, refer to the instructions provided with the battery charger. UNDER FEDERAL, STATE, OR LOCAL LAW, IT MAY BE ILLEGAL TO DISPOSE OF BATTERIES BY PUTTING THEM IN THE TRASH. BE SURE - Fujitsu ST6012 | User Guide - Page 65
built into the Tablet PC. The bridge battery is not designed for long-term operation. To maintain the bridge battery properly, observe the following measures: • THE BRIDGE BATTERY FUNCTION IS DISABLED IF WAKE ON LAN IS ENABLED IN THE BIOS. • THE SYSTEM ARRIVES WITH THE BRIDGE BATTERY IN A DISCHARGED - Fujitsu ST6012 | User Guide - Page 66
and the system is in On or Off states or Sleep mode. It charges from the battery only when the system is in the On state. Memory Stick/SD Card Slot Your Tablet PC supports Memory Stick and SD flash memory cards on which you can store and transfer data to and from a variety of digital devices - Fujitsu ST6012 | User Guide - Page 67
slot Figure 15. Inserting an SD Card Removing A Memory Stick/SD Card To remove a Memory Stick/SD Card, follow these steps: SEE YOUR MEMORY STICK OR SD CARD MANUAL FOR SPECIFIC INSTRUCTIONS ON THE REMOVAL OF YOUR CARD. SOME CARDS MAY REQUIRE YOUR COMPUTER TO BE IN SLEEP MODE OR OFF WHILE REMOVING - Fujitsu ST6012 | User Guide - Page 68
location). If you need assistance inserting a PC Card in the Stylistic ST6000 Series Tablet PC, contact your corporate help desk or reseller. PC Card slot PC Card PC Card eject button Figure 16. Inserting a PC Card Removing a PC Card To remove a PC Card, first click the Safely Remove Hardware - Fujitsu ST6012 | User Guide - Page 69
There are two DIMM slots in your Tablet PC. 1 GB and 2 GB modules are available, so you can install a combination of up to 4 GB in the system. • DO NOT REMOVE ANY SCREWS FROM THE MEMORY UPGRADE MODULE COMPARTMENT EXCEPT THE ONES SPECIFICALLY SHOWN IN THE DIRECTIONS FOR INSTALLING AND REMOVING THE - Fujitsu ST6012 | User Guide - Page 70
module cover Alignment key ø ù Alignment key Figure 17. Accessing the Memory Slot Figure 18. Installing a DIMM Module Removing a Memory Module To remove a DIMM module: 1 Ensure that the Tablet PC is off. To do so, carry out the Shut Down command in the Start menu. (Do not attempt to remove - Fujitsu ST6012 | User Guide - Page 71
and maintain your Stylistic ST6000 Series Tablet PC. • IN THE EVENT YOU DROP YOUR TABLET PC OR DAMAGE THE HOUSING IN ANY WAY, IMMEDIATELY TURN OFF POWER AND DISCONNECT THE POWER PLUG. FAILURE TO DO SO COULD RESULT IN A SHORT CIRCUIT, SMOKE, AND/OR FIRE. CONTACT FUJITSU SERVICE AND SUPPORT BY PHONE - Fujitsu ST6012 | User Guide - Page 72
and care. • Make a habit of transporting the system in a suitable carrying case. • Do not attempt to service the computer yourself. Always follow installation and operation instructions closely. • If you accidentally spill liquid on your Tablet PC: 1 Turn it off. 2 Position it so that the liquid can - Fujitsu ST6012 | User Guide - Page 73
Protecting the Display Screen The Stylistic ST6000 Series Tablet PC is designed to provide you with years of service. Using a screen protector will help ensure the screen remains as clear as possible. When installed, the screen protector becomes a durable, replaceable writing su/rface that protects - Fujitsu ST6012 | User Guide - Page 74
. Wipe the screen protector with a soft dry cloth to remove any low-tack adhesive; this will help prevent the pen tip from squeaking. Storing the Tablet PC Store the Stylistic ST6000 Series Tablet PC in the Off state with a fully charged battery installed. You can store the Tablet PC in the Off - Fujitsu ST6012 | User Guide - Page 75
like a bed or cushion. Cleaning the Display Screen To clean the Tablet PC display screen, wipe the screen surface gently using a soft cotton cloth slightly dampened with water or isopropyl alcohol. THE TABLET PC IS NOT WATERPROOF. DO NOT POUR LIQUIDS ON THE TABLET PC OR WASH IT WITH A HEAVILY SOAKED - Fujitsu ST6012 | User Guide - Page 76
Troubleshooting Solutions to some common problems are described in the following sections. If you are experiencing a problem with your Tablet PC that you cannot solve by taking the actions described, contact your local help desk or reseller, or call Fujitsu Service and Support at 1-800-8Fujitsu (1- - Fujitsu ST6012 | User Guide - Page 77
system responds to a keyboard but not to a pen, contact your local help desk or reseller, or call Fujitsu Service and Support at 1-800-8Fujitsu (1-800-838-5487) for further assistance. Speaker/Headphone Volume Too Low If the audio volume on your Tablet PC speaker or external headphones is too low - Fujitsu ST6012 | User Guide - Page 78
it is enabled in the BIOS. Contact your local help desk or reseller, or call Fujitsu Service and Support at 1-800-8Fujitsu (1-800-8385487) if you need assistance using BIOS Setup. Restoring the Included Software Copies of your system images, applications, and drivers are available in three locations - Fujitsu ST6012 | User Guide - Page 79
AUTOMATICALLY BOOT TO THE RECOVERY AND UTILITIES TOOL. To re-install drivers and/or applications: 1 Attach an external DVD drive to your system. 2 Boot up the system and insert the DAR disc into the external drive after Windows has started. A Fujitsu Installer screen is displayed after the disc is - Fujitsu ST6012 | User Guide - Page 80
MEDIA. THAT BEING THE CASE, YOU MUST HAVE AN utilities, please follow the instructions in the "Using the Recovery Utilities" manual that is bundled separately with your system. Automatically Downloading Driver Updates Your system has a convenient tool called the Fujitsu Driver Update (FDU) utility - Fujitsu ST6012 | User Guide - Page 81
contains the following items: Check for updates now Allows for manual driver update search. The first time it is used, you screen that displays a history of updates that have been made via the FDU. About Fujitsu Driver Update Displays the FDU version number and copyright information Fujitsu Driver - Fujitsu ST6012 | User Guide - Page 82
section provides the hardware and environmental specifications for your Fujitsu Stylistic Tablet PC. Specifications of particular configurations will vary. Configuration Label The configuration label located on the back of your Tablet PC contains specific information regarding the options you've - Fujitsu ST6012 | User Guide - Page 83
-800 MHz SDRAM dual-channel memory module. • Two DIMM slots; upgradeable to 4 GB of total memory (2 GB x 2). Note that when 4 MB of memory is installed in a Windows Vista system, approximately 3.3 GB is addressable memory; the upper memory is reserved by Vista for hardware usage. • Optional Intel - Fujitsu ST6012 | User Guide - Page 84
video memory using Dynamic Video Memory Technology (DVMT), as determined by the amount of system memory: Operating System Windows Vista Windows XP System Memory 1 GB 2 GB 3 GB 4 GB 1 GB 2 GB 3 GB 4 GB Maximum Graphics Memory mm diameter • Two built-in dual digital microphones 84 - Specifications - Fujitsu ST6012 | User Guide - Page 85
shock-mounted, Shock Sensor utility • MLC Solid State Drive, 64 GB, 2.5" Communications • Gigabit LAN: Internal wired 10/100/1000 Gigabit Ethernet Bluetooth: Bluetooth 2.1 device for wireless personal area network communication Security Features Trusted Platform Module The Stylistic Tablet PC ST6012 - Fujitsu ST6012 | User Guide - Page 86
Device Ports On the Stylistic Tablet PC: • PC Card slot for one Type I or Type II card: PCMCIA Standard 2.1 with CardBus support • Memory Stick/SD Card slot • One 15-pin D-SUB connector for VGA external monitor (see Display specifications) • Two USB 2.0 (Universal Serial Bus) connectors for input/ - Fujitsu ST6012 | User Guide - Page 87
battery, rechargeable, 6-cell 10.8V, 5200 mAh AC Adapter Autosensing 100-240V AC, supplying 16V DC, 3.75A, 60W to the Tablet PC ) with 6-cell battery Environmental Requirements Temperature 10,000 feet (3,048 m) maximum Popular Accessories For ordering or additional information on Fujitsu accessories - Fujitsu ST6012 | User Guide - Page 88
free trial) • ArcSoft Webcam Companion 2 • Roxio Creator LJ (on select models) • Google Desktop • Google Tool Bar • Google Picasa • OmniPass Fingerprint application • Fujitsu Driver Update utility • Microsoft Office Ready 2007 (60-day free trial) with Activation Assistant • Microsoft Office OneNote - Fujitsu ST6012 | User Guide - Page 89
capturing still and video images, and editing photos. Norton Internet Security Your system is preinstalled with a free 90-day trial version of Symantec's Norton Internet Security™. Norton Internet Security is a suite of tools designed to protect your Tablet PC from computer viruses, hackers, spyware - Fujitsu ST6012 | User Guide - Page 90
system configuration is installed on your system: • Microsoft Windows Vista Business Edition With Microsoft Office Ready and Microsoft Office Activation Assistant • Microsoft Windows XP Tablet PC Edition With Microsoft Office Ready and Microsoft Office Activation Assistant 90 - Specifications - Fujitsu ST6012 | User Guide - Page 91
Fujitsu could void this user's authority to operate the equipment. FCC NOTICES Notice to Users of Radios and Television This equipment has been tested energy and, if not installed and used in accordance with the instructions, may cause harmful interference to radio communications. However, there is - Fujitsu ST6012 | User Guide - Page 92
DOC (INDUSTRY CANADA) NOTICES Notice to Users of Radios and Television This Class B digital apparatus meets all requirements of Canadian Interference-Causing Equipment Regulations. CET appareil numérique de la class B respecte toutes les exigence du Réglement sur le matérial brouilleur du Canada. 92 - Fujitsu ST6012 | User Guide - Page 93
Appendix A: WLAN User's Guide FCC Regulatory Information Please note the following regulatory information related risk to other devices or services is perceived or identified as harmful. In cases in which the policy regarding use of Wireless LAN devices in specific environments is not clear (e.g., - Fujitsu ST6012 | User Guide - Page 94
undesired operation of this device. FCC Interference Statement This equipment has been tested and found to comply with the limits for a Class B digital device energy. If not installed and used in accordance with the instructions, it may cause harmful interference to radio communications. However, - Fujitsu ST6012 | User Guide - Page 95
that any health problems are associated with wireless LAN radio device has been tested and found to comply with FCC be exported or transferred from the US or Canada without an approved US Department of Commerce export license not expressly authorized by Fujitsu Computer Systems Corp. may invalidate - Fujitsu ST6012 | User Guide - Page 96
rest of the manual). Before using the WLAN device, read this manual carefully to ensure it's correct operation. Keep this manual in a safe IEEE802.11g mode; and 11 Mbps in IEEE802.11b mode. • The WLAN devices support the following encryption methods - WEP, TKIP, CKIP, and AES encryption. • The - Fujitsu ST6012 | User Guide - Page 97
Using this Device Ad Hoc Mode "Ad Hoc Mode" refers to a wireless network architecture where wireless network connectivity between multiple computers is established without a central wireless network device, typically known as Access Point(s). Connectivity is accomplished using only client devices in - Fujitsu ST6012 | User Guide - Page 98
wired network. Corporate wireless networks operate in infrastructure mode because they require access to the WLAN in order to access services, devices, and computers (e.g., file servers, printers, databases). Internet ADSL modem, cable modem, or similar Wired LAN Access Point* Wireless LAN *An - Fujitsu ST6012 | User Guide - Page 99
operating system that your mobile computer comes with has been pre-configured to support the WLAN device. • The wireless devices support IEEE802.11a, IEEE802.11b, IEEE802 device may be desired in certain circumstances (to extend battery life) or where certain environments require it (i.e. hospitals, - Fujitsu ST6012 | User Guide - Page 100
Wireless LAN models. WLAN/UWB/Bluetooth Switch Figure 24. Wireless LAN/UWB/Bluetooth On/Off Switch Location Disconnection Using the taskbar at the bottom right of your screen. 2 Choose Disconnect from a network. Activating the Switch • In Windows, by right-clicking the WLAN icon then clicking - Fujitsu ST6012 | User Guide - Page 101
connectivity using the software that is built into Windows Vista. Support for most industry standard security solutions is contained in you would like to make, make a selection. For an infrastructure network, select "Manually create a network profile. For ad hoc network, select "Create an ad hoc - Fujitsu ST6012 | User Guide - Page 102
WLAN Using Windows XP Procedure network, select "Manually create a network profile. For ad hoc network, select "Choose from a list of Internet service providers". 7 Connection to the network After you have configured your computer, you can connect to an active network by clicking on the Wireless - Fujitsu ST6012 | User Guide - Page 103
on Wireless Network Connection. If Enable appears at the top of the menu, click it to enable the device. In Windows Vista, go to Start -> Control Panel, and double-click on Windows Mobility Center. If the wireless network is off, click the [Turn wireless on] button. 103 Troubleshooting the WLAN - Fujitsu ST6012 | User Guide - Page 104
Problem Unavailable network connection (continued) Possible Cause The computer to be connected is turned off RF interference from Access Points or other wireless networks Possible Solution Check if the computer your network administrator for the correct settings. 104 Troubleshooting the WLAN - Fujitsu ST6012 | User Guide - Page 105
Channel Bonding Security Encryption Types - WEP, TKIP, AES***, WPA 1.0 compliant Encryption Key lengths Supported: 64 bits and 128 bits 802.1x/EAP Maximum recommended number of computers to be connected over wireless LAN (during ad hoc connection) 10 units or less **** 105 WLAN Specifications - Fujitsu ST6012 | User Guide - Page 106
* "Wi-Fi based" indicates that the interconnectivity test of the organization which guarantees the interconnectivity of wireless LAN (Wi-Fi length of 24 bits. **** Depending on practical environments, the allowable number of computers to be connected may be decreased. 106 WLAN Specifications - Fujitsu ST6012 | User Guide - Page 107
click on Toshiba. Select Bluetooth, then select User's Guide. Windows Vista: o access the Help file, click [Start] -> All Programs, and click on Bluetooth, then select User's Guide. For additional information about Bluetooth Technology, visit the Bluetooth Web site at: www.bluetooth.com. 107 Using - Fujitsu ST6012 | User Guide - Page 108
radio interference to the licensed service, this device is intended to be operated indoors and away from windows to provide maximum shielding. Equipment Fujitsu. Unauthorized modification will void the equipment authorization from the FCC and Industry Canada and the warranty. 108 Using the Bluetooth - Fujitsu ST6012 | User Guide - Page 109
for Fujitsu mobile computers. What computer for association before the UWB hub will be recognized by the UWB module. Please refer to your UWB hub manual for detailed installation instructions. The Wireless LAN/UWB/Bluetooth Bluetooth ON/OFF switch to the ON position (refer to your system User's Guide - Fujitsu ST6012 | User Guide - Page 110
at the top left of the display screen (when holding the display in portrait mode). Fingerprint Sensor Device Figure 25. Fingerprint sensor With a fingerprint sensor, you can avoid having to enter a username and password every time you want to: • Log onto Windows • Resume from sleep mode • Cancel - Fujitsu ST6012 | User Guide - Page 111
the fingerprint sensor before granting access to the Windows desktop. This device results in a secure authentication system for restricting access to your computer, system tray at the bottom right of the screen. • The Softex program group in the Programs group of the Start menu 111 - Introducing the - Fujitsu ST6012 | User Guide - Page 112
; it also requires specific Operating Systems (OS's). The minimum requirements are as follows: • Windows XP Professional or WIndows Vista operating system • At automatically places an icon (Softex OmniPass) in the Windows Control Panel as well as a golden key shaped icon in the taskbar. 112 - - Fujitsu ST6012 | User Guide - Page 113
Windows Desktop, double-click the key-shaped OmniPass icon in the taskbar (usually located in the lower right corner of the screen ), or, Click the Start button, select Settings, and click Control Panel (if you are using Windows window appears Click Start on the Windows taskbar. Select Settings, - Fujitsu ST6012 | User Guide - Page 114
credentials of the password protected resource. If John were to go to another computer without he OmniPass account to access his webmail, he would need to enter his original webmail credentials ("John_02" and "Tablet PC") to gain access. If he attempts his OmniPass user credentials on a system other - Fujitsu ST6012 | User Guide - Page 115
guide cases, the Domain: value will be your Windows computer name. In a corporate environment, or when accessing corporate resources, the Domain: may not be your Windows computer name. Click [Next] to continue. 3 In this step OmniPass captures your fingerprint a Congratulations screen indicating your - Fujitsu ST6012 | User Guide - Page 116
, the Verify Fingerprint screen will automatically appear. To verify your enrolled fingerprint, place your fingertip on the sensor and hold it there as if you were having a fingerprint captured. Successful fingerprint verification will show a green fingerprint in the capture window and the text - Fujitsu ST6012 | User Guide - Page 117
you see this toolbar, OmniPass is prompting you to authenticate. The Logon Authentication window indicates what OmniPass-restricted function you are attempting. The icons in the lower left (fingerprint and key) show what authentication methods are available to you. Selected authentication methods - Fujitsu ST6012 | User Guide - Page 118
supply the appropriate credentials: an enrolled finger for the fingerprint capture window or your master password for the master password prompt enter something that reminds you of the website, the company, or the service you are logging into. In its secure database, OmniPass associates this friendly - Fujitsu ST6012 | User Guide - Page 119
Site, OmniPass will prompt you for your master password or fingerprint authentication device. Once you have authenticated with OmniPass your credentials will be changed in Vault Management. The following cases are applicable to using OmniPass to login to: Windows, remembered web sites, and all other - Fujitsu ST6012 | User Guide - Page 120
, your login options must be set either for classic login, or for fast user switching and logon screen to be enabled to use your fingerprint to log on to Windows. To change this go to Control Panel, select User Accounts and then click Change the way users log on or off. If your - Fujitsu ST6012 | User Guide - Page 121
The exception to the above rule is when resetting the Windows password. If your password is reset in Windows, the next time you login to Windows, OmniPass will detect the password change and prompt you to SITES AND PASSWORD PROTECTED DIALOGS ARE LOST. 121 - Introducing the Fingerprint Sensor Device - Fujitsu ST6012 | User Guide - Page 122
identity you want as default and click [Set as Default]; click [Apply] to ensure the settings are saved. If you log in to OmniPass with a fingerprint device, you will automatically be logged in to the default identity for that OmniPass user. You can choose the identity with which you are logging - Fujitsu ST6012 | User Guide - Page 123
AND HAVE ALL YOUR REMEMBERED SETTINGS AND FINGERPRINTS INSTANTLY. • YOU DON'T FORGET THE WINDOWS LOGIN CREDENTIALS WHEN EXPORTING. WHEN YOU copy of it in a safe place. This .opi file contains all your user specific OmniPass data, and it is both encrypted and password protected. This user profile - Fujitsu ST6012 | User Guide - Page 124
If you don't remember the value for Domain, in a PC or SOHO environment Domain should be your computer name. OmniPass will notify you if the user was successfully imported. Things to Know Regarding Import/Export • Assume you export a local Windows User profile from OmniPass. You want to import that - Fujitsu ST6012 | User Guide - Page 125
and click the OmniPass Control Center selection. • Open the Windows Control Panel (accessible via Start button --> Settings --> Control Panel will prompt you to authenticate. Authenticate with the credentials (or enrolled fingerprint) of the user you wish to remove. OmniPass will prompt you to - Fujitsu ST6012 | User Guide - Page 126
any setting where users must enter a username and password to log into a computer. This is the default setting. With the second option, Manually log on to OmniPass at startup, OmniPass will prompt you to login once you have logged on to Windows. With the third option, Do not log on to OmniPass at - Fujitsu ST6012 | User Guide - Page 127
Troubleshooting You cannot use OmniPass to create Windows users. You must first create the Windows user, and you will need administrative privileges to do that. Once the Windows user is created, you can add that user to OmniPass using the same username and password Cannot add Windows Tools, - Fujitsu ST6012 | User Guide - Page 128
Password and you will be prompted with a dialog to reconfirm your password. Enter the new password to your Windows user account and click OK. If the error persists, then it is unlikely the problem is due to your Windows user account password changing. 128 - Introducing the Fingerprint Sensor Device - Fujitsu ST6012 | User Guide - Page 129
65 used in Standby mode 52 battery release latch 19, 42 BIOS 32 application buttons, for 32, 34 Bluetooth Where to Find Information 107 bridge battery 65 built-in microphone 17 C calibrating the pen 61 charge/DC input icon 26 charging the battery pack 63 cleaning the display screen 75 Click Me! 40 - Fujitsu ST6012 | User Guide - Page 130
OmniPass 117 fingerprint sensor device 17 Fujitsu Contact Information 13 Fujitsu Driver Update utility 40, 80, 90 Fujitsu Shopping Online Area Network (LAN) 42 Lock 42 low-battery warning 52 M make a Factory Recovery DVD 78 memory cover 18 Memory Stick 21 installing 66 microphone 23 microphone jack - Fujitsu ST6012 | User Guide - Page 131
up the pen tablet 46 Pre-Installed Software 88 Adobe Acrobat Reader 89 Google Toolbar 89, 90 manuals 88 problems, solving 76 protecting the display screen 73 R Recovering Factory and System Images 80 Registration 49 Regulatory Information 91 removable battery pack 19 removing a Memory Stick 67 - Fujitsu ST6012 | User Guide - Page 132
22, 41 using the pen 59 W Warranty 14 Windows XP configuring the Wireless LAN 102 Windows XP Tablet PC Edition 12, 15 Wireless LAN 19 configuring 96 connection to the network 102 deactivating/disconnecting 99 modes 97 Specifications 105 Troubleshooting 103 wireless LAN/UWB/Bluetooth on/off switch 19
-
 1
1 -
 2
2 -
 3
3 -
 4
4 -
 5
5 -
 6
6 -
 7
7 -
8
-
9
-
10
-
11
-
12
-
13
-
14
-
15
-
16
-
17
-
18
-
19
-
20
-
21
-
22
-
23
-
24
-
25
-
26
-
27
-
28
-
29
-
30
-
31
-
32
-
33
-
34
-
35
-
36
-
37
-
38
-
39
-
40
-
41
-
42
-
43
-
44
-
45
-
46
-
47
-
48
-
49
-
50
-
51
-
52
-
53
-
54
-
55
-
56
-
57
-
58
-
59
-
60
-
61
-
62
-
63
-
64
-
65
-
66
-
67
-
68
-
69
-
70
-
71
-
72
-
73
-
74
-
75
-
76
-
77
-
78
-
79
-
80
-
81
-
82
-
83
-
84
-
85
-
86
-
87
-
88
-
89
-
90
-
91
-
92
-
93
-
94
-
95
-
96
-
97
-
98
-
99
-
100
-
101
-
102
-
103
-
104
-
105
-
106
-
107
-
108
-
109
-
110
-
111
-
112
-
113
-
114
-
115
-
116
-
117
-
118
-
119
-
120
-
121
-
122
-
123
-
124
-
125
-
126
-
127
-
128
-
129
-
130
-
131
-
132
 |
 |

User’s Guide
Learn how to use your
Fujitsu Stylistic
ST6012 Tablet PC