Garmin Foretrex 101 Owner's Manual
Garmin Foretrex 101 - Hiking GPS Receiver Manual
 |
UPC - 753759046101
View all Garmin Foretrex 101 manuals
Add to My Manuals
Save this manual to your list of manuals |
Garmin Foretrex 101 manual content summary:
- Garmin Foretrex 101 | Owner's Manual - Page 1
Foretrex™ 101 personal navigator® owner's manual - Garmin Foretrex 101 | Owner's Manual - Page 2
Web site (www.Garmin.com) for current updates and supplemental information concerning the use and operation of this and other Garmin products. Garmin®, AutoLocate®, Personal Navigator®, MapSource®, TracBack®, and BlueChart® are registered trademarks and PanTrack™ and Foretrex™ are trademarks of - Garmin Foretrex 101 | Owner's Manual - Page 3
which they appear. Introduction About This Manual Standard Package Contents: 1 Foretrex 101 Unit 1 Strap Extension 1 Wrist Strap 1 Owner's Manual 1 Quick Start Guide Check to see that your package includes the items listed above. If any parts are missing, contact your Garmin dealer immediately. i - Garmin Foretrex 101 | Owner's Manual - Page 4
as waypoints and routes will be retained in the unit's memory without the need for battery power. Immersing the Unit in Water The Foretrex 101 is To resolve problems that cannot be remedied using this guide, contact Garmin Product Support in the U.S.A. at 800/800.1020 or Garmin Europe at - Garmin Foretrex 101 | Owner's Manual - Page 5
the Unit in Water ii Table of Contents iii Overview 1 Getting Started 1 Foretrex 101 Overview 1 Using the Buttons 2 Using the Wrist Strap 3 Installing Batteries 5 Turning on the Foretrex 101 6 Using the Main Pages 7 Switching Between the Main Pages .......... 7 Main Pages 8 Satellite - Garmin Foretrex 101 | Owner's Manual - Page 6
Interface Page 51 Setup Menu: Set System 52 Set System Page 52 GPS Mode 53 Owner Info 53 Appendix 54 Specifications 54 Optional Accessories 54 Physical 54 Performance 54 Power 54 Data Field Options 55 Compliance, License, and Warranty Information 57 FCC Compliance 57 Software License - Garmin Foretrex 101 | Owner's Manual - Page 7
for complete information. The images below describe the buttons and some features of your Foretrex 101. Strap spring bars Back View (without strap) Built-in GPS Antenna PC Interface Cable Connector under weather cap Overview Getting Started Front View LCD Display (with Backlight) Battery - Garmin Foretrex 101 | Owner's Manual - Page 8
Overview Getting Started 2 Using the Buttons POWER GOTO PAGE ENTER/ MARK DOWN UP The POWER button: • Press and hold to turn unit on and off • Press and release to turn display backlight on and off The GOTO button: • Press to initiate a Goto (navigate to a specific destination/waypoint) The PAGE - Garmin Foretrex 101 | Owner's Manual - Page 9
Using the Wrist Strap The Foretrex 101 has been designed to comfortably fit your wrist. For best perfor- mance, wear the Foretrex 101 Foretrex 101 to your wrist: 1. With the strap open, place the Foretrex 101 on your wrist on the extension. 2. Place the Foretrex 101 on your wrist or arm. 3. Slide the - Garmin Foretrex 101 | Owner's Manual - Page 10
the Foretrex 101 steady with one hand, use a jeweler's band pin removing tool or a very soft flat head screwdriver. Catch the spring bar's loaded stem and pull it back enough for the band to clear the case's edge. To replace the wrist strap on the Foretrex 101: 1. To reinstall, insert the spring bar - Garmin Foretrex 101 | Owner's Manual - Page 11
the unit. NOTE: When replacing batteries, use only new or fully charged instructions for proper care and disposal of used batteries. Do not incinerate used batteries, as internal materials may ignite with explosive violence. Overview Getting Started Installing AAA batteries into the Foretrex 101 - Garmin Foretrex 101 | Owner's Manual - Page 12
Started Satellite Page Turning on the Foretrex 101 After you have placed the batteries in the Foretrex 101, it is ready for use. Allow the Foretrex 101 time to track satellites and determine your position the first time you use it. Upon startup, the GPS signal bar appears. As the Foretrex 101 - Garmin Foretrex 101 | Owner's Manual - Page 13
the Foretrex 101 is found on six main 'pages' (or display screens). These pages are the Satellite, Map, Navigation, Trip Computer, Timer (if enabled), and Main Menu. Switching Between the Main Pages Simply press the PAGE button to switch between pages as shown below. Overview Getting Started - Garmin Foretrex 101 | Owner's Manual - Page 14
the location you last used your Foretrex 101 unit, or have not used your Foretrex 101 in more than one month, allow time for the unit to track satellites by leaving it outside with a clear view of the sky for 15 to 30 minutes. Using the Satellite Page Options Press the ENTER button to display the - Garmin Foretrex 101 | Owner's Manual - Page 15
Page. 2. Press ENTER to display the Satellite Page Options. 3. Press UP/DOWN to highlight 'SETUP DISPLAY' from the options menu. Press ENTER. Use the UP/DOWN buttons to highlight the line below 'CONTRAST'. Press ENTER. Or Press UP/DOWN on the Satellite Page to automatically bring up the contrast - Garmin Foretrex 101 | Owner's Manual - Page 16
world', Foretrex 101 automatically rotates the map as you move, so that waypoints that are and holding the UP button to view a larger area (zoom out), or the DOWN button for viewing a smaller waypoints. Refer to the procedure titled "To Measure Distance" for instructions on measuring distance. 10 - Garmin Foretrex 101 | Owner's Manual - Page 17
start a TRACBACK or a Goto, MARK a waypoint, or ZOOM In or Out. The following option is shown only if you are actively navigating to a destination: Stop Navigation: Press ENTER when this is highlighted to stop any active navigation. Navigation refers to any time you are using the Foretrex to guide - Garmin Foretrex 101 | Owner's Manual - Page 18
Press ENTER when the field to the right of 'FROM' is highlighted to select a waypoint from which to measure. Use the arrow buttons to highlight the desired waypoint from the waypoint list. Press ENTER to select the waypoint. 4. Press ENTER when the field to the right of 'TO' is highlighted to select - Garmin Foretrex 101 | Owner's Manual - Page 19
list and description of the data fields available in the Foretrex, refer to "Data Field Options" found in the "Appendix". Restore Defaults: Press ENTER when this is highlighted to restore the unit to the default Navigation Page settings. When you are navigating to a destination the following option - Garmin Foretrex 101 | Owner's Manual - Page 20
. For a complete list and description of the data fields available in the Foretrex, refer to "Data Field Options" found in the "Appendix". Reset Max Speed: Press ENTER when this is highlighted to reset the Maximum Speed achieved during a trip. Reset Trip Data: Press ENTER when this is highlighted to - Garmin Foretrex 101 | Owner's Manual - Page 21
enable the Timer Page: 1. Press the PAGE button until the Main Menu Page is displayed. 2. Use the UP and DOWN buttons to highlight 'SETUP' and press ENTER. 3. Use the UP and DOWN buttons to highlight 'SET TIMER' and press ENTER. 4. Use the UP and DOWN buttons to highlight the field below 'SHOW TIMER - Garmin Foretrex 101 | Owner's Manual - Page 22
displayed. 5. Use the UP and DOWN buttons to highlight the number position you want to change and press ENTER. 6. Use the UP and DOWN buttons to highlight the to count down from is entered. 7. Use the UP and DOWN buttons to highlight 'OK' and press ENTER. When you use the timer, it will count down - Garmin Foretrex 101 | Owner's Manual - Page 23
down time is entered, you can use the timer for a variety of applications, such as running and sailboat racing. The synchronization and quick reset capabilities make the Foretrex an extremely handy timer. To stop and start the timer: 1. Press the PAGE button until the Timer Page is displayed. 2. To - Garmin Foretrex 101 | Owner's Manual - Page 24
Menu Page Basics The Main Menu Page gives you access to the Foretrex 101 unit's waypoints, tracks, routes, and setup screens. When the Main Menu Page is displayed, use the UP or DOWN buttons to highlight the desired sub-page (Waypoints, Tracks, Routes, or Setup), and press ENTER to open that page - Garmin Foretrex 101 | Owner's Manual - Page 25
the alphabetical tab containing the desired waypoint, then press the ENTER button. 4. Press the UP or DOWN button to select the waypoint and press the ENTER button to display the Review Waypoint Page. Main Menu Pages Waypoints Menu Page Waypoints Menu Mark Waypoint Page List All Waypoints Page 19 - Garmin Foretrex 101 | Owner's Manual - Page 26
Page 3. Press the UP or DOWN button to select the waypoint and press the ENTER button to display the Review Waypoint Page. To delete all waypoints: 1. From the Main Menu Page press the UP or DOWN button to highlight 'WAYPOINTS', then press the ENTER button. 2. Select 'DELETE ALL' and press the - Garmin Foretrex 101 | Owner's Manual - Page 27
two ways: • Press and hold the ENTER/MARK button. The Mark Waypoint Page displays. • Press PAGE to view the Main Menu. Select Waypoints and press ENTER. Select 'CREATE NEW'. The Mark Waypoint Page displays. Editing a Waypoint After you have marked a waypoint using on of the above methods, the Mark - Garmin Foretrex 101 | Owner's Manual - Page 28
the 'NAME' field (001 is the default name for the first waypoint). 3. Press the ENTER button to display the Edit Waypoint Name Page. 4. Press the ENTER button to display a drop-down list of characters. 5. Using the UP and DOWN buttons, scroll to the desired letter or number and press enter. Selecting - Garmin Foretrex 101 | Owner's Manual - Page 29
ENTER button. Using the UP or DOWN button, scroll through the choices and highlight the one you want. Press the ENTER button and the position place is now changed. Repeat until all changes are made. 4. Press the UP or DOWN button to highlight 'OK' and press ENTER to return to the Mark Waypoint Page - Garmin Foretrex 101 | Owner's Manual - Page 30
and location (just as on the Mark Waypoint Page). You can also delete the waypoint, display the waypoint on the Map Page, start a Goto, and display the Review Waypoint Page Options. To delete a waypoint: 1. On the Review Waypoint Page, press the UP or DOWN button to highlight 'DELETE'. 2. Press the - Garmin Foretrex 101 | Owner's Manual - Page 31
Press the ENTER button to display the pop-up Options list. 3. Use the UP and DOWN buttons to highlight the desired option and press ENTER. The desired page will then open. Main Menu Pages Waypoints Menu Page Review Waypoint Page Goto Waypoint: Navigation Page displaying Review Waypoint Page Options - Garmin Foretrex 101 | Owner's Manual - Page 32
Pages Waypoints Menu Page Waypoint Options Project Waypoint Page Edit Number Page 26 Projecting a Waypoint Using the Project waypoint feature, the Foretrex 101 can create a waypoint at a specified distance and bearing using an existing waypoint as a reference. You can also change the waypoint name - Garmin Foretrex 101 | Owner's Manual - Page 33
'LIST ALL' and press ENTER to display the Waypoint List Page. 2. Select a waypoint from the list and press the ENTER button to display the Review Waypoint Page. 2. Use the UP or DOWN button to highlight 'OPTIONS' and press ENTER. 3. Use the UP or DOWN button to highlight 'HUNT/FISH' and press ENTER - Garmin Foretrex 101 | Owner's Manual - Page 34
LIST ALL' and press ENTER to display the Waypoint List Page. 2. Select a waypoint from the list and press the ENTER button to display the Review Waypoint Page. 2. Use the UP or DOWN button to highlight 'OPTIONS' and press ENTER. 3. Use the UP or DOWN button to highlight 'SUN/MOON' and press ENTER to - Garmin Foretrex 101 | Owner's Manual - Page 35
contains information about points along its path, including time, and position. The Foretrex 101 uses this information to allow you to navigate using the saved track. The track log starts recording as soon as the Foretrex 101 gets a location fix. For the best results, clear the track log before you - Garmin Foretrex 101 | Owner's Manual - Page 36
you have panned the track log (using the UP and DOWN buttons), press ENTER to display the Pan Options. TracBack guides you to where you started by following the track log that you left behind, allowing you to return along a traveled path without marking any waypoints. You can retrace your track in - Garmin Foretrex 101 | Owner's Manual - Page 37
: Press ENTER when this is highlighted to restore the unit to the default Track Setup settings. Using Saved Tracks When you have made a track that you would like to save and use in the future, save it using the steps below. To avoid overwriting tracks, save the track log before the "Track Memory - Garmin Foretrex 101 | Owner's Manual - Page 38
'SAVE TRACK' and press ENTER to display the track log. 3. Use the UP and DOWN buttons pan the track log and select a beginning point for the track 'NAVIGATE', 'SHOW MAP', 'RENAME', and 'DELETE'. To delete all saved tracks: 1. Press the PAGE button to access the Main Menu. Press the ENTER button when - Garmin Foretrex 101 | Owner's Manual - Page 39
, highlight a track and press ENTER to display the options for that track. Navigate: Press ENTER to navigate this track. Select to begin navigation from the beginning point or the end point. Main Menu Pages Tracks Menu Page Navigate Tracks Page Show Map: Press ENTER to display the track on the Map - Garmin Foretrex 101 | Owner's Manual - Page 40
Using the Routes Menu Page Route navigation allows you to create a sequence of intermediate waypoints that lead you to your final destination. The Foretrex 101 stores 20 routes, each with up to 125 waypoints the UP or DOWN button to highlight 'ROUTES', then press the ENTER button. 2. Select 'CREATE - Garmin Foretrex 101 | Owner's Manual - Page 41
Using the Route Page Each route saved in your Foretrex 101 is displayed in the Routes List. Route displayed, use the UP and DOWN buttons to highlight 'FOLLOW'. 2. Use the UP and DOWN buttons to select the point you would like to navigate to and press ENTER. 3. The Navigation Page automatically opens - Garmin Foretrex 101 | Owner's Manual - Page 42
to the procedure titled "To Remove a Waypoint from the Route" later in this section to learn how to delete points within a route. To delete all routes: 1. From the Main Menu Page press the UP or DOWN button to highlight 'ROUTES', then press the ENTER button. 2. Select 'DELETE ALL' and press the - Garmin Foretrex 101 | Owner's Manual - Page 43
. Distance: Press ENTER to enter a specific number of feet from the next waypoint for the Foretrex 101 to begin guiding you to that waypoint. For example, if you enter 1000 feet, the Foretrex 101 will begin guiding you to the next waypoint (the next leg of the route) when you are within a 1000 feet - Garmin Foretrex 101 | Owner's Manual - Page 44
route name and the route order. You can add waypoints at any point along the route. You can also remove waypoints from the route. To edit a route, highlight steps 3 and 4 until the desired route name is entered. 5. Use the UP and DOWN buttons to highlight 'OK' and press ENTER. The new route name is - Garmin Foretrex 101 | Owner's Manual - Page 45
Route Page displaying, use the UP and DOWN buttons to select the waypoint you would like to enter the new waypoint before. Press the ENTER button. 2. Use the UP and DOWN buttons to highlight 'INSERT' then press ENTER. 3. Use the UP, DOWN, and ENTER buttons to select the desired waypoint in the Add - Garmin Foretrex 101 | Owner's Manual - Page 46
in the compass. To follow the route: 1. With the desired Route displayed, use the UP and DOWN buttons to highlight 'FOLLOW'. 2. On the pop-up list, highlight the waypoint you would like to travel to and press ENTER. The Navigation Page opens to lead you to your destination. Simply follow the arrow - Garmin Foretrex 101 | Owner's Manual - Page 47
Using the Setup Menu The Setup Menu allows you to setup several aspects of the Foretrex 101, such as the timer, display, interface, and system. You must access the Setup Menu and then select one of the options in the Setup Menu to access the individual Setup Pages. - Garmin Foretrex 101 | Owner's Manual - Page 48
program your Foretrex to count down from two minutes. You can also set the action the timer takes when it expires. To set the Timer: 1. Press the PAGE button until the Main Menu Page is displayed. 2. Use the UP and DOWN buttons to highlight 'SETUP' and press ENTER. 3. Use the UP and DOWN buttons to - Garmin Foretrex 101 | Owner's Manual - Page 49
to highlight the field below 'STOP' and press ENTER. 5. Use the UP and DOWN buttons to highlight 'STOP' and press ENTER to have the timer stop after it reaches 0:00. Select 'COUNT UP' and press ENTER to have the timer start counting up when it reaches 0:00. Expired and Interval Timer Tones You - Garmin Foretrex 101 | Owner's Manual - Page 50
The 24hour option sets the Foretrex 101 to display a 24-hour cycle (Military Time). To change the time format: 1. Press the PAGE button until the Main Menu Page is displayed. Use the UP and DOWN buttons to highlight 'SETUP' and press ENTER. 2. Use the UP and DOWN buttons to highlight 'SET TIME' and - Garmin Foretrex 101 | Owner's Manual - Page 51
can choose 'YES' to manually add daylight savings or 'NO' to remain on standard time. To change the daylight saving field: 1. Press the PAGE button until the Main Menu Page is displayed. Use the UP and DOWN buttons to highlight 'SETUP' and press ENTER. 2. Use the UP and DOWN buttons to highlight 'SET - Garmin Foretrex 101 | Owner's Manual - Page 52
you to adjust the display contrast. To adjust the Display contrast: 1. Press the PAGE button until the Main Menu Page is displayed. Use the UP and DOWN buttons to highlight 'SETUP' and press ENTER. 2. Use the UP and DOWN buttons to highlight 'SET DISPLAY' and press ENTER. 2. Press the UP or DOWN - Garmin Foretrex 101 | Owner's Manual - Page 53
maps with your Garmin unit, refer to "Using a Garmin GPS with Paper Land Maps", available for download at http://www.garmin.com/manuals/UsingaGarmtinGPSwithPaperLandMaps_Manual.pdf. Position Format The default position format (and the one most commonly used) for the Foretrex 101 is latitude and - Garmin Foretrex 101 | Owner's Manual - Page 54
Page Selecting the Map Datum Map Datums A map datum is a reference model of the earth's shape. Every map uses a map datum which is usually listed in the title block of the map. The default datum in the Foretrex 101 is WGS 84 (World Geodetic Survey, 1984). You should only change the datum if you - Garmin Foretrex 101 | Owner's Manual - Page 55
/Speed, Elevation, and Vertical Speed The Foretrex 101 allows you to customize speed and distance readouts. To change the Distance/Speed, Elevation, or Vertical Speed: 1. Press the PAGE button until the Main Menu Page is displayed. Use the UP and DOWN buttons to highlight 'SETUP' and press ENTER - Garmin Foretrex 101 | Owner's Manual - Page 56
to match the North Reference used on your paper map, if you are using one. Select from True True North, the direction from any location on the earth's surface to the 'north pole'. Maps are typically for travelling on land. If necessary, manually correct for the difference between Grid North and - Garmin Foretrex 101 | Owner's Manual - Page 57
etc. Effective use of this feature requires a working knowledge of these formats: GARMIN: The proprietary format used to exchange waypoint, track, and map data with a PC. GARMIN DGPS: Allows DGPS input using a GARMIN beacon receiver and a standard RTCM SC-104 and DGPS tuning. NMEA Out: Supports the - Garmin Foretrex 101 | Owner's Manual - Page 58
Set System Page The System Page allows you to select the GPS Mode, Beeper, and Language. You can also enter and view Owner Information and reset the unit to the defaults. GPS Mode: Enable ('NORMAL') and disable ('OFF') the GPS Receiver. You can also enable WAAS, Battery Save, or Demo modes. Refer - Garmin Foretrex 101 | Owner's Manual - Page 59
mode, the GPS receiver turns on and off alternatively to conserve power. Demo: The 'DEMO' mode is designed for dealers to show the features and functions of the Foretrex 101 to potential customers inside a closed building where satellite reception is not possible. There is no navigation possible in - Garmin Foretrex 101 | Owner's Manual - Page 60
Accessories Bicycle Mounting Kit PC Interface Cable Selected MapSource Products 54 Physical Case W (23.368 mm x 36.576 mm) Performance Receiver: Acquisition time: Update Rate: Position Accuracy: Velocity Accuracy: Dynamics: Antenna: for the Foretrex 101 may exceed the usable - Garmin Foretrex 101 | Owner's Manual - Page 61
has moved. Mov'n Avg-Average speed of the unit while moving. Mov'n Time-A running tally of movement time elapsed since last reset. Next Dest (Destination)-The next waypoint on your route. Next Dist (Distance)-The remaining distance to the next waypoint on the route. Appendix Data Field Options 55 - Garmin Foretrex 101 | Owner's Manual - Page 62
Appendix Data Field Options Next ETA-The estimated time of day you will reach the next waypoint on the route. Next ETE-The estimated time elapsed until you reach the next waypoint on the route. Odometer-A running tally of distance travelled, based upon the distance between secondby-second position - Garmin Foretrex 101 | Owner's Manual - Page 63
is on a different circuit than the receiver's circuit. • Consult the dealer or an experienced radio/TV technician for help. The Foretrex 101 does not contain any user-serviceable parts. Repairs should only be made by an authorized Garmin service center. Unauthorized repairs or modifications could - Garmin Foretrex 101 | Owner's Manual - Page 64
we invite you to re-register using our NEW on-line system. Many services provided by our new product registration system are now being automated and re-registering your purchase ensures you the best possible support from Garmin. Software License Agreement BY USING THE Foretrex 101, YOU AGREE TO BE - Garmin Foretrex 101 | Owner's Manual - Page 65
for one year from the date of purchase. Within this period, Garmin will at its sole option repair or replace any components that fail in normal use. Such repairs or replacement will be made at no charge to the customer for parts or labor, provided that the customer shall be responsible for any - Garmin Foretrex 101 | Owner's Manual - Page 66
. 44/1794.519944 Fax. 44/1794.519222 The Garmin Foretrex 101 has no user-serviceable parts. Should you ever encounter a problem with your unit, please take it to an authorized Garmin dealer for repairs. The Foretrex 101 is sealed shut. Any attempt to open the case to change or modify the unit in any - Garmin Foretrex 101 | Owner's Manual - Page 67
Foretrex 101 to secure the GPS unit so that it will not cause damage or personal injury in the event of an accident. Do not mount the Foretrex 101 over airbag panels or in a place where the driver of all GPS equipment. Although the Foretrex 101 is a precision electronic NAVigation AID (NAVAID - Garmin Foretrex 101 | Owner's Manual - Page 68
6 Auto Zoom On/Off 11 B Backlighting 9 Battery 52 Life 54 Battery Save 53 Beacon Receiver Setup 51 Bearing 55 Buttons 2 DOWN 2 ENTER 2 GOTO 2, 25 PAGE 2 POWER 2 UP 2 C Cleaning ii Clear Track Log 10, 12 Waypoint 20, 36 62 Computer PC 51 Trip 1, 7, 14, 55 Contrast 9, 46 Count Down 16, 42 Count Up 43 - Garmin Foretrex 101 | Owner's Manual - Page 69
1 Owner Info 52, 53 P Pan 30 Pan Track Log 11, 30 Paper Maps 47 PC 51 Position Format 47, 48, 55 Power 2, 6, 54 Project a Waypoint 26 R Record Tracks Interval 31 Rename Index Track 33 Reset Max Speed 14 Reset Trip 14 Review Waypoint Page 24 Route 34, 35, 36, 37, 38, 39, 40 Editing 38 Leg - Garmin Foretrex 101 | Owner's Manual - Page 70
Navigation 11, 13 Stop the Timer 17 Stop Time 56 Storage ii Strap 3 Strap Extension 3 Sunrise 28, 56 Sunset 28, 56 Sun and Moon Information 28 Symbol 64 Waypoints 22 Synchronize Timer 17 System 52, 53 T Temperature 54 Text Out 51 Time 56 Timeout Backlight 46 Timer 15, 17, 41, 42, 43 Quick Reset - Garmin Foretrex 101 | Owner's Manual - Page 71
- Garmin Foretrex 101 | Owner's Manual - Page 72
the latest free software updates (excluding map data) throughout the life of your Garmin products, visit the Garmin Web site at www.garmin.com. © Copyright 2004-2006 Garmin Ltd. or its subsidiaries Garmin International, Inc. 1200 East 151st Street, Olathe, Kansas 66062, U.S.A. Garmin (Europe) Ltd
-
 1
1 -
 2
2 -
 3
3 -
 4
4 -
 5
5 -
 6
6 -
 7
7 -
8
-
9
-
10
-
11
-
12
-
13
-
14
-
15
-
16
-
17
-
18
-
19
-
20
-
21
-
22
-
23
-
24
-
25
-
26
-
27
-
28
-
29
-
30
-
31
-
32
-
33
-
34
-
35
-
36
-
37
-
38
-
39
-
40
-
41
-
42
-
43
-
44
-
45
-
46
-
47
-
48
-
49
-
50
-
51
-
52
-
53
-
54
-
55
-
56
-
57
-
58
-
59
-
60
-
61
-
62
-
63
-
64
-
65
-
66
-
67
-
68
-
69
-
70
-
71
-
72
 |
 |
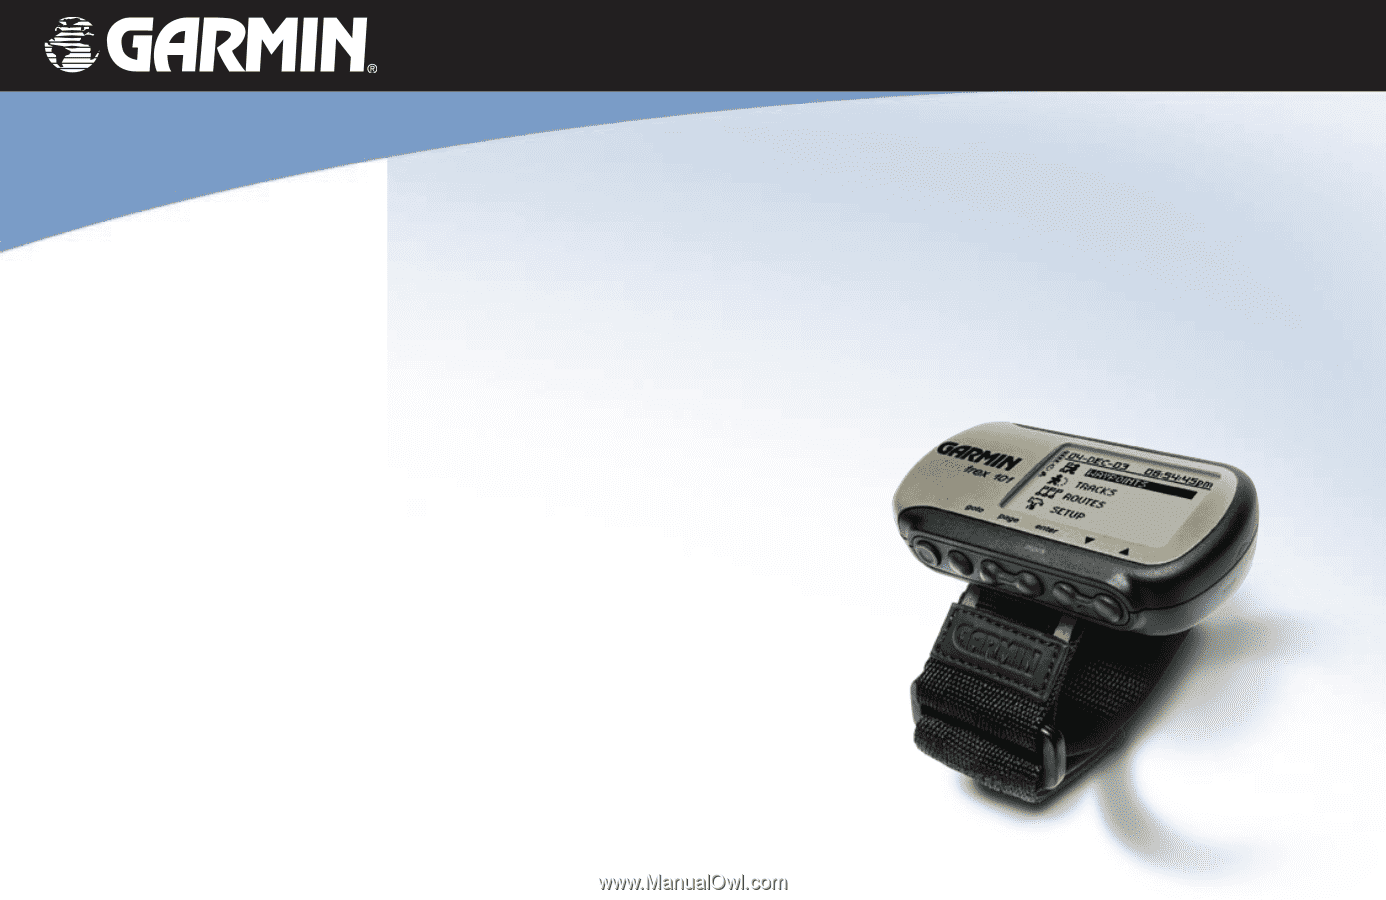
Foretrex
™
101
personal navigator
®
owner’s manual