Garmin Portable Kit echo User Guide - Page 4
Instructions d'installation du kit, portable echo™
 |
View all Garmin Portable Kit echo manuals
Add to My Manuals
Save this manual to your list of manuals |
Page 4 highlights
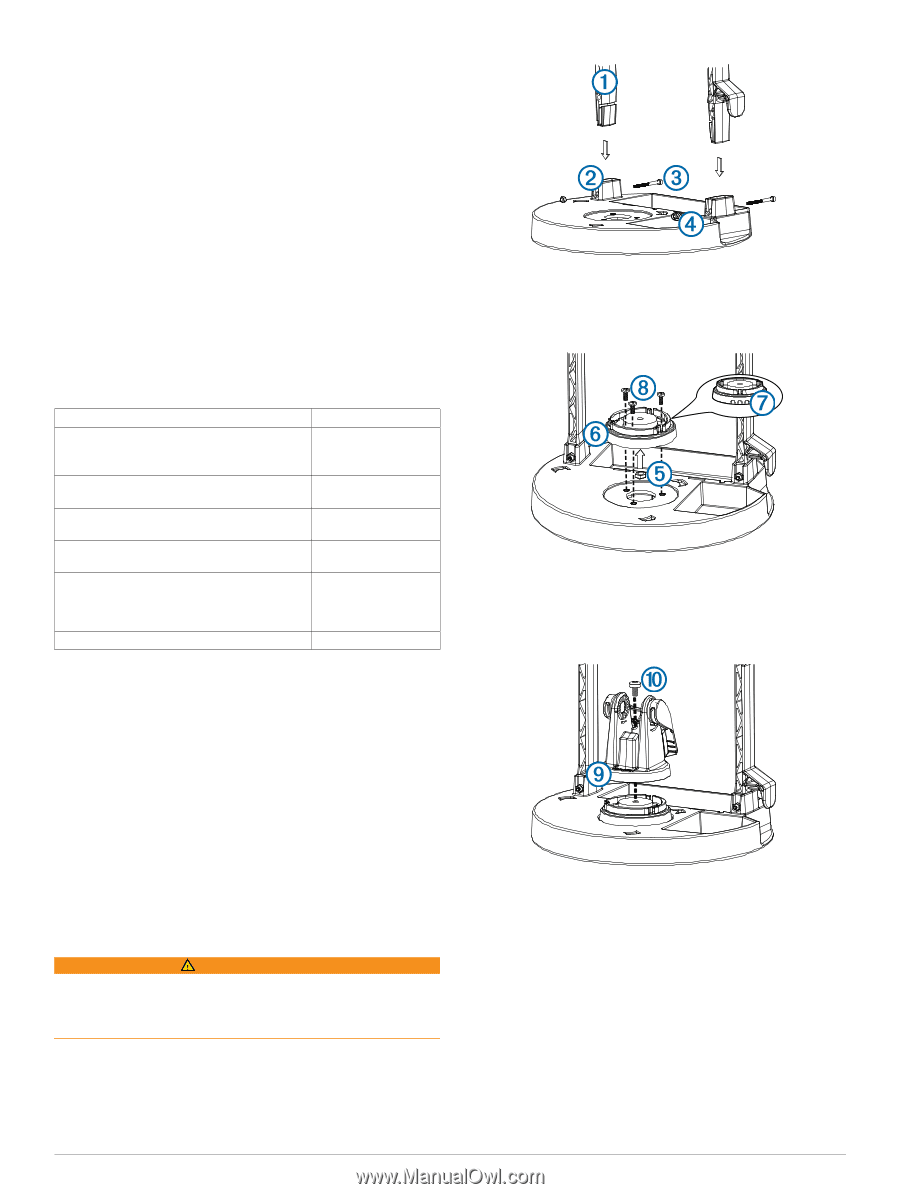
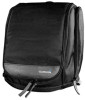
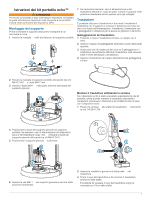
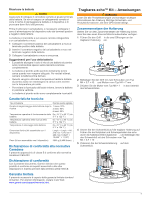
The battery is rechargeable and can be charged by connecting the battery to a wall charger. 1 Connect the positive connector on the wall charger onto the positive terminal on the battery. 2 Slide the negative connector on the wall charger onto the negative terminal on the battery. 3 Connect the wall charger to the wall outlet. Battery Tips • The life expectancy of a sealed lead acid battery can be extended by recharging often and not completely discharging the battery. • Sealed lead acid batteries slowly lose their charge while in storage. For best results, charge the battery prior to use. • When used in cold temperatures, sealed lead acid batteries do not hold the charge as long as in warmer temperatures. • To avoid spilling the internal acid, keep the battery in the upright position. • Sealed lead acid batteries are completely recyclable. Specifications Battery type Battery shelf life after charging Battery operating temperature range Battery charging temperature range Battery storage temperature range Physical size (assembled kit with device) Weight (unassembled kit with device) Sealed lead acid 1 month: 92% 3 months: 90% 6 months: 80% From 5° F to 122° F (from -15° C to 50° C) From 5° F to 104° F (from -15° C to 40° C) From 5° F to 104° F (from -15° C to 40° C) L × W × H: 10. 629 in. × 10. 629 in. × 11. 02 in. (270 mm × 270 mm × 280 mm) 8. 498 lb. (3855 g) Industry Canada Compliance Statement This Class B digital apparatus complies with Canadian ICES-003. Declaration of Conformity Hereby, Garmin® declares this product is in compliance with the essential requirements and other relevant provisions of Directive 2004/108/EC. Limited Warranty The Garmin standard limited warranty applies to this accessory. For more information, go to www.garmin.com/ support / warranty .html. Instructions d'installation du kit portable echo™ AVERTISSEMENT Consultez le guide Informations importantes sur le produit et la sécurité inclus dans l'emballage du GPS pour prendre connaissance des avertissements et autres informations sur le produit. Assemblage du support de montage Pour pouvoir fixer le support de montage, vérifiez que vous disposez bien d'un tournevis cruciforme. 1 Insérez la poignée dans les deux emplacements situés sur À le support portable . Á 4 2 Fixez la poignée au support portable à l'aide de deux vis M4×0,7×40 et de deux écrous M4×7 mm . Â Ã 3 Enfoncez l'écrou M6×1 dans le fond de la base de l'étrier Ä pivotant . Å 4 Placez la base de l'étrier pivotant sur le support portable, faites passer les câbles d'alimentation et de la sonde de l'echo par les trous de passage des câbles , puis fixez la Æ base de l'étrier pivotant à l'aide de trois vis M4×0,7×10 . Ç 5 Placez l'étrier pivotant sur sa base. È 6 Positionnez la vis M6×1,0 à travers l'étrier pivotant, puis É serrez-la dans la position voulue. 7 Au besoin, laissez suffisamment de mou dans les câbles d'alimentation et de la sonde pour que l'étrier puisse librement pivoter dans toutes les positions lorsque les câbles seront connectés. Sonde La sonde peut être installée de deux façons. Vous pouvez installer la sonde à l'aide du support à ventouse inclus pour la fixer sur les côtés ou le dessous de votre bateau. Vous pouvez également utiliser la sonde avec le flotteur fourni pour pêcher sous la glace ou depuis un ponton.
-
 1
1 -
 2
2 -
 3
3 -
 4
4 -
 5
5 -
 6
6 -
 7
7 -
 8
8 -
 9
9 -
 10
10 -
11
-
12
-
13
-
14
-
15
-
16
-
17
-
18
-
19
-
20
-
21
-
22
-
23
-
24
-
25
-
26
-
27
-
28
-
29
-
30
 |
 |