Garmin TB 10 Dog Device Owner's Manual - Page 8
Getting More Information, When properly installed, the connector plug snaps into
 |
View all Garmin TB 10 Dog Device manuals
Add to My Manuals
Save this manual to your list of manuals |
Page 8 highlights
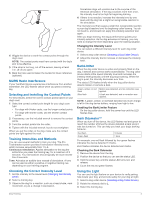
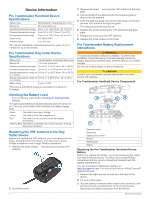
When properly installed, the connector plug snaps into the port. 12Replace the front plate, and replace and tighten the six screws to secure the front plate. 13Replace the screw securing the VHF antenna to the back plate. 14 Replace the cover over the VHF antenna. 15 Replace the three screws on the cover. 16 Verify the gasket is not sticking out of the device. Getting More Information You can find more information about this product on the Garmin website. • Go to www.garmin.com/ outdoor. • Go to www.garmin.com/ learningcenter. • Go to http: / / buy .garmin .com, or contact your Garmin dealer for information about optional accessories and replacement parts. Registering Your Device Help us better support you by completing our online registration today. • Go to http: / / my .garmin .com. • Keep the original sales receipt, or a photocopy, in a safe place. 6 Device Information
-
 1
1 -
2
-
 3
3 -
 4
4 -
 5
5 -
 6
6 -
 7
7 -
 8
8 -
 9
9 -
 10
10
 |
 |
