Garmin eTrex 20 Quick Start Manual - Page 7
Creating a Route, Tracks
 |
View all Garmin eTrex 20 manuals
Add to My Manuals
Save this manual to your list of manuals |
Page 7 highlights
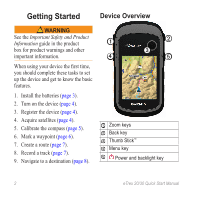
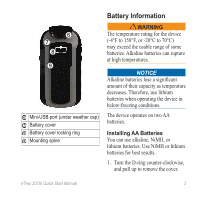
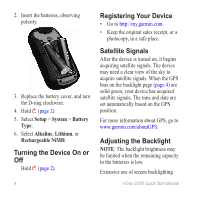
1. Select Where To?. 2. Select All POIs. 3. Enter the name or part of the name. 4. Select Done. Creating a Route A route is a sequence of waypoints that leads you to your final destination. 1. Select Route Planner > Create Route > Select First Point. 2. Select a category. 3. Select the first point in the route. 4. Select Use. 5. Repeat steps 2-4 until the route is complete. 6. Select back to save the route. Tracks A track is a recording of your path. The track log contains information about points along the recorded path, including time, location, and elevation for each point. Recording Track Logs 1. Select Setup > Tracks > Track Log. 2. Select Record, Do Not Show or Record, Show On Map. If you select Record, Show On Map, a line on the map indicates your track. 3. Select Record Method. 4. Select an option: • To record tracks at a variable rate that creates an optimum representation of your tracks, select Auto. • To record tracks at a specified distance, select Distance. • To record tracks at a specified time, select Time. 5. Select Recording Interval. eTrex 20/30 Quick Start Manual 7
-
 1
1 -
 2
2 -
 3
3 -
 4
4 -
 5
5 -
 6
6 -
 7
7 -
 8
8 -
 9
9 -
 10
10 -
 11
11 -
 12
12
 |
 |