Gateway 7400 Rackmount Installation Guide
Gateway 7400 Manual
 |
View all Gateway 7400 manuals
Add to My Manuals
Save this manual to your list of manuals |
Gateway 7400 manual content summary:
- Gateway 7400 | Rackmount Installation Guide - Page 1
7400 Server Rackmount Installation Guide - Gateway 7400 | Rackmount Installation Guide - Page 2
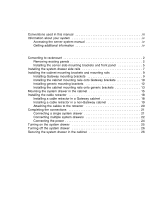
manual iii Information about your system iv Accessing the server system manual iv Getting additional information iv 1 Installation 1 Converting to rackmount 2 Removing existing panels 2 Installing the server in a Gateway cabinet 18 Installing a cable retractor in a non-Gateway cabinet 19 - Gateway 7400 | Rackmount Installation Guide - Page 3
. No part of it may be reproduced or transmitted by any means or in any form, without prior consent in writing from Gateway. The information in this manual has been carefully checked and is believed to be accurate. However, changes are made periodically. These changes are incorporated in newer - Gateway 7400 | Rackmount Installation Guide - Page 4
Preface Conventions used in this manual Throughout this manual, you will see the following conventions: Convention ENTER CTRL+ALT+DEL Setup User's Guide Description Keyboard key names are printed in small capitals. A plus sign means to press the keys at the same time. Commands to be entered, - Gateway 7400 | Rackmount Installation Guide - Page 5
system manual A comprehensive 7400 Server System Manual is located on the Server Companion CD, which accompanied this system. To access this document (in PDF format), place the Server Companion CD into the CD drive on a system running a Window-based operating system, then follow the instructions on - Gateway 7400 | Rackmount Installation Guide - Page 6
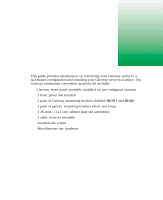
Installation 1 This guide provides information on converting your Gateway server to a rackmount configuration and installing your Gateway server in a cabinet. The Gateway rackmount conversion accessory kit includes: s Gateway front panel assembly (installed on pre-configured systems) s 2 front - Gateway 7400 | Rackmount Installation Guide - Page 7
the bezel and the top panel: 1 Turn off system power, then disconnect all the peripherals. 2 Make sure the server is on a stable surface, such as a table or counter. Warning In order to avoid injury or dropping the server, Gateway recommends that two people lift the system drawer. 2 Installation - Gateway 7400 | Rackmount Installation Guide - Page 8
3 Unlock the bezel, if necessary, then depress the two tabs, one on each side of the bezel. 4 Pull the bezel away from the server. Tab Tab 5 Remove the screw located at the top of the server. 6 Slide the top panel forward, then pull it off. Top panel Screw Converting to rackmount 3 - Gateway 7400 | Rackmount Installation Guide - Page 9
, then slide the outrigger towards the center of the bottom panel. 3 Remove the outrigger by pulling it up and away from the server. Retaining latches Outriggers Retaining latches 4 Remove the second outrigger by repeating Steps 2 and 3. 5 Using a flat-bladed screwdriver, remove the feet. Foot - Gateway 7400 | Rackmount Installation Guide - Page 10
brackets and front panel To install the side mounting brackets: 1 Turn the server on its left side. 2 Align one of the server side mounting brackets with the screw holes on the side (and towards the front) of the server, then attach the bracket using six screws from the accessory kit. Side mounting - Gateway 7400 | Rackmount Installation Guide - Page 11
. You may find it easier to remove the hinge from the front panel assembly, attach the hinge to the server, then re-attach the front panel assembly to the hinge. 2 Move the server forward until the front edge extends slightly beyond the table or counter edge. 3 Align the front panel hinge screw - Gateway 7400 | Rackmount Installation Guide - Page 12
(system drawer) in the cabinet, you need to install the system drawer side rails on the server. To install the system drawer side rails: 1 Remove the system drawer side rails from the cabinet mounting rails by depressing the retention clips on the - Gateway 7400 | Rackmount Installation Guide - Page 13
2 Mount the system drawer side rail on the server using five screws from the accessory kit. Make sure the retention clips are at the back of the server. 3 Mount the second rail on the opposite side of the server. Retention clip System drawer side rail 8 Installation - Gateway 7400 | Rackmount Installation Guide - Page 14
cabinet, refer to the following section. If you are installing the server in a non-Gateway cabinet, go to "Installing generic mounting brackets" on page 12. Installing Gateway mounting brackets If Gateway mounting brackets are already installed in the cabinet, go to "Installing the cabinet mounting - Gateway 7400 | Rackmount Installation Guide - Page 15
of brackets on the opposite side of the cabinet by repeating Steps 2 through 5. Installing the cabinet mounting rails onto Gateway brackets To install the cabinet mounting rails onto Gateway brackets: 1 Align the back end of the cabinet mounting rail to the back mounting bracket by sliding the inner - Gateway 7400 | Rackmount Installation Guide - Page 16
3 Align the front of the cabinet mounting rail to the front mounting bracket by sliding the inner rail and inner slide until the rail screw hole opening lines up with one of the front mounting bracket screw holes. Inner rail Inner slide Front vertical mounting rail Spring latch Cabinet mounting - Gateway 7400 | Rackmount Installation Guide - Page 17
Installing generic mounting brackets If you are installing the server in a non-Gateway cabinet, use the generic mounting brackets. These brackets allow for different cabinet depths. If generic mounting brackets are already installed in the cabinet, go to " - Gateway 7400 | Rackmount Installation Guide - Page 18
5 Attach the back mounting bracket to the back vertical mounting rail using two screws from the accessory kit. If screw holes are not threaded in the back vertical mounting rail, attach the back mounting bracket by using the screws and bar nut from the accessory kit. 6 Mount the second set of - Gateway 7400 | Rackmount Installation Guide - Page 19
3 Align the front of the cabinet mounting rail to the front mounting bracket by sliding the inner rail and inner slide until the rail screw hole opening lines up with the first inner rail screw hole and with the second screw hole on the front mounting bracket. Back vertical mounting rail Front - Gateway 7400 | Rackmount Installation Guide - Page 20
Mounting the system drawer in the cabinet To mount the system drawer in the cabinet: 1 Pull both of the inner rails forward until the spring latches on each side lock. 2 Pull the inner slides all the way forward. Inner rail Inner slide Spring latch Mounting the system drawer in the cabinet 15 - Gateway 7400 | Rackmount Installation Guide - Page 21
height as the inner rails, then align the system drawer side rails with inner rails. Warning In order to avoid injury or dropping the server, Gateway recommends that two people lift the system drawer. Cabinet mounting rail System drawer side rail latch System drawer side rail 16 Installation - Gateway 7400 | Rackmount Installation Guide - Page 22
4 Push the system drawer evenly into the cabinet until the latches on the system drawer side rails lock. 5 Press the latches on both sides of the system drawer side rails, then push the system drawer back until the inner rail spring latches lock. Cabinet mounting rail System drawer side rail latch - Gateway 7400 | Rackmount Installation Guide - Page 23
. If you are installing a cable retractor in a non-Gateway cabinet, go to "Installing a cable retractor in a non-Gateway cabinet" on page 19. Installing a cable retractor in a Gateway cabinet To install a cable retractor in a Gateway cabinet: 1 Position the cable retractor adapter bracket on the - Gateway 7400 | Rackmount Installation Guide - Page 24
cabinet To install a cable retractor in a non-Gateway cabinet: 1 Remove the adapter bracket from the cable retractor straight bracket. 2 Position the cable retractor straight bracket on the back vertical mounting rail, then align - Gateway 7400 | Rackmount Installation Guide - Page 25
Attaching the cables to the retractor To attach the cables: 1 Route the cables from the rear of the system drawer to the cable retractor. 2 Attach the cables to the cable retractor, making sure the cables have sufficient slack when the system drawer is pulled forward and pushed back into place. - Gateway 7400 | Rackmount Installation Guide - Page 26
Completing the connections Now that the system drawer is installed in the cabinet, it is time to make the system connections. Important A wide variety of system connections are possible. Your actual system connections may be different from the following examples. Connecting a single system - Gateway 7400 | Rackmount Installation Guide - Page 27
mouse inputs to the currently selected system drawer. Installation of the autoswitcher is relatively simple and covered in detail in the autoswitcher user manual. Turn off all system drawers and devices in the cabinet before attaching any of the system drawer cables. 2 If the newly installed system - Gateway 7400 | Rackmount Installation Guide - Page 28
ports on the back of the autoswitcher. Refer to the following figure for connection details. Tape storage drawer SCSI channel 1 SCSI channel 2 7400 To power Mouse Keyboard To printer QHSII storage drawer VGA video signal Autoswitcher To VGA monitor To power source Keyboard and mouse tray - Gateway 7400 | Rackmount Installation Guide - Page 29
Connecting the power Gateway recommends that a licensed electrician install a dedicated 230 VAC line following devices may share the same power strip: Plug-in Configuration 230 VAC 115 VAC Power Strip Total Supported Devices 15 amp 20 amp 15 amp 20 amp s System drawer s QHS storage drawer s Tape - Gateway 7400 | Rackmount Installation Guide - Page 30
power problems. 6 Make sure the power indicator is illuminated. The monitor should display the normal Power On Self-Test (POST) information. If the monitor does not display information or the system drawer indicates an error has occurred, refer to the server system manual troubleshooting section - Gateway 7400 | Rackmount Installation Guide - Page 31
Turning off the system drawer To turn off the system drawer: 1 Close all programs. 2 If necessary, issue a "flush" command to write the contents of any caches or buffers to disk. 3 If necessary, issue a command to exit or quit the operating system. 4 Press the ON/OFF switch on the system drawer. 5 - Gateway 7400 | Rackmount Installation Guide - Page 32
A MAN US 7400 RACK GDE R0 6/00
-
 1
1 -
 2
2 -
 3
3 -
 4
4 -
 5
5 -
 6
6 -
 7
7 -
8
-
9
-
10
-
11
-
12
-
13
-
14
-
15
-
16
-
17
-
18
-
19
-
20
-
21
-
22
-
23
-
24
-
25
-
26
-
27
-
28
-
29
-
30
-
31
-
32
 |
 |

7400 Server Rackmount
Installation Guide