Gateway 7405GX Hardware Reference - Page 41
Slide the new DVD drive into the drive bay. Make sure that the drive fits, securely in the bay.
 |
View all Gateway 7405GX manuals
Add to My Manuals
Save this manual to your list of manuals |
Page 41 highlights
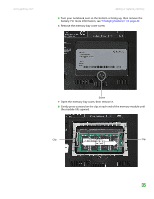
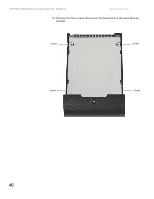
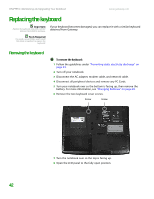
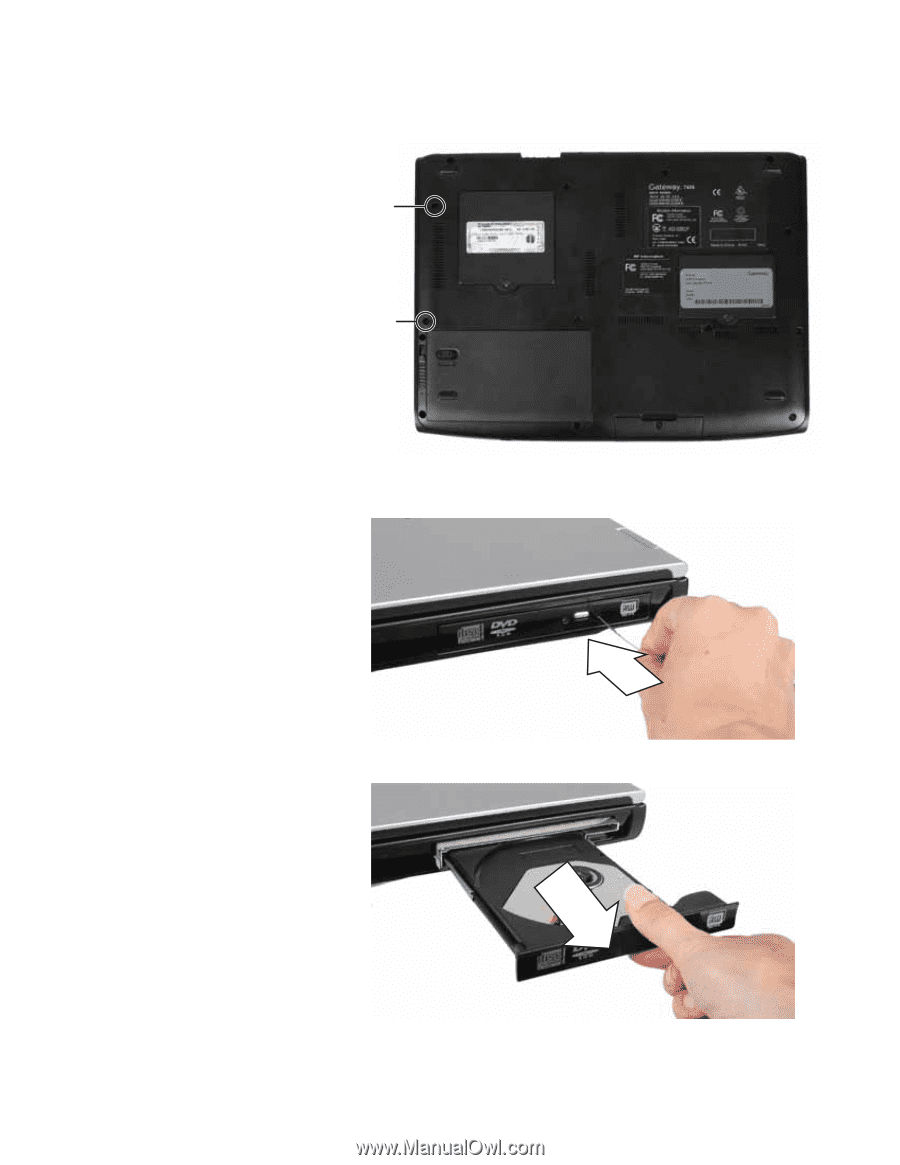
www.gateway.com 7 Remove the two DVD drive screws. Screw Replacing the DVD drive Screw 8 Insert a straightened paper clip into the DVD drive's manual eject hole, push in the paper clip to eject the drive tray, then pull the drive tray open. 9 Carefully slide the drive out of the drive bay. 10 Slide the new DVD drive into the drive bay. Make sure that the drive fits securely in the bay. 37
-
 1
1 -
2
-
3
-
4
-
5
-
6
-
7
-
8
-
9
-
10
-
11
-
12
-
13
-
14
-
15
-
16
-
17
-
18
-
19
-
20
-
21
-
22
-
23
-
24
-
25
-
26
-
27
-
28
-
29
-
30
-
31
-
32
-
33
-
34
-
35
-
 36
36 -
 37
37 -
 38
38 -
 39
39 -
 40
40 -
 41
41 -
 42
42 -
 43
43 -
 44
44 -
 45
45 -
 46
46 -
47
-
48
-
49
-
50
-
51
-
52
-
53
-
54
-
55
-
56
-
57
-
58
-
59
-
60
-
61
-
62
-
63
-
64
-
65
-
66
-
67
-
68
 |
 |
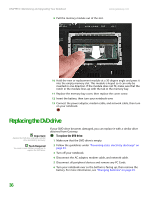
Replacing the DVD drive
www.gateway.com
37
7
Remove the two DVD drive screws.
8
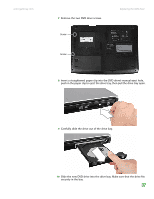
Insert a straightened paper clip into the DVD drive’s manual eject hole,
push in the paper clip to eject the drive tray, then pull the drive tray open.
9
Carefully slide the drive out of the drive bay.
10
Slide the new DVD drive into the drive bay. Make sure that the drive fits
securely in the bay.
Screw
Screw