Gateway One 8512740 - Gateway One Hardware Guide - Page 53
and cables have been returned to their correct locations
 |
View all Gateway One manuals
Add to My Manuals
Save this manual to your list of manuals |
Page 53 highlights
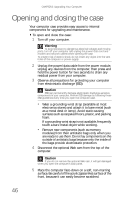
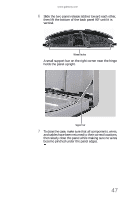
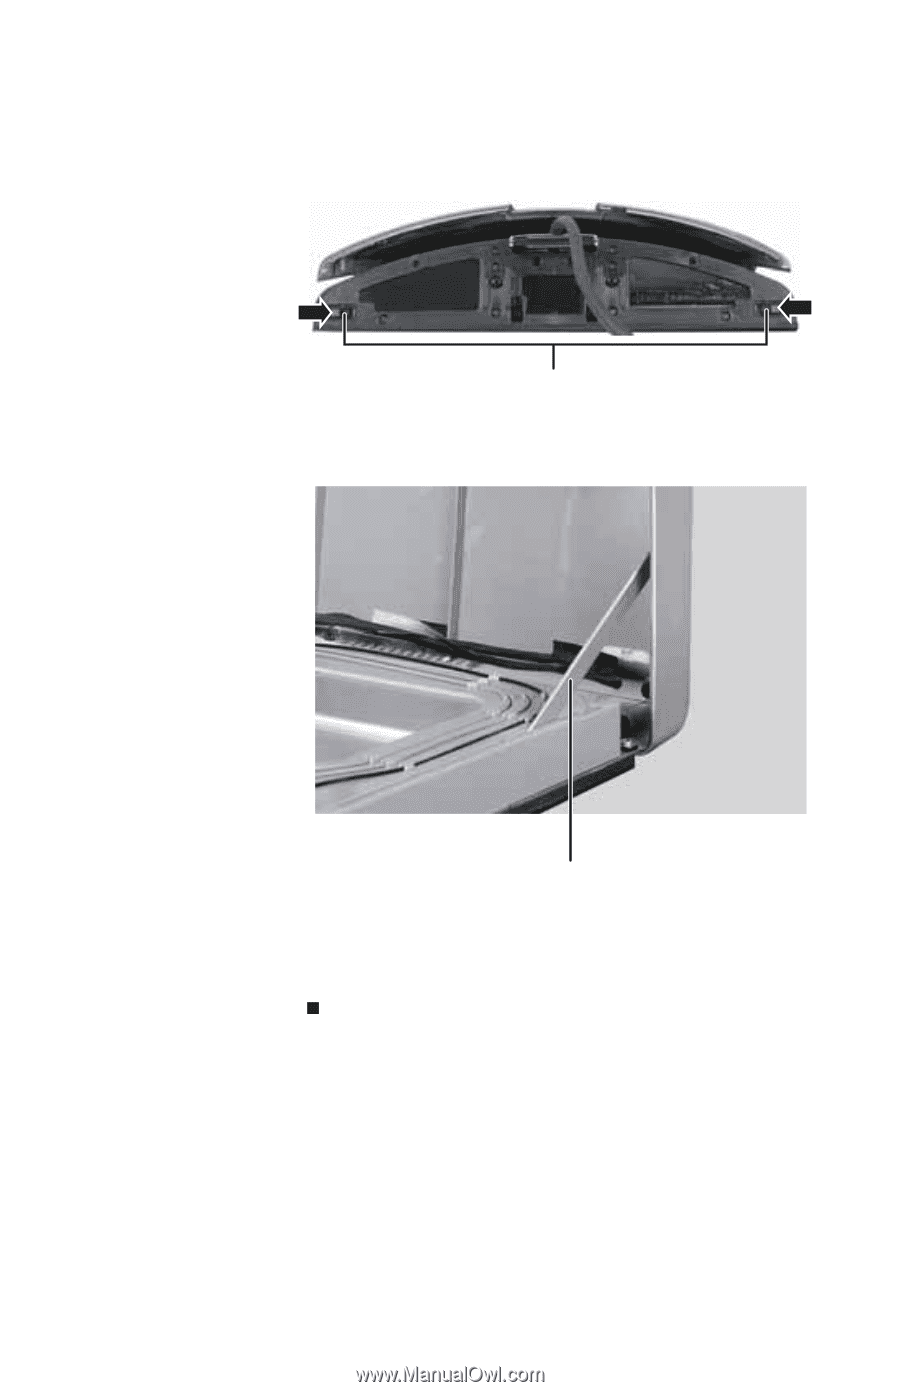
www.gateway.com 6 Slide the two panel release latches toward each other, then lift the bottom of the back panel 90° until it is vertical. Release latches A small support bar on the right corner near the hinge holds the panel upright. Support bar 7 To close the case, make sure that all components, wires, and cables have been returned to their correct locations, then slowly close the panel while making sure no wires become pinched under the panel edges. 47
-
 1
1 -
2
-
3
-
4
-
5
-
6
-
7
-
8
-
9
-
10
-
11
-
12
-
13
-
14
-
15
-
16
-
17
-
18
-
19
-
20
-
21
-
22
-
23
-
24
-
25
-
26
-
27
-
28
-
29
-
30
-
31
-
32
-
33
-
34
-
35
-
36
-
37
-
38
-
39
-
40
-
41
-
42
-
43
-
44
-
45
-
46
-
47
-
 48
48 -
 49
49 -
 50
50 -
 51
51 -
 52
52 -
 53
53 -
 54
54 -
 55
55 -
 56
56 -
 57
57 -
 58
58 -
59
-
60
-
61
-
62
-
63
-
64
-
65
-
66
-
67
-
68
-
69
-
70
-
71
-
72
-
73
-
74
-
75
-
76
-
77
-
78
-
79
-
80
-
81
-
82
-
83
-
84
-
85
-
86
-
87
-
88
-
89
-
90
-
91
-
92
-
93
-
94
-
95
-
96
-
97
-
98
-
99
-
100
-
101
-
102
-
103
-
104
-
105
-
106
-
107
-
108
-
109
-
110
-
111
-
112
-
113
-
114
-
115
-
116
-
117
-
118
-
119
-
120
-
121
-
122
-
123
-
124
-
125
-
126
-
127
-
128
-
129
-
130
-
131
-
132
 |
 |
www.gateway.com
47
6
Slide the two panel release latches toward each other,
then lift the bottom of the back panel 90° until it is
vertical.
A small support bar on the right corner near the hinge
holds the panel upright.
7
To close the case, make sure that all components, wires,
and cables have been returned to their correct locations,
then slowly close the panel while making sure no wires
become pinched under the panel edges.
Release latches
Support bar