GE GBC12IAXLSS Use and Care Manual - Page 11
Installation Instructions, REMOVE THE REFRIGERATOR DOOR CONT., REMOVE THE CENTER HINGE
 |
UPC - 084691176459
View all GE GBC12IAXLSS manuals
Add to My Manuals
Save this manual to your list of manuals |
Page 11 highlights
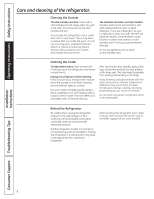
Installation Instructions 1 REMOVE THE REFRIGERATOR DOOR (CONT.) F Remove the tape and tilt the door away from the cabinet. Lift the door off of the center hinge pin. G Set the door on a non-scratching surface with the outside up. NOTE: When removing the door, watch for washer(s) between the center hinge and the bottom of the fresh food door that may stick to the door. Do not lose them. CAUTION: Do not let the door drop to the floor. This could damage the doorstop. 2 REMOVE THE CENTER HINGE A Tape the freezer door shut with masking tape. B Remove the hex screws securing the center hinge to the cabinet using a 10 mm socket ratchet/driver. C Lift the center hinge off of the freezer door. NOTE: When removing the hinge, watch for washer(s) between the hinge and the door. Do not lose them. Center Hinge Hex Screws 3 REMOVE FREEZER DOOR A Remove the tape and lift the door off of the lower hinge. B Set the door on a non-scratching surface with the outside up. NOTE: When removing the door, watch for washer(s) between the bottom hinge and the freezer door that may stick to the door. Do not lose them. CAUTION: Do not let the door drop to the floor. This could damage the doorstop. 5 TRANSFER TOE KICK AND BOTTOM HINGE A Using a Phillips screwdiver, remove the screws securing the toe kick to the cabinet. B Pull the toe kick to remove it from the refrigerator. Screw Screw C Transfer the slide plate from the left side and install it on the right. D Using a 10 mm socket ratchet/driver, remove the screws securing the bottom hinge to the cabinet . E Using an adjustable wrench or Phillips screwdriver, remove the hinge pin and washer(s) from the right side of the bracket and install it on the left. F Install the bottom hinge on the left side of the cabinet. 4 TRANSFER TOP HINGE A Using an adjustable wrench or Phillips screwdriver, remove the hinge pin and washer(s) from the bottom of the hinge. Turn the hinge over and reinstall the hinge pin so it is on the bottom of the hinge. B Reassemble the top hinge on the left side, turning the screws just enough to hold the hinge in place. Hex Screws G Place the toe kick back onto the front of the refrigerator cabinet. The cutout will go around the bottom hinge pin. H Secure the toe kick with the screws removed earlier. Bottom Hinge Pin Screw Screw 11
-
 1
1 -
2
-
3
-
4
-
5
-
 6
6 -
 7
7 -
 8
8 -
 9
9 -
 10
10 -
 11
11 -
 12
12 -
 13
13 -
 14
14 -
 15
15 -
 16
16 -
17
-
18
-
19
-
20
-
21
-
22
-
23
-
24
-
25
-
26
-
27
-
28
-
29
-
30
-
31
-
32
-
33
-
34
-
35
-
36
-
37
-
38
-
39
-
40
-
41
-
42
-
43
-
44
-
45
-
46
-
47
-
48
-
49
-
50
-
51
-
52
-
53
-
54
-
55
-
56
-
57
-
58
-
59
-
60
-
61
-
62
-
63
-
64
-
65
-
66
-
67
-
68
 |
 |
