GE GG40T06PVK Use and Care Manual - Page 14
Additional Considerations, Horizontal Vent Terminal Location
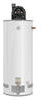 |
View all GE GG40T06PVK manuals
Add to My Manuals
Save this manual to your list of manuals |
Page 14 highlights
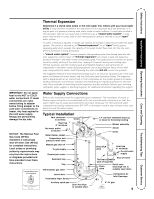
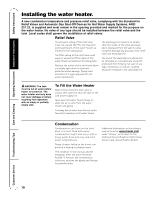
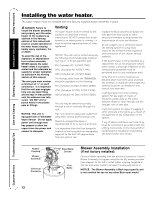
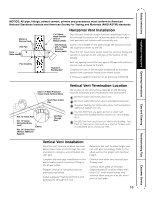
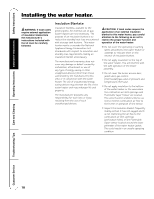
Operating Instructions Installation Instructions Safety Instructions Installing the water heater. NOTICE: All pipe, fittings, solvent cement, primers and procedures must conform to American National Standards Institute and American Society for Testing and Materials (ANSI/ASTM) standards. Soffit vents 4' 4' Inside corner Electric meter 18" 18" 4' window or vent 4' 4' 3' above if within 10' Fresh air intake 12" (Above grade/snow level) Horizontal Vent Terminal Location The location of the vent terminal depends on the following minimum clearances and considerations (see illustration): Twelve (12) inches above grade level and above normal snow levels. Four (4) feet below, or four (4) feet horizontally from any door, window, soffit, under eave vent or gravity air inlet to the building or other appliances, or from gas or electric meters. Do not locate vent above walkways, doors, windows, air inlets, gas or electric meters or other equipment. Three (3) feet above any forced air inlet located within ten (10) feet. Any fresh or make-up air inlet such as for a dryer or furnace area is considered to be a forced air inlet. Eighteen (18) inches from an inside corner formed by two exterior walls. Caulk Rising moisture will collect under eaves If soffit vent is too close, block off and install new vent at Inside another location corner Caulk 6' (1.83 m) caulk zone (1.83 m) 6' 6' (1.83 m) caulk zone or to edge of window etc., starting within 6' (1.83 m) Caulk RTV silicone caulk 4' (1.22 m) 2 ft. sq. (60 x 60 m) sheet metal plate brick or masonary surface is recomen WARNING: Moisture in the flue gas will condense as it leaves the vent terminal. In cold weather this condensate can freeze on the exterior wall, under the eaves and on surrounding objects. Some discoloration to the exterior of the building is to be expected. However, improper location or installation can result in severe damage to the structure or exterior finish of the building. Additional Considerations Do Not install vent terminal under any patio or deck. To help prevent moisture from freezing on walls and under eaves, do not locate vent terminal on the side of a building with prevailing winter winds. Do Not terminate vent pipe directly on brick or masonry surfaces. Use a rust-resistant sheet metal backing plate (2 x 2 feet) behind vent. (See illustration.) Do Not locate vent terminal too close to shrubbery, as flue gasses may damage them. Caulk all cracks, seams and joints within six (6) feet of vent terminal. All painted surfaces should be primed to lessen the chance of physical damage. Painted surfaces will require maintenance. Insulate vent pipe exposed to cold conditions (attics, crawl spaces, etc.) with inflammable material to help prevent moisture from accumulating in vent pipe. Do Not extend exposed vent pipe outside of building. Care and Cleaning Troubleshooting Tips Customer Service 14
-
 1
1 -
2
-
3
-
4
-
5
-
6
-
7
-
8
-
 9
9 -
 10
10 -
 11
11 -
 12
12 -
 13
13 -
 14
14 -
 15
15 -
 16
16 -
 17
17 -
 18
18 -
 19
19 -
20
-
21
-
22
-
23
-
24
-
25
-
26
-
27
-
28
-
29
-
30
-
31
-
32
-
33
-
34
-
35
-
36
 |
 |
