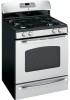
GE JGBP32SENSS Owners Manual
GE JGBP32SENSS - 30" Gas Range Manual
 |
UPC - 084691187349
View all GE JGBP32SENSS manuals
Add to My Manuals
Save this manual to your list of manuals |
GE JGBP32SENSS manual content summary:
- GE JGBP32SENSS | Owners Manual - Page 1
Installation Air Adjustment 42 Instructions Anti-Tip Device 35, 43 Checking Burner Ignition . . .41 JGBP24 Connecting the Range JGBP25 to Gas 36-39 Dimensions and Clearances .34 Electrical Connections . .40, 41 Leveling the Range 42 Location 35 LP 43 Troubleshooting Tips 44-47 JGBP26 - GE JGBP32SENSS | Owners Manual - Page 2
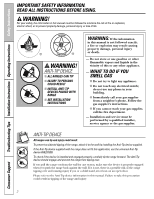
Consumer Support Troubleshooting Tips Installation Instructions Operating Instructions Safety Instructions IMPORTANT SAFETY INFORMATION. READ ALL INSTRUCTIONS BEFORE USING. WARNING! For your safety, the information in this manual must be followed to minimize the risk of fire or explosion, electric - GE JGBP32SENSS | Owners Manual - Page 3
with the Installation Instructions. Any adjustment and service should be performed only by qualified gas range installers or service technicians. s Do not attempt to repair or replace any part of your range unless it is specifically recommended in this manual. All other service should be referred - GE JGBP32SENSS | Owners Manual - Page 4
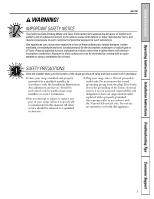
Support Troubleshooting Tips Installation Instructions Operating Instructions Safety Instructions SAFETY PRECAUTIONS s Locate the range out of kitchen traffic path s Never wear loose fitting or hanging garments and out of drafty locations to prevent poor while using the appliance service - GE JGBP32SENSS | Owners Manual - Page 5
Safety Instructions Operating Instructions Installation Instructions Troubleshooting Tips Consumer Support ge.com WARNING! hazard. s If you smell gas, turn off the gas to the range and call a qualified service technician. Never use an open flame to locate a leak. s Always turn the surface burner - GE JGBP32SENSS | Owners Manual - Page 6
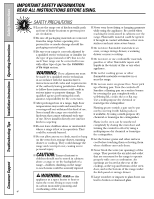
Support Troubleshooting Tips Installation Instructions Operating Instructions Safety Instructions IMPORTANT SAFETY INFORMATION. READ ALL INSTRUCTIONS Do not use aluminum foil anywhere in the oven except as described in this manual. Misuse could result in a fire hazard or damage to the range. s - GE JGBP32SENSS | Owners Manual - Page 7
Safety Instructions Operating Instructions Installation Instructions Troubleshooting Tips Consumer Support ge.com SELF- Clean only parts listed in this Owner's Manual. s If the self-cleaning mode malfunctions, turn the oven off and disconnect the power supply. Have it serviced by a qualified - GE JGBP32SENSS | Owners Manual - Page 8
Support Troubleshooting Tips Installation Instructions Operating Instructions Safety Instructions Using the gas surface burners. Throughout this manual, features and appearance may vary from your model. Before Lighting on. An electric shock may for most cooking. These general-purpose burners can be - GE JGBP32SENSS | Owners Manual - Page 9
Safety Instructions Operating Instructions Installation Instructions Troubleshooting Tips Consumer Support Use a flat-bottomed wok. LITE position. Use extreme caution when lighting burners this way. Surface burners in use when an electrical power failure occurs will continue to operate normally. 9 - GE JGBP32SENSS | Owners Manual - Page 10
Support Troubleshooting Tips Installation Instructions Operating Instructions Safety Instructions Using the oven controls. Throughout this manual the power to the range and call for service. KITCHEN TIMER ON/OFF or TIMER ON/ at a time you set. START TIME Light Flashes while in edit mode-you can - GE JGBP32SENSS | Owners Manual - Page 11
Safety Instructions Operating Instructions Installation Instructions Troubleshooting Tips Consumer Support ge.com Oven Control, Clock and Timer Features and Settings (on some models) AUTOMATIC OVEN Light (on some models) This lights anytime the oven has been programmed using the COOKING TIME or - GE JGBP32SENSS | Owners Manual - Page 12
Support Troubleshooting Tips Installation Instructions Operating Instructions Safety Instructions electric ignition oven during an electrical Light (on some models) Touch the OVEN LIGHT or pad on the upper control panel to turn the light on or off. Oven Light (on some models) Press the OVEN LIGHT - GE JGBP32SENSS | Owners Manual - Page 13
Safety Instructions Operating Instructions Installation Instructions Troubleshooting Tips Consumer Support ge.com Do not lock when baking cakes, cookies, pastry and breads. For ovens without a preheat indicator light or tone, preheat 10 minutes. Baking results will be better if baking pans are - GE JGBP32SENSS | Owners Manual - Page 14
Consumer Support Troubleshooting Tips Installation Instructions Operating Instructions Safety Instructions Using the oven. Do not lock the oven door with the latch during broiling. The latch is used for self-cleaning only. Always use the - GE JGBP32SENSS | Owners Manual - Page 15
Safety Instructions Operating Instructions Installation Instructions Troubleshooting Tips Consumer Support Using the clock and timer. (on some models) ge.com Not all features are on all models. To Set the Clock The clock must be - GE JGBP32SENSS | Owners Manual - Page 16
Consumer Support Troubleshooting Tips Installation Instructions Operating Instructions Safety Instructions Using the clock and timer. (on some models) Not all features are on all models. To Reset the Timer If the display is still showing - GE JGBP32SENSS | Owners Manual - Page 17
Safety Instructions Operating Instructions Installation Instructions Troubleshooting Tips Consumer Support Using the timed baking . Room temperature promotes the growth of harmful bacteria. Be sure that the oven light is off because heat from the bulb will speed harmful bacteria growth. How to - GE JGBP32SENSS | Owners Manual - Page 18
Consumer Support Troubleshooting Tips Installation Instructions Operating Instructions Safety Instructions Special features of your oven control. (on some models) Your new touch pad control has additional features that you may choose to use. The following - GE JGBP32SENSS | Owners Manual - Page 19
⊃ ⊃ Safety Instructions Operating Instructions Installation Instructions Troubleshooting Tips Consumer Support Using the Sabbath Feature bulb may be removed. See the Oven Light Replacement section. On models with a light switch on the control panel, the oven light may be turned on and left on. - GE JGBP32SENSS | Owners Manual - Page 20
Consumer Support Troubleshooting Tips Installation Instructions Operating Instructions Safety Instructions Using the Sabbath Feature. (on some models) (Designed for use on the Jewish Sabbath and Holidays) How to Exit the Sabbath Feature Touch the CLEAR/ - GE JGBP32SENSS | Owners Manual - Page 21
Safety Instructions Operating Instructions Installation Instructions Troubleshooting Tips Consumer Support Adjust the oven thermostat-Do it yourself! ge.com You may find that your new oven cooks differently than the one it replaced. Use your - GE JGBP32SENSS | Owners Manual - Page 22
Consumer Support Troubleshooting Tips Installation Instructions Operating Instructions Safety Instructions CLEAN Using the self-cleaning TEMP knob to CLEAN. The Clean Time is 4 hours and 20 minutes. The self clean light will come on and stay on until the self clean cycle is complete. The oven shuts - GE JGBP32SENSS | Owners Manual - Page 23
Safety Instructions Operating Instructions Installation Instructions Troubleshooting Tips Consumer Support ge.com The oven door must be closed and all controls set correctly for the cycle to work properly. How to Delay the Start of - GE JGBP32SENSS | Owners Manual - Page 24
Consumer Support Troubleshooting Tips Installation Instructions Operating Instructions Safety Instructions Care and cleaning of the range. Be sure electrical power is off and all surfaces are cool before cleaning any part of the range. If your range is removed for cleaning, servicing or any reason, - GE JGBP32SENSS | Owners Manual - Page 25
Safety Instructions Operating Instructions Installation Instructions Troubleshooting Tips Consumer Support Grate Burner cap Burner head Drip pan (if so equipped) Electrode Cooktop ge.com Sealed Burner Assemblies (on some models) Turn all controls OFF before removing the burner parts and drip pans - GE JGBP32SENSS | Owners Manual - Page 26
Consumer Support Troubleshooting Tips Installation Instructions Operating Instructions Safety Instructions Care and cleaning of the range. Use a sewing needle or twist-tie to unclog the small hole in the burner head. Burner Caps and Heads - GE JGBP32SENSS | Owners Manual - Page 27
Safety Instructions Operating Instructions Installation Instructions Troubleshooting Tips Consumer Support ge.com Burner Grates Lift out stainless steel appliance cleaner or polish, or to find the location of a dealer nearest you, please call our toll-free number: National Parts Center 800.626 - GE JGBP32SENSS | Owners Manual - Page 28
Consumer Support Troubleshooting Tips Installation Instructions Operating Instructions Safety Instructions Care and cleaning of the range. Lift the door straight up and off the hinges. The gasket is designed with a gap at the bottom to - GE JGBP32SENSS | Owners Manual - Page 29
Safety Instructions Operating Instructions Installation Instructions Troubleshooting Tips Consumer Support Some models have dual support rods that will hold the cooktop up while you clean underneath it. ge.com Lift-Up Cooktop (on models with standard twin burners) Clean the - GE JGBP32SENSS | Owners Manual - Page 30
Consumer Support Troubleshooting Tips Installation Instructions Operating Instructions Safety Instructions Care and cleaning of before replacing. Replace the knobs in the OFF position to ensure proper placement. Metal parts can be cleaned with soap and water. Do not use steel wool, abrasives, ammonia, - GE JGBP32SENSS | Owners Manual - Page 31
Safety Instructions Operating Instructions Installation Instructions Troubleshooting Tips Consumer Service Wire cover holder. ge.com Oven Shelves Clean the shelves with an abrasive cleanser or scouring pad. After cleaning, rinse the shelves with clean water - GE JGBP32SENSS | Owners Manual - Page 32
codes and ordinances. • Note to Installer - Be sure to leave these instructions with the Consumer. • Note to Consumer - Keep these instructions for future reference. • Note - This appliance must be properly grounded. • Servicer - The electrical diagram is in an envelope attached to the back of the - GE JGBP32SENSS | Owners Manual - Page 33
INSTALLATION SAFETY INSTRUCTIONS Read these instructions completely and carefully. Improper installation, adjustment, alteration, service or maintenance can cause injury or property damage. Refer to this manual. For assistance or additional information, consult a qualified installer, service agency - GE JGBP32SENSS | Owners Manual - Page 34
Installation Instructions DIMENSIONS AND CLEARANCES Provide adequate clearances between the range and adjacent combustible surfaces. These dimensions must be met for safe use of your range. The location of the electrical outlet and pipe opening (see Gas Pipe and Electric Outlet Locations) may be - GE JGBP32SENSS | Owners Manual - Page 35
flammable vapors and liquids in the vicinity of this or any other appliance. Explosions or fires could result. s Do not use oven for or servicing. Also, make sure your floor covering will withstand 180°F. (See the Installation Safety Instructions section.) parts have come loose during shipping. 35 - GE JGBP32SENSS | Owners Manual - Page 36
Installation Instructions 1 PROVIDE ADEQUATE GAS SUPPLY Your range is designed to operate at adapter to the NPT internal thread of the manual shut-off valve, taking care to back-up the shut-off valve to keep it from turning. D. Connect flexible metal appliance connector to the adapter on the range. - GE JGBP32SENSS | Owners Manual - Page 37
Installation Instructions GAS PIPE AND ELECTRICAL OUTLET LOCATIONS (for models with Sealed Burners) This installation with through-the-floor connection of pipe stub/shut-off valve. GAS PIPE AND ELECTRICAL OUTLET LOCATIONS (for models with Standard Twin Burners) This area allows for flush range - GE JGBP32SENSS | Owners Manual - Page 38
Installation Instructions FLEXIBLE CONNECTOR HOOKUP (for models equipped with Sealed Burners) Pressure regulator Adapter Installer: Inform the consumer of the location of the gas shut-off valve. 1/2″ - GE JGBP32SENSS | Owners Manual - Page 39
Installation Instructions FLEXIBLE CONNECTOR HOOKUP (for models equipped with Standard Twin Burners) Pressure regulator Manifold pipe Installer: Inform the consumer of the location of the gas shut- - GE JGBP32SENSS | Owners Manual - Page 40
Instructions 3 ELECTRICAL CONNECTIONS Electrical wall receptacle to minimize the possibility of electric shock hazard from this appliance. The customer should have the wall detected. These devices must be manually reset by the consumer. The National Electrical Code requires the use of GFCI - GE JGBP32SENSS | Owners Manual - Page 41
Installation Instructions 3 ELECTRICAL CONNECTIONS (CONT.) B. Usage Situations where Appliance Power Cord will be Disconnected Frequently. Do not use an adapter plug in these situations because disconnecting of the power cord places undue strain on - GE JGBP32SENSS | Owners Manual - Page 42
Installation Instructions 7 ADJUST BROIL AND OVEN BURNER AIR ADJUSTMENT SHUTTERS IF NECESSARY Air adjustment shutters for the top and bottom burners regulate the flow of air to - GE JGBP32SENSS | Owners Manual - Page 43
Installation Instructions 9 INSTALLING THE ANTI-TIP DEVICE WARNING! s Range must be secured with an approved , the conversion must be performed by a qualified LP gas installer. The conversion instructions and LP orifices can be found attached to the range next to the pressure regulator. Keep these - GE JGBP32SENSS | Owners Manual - Page 44
Support Troubleshooting Tips Installation Instructions Operating Instructions Safety Instructions Before you call for service... Troubleshooting Tips Save time and money! Review the charts on the following pages first and you may not need to call for service. Problem Top burners do not light - GE JGBP32SENSS | Owners Manual - Page 45
Instructions Operating Instructions Installation Instructions Troubleshooting Tips Consumer Support ge.com Problem Food does not bake or roast properly Food does not broil properly Oven temperature too hot or too cold Oven light being used. • See the Broiling Guide. Food being cooked in a hot - GE JGBP32SENSS | Owners Manual - Page 46
Support Troubleshooting Tips Installation Instructions Operating Instructions Safety Instructions Before you call for service... Troubleshooting Tips Problem the self-cleaning oven section. was set to CLEAN. Self clean light (on some models) blinks during self clean cycle A power interruption - GE JGBP32SENSS | Owners Manual - Page 47
Safety Instructions Operating Instructions Installation Instructions Troubleshooting Tips Consumer Support ge.com Problem Display goes blank ( is used. A cooling fan may automatically turn on and off to cool internal parts. The drawer is out of alignment. Drawer is over-loaded or load is unbalanced - GE JGBP32SENSS | Owners Manual - Page 48
Consumer Support Troubleshooting Tips Installation Instructions Operating Instructions Safety Instructions Notes. 48 - GE JGBP32SENSS | Owners Manual - Page 49
Service Protection Plus ™-comprehensive protection on all your appliances- No Matter What Brand! Benefits Include: • Backed by GE • All brands covered • Unlimited service calls • All parts mail to: General Electric Company Warranty Registration Department P.O. Box 32150 Louisville, KY 40232-2150 49 - GE JGBP32SENSS | Owners Manual - Page 50
service. Our service number is 800.GE.CARES (800.432.2737). 3 Read your Owner's Manual carefully. It will help you operate your new appliance Code Day Year Phone _ _ Number GE Consumer & Industrial Appliances General Electric Company Louisville, KY 40225 ge.com * Please provide your e-mail - GE JGBP32SENSS | Owners Manual - Page 51
Safety Instructions Operating Instructions Installation Instructions Troubleshooting Tips Consumer Support 51 ge.com Notes. - GE JGBP32SENSS | Owners Manual - Page 52
Consumer Support Troubleshooting Tips Installation Instructions Operating Instructions Safety Instructions Notes. 52 - GE JGBP32SENSS | Owners Manual - Page 53
Safety Instructions Operating Instructions Installation Instructions Troubleshooting Tips Consumer Support Accessories. Looking For Something More? You can find these accessories and many more at ge.com, or call 800.626.2002 (during normal business hours). - GE JGBP32SENSS | Owners Manual - Page 54
Consumer Support Troubleshooting Tips Installation Instructions Operating Instructions Safety Instructions GE Gas Range Warranty. (For customers in the United States) All warranty service provided by our Factory Service Centers, or an authorized Customer Care® technician. To schedule service, on- - GE JGBP32SENSS | Owners Manual - Page 55
Safety Instructions Operating Instructions Installation Instructions Troubleshooting Tips Consumer Support GE Gas Range Warranty. (For customers in Canada) All warranty service provided by our Factory Service Centers or an authorized Customer Care® technician. For service, call 1.800.361.3400. - GE JGBP32SENSS | Owners Manual - Page 56
Consumer Support. GE Appliances Website ge.com Have a question or need assistance with your appliance? Try the GE Appliances Website 24 hours a day, any day of the year! For greater convenience and faster service, you can now download Owner's Manuals, order parts or even schedule service on-line.
-
 1
1 -
 2
2 -
 3
3 -
 4
4 -
 5
5 -
 6
6 -
 7
7 -
8
-
9
-
10
-
11
-
12
-
13
-
14
-
15
-
16
-
17
-
18
-
19
-
20
-
21
-
22
-
23
-
24
-
25
-
26
-
27
-
28
-
29
-
30
-
31
-
32
-
33
-
34
-
35
-
36
-
37
-
38
-
39
-
40
-
41
-
42
-
43
-
44
-
45
-
46
-
47
-
48
-
49
-
50
-
51
-
52
-
53
-
54
-
55
-
56
 |
 |

183D5580P194
49-85109-1
01-07 JR
ge.com
Write the model and serial
numbers here:
Model #______________________
Serial # ______________________
You can find them on a label on
the front of the range behind the
storage drawer or kick panel.
Safety Instructions
. . . . . . .2–7
Operating Instructions
Aluminum Foil . . . . . . . . . . .13
Clock and Timer . . . . . . .15, 16
Oven
. . . . . . . . . . . . . . . .10–31
Baking and Roasting . . . . . .13
Broiling, Broiling Guide . . .14
Oven Control
. . . . . . . .10, 11
Power Outage . . . . . . . .12, 16
Preheating . . . . . . . . . . . . . .13
Sabbath Feature . . . . . .19, 20
Self-Cleaning . . . . . . . . .22, 23
Special Features
. . . . . . . . .18
Thermostat Adjustment . . .21
Timed Baking
and Roasting . . . . . . . . . . . .17
Surface Cooking . . . . . . . . .8, 9
Care and Cleaning
Broiler Pan and Grid
. . . . . .28
Burner Assembly . . . . . . .24–26
Burner Grates . . . . . . . . . . . .27
Control Panel and Knobs . . .30
Cooktop Surface . . . . . . . . . .27
Door Removal . . . . . . . . . . . .28
Kick Panel . . . . . . . . . . . . . . .29
Lift-up Cooktop . . . . . . . . . . .29
Oven Bottom . . . . . . . . . . . . .28
Oven Light Replacement . . .31
Oven Vents
. . . . . . . . . . . . . .30
Self-Cleaning . . . . . . . . . .22, 23
Shelves . . . . . . . . . . . . . . . . . .31
Stainless Steel Surfaces . . . . .27
Storage Drawer . . . . . . . . . . .29
Installation
Instructions
. . . . . . . . . . .32–43
Air Adjustment . . . . . . . . . . .42
Anti-Tip Device . . . . . . . .35, 43
Checking Burner Ignition . . .41
Connecting the Range
to Gas
. . . . . . . . . . . . . . .36–39
Dimensions and Clearances .34
Electrical Connections . .40, 41
Leveling the Range . . . . . . . .42
Location . . . . . . . . . . . . . . . . .35
LP . . . . . . . . . . . . . . . . . . . . . .43
Troubleshooting
Tips
. . . . . . . . . . . . . . . . .44–47
Accessories
. . . . . . . . . . . . . .53
Consumer Support
Consumer
Support . . . . . . . . . .Back Cover
Product Registration . . . .49, 50
Warranty for Customers
in Canada
. . . . . . . . . . . . . . .55
Warranty for Customers
in the U.S.A.
. . . . . . . . . . . . .54
Ranges
JGBP24
JGBP25
JGBP26
JGBP27
JGBP28
JGBP29
JGBP30
JGBP32
JGBP33
JGBP34
RGB735
RGB740
RGB745
RGB746
RGB790
Owner’s Manual
& Installation
Instructions
Self-Cleaning Gas