GE PGS968DEP Use and Care Manual
GE PGS968DEP - Profile 30" Slide-In Gas Range Manual
 |
View all GE PGS968DEP manuals
Add to My Manuals
Save this manual to your list of manuals |
GE PGS968DEP manual content summary:
- GE PGS968DEP | Use and Care Manual - Page 1
Knobs 31 Owner's Manual JGS968 PGS968 Lift-Off Oven Door 34 Light Bulbs 33 Packaging Tape 31 Painted Surfaces 35 Racks 32 Stainless Steel Surfaces 35 Storage Drawer 32 Vent 32, 35 Troubleshooting Tips 38-42 Accessories 45 Consumer Support Consumer Support 48 Ownership Registration for - GE PGS968DEP | Use and Care Manual - Page 2
light any appliance. n Do not touch any electrical switch; do not use any phone in your building. n Immediately call your gas supplier from a neighbor's phone. Follow the gas supplier's instructions. n If you cannot reach your gas supplier, call the fire department. - Installation and service must - GE PGS968DEP | Use and Care Manual - Page 3
electric shock, or to prevent property damage, personal injury, or loss of life. ANTI-TIP DEVICE To reduce the risk of tipping the range, the range must be secured by a properly installed anti-tip bracket. See installation instructions Gas appliances can in self-clean ovens gives off a very - GE PGS968DEP | Use and Care Manual - Page 4
Manual. n Be sure your appliance is properly installed and grounded by a qualified technician in accordance with the provided installation instructions. n Before performing any service Teach children not to play with the controls or any other part of the range. n Do not leave children alone or - GE PGS968DEP | Use and Care Manual - Page 5
use. Never install the range over vinyl tile or linoleum that cannot withstand such type of use. Never install it directly result in carbon monoxide poisoning and overheating of the cooktop or oven. n For your safety, never use your appliance for warming or heating the room. n Large scratches or - GE PGS968DEP | Use and Care Manual - Page 6
INSTRUCTIONS metal ring that is placed over the burner grate to support the wok. This ring acts as a heat trap, off the gas to the range and call a qualified service technician. Never use an open flame to locate a leak parts in place. n Do not use aluminum foil to cover the grates or line any part - GE PGS968DEP | Use and Care Manual - Page 7
the self-cleaning operation. n If the self-cleaning mode malfunctions, turn the oven off and disconnect the power supply. Have it serviced by a qualified technician. n Clean only parts listed in this Owner's Manual. READ AND FOLLOW THIS SAFETY INFORMATION CAREFULLY. SAVE THESE INSTRUCTIONS 7 - GE PGS968DEP | Use and Care Manual - Page 8
Throughout this manual, features and appearance may vary from your model. Push the control knob in and turn it to the LITE position. How to Light a Gas Surface Burner Push the control knob in and turn it to the LITE position. You will hear a little clicking noise- the sound of the electric spark - GE PGS968DEP | Use and Care Manual - Page 9
Glass Ceramic: Can be used for either surface or oven cooking. It conducts heat very slowly and cools Stove Top Grills Do not use stove top grills on your sealed gas burners. If you use the stove used. Do not use a flat-bottomed wok on a support ring. Placing the ring over the burner or grate may - GE PGS968DEP | Use and Care Manual - Page 10
Using the oven controls. (Throughout this manual, features and appearance may vary from your model.) Features and appearance may vary. Oven Control, Clock and Timer Features and Settings BAKE Pad Touch to select the bake function. OVEN LIGHT ON/OFF Pad Touch to turn the oven light on or off. - GE PGS968DEP | Use and Care Manual - Page 11
you turn the oven on. The oven has 7 rack positions. Before you begin... The racks have stops, so that when placed correctly on the supports, they will turn on and off to cool internal parts. This is normal, and the fan may continue to run even after the oven in turned off. Bundt or pound cakes - GE PGS968DEP | Use and Care Manual - Page 12
your set temperature. The preheat time will vary depending on the temperature setting. Baking results will be better if baking pans are centered in the oven as much as possible. If baking with more than one pan, place the pans so each has at least 1" (2.5 cm) to 11⁄2" (3.8 cm) of air - GE PGS968DEP | Use and Care Manual - Page 13
very hot if they are left on the cooktop, and could cause burns. Power Outage CAUTION: Do not make any attempt to operate the electric ignition oven during an electrical power failure. The oven or broiler cannot be lit during a power failure. Gas will not flow unless the glow bar is hot. If the - GE PGS968DEP | Use and Care Manual - Page 14
outside the oven to cool during the meal for easiest cleaning. NOTE: Broil will not work if the temperature probe is plugged in. Broiling Guide The size, weight, thickness, starting temperature and your preference of doneness will affect broiling times. This guide is based on meats at refrigerator - GE PGS968DEP | Use and Care Manual - Page 15
START pad. The timer is a minute timer only. The timer does not control oven operations. The maximum setting on the timer is 9 hours and 59 minutes. To can be canceled by following the steps in the Special features of your oven control section under Tones at the End of a Timed Cycle. To Reset - GE PGS968DEP | Use and Care Manual - Page 16
promotes the growth of harmful bacteria. Be sure that the oven light is off because heat from the bulb will speed harmful bacteria growth. How cooking time. Using the number pads, enter the desired baking time. The oven temperature and the cooking time that you entered will be displayed. Touch the - GE PGS968DEP | Use and Care Manual - Page 17
fat or gristle. For roasts with no bone, insert the probe into the meatiest part of the roast. For bone-in ham or lamb, insert the probe into the the probe into the meatiest part of the inner thigh from below and parallel to the leg of a whole turkey. How to Set the Oven For Roasting When Using the - GE PGS968DEP | Use and Care Manual - Page 18
Auto Recipe™ Conversion in the Special Features section. n Use pan size recommended. n Some package instructions for frozen casseroles or main dishes have been developed using commercial convection ovens. For best results in this oven, preheat the oven and use the temperature on the package. 18 - GE PGS968DEP | Use and Care Manual - Page 19
the pans do not touch each other or the walls of the oven. Paper and Plastic Heat-resistant paper and plastic containers that are recommended used. Metal and Glass Any type of cookware will work in your convection oven. However, metal pans heat the fastest and are recommended for convection baking - GE PGS968DEP | Use and Care Manual - Page 20
not be allowed to sit for more than 1 hour before or after cooking. Room temperature promotes the growth of harmful bacteria. Be sure that the oven light is off because heat from the bulb will speed harmful bacteria growth. How to Set an Immediate Start and Automatic Stop The - GE PGS968DEP | Use and Care Manual - Page 21
RACK or CONVECTION ROAST pad. Touch the number pads to set the desired oven temperature. Touch the COOKING TIME pad. NOTE: If your recipe requires preheating, touch the START pad after entering the baking or roasting temperature. When the oven turns on at the time of day you have set, the display - GE PGS968DEP | Use and Care Manual - Page 22
use the kitchen timer even though you cannot use timed oven operations. Convection Roasting Guide Meats Beef Pork Ham Lamb Seafood Rib, Boneless Rib, 19 (35-42) 325°F (163°C) 170°F (77°C) * Stuffed birds generally require 30-45 minutes additional roasting time. Shield legs and breast with foil - GE PGS968DEP | Use and Care Manual - Page 23
not blow it off). Touch the PROOF pad and then the START pad. The display will read PrF (proof). The oven interior light turns on and remains on during proofing. The proofing feature automatically provides the optimum temperature for the proofing process, and therefore does not have a temperature - GE PGS968DEP | Use and Care Manual - Page 24
shows SF. Touch the BAKE pad. A two-digit number shows in the display. Touch BAKE again to alternate between increasing and decreasing the oven temperature. The oven temperature can be adjusted up to (+) 35ºF (19°C) hotter or (-) 35ºF (19°C) cooler. Touch the number pads the same way you read them - GE PGS968DEP | Use and Care Manual - Page 25
, but they will darken, lose their luster and become hard to slide. Wipe up any heavy spillovers on the oven bottom. Make sure the oven light bulb cover is in place and the oven light is off. IMPORTANT: The health of some birds is extremely sensitive to the fumes given off during the self-cleaning - GE PGS968DEP | Use and Care Manual - Page 26
locks automatically. The display will show the start time. It will not be possible to open the oven door until the temperature drops below the lock temperature and the LOCKED light goes off. When the LOCKED light goes off, you will be able to open the door. Using the number pads, enter the - GE PGS968DEP | Use and Care Manual - Page 27
the START pad to activate the no shut-off and leave the control set in this special features mode. Fahrenheit or Celsius Temperature Selection Your oven control is set to use the Fahrenheit temperature selections but you may change this to use the Celsius selections. Touch the BROIL HI/LO and - GE PGS968DEP | Use and Care Manual - Page 28
Special features of your oven control. 12-Hour, 24-Hour or Clock Blackout Your control is set to use a 12-hour clock. Touch the CLOCK pad again to change If - GE PGS968DEP | Use and Care Manual - Page 29
GEAppliances.com Using Auto Recipe™ Conversion When using convection bake, the Auto Recipe™ Conversion feature will automatically convert entered regular baking temperatures to convection baking temperatures. The display will show the actual converted (reduced) temperature. For example, if you - GE PGS968DEP | Use and Care Manual - Page 30
when the door is opened and goes off when the door is closed. The bulb may be removed. See the Oven Light Replacement section. On models with a light switch on the control panel, the oven light may be turned on and left on. How to Set for Regular Baking/Roasting When the display shows the - GE PGS968DEP | Use and Care Manual - Page 31
cleaning any part of the range. WARNING: If your range is removed for cleaning, servicing or any the adhesive from packaging tape on new appliances is an application of a household liquid dishwashing detergent electrical shock might result which could cause you to knock over hot cookware. Wash burner parts - GE PGS968DEP | Use and Care Manual - Page 32
the stops clear the guides. Lower the front of the drawer and push back until it closes. Oven rack 32 Oven Racks All oven racks may be cleaned by necessary to grease all oven rack side edges with a light coating of vegetable oil after cleaning them by hand or in the oven. This will help maintain - GE PGS968DEP | Use and Care Manual - Page 33
Oven Light Replacement (on some models) WARNING: SHOCK OR BURN HAzARD: Before replacing oven light bulb, disconnect the electrical light receptacle. Pull wire forward to the center of the cover until it snaps into place. Connect electrical power to the range. Replace bulb with a 40-watt appliance - GE PGS968DEP | Use and Care Manual - Page 34
has become displaced on the door, you should have it replaced. Cleaning the Oven Door To clean the inside of the door: n Because the area inside the of the slot. Push the hinge locks up against the front frame of the oven cavity to the locked position. To replace the door: Firmly grasp both sides - GE PGS968DEP | Use and Care Manual - Page 35
instructions for cleaning the stainless steel surface. To inquire about purchasing stainless steel appliance cleaner or polish, or to find the location of a dealer or Mabe Parts foil or any other material. This would prevent the oven vent from working properly. Control Panel If desired, the - GE PGS968DEP | Use and Care Manual - Page 36
Cooktop Cleaner* and a paper towel. The CERAMA BRYTE® Ceramic Cooktop Scraper* and all recommended supplies are available through our Parts Center. See instructions under "To Order Parts" section on next page. NOTE: Do not use a dull or nicked blade. Heavy, Burned-On Residue Allow the cooktop - GE PGS968DEP | Use and Care Manual - Page 37
spillover should be left until the surface of the cooktop has cooled. Wearing an oven mitt: a. Use a single-edge razor blade scraper (CERAMA BRYTE® Ceramic Cooktop will have to be replaced. In this case, service will be necessary. To Order Parts To order CERAMA BRYTE® Ceramic Cooktop Cleaner and - GE PGS968DEP | Use and Care Manual - Page 38
. • If range is connected to LP gas, check all steps in the Installation Instructions that came with your range. • Tighten or replace the bulb. • Call for service. • Make sure electrical plug is plugged into a live, properly grounded outlet. • Replace the fuse or reset the circuit breaker. • See - GE PGS968DEP | Use and Care Manual - Page 39
door is removable, it sometimes gets out of position during installation. Remove and replace the oven door. See the Lift-Off Oven Door section. • Reposition the drawer. See the Storage Drawer Removal instructions in the Care and cleaning of your range section. • Reposition the drawer and power cord - GE PGS968DEP | Use and Care Manual - Page 40
for service... Troubleshooting Tips Problem Clock and timer do not work Oven will not self-clean "Crackling" or "popping" sound Excessive smoking during a clean cycle Oven door will not open after a clean cycle Oven not clean after a clean cycle "LOCKED" flashes in the display "LOCKED" light is - GE PGS968DEP | Use and Care Manual - Page 41
GEAppliances.com Problem Control signals after entering cooking time or start time Display goes blank off. • This is normal. The cooling fan will turn off and on to cool internal parts. It may run after the oven is turned OFF. The convection fan will cycle on and off until the function is over or - GE PGS968DEP | Use and Care Manual - Page 42
Before you call for service... Troubleshooting Tips Problem Scratches (may appear as cracks) on cooktop glass surface Food spillovers not cleaned before next use. Hot surface on a model with a light-colored cooktop. Plastic melted to the glass cooktop surface Pitting (or indentation) of the - GE PGS968DEP | Use and Care Manual - Page 43
Please place in envelope and mail to: Veuillez mettre dans une enveloppe et envoyez à : OWNERSHIP REGISTRATION P.O. BOX 1780 MISSISSAUGA, ONTARIO L4Y 4G1 (FOR CANADIAN CONSUMERS ONLY) 43 - GE PGS968DEP | Use and Care Manual - Page 44
44 - GE PGS968DEP | Use and Care Manual - Page 45
Oven Elements Light Bulbs Experience these other great products to keep your kitchen looking great! Ceramic Cooktop Cleaning Kit: Includes cleaner, scraper and pad Ceramic Cooktop Cleaning Wipes Stainless Steel Appliance Polish Wipes Stainless Steel Appliance oils. • Genuine GE Part • Easy To - GE PGS968DEP | Use and Care Manual - Page 46
service to replace the defective part. What GE Will Not Cover: n Service trips to your home to teach you how to use the product. n Improper installation to the directions in the Owner's Manual. n Damage to the glass cooktop General. Warrantor: General Electric Company. Louisville, KY 40225 46 - GE PGS968DEP | Use and Care Manual - Page 47
home service to replace the defective part. Five service. What Mabe Will Not Cover: n Service trips to your home to teach you how to use the product. n Improper installation the Owner's Manual. n Damage appliance. n Damage caused after delivery. n Product not accessible to provide required service - GE PGS968DEP | Use and Care Manual - Page 48
Consumer Support. GE Appliances Website In the U.S.: GEAppliances.com Have a question or need assistance with your appliance? Try the GE Appliances Website 24 hours a day, any day of the year! For greater convenience and faster service, you can now download Owner's Manuals, order parts or even - GE PGS968DEP | Use and Care Manual - Page 49
Au gaz, coulissantes Cuisinières www.electromenagersge.ca Instructions de sécurit 2-7 Mode d'emploi Auto-nettoyage 25, du Sabbath 30, 31 Fonctions spéciales 27-29 Four 10-31 Griller, guide pour griller 14 Horloge et minuterie 15 Lockout (verrouillage) des contrôles 15 . 49-80542-4 11-10 GE - GE PGS968DEP | Use and Care Manual - Page 50
immédiatement votre fournisseur de gaz du téléphone d'un voisin. Suivez les instructions du fournisseur de gaz. n Si vous ne pouvez pas rejoindre votre fournisseur de gaz, appelez le service d'incendie. - L'installation et l'entretien doivent être effectués par un installateur qualifié, une agence - GE PGS968DEP | Use and Care Manual - Page 51
antibasculement lors de votre achat, composez le 1.800.626.8774 pour l'obtenir sans frais (au Canada, composez le 1.800.561.3344). Les installations d'instruction du dispositif se trouvent sur le site GEAppliances.com (au Canada, GEAppliances.ca). AVIS DE SÉCURITÉ IMPORTANT La loi de la Californie - GE PGS968DEP | Use and Care Manual - Page 52
é selon ce manuel du propriétaire. n Assurez-vous que votre appareil soit bien installé et mis à la terre par un technicien qualifié, conformément aux instructions d'installation fournies. n Avant d'effectuer tout service, coupez le courant à la cuisinière dans le tableau de distribution résidentiel - GE PGS968DEP | Use and Care Manual - Page 53
www.electromenagersge.ca PRÉCAUTIONS DE SÉCURITÉ n Gardez toujours les ustensiles de bois et de plastique et les aliments en boîte à distance de votre cuisinière. n Gardez toujours les revêtements muraux combustibles, les rideaux ou les tentures à distance de votre cuisinière. n Ne nettoyez pas la - GE PGS968DEP | Use and Care Manual - Page 54
TOUTES LES INSTRUCTIONS AVANT L'UTILISATION placé sur la grille du brûleur pour supporter le wok. Cet anneau agit comme piège à chaleur ce qui pourrait endommager la grille et n Ne faites pas fonctionner le brûleur sans que toutes cualquier parte de la cocina. Si se hace esto se les pièces du - GE PGS968DEP | Use and Care Manual - Page 55
une température INTERNE de 82 °C (180 °F). Préparer la nourriture à ces températures protège normalement contre les maladies alimentaires. AVERTISSEMENT ! FOUR Lorsque vous ouvrez la porte du four, restez à l'écart ET CONFORMEz-VOUS à CES INFORMATIONS DE SÉCURITÉ. CONSERVEZ CES INSTRUCTIONS 7 - GE PGS968DEP | Use and Care Manual - Page 56
Utilisation des brûleurs de surface au gaz. Dans ce manuel, les fonctions et l'apparence pourraient différer de votre modèle. Comment allumer un brûleur de surface au gaz Enfoncez le bouton de contrôle et tournez-le à la position « LITE ». Enfoncez le bouton de commande et tournez-le en position - GE PGS968DEP | Use and Care Manual - Page 57
disponibles chez votre quincaillier local. Seul un wok à fond plat doit être utilisé. N'utilisez pas de wok à fond plat sur un anneau de support. Placer l'anneau sur le brûleur ou la grille pourrait provoquer un mauvais fonctionnement du brûleur, menant à des niveaux de monoxyde de carbone au - GE PGS968DEP | Use and Care Manual - Page 58
un environnement chaud utile pour les produits à levure. Touche START (démarrer) Doit être enfoncée pour démarrer toute fonction de cuisine ou de nettoyage. Touche OVEN LIGHT ON/OFF (lumière de four marche/arrêt) Enfoncez pour mettre en marche ou éteindre la lumière du four. Touche DELAY START - GE PGS968DEP | Use and Care Manual - Page 59
une grille, tirez-la vers vous, penchez l'avant vers le haut et sortez. Pour replacer, placez le bout de la grille (verrous d'arrêt) sur le support, penchez l'avant vers le haut et poussez pour la faire entrer. MISE EN GARDE : lorsque vous utilisez la grille à la position la plus basse (A), faites - GE PGS968DEP | Use and Care Manual - Page 60
variera selon le réglage de température. Papier aluminium N'utilisez pas de papier d'aluminium pour couvrir le fond du four. Le papier d'aluminium piège la chaleur et nuit à la performance du four. Le papier peut fondre et endommager de manière permanente le fond du four. Tout dommage par - GE PGS968DEP | Use and Care Manual - Page 61
www.electromenagersge.ca Évent de four Votre four est ventilé à travers un évent qui se trouve vers l'arrière de la cuisinière. Ne bloquez pas cet évent en cuisinant dans le four. Il est important que le courant d'air chaud du four et l'air frais du brûleur du four circule sans interruption. Évitez - GE PGS968DEP | Use and Care Manual - Page 62
démarrage et votre préférence de cuisson affecteront le temps de préparation. Ce guide est établi à partir de viandes à la température du réfrigérateur. † conçue pour la grillade. Suivez les positions de grilles suggérées dans le Guide pour griller. La porte du four doit être fermée pendant que les - GE PGS968DEP | Use and Care Manual - Page 63
Utiliser l'horloge, la minuterie et le verrouillage des contrôles. Assurez-vous que l'horloge soit réglée à la bonne heure. Pour régler l'horloge L'horloge doit être réglée à la bonne heure pour que les fonctions de minuterie automatique du four fonctionnent correctement. L'heure ne peut pas être - GE PGS968DEP | Use and Care Manual - Page 64
Utilisation des fonctions pour cuisiner et rôtir avec la minuterie.(sur certaines modèles) REMARQUE : les aliments qui se gâtent facilement-comme le lait, les oeufs, le poisson, la farce, la volaille et le porc-ne devraient pas rester sortis pendant plus d'une heure avant ou après la cuisson. La - GE PGS968DEP | Use and Care Manual - Page 65
Utiliser la sonde. www.electromenagersge.ca Pour de nombreux aliments, tout particulièrement les rôtis et la volaille, la température interne des aliments est le meilleur moyen de savoir s'ils sont prêts. La sonde de température permet de ne plus tenter de deviner si les aliments rôtis sont bien - GE PGS968DEP | Use and Care Manual - Page 66
°F). Reportezvous à la Conversion Auto Recipe™ de la section de Fonctions Spéciales. n Utilisez la taille de casserole recommandée. n Certaines instructions d'emballage d'aliments en cocotte surgelés ou de plats principaux ont été développées en utilisant les fours à convexion commerciaux. Pour de - GE PGS968DEP | Use and Care Manual - Page 67
Lorsque vous préparez des biscuits, vous obtiendrez les meilleurs résultats si vous utilisez une plaque à biscuit plate plutôt qu'une casserole à bords bas. OU www.electromenagersge.ca Rôtir par convexion n Convient pour les larges coupes tendres de viande, découvertes. Le ventilateur de convexion - GE PGS968DEP | Use and Care Manual - Page 68
Utiliser les fonctions à minuterie pour la cuisson à convexion. Vous entendrez un ventilateur en cuisinant avec ces fonctions. Le ventilateur s'arrête si la porte est ouverte, mais la chaleur continuera. REMARQUE : les aliments qui se gâtent facilement-comme le lait, les oeufs, le poisson, la farce - GE PGS968DEP | Use and Care Manual - Page 69
www.electromenagersge.ca Comment régler un démarrage retardé et un arrêt automatique OU Vous pouvez régler le contrôle du four pour Enfoncez la touche START (démarrer). retarder le démarrage du four, cuire pendant un temps précis, puis s'éteindre REMARQUE : une tonalité se fera entendre si - GE PGS968DEP | Use and Care Manual - Page 70
, mais la chaleur continuera. n Vous pouvez utiliser la minuterie de cuisine même si vous ne pouvez pas utiliser les opérations du four à minuterie. Guide pour rôtir à convexion Viandes Bœuf Porc Jambon Agneau Fruit de mer Volaille Minutes/kg/lb Côtes, côtes désossées, Haut de surlonge (1,36 kg - GE PGS968DEP | Use and Care Manual - Page 71
après avoir ajouté des articles. n Avec de grosses charges, il faudra peutêtre couvrir certains des aliments cuits. n Retirez les cuillères de service, etc. avant de placer les contenants dans le four. n N'utilisez pas de contenants, couvercles de plastique ou de pellicule de plastique. Pour rendre - GE PGS968DEP | Use and Care Manual - Page 72
Ajustez le thermostat du four-Faites-le vous-même ! Vous pouvez découvrir que votre nouveau four prépare les aliments différemment de celui qu'il remplace. Utilisez votre nouveau four pendant quelques semaines pour vous familiarisez avec lui. Si vous croyez que votre nouveau four est trop chaud ou - GE PGS968DEP | Use and Care Manual - Page 73
Utiliser le four autonettoyant. www.electromenagersge.ca La porte du four doit être fermée et tous les contrôles réglés correctement pour que les cycles fonctionnent correctement . Essuyez toute accumulation de saleté sur le fond du four. Avant un cycle de nettoyage AVERTISSEMENT : Nous - GE PGS968DEP | Use and Care Manual - Page 74
Utiliser le four autonettoyant. La porte du four doit être fermée et tous les contrôles réglés correctement pour que le cycle fonctionne correctement . Comment retarder le début du nettoyage Enfoncez la touche SELF CLEAN STD/LOW (autonettoyage std/bas) une fois pour une durée de nettoyage de 4 - GE PGS968DEP | Use and Care Manual - Page 75
Fonctions spéciales de votre contrôle de four. www.electromenagersge.ca Votre nouveau contrôle tactile a d'autres fonctions. Voici les fonctions et comment les activer. Les modes de fonctions spéciales peuvent être activées seulement lorsque l'affichage présente l'heure. Elles restent en mémoire - GE PGS968DEP | Use and Care Manual - Page 76
Fonctions spéciales de votre contrôle de four. 12 heures, 24 heures ou effacer l'horloge Votre contrôle est réglé pour utiliser une horloge de 12 heures. Enfoncez la touche CLOCK (horloge) à nouveau pour passer à l'horloge de Si vous préférez une horloge de 24 heures ou un arrêt d'affichage, - GE PGS968DEP | Use and Care Manual - Page 77
www.electromenagersge.ca Utiliser la conversion Auto Recipe™ Pour la cuisson à convexion, la fonction de conversion Auto Recipe™ convertira automatiquement les températures de cuisson régulières par la température de cuisson à convexion. L'affichage indiquera la température convertie (réduite) - GE PGS968DEP | Use and Care Manual - Page 78
Utiliser la fonction Sabbath (Conçue pour le Sabbath et les Grandes Fêtes juives.) (sur certaines modèles) La fonction Sabbath peut servir seulement sous cuire/rôtir. Elle ne peut servir pour la convexion, gril, autonettoyage ou démarrage retardé. REMARQUE : la lumière du four s'allume - GE PGS968DEP | Use and Care Manual - Page 79
www.electromenagersge.ca Comment quitter la fonction Sabbath Enfoncez la touche CLEAR/OFF (annulation/arrêt). Si le four fonctionne, attendez pendant une période de délai aléatoire d'environ 30 secondes à 1 minute, jusqu'à ce que seulement s'affiche. Enfoncez et tenez enfoncées les touches BROIL - GE PGS968DEP | Use and Care Manual - Page 80
Entretien et nettoyage de la cuisinière. Assurez-vous que tous les contrôles sont éteints et que toutes les surfaces sont fraîches avant de nettoyer toute partie de la cuisinière. AVERTISSEMENT : si votre cuisinière est retirée pour le nettoyage, l'entretien ou pour toute autre raison, assurez-vous - GE PGS968DEP | Use and Care Manual - Page 81
le tiroir aussi loin que possible. Soulevez l'avant du tiroir et poussez jusqu'à ce que les butées dépassent les guides. Abaissez l'avant du tiroir et poussez jusqu'à ce qu'il ferme. Grille de four Grilles de four Toutes les grilles de four se nettoient à la - GE PGS968DEP | Use and Care Manual - Page 82
Entretien et nettoyage de la cuisinière. Réceptacle Douille Ampoule G6.35 Languette Couvercle de protection en verre (sur certains modèles) Réceptacle Douille Ampoule G9 Languette Couvercle de protection en verre (sur certains modèles) Remplacer les ampoules de four (sur certains modèles) - GE PGS968DEP | Use and Care Manual - Page 83
charnière. L'encoche du bras de charnière doit être bien installée dans le bas de la fente. Ouvrez entièrement la porte. Si la porte ne s'ouvre pas entièrement, l'enfoncement ne s'installe pas correctement dans le bord inférieur de la fente. Poussez le verrou - GE PGS968DEP | Use and Care Manual - Page 84
toujours la surface dans le sens du grain. Suivez les instructions du produit nettoyant pour nettoyer la surface en acier inoxydable. Pour du four et faciliter le nettoyage : Retirez la porte du four en suivant les instructions de la section Retrait de la porte du four. Agrippez le fond du four - GE PGS968DEP | Use and Care Manual - Page 85
et toutes fournitures recommandées sont disponibles auprès du centre de pièces. Consultez les instructions de la section 'Pour commander les pièces' de la page suivante. REMARQUE : ne sont pas disponibles. Contactez Mabe Replacement Parts pour commander des 37 produits de nettoyage de rechange. - GE PGS968DEP | Use and Care Manual - Page 86
*Pour les modèles canadiens, utilisez un modèle équivalent approuvée par Mabe lorsque les produits CERAMA BRYTE® ne sont pas disponibles. Contactez Mabe Replacement Parts pour commander des produits de nettoyage de rechange. 38 - GE PGS968DEP | Use and Care Manual - Page 87
rallumez-le. Si le son de déclic se poursuit, appelez le service. Flammes du brûleur très Mauvais rapport d'air à gaz. larges ou jaunes • Si la cuisinière est branchée au gaz PL, vérifiez toutes les étapes dans les Instructions d'installation fournies avec votre cuisinière. La lumière du four ne - GE PGS968DEP | Use and Care Manual - Page 88
appeler le service... Conseils installation. Retirez et replacez la porte du four. Reportez-vous à la section Retrait de la porte du four. Le tiroir de rangement est tordu Le support du tiroir arrière • Replacez le tiroir. Consultez les instructions de Retrait repose sur le dessus du rail guide - GE PGS968DEP | Use and Care Manual - Page 89
. • Coupez le courant à la cuisinière pendant au moins 30 secondes, puis remettez le courant. Si le code d'erreur de fonction se répète, appelez le service. 41 - GE PGS968DEP | Use and Care Manual - Page 90
Avant d'appeler le service... Conseils de dépannage Problème Le contrôle signale après avoir entré la durée de cuisson ou l'heure de démarrage Causes possibles Vous avez oublié d' - GE PGS968DEP | Use and Care Manual - Page 91
www.electromenagersge.ca Problème Causes possibles Action Des égratignures (peuvent être des fissures) sur la surface de cuisson vitrée Mauvaises méthodes de nettoyage utilisées. • Les égratignures ne s'éliminent pas. Les petites égratignures seront moins visibles avec le temps et suite au - GE PGS968DEP | Use and Care Manual - Page 92
toutes les huiles et lesproduits gras en excès. • Pièce GE authentique • Facile à nettoyer • Garantie d'un an Offre d'une commandez votre gril-lèchefrite dans les 30 jours qui suivent votre achat d'un appareil ménager GE. Pièce # Dimensions P Petit WB48X10055 8-3/4 po (22,2 cm) L x 1-1/4 - GE PGS968DEP | Use and Care Manual - Page 93
Notes. www.electromenagersge.ca 45 - GE PGS968DEP | Use and Care Manual - Page 94
Notes. 46 - GE PGS968DEP | Use and Care Manual - Page 95
gaz GE. Le service sous garantie est assuré par nos centres de service de l'usine ou par un technicien agréé Customer Care®. Pour obtenir le service, pas : n Les déplacements du service pour vous enseigner comment utiliser le produit. n Mauvaise installation, livraison ou maintenance. n Défaillance - GE PGS968DEP | Use and Care Manual - Page 96
par Internet au site www.electromenagersge.ca 24 heures par jour, tous les jours de l'année. Service de réparations Service de réparations GE est tout près de vous. Pour faire réparer votre électroménager GE, il suffit de nous téléphoner. 1.800.561.3344 Studio de conception réaliste Sur demande
-
 1
1 -
 2
2 -
 3
3 -
 4
4 -
 5
5 -
 6
6 -
 7
7 -
8
-
9
-
10
-
11
-
12
-
13
-
14
-
15
-
16
-
17
-
18
-
19
-
20
-
21
-
22
-
23
-
24
-
25
-
26
-
27
-
28
-
29
-
30
-
31
-
32
-
33
-
34
-
35
-
36
-
37
-
38
-
39
-
40
-
41
-
42
-
43
-
44
-
45
-
46
-
47
-
48
-
49
-
50
-
51
-
52
-
53
-
54
-
55
-
56
-
57
-
58
-
59
-
60
-
61
-
62
-
63
-
64
-
65
-
66
-
67
-
68
-
69
-
70
-
71
-
72
-
73
-
74
-
75
-
76
-
77
-
78
-
79
-
80
-
81
-
82
-
83
-
84
-
85
-
86
-
87
-
88
-
89
-
90
-
91
-
92
-
93
-
94
-
95
-
96
 |
 |

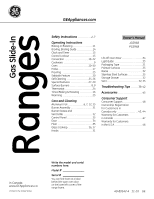
Safety Instructions
. . . . . . . . . . . . .2–7
Operating Instructions
Baking or Roasting . . . . . . . . . . . . . . . . . . .11
Broiling, Broiling Guide . . . . . . . . . . . . . . .14
Clock and Timer . . . . . . . . . . . . . . . . . . . . . .15
Control Lockout . . . . . . . . . . . . . . . . . . . . . .15
Convection . . . . . . . . . . . . . . . . . . . . . . .18–22
Cookware . . . . . . . . . . . . . . . . . . . . . . . . . . . . .9
Oven . . . . . . . . . . . . . . . . . . . . . . . . . . . . .10–30
Probe . . . . . . . . . . . . . . . . . . . . . . . . . . . . . . . . .17
Proofing . . . . . . . . . . . . . . . . . . . . . . . . . . . . .23
Sabbath Feature . . . . . . . . . . . . . . . . . . . . .30
Self-Cleaning . . . . . . . . . . . . . . . . . . . . .25, 26
Special Features
. . . . . . . . . . . . . . . . .27–29
Surface Burners . . . . . . . . . . . . . . . . . . . . 8, 9
Thermostat . . . . . . . . . . . . . . . . . . . . . . . . . . .24
Timed Baking & Roasting . . . . . . . . . . . .16
Warming . . . . . . . . . . . . . . . . . . . . . . . . . . . . .23
Care and Cleaning
Aluminum Foil . . . . . . . . . . . . . . .6, 7, 12, 35
Burner Assembly . . . . . . . . . . . . . . . . . . . . 31
Burner Grates and
Vent Grille
. . . . . . . . . . . . . . . . . . . . . . . . . . . 32
Control Panel . . . . . . . . . . . . . . . . . . . . . . . . 35
Door . . . . . . . . . . . . . . . . . . . . . . . . . . . . . . . . . 34
Floor
. . . . . . . . . . . . . . . . . . . . . . . . . . . . . . . . .35
Glass Cooktop . . . . . . . . . . . . . . . . . . . 36, 37
Knobs . . . . . . . . . . . . . . . . . . . . . . . . . . . . . . . 31
Lift-Off Oven Door . . . . . . . . . . . . . . . . . . . .34
Light Bulbs . . . . . . . . . . . . . . . . . . . . . . . . . . .33
Packaging Tape . . . . . . . . . . . . . . . . . . . . . .31
Painted Surfaces . . . . . . . . . . . . . . . . . . . . .35
Racks . . . . . . . . . . . . . . . . . . . . . . . . . . . . . . . . 32
Stainless Steel Surfaces . . . . . . . . . . . . . .35
Storage Drawer
. . . . . . . . . . . . . . . . . . . . . 32
Vent . . . . . . . . . . . . . . . . . . . . . . . . . . . . . . 32, 35
Troubleshooting Tips
. . . . . . . 38–42
Accessories
. . . . . . . . . . . . . . . . . . . . . . . 45
Consumer Support
Consumer Support . . . . . . . . . . . . . . . . . . 48
Ownership Registration
for Customers in
Canada only . . . . . . . . . . . . . . . . .43, 44
Warranty for Customers
in Canada . . . . . . . . . . . . . . . . . . . . . . . . . . . 47
Warranty for Customers
in the U.S.A. . . . . . . . . . . . . . . . . . . . . . . . . . . 46
GEAppliances.com
JGS968
PGS968
Owner’s Manual
49-80542-4
11-10
GE
Write the model and serial
numbers here:
Model
# ______________
Serial
# ______________
You can find them on a label
behind the open oven door
on the lower left corner of the
range frame.
Ranges
Gas Slide-In
Printed in the United States
In Canada:
www.GEAppliances.ca