GE PI6000 Installation Instructions - Page 3
Masking, Maintaining the Detector
 |
UPC - 046188070398
View all GE PI6000 manuals
Add to My Manuals
Save this manual to your list of manuals |
Page 3 highlights
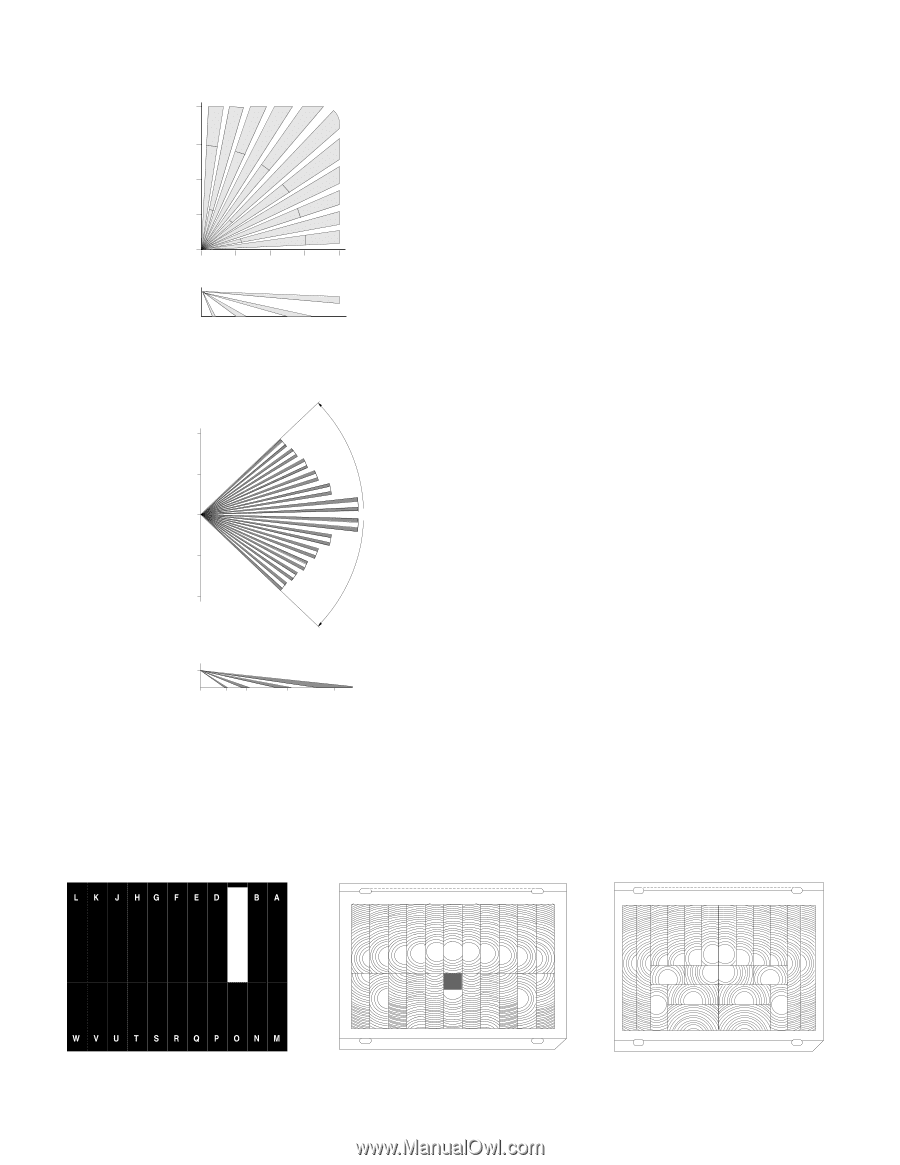
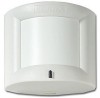
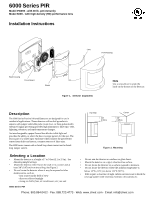
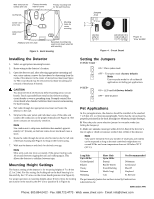
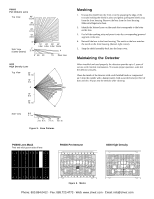
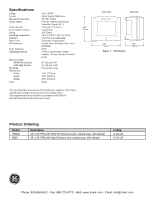
PI6000 Pet Immune Lens Top View 40' 12.2m 30' 9.1m 20' 6.1m 10' 3.0m Side View (Center Beams) 0' 0' 7' 2.1m 10' 20' 30' 40' 3.0m 6.0m 9.0m 12.2m 4 0' 60 30 15 Floor Line 6000 High Density Lens Top View 35' 10.1 m 16' 5 m 0 88.6 16' 5 m 35' 10.1 m Side View 6.9' 2.1 m 7' 13' 23' 35' 2 m 4 m 7.1 m 10.1 m Figure 5. Zone Patterns Masking 1. Unsnap the shield from the front cover by grasping the edge of the two tabs holding the shield in place and gently pulling the shield away from the front housing. Remove the lens from the front housing. Make sure fingers are clean. 2. Identify the lettered zone on the mask that corresponds to the letter on the lens. 3. Peel off the masking strip and press it onto the corresponding grooved segment on the lens. 4. Reinstall the lens in the front housing. The notch on the lens matches the notch on the front housing. (bottom right corner). 5. Snap the shield assembly back into the front cover. Maintaining the Detector When installed and used properly, the detectors provide up to 5 years of service with minimal maintenance. To ensure proper operation, walk test the detector annually. Clean the inside of the detector with a soft bristled brush or compressed air. Clean the outside with a damp (water) cloth as needed to keep it free of dust and dirt. Always test the detector after cleaning. PI6000 Lens Mask Peel and stick groove side of lens PI6000 Pet Immune L K J I H G F E D C B A 6000 High Density W V U T S R Q P O N M Figure 6. Masks Phone: 800.894.0412 - Fax: 888.723.4773 - Web: www.clrwtr.com - Email: [email protected]
-
 1
1 -
 2
2 -
 3
3 -
 4
4
 |
 |