GE PT960SMSS Owners Manual
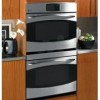
GE PT960SMSS - 30 Inch Double Electric Wall Oven Manual
 |
View all GE PT960SMSS manuals
Add to My Manuals
Save this manual to your list of manuals |
GE PT960SMSS manual content summary:
- GE PT960SMSS | Owners Manual - Page 1
Control Panel 39 Light Bulb 39 Oven Door 40 Probe 40 Racks 41 Removing Packaging Tape 39 Stainless Steel Surfaces 39 Troubleshooting Tips 42-44 Accessories 45 Consumer Support Consumer Support back cover Warranty 46 Write the model and serial numbers here: Model Serial You can - GE PT960SMSS | Owners Manual - Page 2
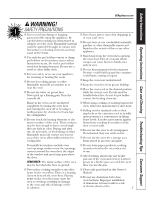
watching the oven. provided installation instructions. ■ Always keep combustible wall covering, ■ Do not attempt to repair or replace any curtains or drapes a safe distance from part of your oven unless it is specifically your oven. recommended in this manual. All other servicing should be - GE PT960SMSS | Owners Manual - Page 3
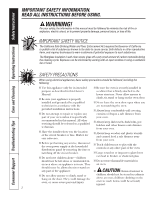
Safety Instructions Operating Instructions Care and Cleaning Troubleshooting Tips Consumer Support GEAppliances.com WARNING! SAFETY PRECAUTIONS ■ Never wear loose-fitting or hanging garments while using the appliance. Be careful when reaching for items stored in cabinets over the oven. Flammable - GE PT960SMSS | Owners Manual - Page 4
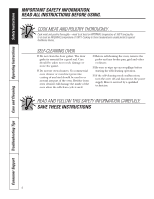
Consumer Support Troubleshooting Tips Care and Cleaning Operating Instructions Safety Instructions IMPORTANT SAFETY INFORMATION. READ ALL INSTRUCTIONS BEFORE USING. COOK MEAT AND POULTRY THOROUGHLY... Cook meat and poultry thoroughly-meat to at least an INTERNAL temperature of 160°F and poultry to - GE PT960SMSS | Owners Manual - Page 5
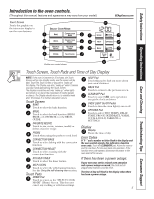
Instructions Operating Instructions Care and Cleaning Troubleshooting Tips Consumer Support Introduction to the oven controls. (Throughout this manual, features and appearance may vary from your model.) GEAppliances.com Touch Screen Touch the graphics on the interactive display to use the oven - GE PT960SMSS | Owners Manual - Page 6
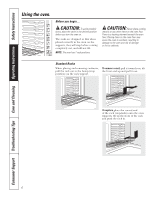
Support Troubleshooting Tips Care and Cleaning Operating Instructions Safety Instructions Using the oven. Before you begin... CAUTION: To avoid possible burns, place the racks in the desired position before you turn the oven on. The racks are designed so that when placed correctly in the oven - GE PT960SMSS | Owners Manual - Page 7
Safety Instructions Operating Instructions Care and Cleaning Troubleshooting Tips Consumer Support GEAppliances.com Extension Rack the locking side paddles on the rack frame will click-lock into place on the oven supports. If the side paddles did not click-lock into position, repeat the steps above - GE PT960SMSS | Owners Manual - Page 8
Consumer Support Troubleshooting Tips Care and Cleaning Operating Instructions Safety Instructions 250 Using the oven. Aluminum Foil Do not use aluminum foil on the bottom of the oven. Never entirely cover a rack with aluminum foil. This will disturb the heat circulation and result in poor baking - GE PT960SMSS | Owners Manual - Page 9
Instructions Care and Cleaning Troubleshooting Tips Consumer Support Baking and roasting. GEAppliances.com BAKE UPPER OVEN OR LOWER OVEN On double oven models only. 1 2 3 4 5 6 7 8 9 0 ENTER START NOTE: A cooling fan may automatically turn on and off to cool internal parts - GE PT960SMSS | Owners Manual - Page 10
Consumer Support Troubleshooting Tips Care and Cleaning Operating Instructions Safety Instructions Timed baking and roasting. On double oven models, you can use timed baking in one oven while using self-clean in the other; you can also use timed baking in both ovens at the same time. NOTE: Foods - GE PT960SMSS | Owners Manual - Page 11
Safety Instructions Operating Instructions Care and Cleaning Troubleshooting Tips Consumer Support BAKE UPPER OVEN OR LOWER OVEN On double oven models only. 1 2 3 4 5 6 7 8 9 0 ENTER 1 2 3 4 5 6 7 8 9 0 ENTER ADD BAKE OPTION DELAY START START COOK TIME OR FINISH COOK - GE PT960SMSS | Owners Manual - Page 12
Consumer Support Troubleshooting Tips Care and Cleaning Operating Instructions Safety Instructions Using the probe. For many foods, especially roasts and poultry, internal food temperature is the best test for doneness. The temperature probe takes the guesswork out of roasting by cooking foods to - GE PT960SMSS | Owners Manual - Page 13
Safety Instructions Operating Instructions Care and Cleaning Troubleshooting Tips Consumer Support PROBE UPPER OVEN OR LOWER OVEN On double oven models only. 1 2 3 4 5 6 7 8 9 0 ENTER BAKE 1 2 3 4 5 6 7 8 9 0 ENTER START GEAppliances.com How to Set the Oven For - GE PT960SMSS | Owners Manual - Page 14
oven models only, touch UPPER OVEN or LOWER OVEN to select the desired oven. Follow suggested rack positions in the Broiling Guide. The size, weight, thickness, starting temperature and your preference for doneness will affect broiling times. This guide is based on meats at refrigerator temperature - GE PT960SMSS | Owners Manual - Page 15
Safety Instructions Operating Instructions Care and Cleaning Troubleshooting Tips Consumer Support Broiling Guide The size, weight, thickness, starting temperature and your preference for doneness will affect broiling times. This guide is based on meats at refrigerator temperature. Food Ground - GE PT960SMSS | Owners Manual - Page 16
Consumer Support Troubleshooting Tips Care and Cleaning Operating Instructions Safety Instructions Using the convection oven. Convection Bake NOTE: The convection fan will cycle on and off while cooking to best distribute hot air in the oven. The convection oven fan shuts off when the oven door is - GE PT960SMSS | Owners Manual - Page 17
Safety Instructions Operating Instructions Care and Cleaning Troubleshooting Tips Consumer Support When baking cookies, you will get the best results if you use a flat cookie sheet instead of a pan with low sides. GEAppliances.com Convection Roast ■ Good for large tender cuts of meat, uncovered. - GE PT960SMSS | Owners Manual - Page 18
Consumer Support Troubleshooting Tips Care and Cleaning Operating Instructions Safety Instructions Convection baking and roasting. CONVECTION BAKE OR CONVECTION ROAST UPPER OVEN OR LOWER OVEN On double oven models only. SINGLE RACK OR MULTI-RACK 1 2 3 4 5 6 7 8 9 0 ENTER START - GE PT960SMSS | Owners Manual - Page 19
Safety Instructions Operating Instructions Care and Cleaning Troubleshooting Tips Consumer Support GEAppliances.com For best results when roasting large turkeys and roasts, we recommend using the probe included in the convection oven. PROBE UPPER OVEN OR LOWER OVEN On double oven models only. - GE PT960SMSS | Owners Manual - Page 20
Consumer Support Troubleshooting Tips Care and Cleaning Operating Instructions Safety Instructions Timed convection baking and roasting. On double oven models, you can use timed baking in one oven while using self-clean in the other; you can also use timed baking in both ovens at the same time. - GE PT960SMSS | Owners Manual - Page 21
day. Touch CONVECTION BAKE or CONVECTION ROAST. For double oven models only, touch UPPER OVEN or LOWER OVEN to select the desired oven. Two rack options are available: ■ SINGLE RACK five minutes. 21 Safety Instructions Operating Instructions Care and Cleaning Troubleshooting Tips Consumer Support - GE PT960SMSS | Owners Manual - Page 22
Support Troubleshooting Tips Care and Cleaning Operating Instructions Safety Instructions PRE-HEAT OPTION to set preheating or CONTINUE to review the set recipe. Touch SAVE AND CREATE NEW START. For double oven models only, touch UPPER OVEN or LOWER OVEN to select the desired oven. FAVORITE RECIPE - GE PT960SMSS | Owners Manual - Page 23
Consumer Support Kitchen timer and control lockout. GEAppliances.com KITCHEN TIMER 1 2 3 4 5 6 7 8 9 0 START The KITCHEN TIMER can be set from 1 minute to 24 hours. This timer does not control oven operations. To Set the Kitchen Timer Touch KITCHEN TIMER. For double wall oven models - GE PT960SMSS | Owners Manual - Page 24
Consumer Support Troubleshooting Tips Care and Cleaning Operating Instructions Safety Instructions Using the self-cleaning oven. The oven door must be closed and all controls must be set correctly for the cycle to work properly. Wipe up heavy soil on the oven bottom. (appearance may vary) Before - GE PT960SMSS | Owners Manual - Page 25
Safety Instructions Operating Instructions Care and Cleaning Troubleshooting Tips Consumer Support SELF CLEAN UPPER OVEN OR LOWER OVEN On double oven models only. LIGHT CLEAN OR REGULAR CLEAN OR CUSTOM 1 2 3 4 5 6 7 8 9 0 (Numbers will only be used when setting a CUSTOM clean - GE PT960SMSS | Owners Manual - Page 26
Support Troubleshooting Tips Care and Cleaning Operating Instructions Safety Instructions Using the self-cleaning oven. The oven door must be closed and all controls must be set correctly for the cycle to work properly. SELF CLEAN UPPER OVEN OR LOWER OVEN On double oven models only. LIGHT - GE PT960SMSS | Owners Manual - Page 27
Safety Instructions Operating Instructions Care and Cleaning Troubleshooting Tips Consumer Support Option-Proof. OPTIONS PROOF UPPER OVEN OR LOWER OVEN START KITCHEN TIMER CANCEL GEAppliances.com Proofing The proofing feature maintains a warm environment useful for rising yeast-leavened - GE PT960SMSS | Owners Manual - Page 28
Consumer Support Troubleshooting Tips Care and Cleaning Operating Instructions Safety Instructions Option-Warm. OPTIONS WARM UPPER OVEN OR LOWER OVEN On double oven models only. HIGH OR MEDIUM OR LOW CRISP OR MOIST START 28 Warming Warm can be activated to keep hot, cooked foods warm. - GE PT960SMSS | Owners Manual - Page 29
Safety Instructions Operating Instructions Care and Cleaning Troubleshooting Tips Consumer Support GEAppliances.com Temperature beef. Use a portable meat thermometer to check internal temperatures. Tips: ■ Cover food with lid or aluminum foil. ■ Do not put water in the oven. ■ Do not use - GE PT960SMSS | Owners Manual - Page 30
Consumer Support Troubleshooting Tips Care and Cleaning Operating Instructions Safety Instructions Option-Two temps. OPTIONS TWO TEMPS UPPER OVEN OR LOWER OVEN On double oven models only. 1 2 3 4 5 6 7 8 9 0 ENTER 1 2 3 4 5 6 7 8 9 0 ENTER BAKE OR CONVECTION BAKE OR - GE PT960SMSS | Owners Manual - Page 31
Instructions Operating Instructions Care and Cleaning Troubleshooting Tips Consumer Support For double oven models only, touch UPPER OVEN or LOWER OVEN to select the desired oven. Touch service, as a guide for selecting food-safe drying trays. To order a replacement doorstop, call our National Parts - GE PT960SMSS | Owners Manual - Page 32
Consumer Support Troubleshooting Tips Care and Cleaning Operating Instructions Safety Instructions Option-Delay start. NOTE . Touch OPTIONS. Touch DELAY START. For double oven models only, touch UPPER OVEN or LOWER OVEN to select the desired oven. Two delay start time setting options are available: - GE PT960SMSS | Owners Manual - Page 33
Instructions Operating Instructions Care and Cleaning Troubleshooting Tips Consumer Support Option-Sabbath. (Designed for use on the Jewish Sabbath and Holidays.) (on some models oven will begin baking/roasting. The touch screen will not change and the oven light will be disabled. To adjust the oven - GE PT960SMSS | Owners Manual - Page 34
Consumer Support Troubleshooting Tips Care and Cleaning Operating Instructions Safety Instructions Options-Settings. OPTIONS SETTINGS TEMP SELECTION TEMPERATURE OFFSET +1˚ AND/OR -1˚ OK DONE Adjust the Oven Thermostat-Do It Yourself! You may find that your new oven cooks differently than - GE PT960SMSS | Owners Manual - Page 35
Instructions Operating Instructions Care and Cleaning Troubleshooting Tips Consumer Support OPTIONS SETTINGS 12 HR SHUT-OFF DEACTIVATED OR ACTIVATED OK GEAppliances.com 12-Hour Shut-Off With this option, should you forget and leave the oven on, the control will automatically turn off the oven - GE PT960SMSS | Owners Manual - Page 36
Consumer Support Troubleshooting Tips Care and Cleaning Operating Instructions Safety Instructions Options-Settings. OPTIONS SETTINGS AUTO RECIPE CONVERSION ON OR OFF OK DONE Auto Recipe™ Conversion (on some models) When using convection bake, the Auto Recipe™ Conversion option will - GE PT960SMSS | Owners Manual - Page 37
Safety Instructions Operating Instructions Care and Cleaning Troubleshooting Tips Consumer Support OPTIONS SETTINGS SOUND/ VOLUME SOUND ON/OFF SOUND ON OR SOUND OFF OK OK DONE Sound On/Off This option allows you to turn on - GE PT960SMSS | Owners Manual - Page 38
Consumer Support Troubleshooting Tips Care and Cleaning Operating Instructions Safety Instructions Options-Settings. OPTIONS SETTINGS SOUND/ VOLUME TIMER SIGNAL CONTINUE OR 1 BEEP OR 2 BEEP OR 3 BEEP OK OK DONE Timer Signal This option allows you to - GE PT960SMSS | Owners Manual - Page 39
Safety Instructions Operating Instructions Care and Cleaning Troubleshooting Tips Consumer Support Care and cleaning. GEAppliances.com Be sure electrical power is off and all surfaces are cool before cleaning any part of the oven. How to Remove Protective Shipping Film and Packaging Tape - GE PT960SMSS | Owners Manual - Page 40
Consumer Support Troubleshooting Tips Care and Cleaning Operating Instructions Safety Instructions Care and cleaning. Cleaning the Oven Door Do not rub or clean the door gasket- it has an extremely low resistance to abrasion. If you notice the gasket becoming worn, frayed - GE PT960SMSS | Owners Manual - Page 41
Instructions Care and Cleaning Troubleshooting Tips Consumer Support GEAppliances.com Standard Racks The standard racks may be cleaned by hand with an abrasive cleaner or steel wool. After cleaning, rinse the racks with clean water and dry with a clean cloth. They may also remain in the oven - GE PT960SMSS | Owners Manual - Page 42
Consumer Support Troubleshooting Tips Care and Cleaning Operating Instructions Safety Instructions Before you call for service... Troubleshooting Tips Save time and money! Review the charts on the following pages first and you may not need to call for service. Problem Control signals after - GE PT960SMSS | Owners Manual - Page 43
Safety Instructions Operating Instructions Care and Cleaning Troubleshooting Tips Consumer Support GEAppliances.com Problem Oven will not work Possible Causes What To Do A fuse in your home may be blown or the circuit breaker tripped. • Replace the fuse or reset the circuit breaker. Oven - GE PT960SMSS | Owners Manual - Page 44
Consumer Support Troubleshooting Tips Care and Cleaning Operating Instructions Safety Instructions Before you call for service... Troubleshooting Tips Problem Display "wakes up" without touching it "F- and a number or letter" flash in the display Display goes blank Display flashes "PROBE" appears - GE PT960SMSS | Owners Manual - Page 45
Safety Instructions Operating Instructions Care and Cleaning Troubleshooting Tips Consumer Support Accessories. Looking For Something your model number ready. GEAppliances.com Grates Surface Burner Heads and Caps Surface Elements and Drip Pans Knobs or Oven Racks Oven Elements Light Bulbs - GE PT960SMSS | Owners Manual - Page 46
Consumer Support Troubleshooting Tips Care and Cleaning Operating Instructions Safety Instructions GE Built-In Electric Oven Warranty. All warranty service provided by our Factory Service Centers, or an authorized Customer Care® technician. To schedule service, visit us on-line at GEAppliances.com - GE PT960SMSS | Owners Manual - Page 47
autonettoyant 69-71 Gril 60 Grilles 52, 53 Minuterie de cuisine 68 Option de cuisson et de maintien de la température 76 Option de départ différ 77 Option de déshydratation 76 Option de réglage de deux températures 75 Option Sabbat 78 Recettes préférées 67 Réglage des options 79 - GE PT960SMSS | Owners Manual - Page 48
de réparer ni de remplacer aucune pièce du four, à moins que cela ne soit recommandé dans le présent manuel. Tout autre service d'entretien doit être assuré par un réparateur qualifié. ■ Demandez à l'installateur de vous montrer l'emplacement du disjoncteur ou du fusible. Identifiez-le pour pouvoir - GE PT960SMSS | Owners Manual - Page 49
Mesures de sécurité Fonctionnement Entretien et nettoyage Conseils de dépannage Soutien au consommateur electromenagersge.ca AVERTISSEMENT! MESURES DE SÉCURITÉ ■ N'utilisez que des poignées ou des mitaines de four sèches-les poignées ou mitaines de four humides ou mouillées peuvent causer des brû - GE PT960SMSS | Owners Manual - Page 50
Soutien au consommateur Conseils de dépannage Entretien et nettoyage Fonctionnement Mesures de sécurité MESURES DE SÉCURITÉ IMPORTANTES. VEUILLEZ D'ABORD LIRE LES MESURES DE SÉCURITÉ. FAITES CUIRE LA VIANDE ET LA VOLAILLE À FOND... Faites cuire la viande et la volaille à fond-la température - GE PT960SMSS | Owners Manual - Page 51
LEVÉE ou GRIL À TEMP BAS) ou le GUIDE DE GRILLAGE. RECETTE PRÉFÉRÉE Appuyez sur cette l'exception de l'horloge et de la minuterie. TOUCHE(S) OVEN LIGHT ON/OFF (ALLUMER/ÉTEINDRE LA LUMIÈRE DU FOUR TOUCHE OPTIONS Appuyez pour choisir DEUX TEMP, DÉPART DIFFÉRÉ, FERMENTATION, DÉSHYDRATER, CHAUD, CUISSON - GE PT960SMSS | Owners Manual - Page 52
risque de brûlures, installez les grilles à la hauteur appropriée avant de mettre le four en marche. À condition d'être correctement placées sur leurs supports, les grilles sont conçues pour s'arrêter sans basculer avant d'être complètement retirées du four. NOTE : Le four a 7 positions de grille - GE PT960SMSS | Owners Manual - Page 53
leviers de dégagement vers l'avant de la grille, maintenez-les et faites glisser la grille vers vous jusqu'à la butée (position d'arrêt) sur le support de la grille. Leviers de dégagement Saisissez fermement les deux côtés du cadre de la grille et la grille coulissante, inclinez la partir avant vers - GE PT960SMSS | Owners Manual - Page 54
Soutien au consommateur Conseils de dépannage Entretien et nettoyage Fonctionnement Mesures de sécurité 250 Utilisation de votre four. Papier d'aluminium N'utilisez pas de papier aluminium dans le bas du four. Ne recouvrez pas entièrement une grille avec du papier d'aluminium. La circulation de la - GE PT960SMSS | Owners Manual - Page 55
choisir le four. Appuyez sur les touches numériques pour régler la température voulue. Appuyez sur la touche ENTRER. Appuyez sur la touche DÉPART. Le ventilateur de convection s'allumera durant le préchauffage. Une signal sonore indiquera que le préchauffage du four est terminé ; cela peut prendre - GE PT960SMSS | Owners Manual - Page 56
signal sonore, placez les aliments dans le four. La cuisson minutée ne démarrera qu'une fois le préchauffage terminé et la touche DÉPART enfoncée. ■ DÉPART à FROID - Appuyez sur cette touche pour démarrer le four immédiatement et cuire la nourriture sans préchauffage. Le ventilateur de convection - GE PT960SMSS | Owners Manual - Page 57
four approprié. Le réglage de la minuterie s'effectue en appuyant sur RÉGLER LA MINUTERIE. Consultez la section Minuterie. Une fois le délai de départ différé écoulé, le four va démarrer et poursuivre la cuisson pendant la période programmée, puis il s'arrêtera automatiquement, sauf si la fonction - GE PT960SMSS | Owners Manual - Page 58
Soutien au consommateur Conseils de dépannage Entretien et nettoyage Fonctionnement Mesures de sécurité Utilisation de la sonde. Dans le cas de nombreux aliments, plus particulièrement dans celui des rôtis et de la volaille, la température interne de l'aliment constitue le meilleur moyen d'en é - GE PT960SMSS | Owners Manual - Page 59
9 0 ENTRER CUISSON 1 2 3 4 5 6 7 8 9 0 ENTRER DÉPART Comment régler un rôtissage avec la sonde thermique Insérez la sonde dans la nourriture. é la température de la sonde ni appuyé sur ENTRER. Appuyez sur DÉPART. Le four s'allumera immédiatement et le restera jusqu'à ce qu'il soit - GE PT960SMSS | Owners Manual - Page 60
de grillage concernant la position de la grille. La taille, le poids, l'épaisseur, la température de départ et vos préférences de cuisson influencent la durée de grillage. Ce guide est basé sur des viandes à température de réfrigération. Appuyez sur GRIL à TEMP ÉLEVÉE ou GRIL à TEMP BAS. Appuyez - GE PT960SMSS | Owners Manual - Page 61
Mesures de sécurité Fonctionnement Entretien et nettoyage Conseils de dépannage Soutien au consommateur Utilisation du four à convection. electromenagersge.ca Cuisson à convection NOTE : Le ventilateur de convection se met en marche et s'arrête pendant la cuisson pour mieux distribuer l'air chaud - GE PT960SMSS | Owners Manual - Page 62
Soutien au consommateur Conseils de dépannage Entretien et nettoyage Fonctionnement Mesures de sécurité Utilisation du four à convection. Rôtissage par convection ■ Pour les grosses coupes de viande tendres, cuites à découvert. Le ventilateur fait circuler l'air chaud uniformément au-dessus et - GE PT960SMSS | Owners Manual - Page 63
avec plusieurs grilles pour plus d'information. Appuyez sur les touches numériques pour régler la température désirée. Appuyez sur ENTRER. Appuyez sur DÉPART. Le ventilateur de convection se mettra en marche durant le préchauffage. Une signal sonore indiquera que le préchauffage du four est termin - GE PT960SMSS | Owners Manual - Page 64
les touches numériques pour régler la température de four désirée. Appuyez sur ENTRER. Appuyez sur DÉPART. Le four s'allumera immédiatement et le restera jusqu'à ce que le four soit éteint. Guide de rôtissage par convection Le ventilateur de convection se mettra en marche (après un bref délai) et - GE PT960SMSS | Owners Manual - Page 65
réglage de température. La cuisson minutée ne démarrera qu'une fois le préchauffage terminé et la touche DÉPART enfoncée. Au signal sonore, placez les aliments dans le four. ■ DÉPART à FROID - Appuyez sur cette touche pour démarrer le four immédiatement et cuire la nourriture sans préchauffage - GE PT960SMSS | Owners Manual - Page 66
four approprié. Le réglage de la minuterie s'effectue en appuyant sur RÉGLER LA MINUTERIE. Consultez la section Minuterie. Une fois le délai de départ différé écoulé, le four va démarrer et poursuivre la cuisson pendant la période programmée, puis il s'arrêtera automatiquement, sauf si la fonction - GE PT960SMSS | Owners Manual - Page 67
sur ENTRER. Appuyez sur MODIFIER puis modifiez le réglage. Appuyez sur PRÊT. Appuyez sur SAUVEGARDER ou SAUVEGARDER ET DÉBUTER LA CUISSON. Appuyez sur DÉPART. Sur les modèles à four double seulement, appuyez sur FOUR SUPÉR. ou FOUR INFÉR. pour choisir le four. RECETTE PRÉFÉRÉE Supprimer une - GE PT960SMSS | Owners Manual - Page 68
'à ce que la période désirée s'affiche à l'écran. Par exemple, pour une période de 2 heures et 45 minutes, appuyez sur 2, 4 et 5 dans cet ordre. Appuyez sur DÉPART. Si la période réglée ou restante est supérieure ou égale à une heure, l'écran affichera les heures et les minutes [HH: MM]. Les lettres - GE PT960SMSS | Owners Manual - Page 69
la durée résiduelle d'autonettoyage, appuyez sur AUTONETTOYAGE. Grilles Normales S'il devient difficile de faire glisser les grilles, essuyez leurs bords et les supports dans le four avec de l'huile de cuisson. Grille extensible S'il devient difficile de faire glisser la grille ou si les leviers de - GE PT960SMSS | Owners Manual - Page 70
Soutien au consommateur Conseils de dépannage Entretien et nettoyage Fonctionnement Mesures de sécurité Utilisation du four autonettoyant. AUTONETTOYAGE FOUR SUPÉR. OU FOUR INFÉR. Sur les modèles à four double seulement. NETTOYAGE LÉGER OU NETTOYAGE RÉGULIER OU PERSONNALISÉ 1 2 3 4 5 - GE PT960SMSS | Owners Manual - Page 71
de nettoyage de 3 à 7 heures et 30 minutes, selon le degré d'encrassement du four. Appuyez sur PLUS TARD. Trois options de réglage de départ différé sont disponibles : ■ HEURE DE DÉPART - Appuyez sur la touche puis servez-vous des touches numérotées pour entrer le délai qui précédera le début du - GE PT960SMSS | Owners Manual - Page 72
ôle de la température. Sur les modèles à four double seulement, appuyez sur FOUR SUPÉR. ou FOUR INFÉR. pour choisir le four. Appuyez sur DÉPART. Réglez la touche MINUTERIE à la durée de fermentation minimale. Lorsque la fermentation est terminée, appuyez sur la touche ANNULER. ■ La fermentation ne - GE PT960SMSS | Owners Manual - Page 73
que vous souhaitez obtenir des aliments croustillants ou tendres. Appuyez sur DÉPART. Laissez le four se préchauffer : BASSE MOYENNE ÉLEVÉE la garantie. Pour réchauffer les bols et plats de service Pour réchauffer les bols et plats de service, réglez la commande à BASSE. ■ Utilisez uniquement de - GE PT960SMSS | Owners Manual - Page 74
Soutien au consommateur Conseils de dépannage Entretien et nettoyage Fonctionnement Mesures de sécurité Option - Chaud. Tableau de sélection des températures pour les aliments croutillants Pour garder chauds différents types d'aliments, réglez la température en fonction de l'aliment qui nécessite - GE PT960SMSS | Owners Manual - Page 75
OU CUISSON à CONVECTION OU RÔTISSAGE à CONVECTION GRILLE SIMPLE OU MULTI GRILLES 1 2 3 4 5 6 7 8 9 0 ENTRER 1 2 3 4 5 6 7 8 9 0 ENTRER DÉPART APRÈS PRÉCHAUFFAGE OU DÉPART à FROID Deux températures Utilisez cette option pour associer successivement deux températures - GE PT960SMSS | Owners Manual - Page 76
et la (ou les) période. Appuyez sur ENTRER. Appuyez sur DÉPART APRÈS PRÉCHAUFFAGE ou DÉPART à FROID. Placez l'extrémité magnétique de la butée sur la butée. OPTIONS DÉSHYDRATER FOUR SUPÉR. OU FOUR INFÉR. ENTRER DÉPART 76 Déshydrater La déshydratation (séchage) est une méthode de pré - GE PT960SMSS | Owners Manual - Page 77
la cuisson et le rôtissage minutés par convection. Assurez-vous que l'heure du jour affichée par l'horloge est correcte. Appuyez sur OPTIONS. Appuyez sur DÉPART DIFFÉRÉ. Sur les modèles à four double seulement, appuyez sur FOUR SUPÉR. ou FOUR INFÉR. pour choisir le four. Deux options de réglage de - GE PT960SMSS | Owners Manual - Page 78
retardé. pour régler la température désirée entre 170 °F et 550 °F (77 °F et 288 °F). Aucun signal ou température ne seront donnés. Appuyez sur DÉPART. Si une coupure de courant se produit pendant que le four est en mode Sabbat, il s'éteindra automatiquement et restera éteint, même après le retour - GE PT960SMSS | Owners Manual - Page 79
et les minutes depuis 1:00 jusqu'à 12:59, appuyez sur AM ou PM, sur DÉPART puis sur OK. ■ Pour régler l'heure au format 24 heures : Appuyez sur 24 entrez les heures et les minutes depuis 00:01 jusqu'à 23:59, appuyez sur DÉPART puis sur OK. ■ Pour régler à l'heure avancée : Appuyez sur HEURE AVANCÉE, - GE PT960SMSS | Owners Manual - Page 80
Soutien au consommateur Conseils de dépannage Entretien et nettoyage Fonctionnement Mesures de sécurité Options - Réglages. OPTIONS RÉGLAGES ARRÊT AUTOMATIQUE 12 H DÉSACTIVÉ OU ACTIVÉ OK Arrêt automatique 12 heures Grâce à cette caractéristique, si vous oubliez le four et le laissez allumé, la - GE PT960SMSS | Owners Manual - Page 81
) apparaît sur l'écran. Par exemple, si vous inscrivez une température normale de recette de 350 °F (177 °C) et si vous appuyez sur la touche DÉPART, CON (convection) et la température de convection de 325 °F (163 °C) apparaît sur l'écran. NOTE : Cette caractéristique ne convertit pas les temps de - GE PT960SMSS | Owners Manual - Page 82
Soutien au consommateur Conseils de dépannage Entretien et nettoyage Fonctionnement Mesures de sécurité Options - Réglages. OPTIONS RÉGLAGES SON/ VOLUME SON MARCHE/ ARRÊT SON EN MARCHE OU SON ARRÊT OK OK PRÊT Son marche/arrêt Cette option vous permet d'activer ou de désactiver le signal - GE PT960SMSS | Owners Manual - Page 83
OPTIONS RÉGLAGES SON/ VOLUME SIGNAL DE LA MINUTERIE CUISS. CONTINUER OU 1 BIP OU 2 BIPS OU 3 BIPS OK OK PRÊT Signal de la minuterie Cette option vous permet de régler le type de signal qui retentira à la fin d'un cycle minuté. Appuyez sur OPTIONS. Appuyez sur RÉGLAGES. Appuyez sur SON/VOLUME. - GE PT960SMSS | Owners Manual - Page 84
eau chaude savonneux ou un produit nettoyant ou cire à acier inoxydable. Essuyez toujours la surface dans le sens du grain. Suivez les instructions du produit nettoyant pour nettoyer la surface en acier inoxydable. Pour savoir comment acheter le produit nettoyant ou le cire pour appareils électrom - GE PT960SMSS | Owners Manual - Page 85
Mesures de sécurité Fonctionnement Entretien et nettoyage Conseils de dépannage Soutien au consommateur Ne frottez pas et ne nettoyez pas le joint de porte car il a une résistance extrêmement faible à l'abrasion. Si vous remarquez qu'il devient usé, s'effiloche, est endommagé de quelque façon ou a - GE PT960SMSS | Owners Manual - Page 86
rester dans le four pendant le cycle d'autonettoyage sans subir de dommage. Si la grille devient difficile à retirer ou à remettre en place, essuyez les supports avec de l'huile de cuisson. N'essuyez pas les glissières avec de l'huile de cuisson. S'il devient difficile de faire glisser la grille ou - GE PT960SMSS | Owners Manual - Page 87
la porte fermée. Les commandes du four • Assurez-vous d'avoir appuyé sur GRIL. sont mal réglées. Grille placée à une hauteur • Voir le Guide de grillage. inadéquate. Aliments cuits dans un • Pour obtenir de bons résultats, utilisez un ustensile de cuisine plat de cuisson chaud. conçu pour - GE PT960SMSS | Owners Manual - Page 88
Soutien au consommateur Conseils de dépannage Entretien et nettoyage Fonctionnement Mesures de sécurité Avant d'appeler un réparateur... Conseils de dépannage Problème Causes probables Correctifs Le four ne fonctionne pas Un fusible peut être grillé ou un disjoncteur peut être déclenché dans - GE PT960SMSS | Owners Manual - Page 89
Mesures de sécurité Fonctionnement Entretien et nettoyage Conseils de dépannage Soutien au consommateur electromenagersge.ca Problème L'ecran se "reveille" sans le toucher "F-" et un chiffre ou une lettre clignotent L'écran d'affichage n'est pas allumé L'écran d'affichage clignote Le message " - GE PT960SMSS | Owners Manual - Page 90
recueille toutes les huiles et lesproduits gras en excès. • Pièce GE authentique • Facile à nettoyer • Garantie d'un an Offre d'une gril-lèchefrite dans les 30 jours qui suivent votre achat d'un appareil ménager GE. Pièce # (É.U.) Pièce # (Canada) Dimensions Petit WB48X10055 222D2097G001 8-3/4 - GE PT960SMSS | Owners Manual - Page 91
électrique encastré. Toutes les réparations sous garantie sont effectuées par nos Centres de réparation ou par nos réparateurs Mabe autorisés. Pour obtenir du service, veuillez nous visiter en ligne au site electromenagersge.ca ou appelez le no 1.800.561.3344. Veuillez fournir le numéro de série et - GE PT960SMSS | Owners Manual - Page 92
-nous par Internet au site electromenagersge.ca 24 heures par jour, tous les jours de l'année. Service de réparations Service de réparations GE est tout près de vous. Pour faire réparer votre électroménager GE, il suffit de nous téléphoner. 1.800.561.3344 Studio de conception réaliste Sur demande - GE PT960SMSS | Owners Manual - Page 93
serie aquí: Nº de modelo Nº de serie Puede encontrar esta información en una etiqueta en la parte delantera del horno, detrás de la puerta del horno en los modelos de horno simple, o en la parte delantera del horno inferior, detrás de la puerta del horno en los modelos de horno doble. 93 - GE PT960SMSS | Owners Manual - Page 94
. ■ Siempre mantenga tapices, cortinas o paños ■ No intente reparar o reemplazar ninguna que puedan prenderse fuego a una distancia parte de su horno a menos que este manual segura del horno. lo recomiende de manera específica. Todos los demás servicios de mantenimiento deberán derivarse a un - GE PT960SMSS | Owners Manual - Page 95
una asadera puede incendiarse la próxima vez que utilice la parrilla. ■ Únicamente limpie las partes enlistadas en este Manual del propietario. ■ No utilice papel de aluminio para revestir la parte inferior del horno. La instalación incorrecta del papel de aluminio puede provocar un riesgo de - GE PT960SMSS | Owners Manual - Page 96
mover el empaque. ■ No utilice limpiadores. Ningún limpiador comercial para hornos ni ninguna cubierta protectora para hornos debe utilizarse dentro o alrededor de las partes del horno. Los residuos de los limpiadores de hornos dañarán el interior del horno cuando se utilice el ciclo de autolimpieza - GE PT960SMSS | Owners Manual - Page 97
apariencias varíen con relación a su modelo a lo largo del manual.) GEAppliances.com Pantalla Táctil Toque los gráficos sobre la pantalla las operaciones del horno excepto el reloj y el contador. Tecla(s) de OVEN LIGHT (LUZ DEL HORNO) Encendida/ Apagada Toque para encender o apagar la luz - GE PT960SMSS | Owners Manual - Page 98
Seguridad Operación Uso del horno. Antes de comenzar... PRECAUCIÓN: Para prevenir posibles quemaduras, coloque las parrillas en la posición deseada antes de encender el horno. Las parrillas están diseñadas de modo que al colocarlas correctamente en el horno sobre los soportes se detengan antes de - GE PT960SMSS | Owners Manual - Page 99
Seguridad Operación Parrilla de extensión Cuando coloque o quite recipientes de cocción, siempre tire de la parrilla hacia afuera desde el riel frontal superior hasta alcanzar la posición de apertura total. NOTA: No extienda la parrilla rápidamente. Los alimentos pueden deslizarse desde el frente - GE PT960SMSS | Owners Manual - Page 100
cacerolas se colocan lo más al centro posible en lugar de colocarlas en la parte frontal o trasera del horno. Las cacerolas no deben tocarse mutuamente ni tocar será expulsado hacia fuera a través de las ventilaciones ubicadas en la parte inferior de la puerta del horno. El aire ingresará al horno a - GE PT960SMSS | Owners Manual - Page 101
posible que se encienda automáticamente un ventilador de enfriamiento para refrigerar las partes internas. Esto es normal, y el ventilador puede continuar andando incluso por lo menos un 80% de grasa por peso. Por otra parte, los productos tipo mantequilla bajos en grasa contienen menos grasa y más - GE PT960SMSS | Owners Manual - Page 102
Seguridad Operación Soporte al consumidor Solucionar problemas Cuidado y limpieza Horneado y asado por tiempo. En modelos de horno doble, puede utilizar la función de horneado cronometrado en un horno mientras utiliza la limpieza automática en el otro; también puede usar el horneado cronometrado - GE PT960SMSS | Owners Manual - Page 103
Seguridad Operación Cuidado y limpieza Solucionar problemas Soporte al consumidor HORNEAR HORNO SUPER. U HORNO INFER. Sólo en modelos de horno doble. 1 2 3 4 5 6 7 8 9 0 ACEPTAR 1 2 3 4 5 6 7 8 9 0 ACEPTAR AGREGAR OPCIÓN DE HORNEADO ENCENDIDO DIFERIDO HORA DE INICIO - GE PT960SMSS | Owners Manual - Page 104
debería estar en el centro de la comida y no tocar huesos, grasa ni cartílagos. ■ Para dorar sin huesos - inserte la sonda en la parte más carnosa del asado. ■ Para cocinar jamón o cordero con hueso - inserte la sonda en el centro del músculo o articulación más baja y larga. ■ Para cocinar carne - GE PT960SMSS | Owners Manual - Page 105
SONDA HORNO SUPER. U HORNO INFER. Sólo en modelos de horno doble. 1 2 3 4 5 6 7 8 9 0 ACEPTAR HORNEAR 1 2 3 4 5 6 7 8 9 0 ACEPTAR INICIAR GEAppliances.com Cómo configurar el horno para asar cuando se utiliza la sonda Inserte la sonda en la comida. Lea la sección sobre - GE PT960SMSS | Owners Manual - Page 106
. Toque ASADO ALTO o ASADO BAJO. Toque INICIAR. NOTA: Es posible que el ventilador se encienda y apague de forma automática para enfriar las partes interiores. Esto es normal, y es posible que el ventilador continúe funcionando incluso luego de que el horno se apague. En la mayoría de los - GE PT960SMSS | Owners Manual - Page 107
es popular, pero usted debe saber que cocinarla a solamente 140 °F (60 °C) significa que algunos organismos venenosos podrían sobrevivir". (Fuente: Safe Food Book. Your Kitchen Guide. USDA Rev. Junio 1985.) Cuidado y limpieza Solucionar problemas Soporte al consumidor 107 - GE PT960SMSS | Owners Manual - Page 108
cantidad de tiempo requerida para el horneado de parrillas múltiples puede aumentar ligeramente para algunos alimentos, pero se ahorra el tiempo general ya que muchos alimentos se cocinan al mismo tiempo. Galletas, muffins, bizcochos y otros panecillos rápidos dan buenos resultados con el horneado - GE PT960SMSS | Owners Manual - Page 109
Seguridad Operación Al hornear galletas, obtendrá mejores resultados si utiliza una bandeja de horno plana en vez de una fuente con lados bajos. GEAppliances.com Asado por convección ■ Bueno para grandes cortes de carne tierna, destapada. El ventilador de convección circula el aire calentado - GE PT960SMSS | Owners Manual - Page 110
Seguridad Operación Horneado y asado por convección. HORNEAR CON CONVECCIÓN O ASAR CON CONVECCIÓN HORNO SUPER. U HORNO INFER. Sólo en modelos de horno doble. UNA PARRILLA O VARIAS PARRILLAS 1 2 3 4 5 6 7 8 9 0 ACEPTAR INICIAR Cómo configurar el horno para hornear o asar por - GE PT960SMSS | Owners Manual - Page 111
, pero usted debe saber que cocinarla a solamente 140 °F significa que algunos organismos venenosos podrían sobrevivir". (Fuente: Safe Food Book.Your Kitchen Guide. USDA Rev. Junio 1985.) Cómo configurar el horno para asar por convección cuando se utiliza la sonda Coloque la parrilla en la posici - GE PT960SMSS | Owners Manual - Page 112
Horneado y asado con convección por tiempo. Seguridad Operación En modelos de horno doble, puede utilizar la función de horneado cronometrado en un horno mientras utiliza la limpieza automática en el otro; también puede usar el horneado cronometrado en ambos hornos simultáneamente. NOTA: no debe - GE PT960SMSS | Owners Manual - Page 113
Seguridad Operación Cuidado y limpieza Solucionar problemas Soporte al consumidor HORNEAR CON CONVECCIÓN O ASAR CON CONVECCIÓN HORNO SUPER. U HORNO INFER. Sólo en modelos de horno doble. UNA PARRILLA O VARIAS PARRILLAS 1 2 3 4 5 6 7 8 9 0 ACEPTAR 1 2 3 4 5 6 7 8 9 0 - GE PT960SMSS | Owners Manual - Page 114
Seguridad Operación Recetas favoritas. Su control le permitirá crear (guardar), editar, usar o borrar una receta favorita. RECETA FAVORITA CREAR RECETA Cree una receta Toque RECETA FAVORITA. Toque CREAR RECETA. Toque las letras para crear el nombre de una receta. Toque NÚM para agregar un nú - GE PT960SMSS | Owners Manual - Page 115
Seguridad Operación Cuidado y limpieza Solucionar problemas Soporte al consumidor Contador de tiempo y control bloqueado. GEAppliances.com CONTADOR DE TIEMPO 1 2 3 4 5 6 7 8 9 0 INICIAR El CONTADOR DE TIEMPO se puede programar desde 1 minuto hasta 24 horas. Este contador no controla - GE PT960SMSS | Owners Manual - Page 116
y cualquier residuo de papel aluminio. Las parrillas del horno pueden autolimpiarse sin daño. No utilice abrasivos o limpiadores de hornos. Limpie la parte superior, lados y parte exterior de la puerta del horno con jabón y agua. Asegúrese de que esté puesta la cubierta de la bombilla eléctrica - GE PT960SMSS | Owners Manual - Page 117
Seguridad Operación Cuidado y limpieza Solucionar problemas Soporte al consumidor AUTOLIMPIEZA HORNO SUPER. U HORNO INFER. Sólo en modelos de horno doble. LIMPIEZA LIGERA O LIMPIEZA NORMAL O PERSONALIZAR 1 2 3 4 5 6 7 8 9 0 (Los números sólo serán usados al programar un tiempo - GE PT960SMSS | Owners Manual - Page 118
Seguridad Operación Uso del horno autolimpieza. La puerta del horno debe estar cerrada y todos los controles deben estar configurados correctamente para que el ciclo funcione apropiadamente. AUTOLIMPIEZA HORNO SUPER. U HORNO INFER. Sólo en modelos de horno doble. LIMPIEZA LIGERA O - GE PT960SMSS | Owners Manual - Page 119
Seguridad Operación Opción - Fermentar. GEAppliances.com OPTIONS FERMENTAR HORNO SUPER. U HORNO INFER. INICIAR CONTADOR DE TIEMPO CANCELAR Fermentar La función de fermentar mantiene un ambiente tibio útil para levar los productos con levadura. Coloque en el horno en las parrillas B o C - GE PT960SMSS | Owners Manual - Page 120
horno se estabilice luego de agregar los ítems. ■ Con cantidades grandes es posible que sea necesario usar una configuración de termostato más alta y cubrir parte de los ítems de comida cocinados. ■ Retire las cucharas para servir, etc., antes de colocar recipientes en el horno. ■ No use recipientes - GE PT960SMSS | Owners Manual - Page 121
el grado más alto. Coloque los ítems que necesitan la configuración más alta en una parrilla de la parte inferior y los ítems que necesiten menos calor en una parrilla de la parte superior. Tipo de comida Comidas fritas Pan, panes crocantes Papas, horneadas Pizza Tartas (doble crocante) Tocino - GE PT960SMSS | Owners Manual - Page 122
Seguridad Operación Opción - dos temp. OPTIONS DOS TEMP HORNO SUPER. U HORNO INFER. Sólo en modelos de horno doble. 1 2 3 4 5 6 7 8 9 0 ACEPTAR 1 2 3 4 5 6 7 8 9 0 ACEPTAR HORNEAR U HORNEAR CON CONVECCIÓN O ASAR CON CONVECCIÓN UNA PARRILLA O VARIAS PARRILLAS 1 2 - GE PT960SMSS | Owners Manual - Page 123
Opciones - Cocinar y calentar y deshidratar. GEAppliances.com Seguridad Operación Cuidado y limpieza Solucionar problemas Soporte al consumidor COCINAR Y CALENTAR Coloque el extremo imantado sobre la superficie interior superior de la puerta del horno. Cierre la puerta contra el seguro de la - GE PT960SMSS | Owners Manual - Page 124
Seguridad Operación Soporte al consumidor Solucionar problemas Cuidado y limpieza Opción - Comienzo demorado. NOTA: no debe permitirse que los alimentos que se echan a perder fácilmente-como leche, huevos, pescado, rellenos, aves y cerdo- reposen por más de 1 hora antes o después de la cocción. - GE PT960SMSS | Owners Manual - Page 125
Seguridad Operación Opción - Modo Sabático. (Diseñada para utilizarse en el Sabbath judío y días festivos). (en algunos modelos) GEAppliances.com La característica Sabbath puede utilizarse únicamente para horneado/asado. No puede utilizarse para convección, asado a la parrilla, autolimpieza o - GE PT960SMSS | Owners Manual - Page 126
Seguridad Opciones - Configuraciones. OPTIONS CONFIGURACIÓN SELECCIÓN DE TEMPERATURA AJUSTE DE TEMPERATURA +1˚ Y/O -1˚ ACEPTAR LISTO Ajuste del termostato del horno: ¡Hágalo usted mismo! Usted se puede percatar que su horno nuevo cocina distinto al que reemplazó. Use su horno nuevo por - GE PT960SMSS | Owners Manual - Page 127
Seguridad Operación OPTIONS CONFIGURACIÓN APAGADO AUTOMÁTICO 12 HR DESACTIVADO O ACTIVADO ACEPTAR Apagado automático 12 Hr Con esta característica, si se olvida y deja el horno encendido, el control apagará el horno después de 12 horas automáticamente durante las funciones de horneado o después - GE PT960SMSS | Owners Manual - Page 128
Seguridad Operación Opciones - Configuraciones. OPTIONS CONFIGURACIÓN ADAPTACION AUTO. DE RECETAS ENCENDIDO O APAGADO ACEPTAR LISTO Conversión Auto Recipe™ (Adaptación automática de recetas) (en algunos modelos) Cuando utilice el horneado por convección, la característica Conversión Auto Recipe - GE PT960SMSS | Owners Manual - Page 129
Seguridad Operación OPTIONS CONFIGURACIÓN SONIDO/ VOLUMEN ENCENDER/ APAGAR SONIDO SONIDO ENCENDIDO O SONIDO APAGADO ACEPTAR ACEPTAR LISTO Encender/apagar sonido Esta opción le permite encender o apagar el son. agudo que se produce al tocar una tecla. Toque OPTIONS (OPCIONES). Toque - GE PT960SMSS | Owners Manual - Page 130
Seguridad Opciones - Configuraciones. OPTIONS CONFIGURACIÓN SONIDO/ VOLUMEN SEÑAL DEL CONTAD. COCINAR CONTINUAR O 1 SON. AGUDO O 2 SON. AGUDO O 3 SON. AGUDO ACEPTAR ACEPTAR LISTO Señal del contad. cocinar Esta opción le permite programar el tipo de señal usada al finalizar un ciclo - GE PT960SMSS | Owners Manual - Page 131
la aplicación de un detergente doméstico líquido para lavar platos. Aplique con un paño suave y moje. NOTA: Debe retirar el adhesivo de todas las partes. No puede retirarse si se quema. Portalámparas 31⁄2 pulg. Longitud máxima Bombilla Lengüeta Cubierta de vidrio Lámpara de luz del horno NOTA - GE PT960SMSS | Owners Manual - Page 132
de limpieza automática, no es necesario que la limpie ésta área de manera manual. ■ El área fuera de la junta y el revestimiento interior de la puerta pueden muesca en el brazo de la bisagra debe estar bien asentada en la parte inferior de la ranura. Abra la puerta por completo. Si la puerta no - GE PT960SMSS | Owners Manual - Page 133
Seguridad Operación GEAppliances.com Parrillas estándar Las parrillas estándar de horno pueden limpiarse manualmente con un limpiador abrasivo o lana de acero. Luego de limpiarlas, enjuague las parrillas con agua limpia y séquelas con un paño limpio. Ellas pueden también permanecer en el horno - GE PT960SMSS | Owners Manual - Page 134
Antes de llamar para solicitar un servicio de mantenimiento... Seguridad Operación Soporte al consumidor Solucionar problemas Cuidado y limpieza ¡Los consejos para resolución de problemas ahorran tiempo y dinero! Revise primero las gráficas en las siguientes páginas y es posible que no tenga que - GE PT960SMSS | Owners Manual - Page 135
GEAppliances.com Seguridad Operación Cuidado y limpieza Solucionar problemas Soporte al consumidor Problema La temperatura del horno es demasiado alta o demasiado baja Causas posibles El termostato del horno necesita un ajuste. Qué hacer • Consulte la sección Ajuste del termostato del horno: - GE PT960SMSS | Owners Manual - Page 136
la función que esté utilizando) puede encenderse automáticamente. • Esto es normal. El ventilador de enfriamiento se encenderá para refrigerar las partes internas. Puede funcionar durante 1-1/2 horas después que el horno esté apagado. El ventilador de convección funcionará y se apagará hasta que la - GE PT960SMSS | Owners Manual - Page 137
y mucho más! La bandeja inferior retiene el exceso de grasas y aceites. • Pieza GE genuina • Fácil de limpiar • Garantía de un año ¡Oferta de tiempo limitado! Dirección _____ Ciudad Estado __________ Código Postal Teléfono Correo electrónico Tarjeta de crédito ____ Check ____ Giro postal - GE PT960SMSS | Owners Manual - Page 138
situado en un área que no dispone de servicio por parte de un proveedor de servicio autorizado de GE, podría tener que hacerse cargo de los costes de (Attorney General) en su localidad. Soporte al consumidor Solucionar problemas Cuidado y limpieza Garante: General Electric Company. Louisville - GE PT960SMSS | Owners Manual - Page 139
GE Appliances 24 horas al día, cualquier día del año! Para mayor conveniencia y servicio más rápido, ya puede descargar los Manuales horas normales de oficina. GE Consumer Home Services estará aún ahí cuando íbanos a: General Manager, Customer Relations GE Appliances, Appliance Park Louisville, - GE PT960SMSS | Owners Manual - Page 140
Support. GE Appliances Website GEAppliances.com Have a question or need assistance with your appliance? Try the GE Appliances Website 24 hours a day, any day of the year! For greater convenience and faster service, you can now download Owner's Manuals, order parts or even schedule service
-
 1
1 -
 2
2 -
 3
3 -
 4
4 -
 5
5 -
 6
6 -
 7
7 -
8
-
9
-
10
-
11
-
12
-
13
-
14
-
15
-
16
-
17
-
18
-
19
-
20
-
21
-
22
-
23
-
24
-
25
-
26
-
27
-
28
-
29
-
30
-
31
-
32
-
33
-
34
-
35
-
36
-
37
-
38
-
39
-
40
-
41
-
42
-
43
-
44
-
45
-
46
-
47
-
48
-
49
-
50
-
51
-
52
-
53
-
54
-
55
-
56
-
57
-
58
-
59
-
60
-
61
-
62
-
63
-
64
-
65
-
66
-
67
-
68
-
69
-
70
-
71
-
72
-
73
-
74
-
75
-
76
-
77
-
78
-
79
-
80
-
81
-
82
-
83
-
84
-
85
-
86
-
87
-
88
-
89
-
90
-
91
-
92
-
93
-
94
-
95
-
96
-
97
-
98
-
99
-
100
-
101
-
102
-
103
-
104
-
105
-
106
-
107
-
108
-
109
-
110
-
111
-
112
-
113
-
114
-
115
-
116
-
117
-
118
-
119
-
120
-
121
-
122
-
123
-
124
-
125
-
126
-
127
-
128
-
129
-
130
-
131
-
132
-
133
-
134
-
135
-
136
-
137
-
138
-
139
-
140
 |
 |

Built-In Oven
GEAppliances.com
49-80594
07-09 JR
PT920–30
″
Single Wall Oven
PT960–30
″
Double Wall Oven
Owner’s Manual
Safety Instructions
. . . . . . . . . . . . . . . . . . .
2–4
Operating Instructions
Baking . . . . . . . . . . . . . . . . . . . . . . . . . . . . . . . . . . . . . . .9
Broiling . . . . . . . . . . . . . . . . . . . . . . . . . . . . . . . . . .14, 15
Control Lockout
. . . . . . . . . . . . . . . . . . . . . . . . . . . . .23
Controls
. . . . . . . . . . . . . . . . . . . . . . . . . . . . . . . . . . . . .5
Convection . . . . . . . . . . . . . . . . . . . . . . . . . . . . . . .16–21
Cook and Hold Option . . . . . . . . . . . . . . . . . . . . . . . .31
Dehydrate Option . . . . . . . . . . . . . . . . . . . . . . . . . . . .31
Delay Start Option . . . . . . . . . . . . . . . . . . . . . . . . . . . .32
Favorite Recipes . . . . . . . . . . . . . . . . . . . . . . . . . . . . . .22
Help
. . . . . . . . . . . . . . . . . . . . . . . . . . . . . . . . . . . . . . .33
Kitchen Timer . . . . . . . . . . . . . . . . . . . . . . . . . . . . . . .23
Options–Settings . . . . . . . . . . . . . . . . . . . . . . . . . .34–38
Auto Recipe
™
Conversion . . . . . . . . . . . . . . . . . . . . .36
Clock . . . . . . . . . . . . . . . . . . . . . . . . . . . . . . . . . . . . . .34
Clock Blackout . . . . . . . . . . . . . . . . . . . . . . . . . . . . . .35
Default . . . . . . . . . . . . . . . . . . . . . . . . . . . . . . . . . . . .38
Display Color . . . . . . . . . . . . . . . . . . . . . . . . . . . . . . .36
Fahrenheit or Celsius Temperature Selection . . . . .35
Kitchen Timer Signal
. . . . . . . . . . . . . . . . . . . . . . . .38
Language . . . . . . . . . . . . . . . . . . . . . . . . . . . . . . . . . .36
Sound On/Off . . . . . . . . . . . . . . . . . . . . . . . . . . . . . .37
Sound Volume . . . . . . . . . . . . . . . . . . . . . . . . . . . . . .37
Thermostat . . . . . . . . . . . . . . . . . . . . . . . . . . . . . . . . .34
Timer Signal
. . . . . . . . . . . . . . . . . . . . . . . . . . . . . . .38
12-Hour Shut-Off . . . . . . . . . . . . . . . . . . . . . . . . . . . .35
Oven . . . . . . . . . . . . . . . . . . . . . . . . . . . . . . . . . . . . . .6–8
Probe
. . . . . . . . . . . . . . . . . . . . . . . . . . . . . . . .12, 13, 19
Proofing . . . . . . . . . . . . . . . . . . . . . . . . . . . . . . . . . . . .27
Racks . . . . . . . . . . . . . . . . . . . . . . . . . . . . . . . . . . . . . .6, 7
Roasting
. . . . . . . . . . . . . . . . . . . . . . . . . . . . . . . . . . . . .9
Sabbath Option . . . . . . . . . . . . . . . . . . . . . . . . . . . . . .33
Self-Cleaning Oven
. . . . . . . . . . . . . . . . . . . . . . . .24–26
Timed Baking and Roasting . . . . . . . . . . . . . . . . .10, 11
Timed Convection Baking and Roasting . . . . . . .20, 21
Two Temps Option
. . . . . . . . . . . . . . . . . . . . . . . . . . .30
Warming . . . . . . . . . . . . . . . . . . . . . . . . . . . . . . . . .28, 29
Care and Cleaning
Control Panel . . . . . . . . . . . . . . . . . . . . . . . . . . . . . . . .39
Light Bulb
. . . . . . . . . . . . . . . . . . . . . . . . . . . . . . . . . .39
Oven Door . . . . . . . . . . . . . . . . . . . . . . . . . . . . . . . . . .40
Probe
. . . . . . . . . . . . . . . . . . . . . . . . . . . . . . . . . . . . . .40
Racks . . . . . . . . . . . . . . . . . . . . . . . . . . . . . . . . . . . . . . .41
Removing Packaging Tape
. . . . . . . . . . . . . . . . . . . . .39
Stainless Steel Surfaces . . . . . . . . . . . . . . . . . . . . . . . .39
Troubleshooting Tips
. . . . . . . . . . . . . . .
42–44
Accessories
. . . . . . . . . . . . . . . . . . . . . . . . . .
45
Consumer Support
Consumer Support
. . . . . . . . . . . . . . . . . . . .back cover
Warranty
. . . . . . . . . . . . . . . . . . . . . . . . . . . . . . . . . . .46
Write the model and serial
numbers here:
Model #
__________________
Serial #____________________
You can find them on a label
on the front of the oven behind
the oven door on single oven models,
or the front of the lower oven behind
the oven door on double oven models.
Electric Convection
Four
encastré
à convection électrique
Horno
empotrado
a convección eléctrico
Manuel d’utilisation
Manual del propietario
La section française commence à la page 47
La sección en español empieza
en la página 93
PT920–Horno simple de pared de 30
″
PT960–Horno doble de pared de 30
″
PT920–Four à encastré simple de 30 po
PT960–Four à encastré double de 30 po