Gigabyte GA-9IVDT User Manual - Page 16
Step 3: Install expansion cards - drivers
 |
View all Gigabyte GA-9IVDT manuals
Add to My Manuals
Save this manual to your list of manuals |
Page 16 highlights
Step 3: Install expansion cards Hardware Installation Process 1. Read the related expansion card's instruction document before install the expansion card into the computer. 2. Remove your server's chassis cover, necessary screws and slot bracket from the computer. 3. Press the expansion card firmly into expansion slot in motherboard. 4. Be sure the metal contacts on the card are indeed seated in the slot. 5. Replace the screw to secure the slot bracket of the expansion card. 6. Replace your computer's chassis cover. 7. Power on the computer, if necessary, setup BIOS utility of expansion card from BIOS. 8. Install related driver from the operating system. 16
-
 1
1 -
2
-
3
-
4
-
5
-
6
-
7
-
8
-
9
-
10
-
 11
11 -
 12
12 -
 13
13 -
 14
14 -
 15
15 -
 16
16 -
 17
17 -
 18
18 -
 19
19 -
 20
20 -
 21
21 -
22
-
23
-
24
-
25
-
26
-
27
-
28
-
29
-
30
-
31
-
32
-
33
-
34
-
35
-
36
-
37
-
38
-
39
-
40
-
41
-
42
-
43
-
44
-
45
-
46
-
47
-
48
-
49
-
50
-
51
-
52
-
53
-
54
-
55
-
56
-
57
-
58
-
59
-
60
-
61
-
62
-
63
-
64
-
65
-
66
-
67
-
68
-
69
 |
 |

16
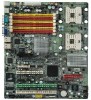
Hardware Installation Process
Step 3: Install expansion cards
1.
Read the related expansion card’s instruction document before install the expansion card into
the computer.
2.
Remove your server’s chassis cover, necessary screws and slot bracket from the computer.
3.
Press the expansion card firmly into expansion slot in motherboard.
4.
Be sure the metal contacts on the card are indeed seated in the slot.
5.
Replace the screw to secure the slot bracket of the expansion card.
6.
Replace your computer’s chassis cover.
7.
Power on the computer, if necessary, setup BIOS utility of expansion card from BIOS.
8.
Install related driver from the operating system.