Gigabyte GSmart i300 User Manual - GSmart i300 Windows Mobile 5 English Versio - Page 46
Connect with Email Server
 |
View all Gigabyte GSmart i300 manuals
Add to My Manuals
Save this manual to your list of manuals |
Page 46 highlights
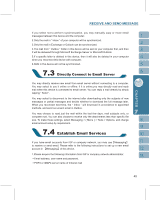
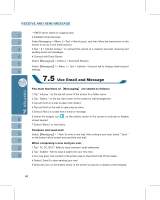
˙SMTP server name for outgoing mail 2.Establish Email Services: Select Messaging > { Menu } > Tool > New Account, and then follow the instructions on the screen to set up a new email account. 3.See " 6.1 Internet Access " to connect this device to a network and start receiving and sending email and messages. 4.Connect with Email Server: Select【Messaging】> { Menu } > Send and Receive. Select【Messaging】> { Menu } > Tool > Options > Account tab to change email account settings. The main functions of 【Messaging】 are stated as follows: 1.Tap " Inbox " on the top left corner of the screen for a folder name. 2.Tap " Date " on the top right corner of the screen for mail arrangement. 3.Tap and hold on a mail to open mail content. 4.Tap and hold on the mail to open pop-up menu. 5.Select { New } to create new a email or message. 6.Select the keypad icon screen keypad. on the bottom center of the screen to activate or disable 7.Select { Menu } to view menu. Compose and send mail: Select【Messaging】> " New "to write a new mail. After writing a new mail, select " Send " on the bottom left of screen and send this new mail. When composing a new mail,you can: 1.Tap " To, CC, BCC " fields to input receivers' email addresses. 2.Tap " Subject " field to input a subject for your new mail 3.You may enter mail content in the empty area on the bottom half of the screen. 4.Select { Send } to start sending your mail. 5.Select the icon on the bottom center of the screen to activate or disable screen keypad. 46
-
 1
1 -
2
-
3
-
4
-
5
-
6
-
7
-
8
-
9
-
10
-
11
-
12
-
13
-
14
-
15
-
16
-
17
-
18
-
19
-
20
-
21
-
22
-
23
-
24
-
25
-
26
-
27
-
28
-
29
-
30
-
31
-
32
-
33
-
34
-
35
-
36
-
37
-
38
-
39
-
40
-
 41
41 -
 42
42 -
 43
43 -
 44
44 -
 45
45 -
 46
46 -
 47
47 -
 48
48 -
 49
49 -
 50
50 -
 51
51 -
52
-
53
-
54
-
55
-
56
-
57
-
58
-
59
-
60
-
61
-
62
-
63
-
64
-
65
-
66
-
67
-
68
-
69
-
70
-
71
-
72
-
73
-
74
-
75
-
76
-
77
-
78
-
79
 |
 |
